For Windows to keep functioning smoothly and effectively, storage space must be cleared. As you use your personal computer, numerous files generate, through important hard disk space. Removing unused and transient files from a storage location can enhance overall speed and make way for more important data. It will help in optimizing windows.
Importance of Windows optimization for Cyber Security
There are various advantages of clearing Windows space for optimization in terms of Cyber Security. Sensitive data is protected by deleting temporary files, cache, and unneeded apps, as well as the attack on the system is decreased. The system’s capacity to identify and stop cyber-attacks is strengthened through quicker software updates and better-performing security technologies. The danger of data loss is lower when space is regularly cleared, and proactive defense tactics are encouraged. While maximizing Windows space is beneficial for online safety, it should be a part of a broader security strategy that also involves using strong passwords, staying up to date with software, and educating users about online dangers. Also, apart from online safety, it is necessary to have storage space on our windows machine to setup virtualization for penetration testing. Penetration testing requires many applications and tools which are heavy in size. In order to setup a penetration testing environment, we need windows storage optimization.
You can perform the following actions to free up space for storage in Windows:
1. Clearing windows cache and windows temp files
A crucial step in freeing up storage space and improving your computer’s speed is deleting temporary files. Various programs and processes generate temporary files as part of routine operation. To speed up particular activities or enhance user experience, they are used to store data that is temporary or cache. But gradually, such temporary files can build up and take the important disk space, thereby slowing down your machine.
Why Delete Temporary Files:
Temporary files are build up over time and occupy a sizable amount of disk space as they are continuously updated and produced. Clearing temporary files can have the following advantages:
- Free up storage space: You can make precious hard drive space available by deleting pointless temporary files, giving you more room for crucial documents and programs.
- System performance improvements: Your computer’s performance may be slowed down by a cluttered disk. Your system’s overall speed and performance can be enhanced by removing temporary files.
- Resolve program problems: Corrupt or out-of-date temporary files may result in program conflicts and problems. These files can be deleted to help with some software-related problems.
- Enhanced privacy: By clearing your browser’s temporary files and cache, you can prevent your computer from keeping confidential information like login information and browsing history.
How to Delete Temporary Files:
As previously noted, you may use the Disk Cleanup application to remove temporary files from Windows. There are, however, additional techniques you can employ:
A. Using Disk cleanup software– The Disk Cleanup program has a few simple procedures that must be followed in order to remove temporary files from Windows:
- Launch Disk Cleanup: Click the “Start” button or hit the “Windows key” to open the Disk Cleanup program. Then, type “Disk Cleanup” into the search box. Disk Cleanup can be chosen from the search results to launch the tool.
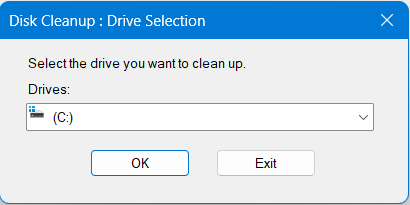
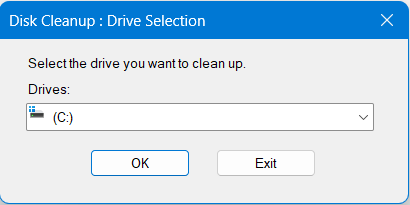
- Choosing the target drive: You will be prompted by Disk Cleanup to select the drive you want to clean up. The system drive (C:) is typically chosen. Select the drive, then select “OK”.
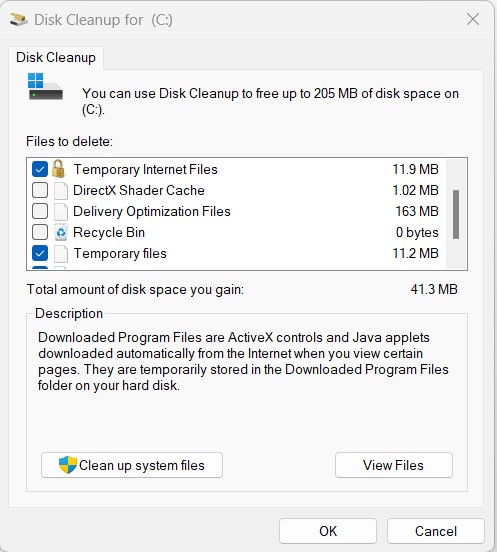
- Analysis and Cleanup Start: The tool will now examine the drive to find removable files. A list of file categories that are suitable for cleanup will be shown following the analysis.
- Select Temporary Files: In the Disk Cleanup box, look for the “Temporary files” category, which includes temporary files generated by operating systems and programs. To include temporary files in the cleanup procedure, tick the box next to “Temporary files”. You can also choose to clean out additional file types, such as “Temporary Internet Files” or “System error memory dump files” if you like.
- Commence Cleanup: Once you’ve chosen the file categories, click “OK” or “Delete Files” to start the cleanup process. You’ll see a confirmation popup asking for your approval before continuing.
- Wait for the cleanup completion: The Disk Cleanup tool will then start eliminating the chosen temporary files. Depending on the data that needs to be eliminated, the process’s duration will change.
- Successful cleanup: A dialogue box displaying the amount of space freed up will appear after completion. Click “OK” to exit the dialog box.
B. Manually Deleting Temporary Files:
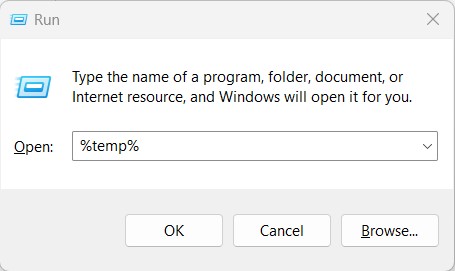
- Launch the Run dialogue box by pressing the Windows key + R.
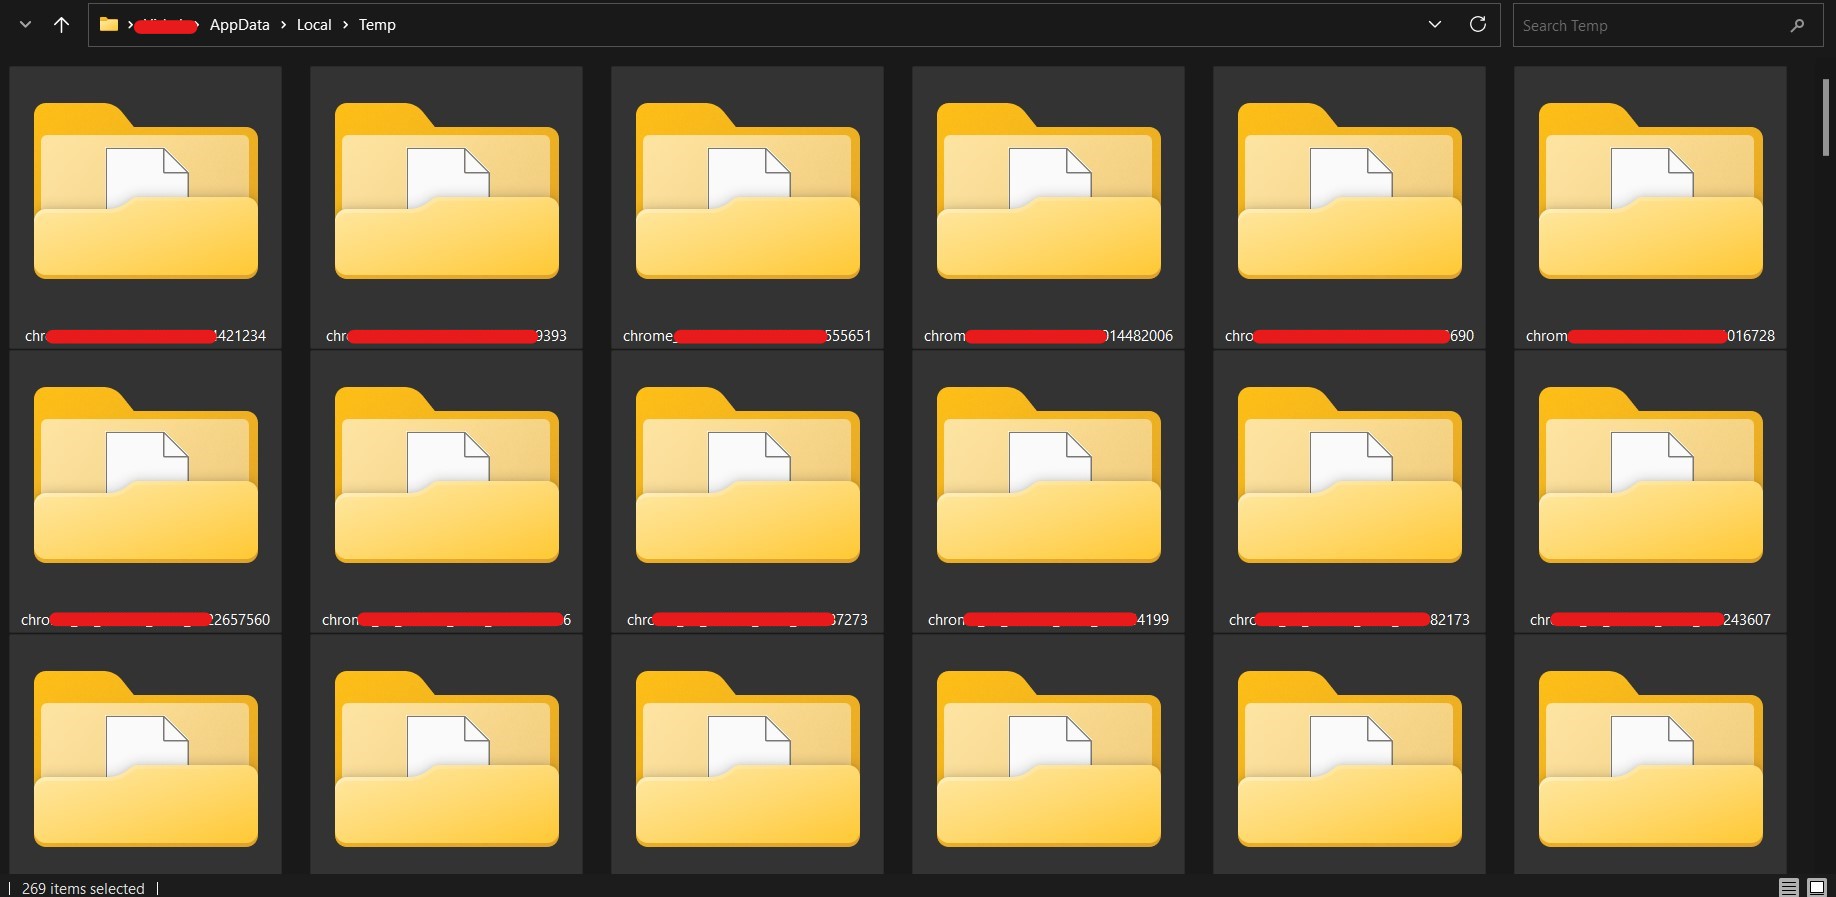
- Enter the text %temp%. This opens the temporary files folder called Temp which stores the temporary files for the logged in user.
- Ctrl + A to select all files, then remove them. It is typical for some files to be in use and unable to be erased. You can leave those files.
- Again launch the Run dialogue box by pressing the Windows key + R.
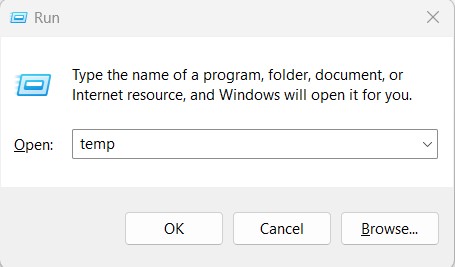
- Enter the text temp. This opens the temporary files folder called Temp.
- Ctrl + A to select all files, then remove them. It is typical for some files to be in use and unable to be erased. You can leave those files.
- Again launch the Run dialogue box by pressing the Windows key + R.
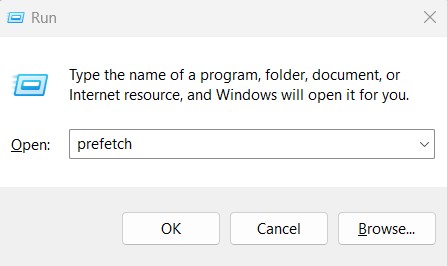
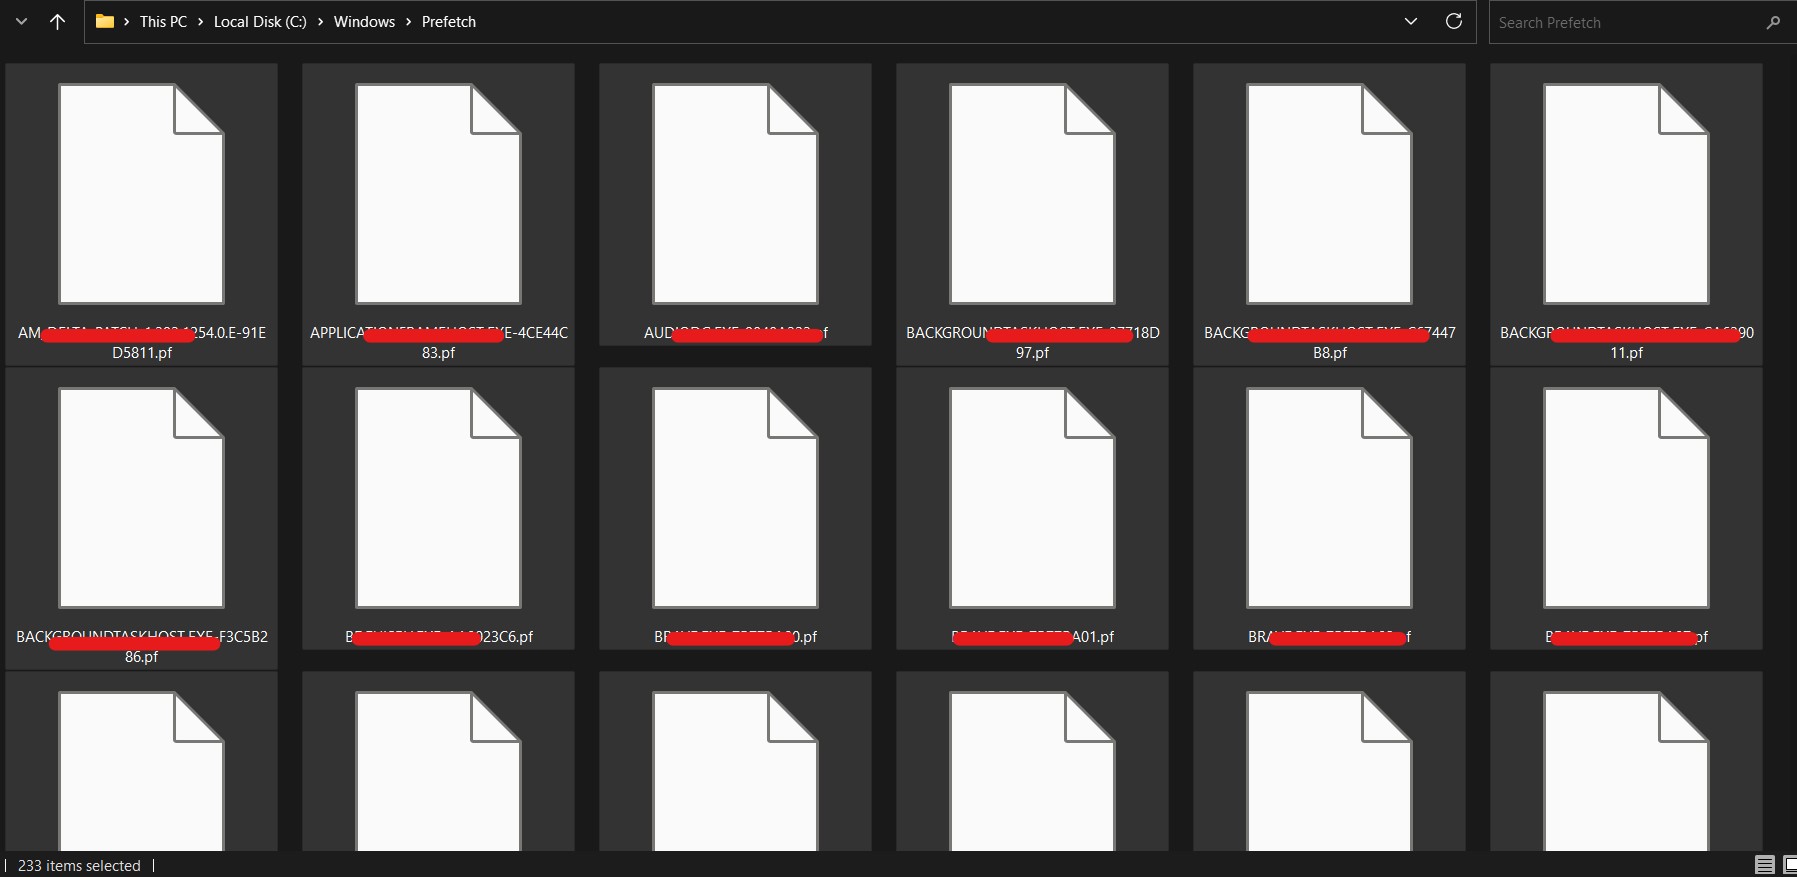
- Enter the text prefetch. This opens the temporary files folder called Prefetch.
- You might be asked for the Administrator’s permission to access the folder. Please click on “Continue”.
- Ctrl + A to select all files, then remove them. It is typical for some files to be in use and unable to be erased. You can leave those files.
2. Clearing GPU cache to improve windows gaming performance and storage:
If you have speed problems, stumbling, or frame rate reductions while playing games on Windows computers, you may benefit from clearing the GPU (Graphics processing unit) cache. Your graphics card’s GPU cache is a storage area used to keep data that is frequently used for quicker retrieval during rendering processes. But after time, the cache may fill up or turn stale, which will slow down games. These problems can be resolved, and overall gaming performance can be enhanced, by clearing the GPU cache. Here’s how to get started:
- Restart Your Computer: Restarting your computer can sometimes clear the GPU cache and fix small performance issues. The GPU cache is cleared when you restart, and your graphics card starts from scratch.
- Update Graphics Drivers: Ensure that the drivers for your graphics device are current. Manufacturers frequently provide driver updates to improve compatibility with the newest games, correct bugs, and optimize performance. The most recent drivers are available for download on the official web page of the company that makes your GPU (such as NVIDIA, AMD, or Intel).
- Modify Graphics Settings: Especially on older or weaker GPUs, reducing the in-game graphics settings can greatly enhance gaming performance. To minimize the GPU workload, lower settings for resolution, texture quality, shadows, and anti-aliasing.
- Keep an eye on the GPU temperature: Overheating can affect a game’s performance. Use programs like MSI Afterburner or HWMonitor to keep track of your GPU temperature and make sure it stays within acceptable ranges. Clean the graphics card and make sure your computer case has enough ventilation if the GPU is running too hot.
- Look for background processes: Make sure no resource-hungry background processes or programs are running while you game. The GPU’s capacity to produce frames effectively can be impacted by other apps using a lot of CPU or disk space.
- Use Gaming Mode (Windows Game Bar): Windows 10 comes with a “Gaming Mode” that enhances system performance while gaming. To access the Game Bar and turn on Gaming Mode, use the Windows key + G.
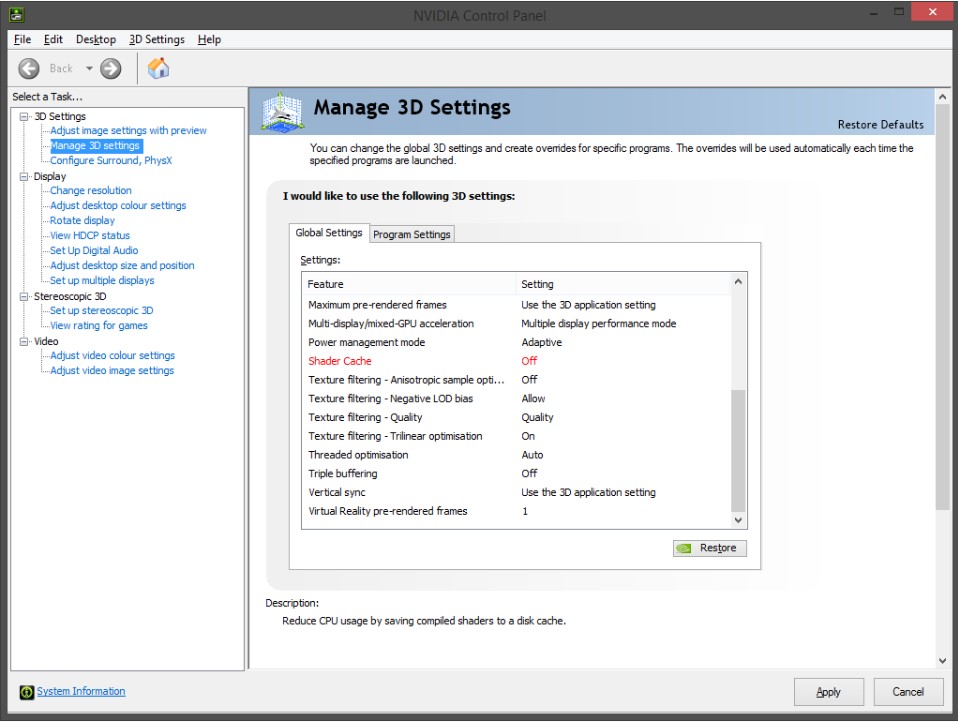
- Delete Shader Cache: Shader data is now stored in a cache on modern graphics cards for quick access while rendering. Performance issues can occasionally be resolved by clearing the shader cache.
For AMD and NVIDIA graphics cards, follow these steps:
For graphics cards made by NVIDIA:
- To get to the NVIDIA Control Panel, do right-clicking on the desktop and choose “NVIDIA Control Panel”.
- Go to the left-hand window and select “Manage 3D settings”.
- Scroll down to “Shader Cache” under the “Global Settings” tab and select “Delete”.
- When asked to confirm the deletion, do so.
For graphics cards made by AMD:
- A shader cache is used by AMD graphics cards and is kept in the “AMD” folder of the “Local” app data directory. Typically, the location is C:\Users\your_username\AppData \Local\AMD\DxCache.
- Any active GPU-using programs or games should be shut down.
- Go to the aforementioned AMD folder and remove everything from it. Just the files inside the folder should be deleted, not the folder itself.
Keep in mind that, while cleaning the GPU cache and optimizing settings can assist boost gaming performance, the final result also depends on your hardware’s capabilities. Consider updating your graphics card or other components to meet the requirements of contemporary games if you are still having serious performance problems.
3. Removing old windows updates
Removing outdated Windows updates might help your computer clear up space while also potentially resolving conflicts between updates or faulty update files. Windows updates are crucial for maintaining the security and most recent features and upgrades on your PC. But over time, especially when you have a little amount of storage, these upgrades can add up and take up a lot of disk space. This is how to uninstall previous Windows updates:
Before continuing, it’s important to realize that deleting outdated Windows updates may prevent you from doing so in the future. Although it is normally safe to remove outdated updates, doing so could impede your capacity to go back in time if necessary. Before making any big changes to your system, it’s usually a good idea to create a backup of your vital data because uninstalling updates could not be reversible.
Using the Disk Cleanup software: The Disk Cleanup utility can assist you in deleting unused data, such as outdated Windows updates. Use it as follows:
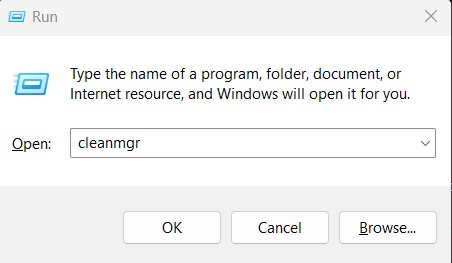
- To see the Run dialog box, press Windows + R.
- Input cleanmgr, then hit Enter or click OK.
- Click OK after selecting the drive (often C:) on which Windows is installed.
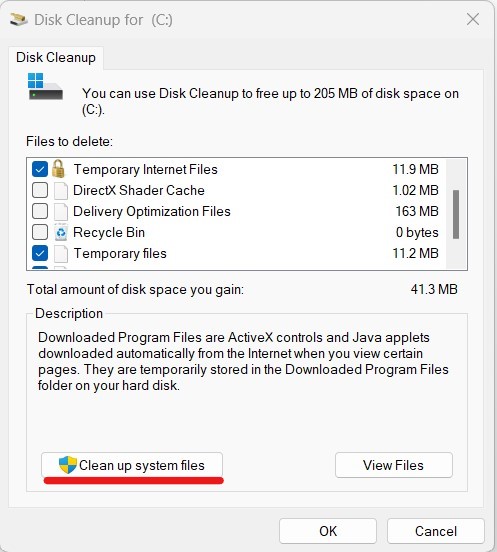
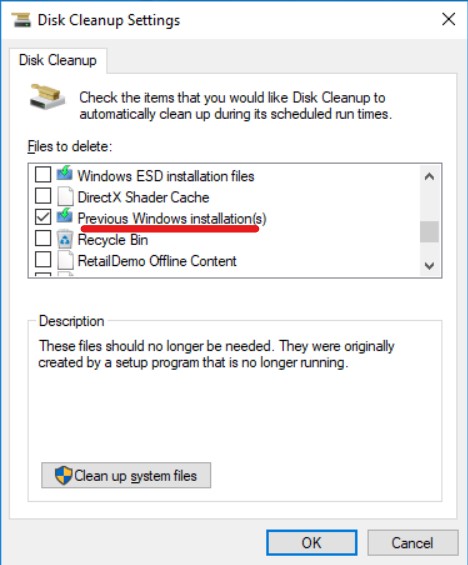
- Your ability to free up space will be determined by the utility. Select “Clean up system files” from the “Disk Cleanup” window’s menu.
- Once more, choose the drive (often C:) on which Windows is installed, and then click OK.
- Wait for the utility to determine the amount of space that can be released. This could take some time.
- Scroll down the list of files to delete to the entry under “Previous Windows installations” or “Windows Update Cleanup”. There is a checkbox next to it.
- You might also look into other things you want to get rid of, including temporary files or system cache.
- To confirm the deletion of previous Windows updates and the additional files you’ve chosen, click OK and then click Delete Files.
Manually deleting windows update files: If disk cleanup doesn’t completely remove all the old windows updates, you can:
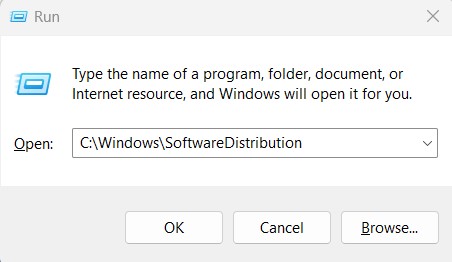
- To see the Run dialog box, press Windows + R.
- Enter C:\Windows\SoftwareDistribution. Press Enter.
- This will launch the “Download” folder, which contains files for Windows updates.
- Ctrl + A to select all items in the “Download” folder and remove them all. To achieve this, you might require administrator rights.
- When asked to confirm the deletion, do so.
Please take note that your machine could no longer have those exact updates after uninstalling outdated Windows updates. New updates, however, will be downloaded and installed as usual as they become available.
Removing outdated Windows updates is not always a sure fix for performance or disk space concerns, so keep that in mind. Consider other elements such as system hardware, program conflicts, or the requirement for system maintenance and optimization if issues persist.
Remember that although deleting outdated Windows updates is often secure, doing so prevents you from ever uninstalling them again. You won’t be able to restore a state using those particular updates after uninstalling outdated updates. However, regular download and installation of new updates will continue.
4. Removing old programs from windows
An important task that helps clear up storage space and maintains your system is removing outdated programs from Windows. On your computer, you might install a variety of programs throughout time, some of which might not be used or needed anymore. In addition to freeing up disk space, uninstalling outdated programs helps enhance system efficiency. Here’s how to uninstall outdated softwares from Windows:
A. Using Control Panel: The Control Panel is the standard technique for uninstalling programs on Windows. Take these actions:
Windows OS versions 10 and 11:
- Go to the context menu by right-clicking the Start button and then selecting “Installed apps”.
- You can view a list of installed programs by visiting this settings
- Find the program you wish to uninstall by scrolling down the list.
- Then select the program you want to remove, click the options icon (…) and select “Uninstall”
- To finish the removal process, adhere to the on-screen instructions.
Microsoft Windows 7:
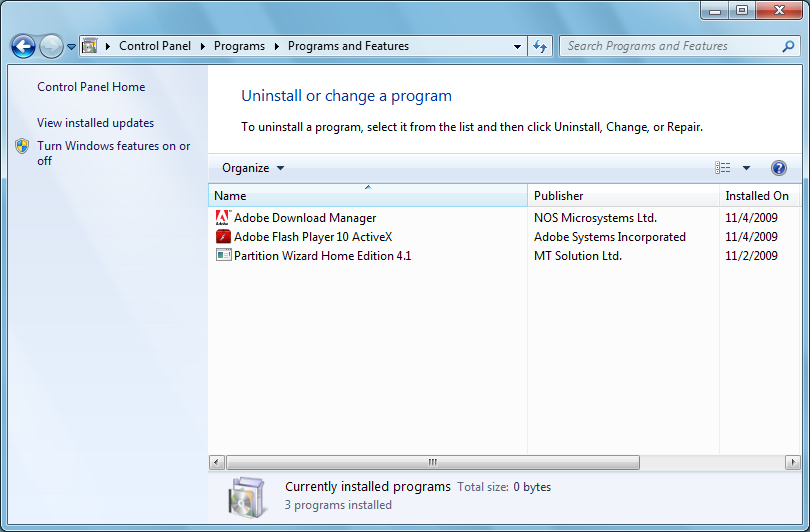
- Control Panel can be found by right clicking on the Start menu.
- Click Programs and Features under Programs in the Control Panel.
- A list of the installed programs will be displayed. Double click the program name to uninstall the program.
- To finish the removal, adhere to the on-screen directions.
B. Making use of Windows settings (Windows 10 and Windows 11):
- Programs can also be removed using the Settings app in Windows 10 and Windows 11. How to do it is as follows:
- By pressing the Windows key + I or by clicking the Start button and choosing the Settings icon, you can access the Settings app.
- Click on Apps in the left-hand sidebar of the Settings box and then on “Installed apps”.
- A list of the installed apps and programs will be displayed. Click the Uninstall button after finding the item you wish to get rid of.
- To finish the uninstallation procedure, adhere to the on-screen directions.
C. Utilizing uninstaller software
For eliminating outdated programs, you can also use third-party uninstaller programs that provide more sophisticated functionality. Revo Uninstaller, IObit Uninstaller, and Geek Uninstaller are a few well-known uninstaller programs. These utilities can assist you in completely uninstalling programs, including any residual files and registry entries that the default Windows removal process can leave behind.
D. Removing Windows Store Apps:
For Windows 10 and Windows 11 users, you can also remove Windows Store apps from the Settings app or directly from the Start menu. Right-click the app tile or icon and select Uninstall.
Before uninstalling a program, make sure that you no longer need it and that it does not affect the functionality of other software. Additionally, we recommend backing up important files and settings before making any major changes to your system. Regularly removing obsolete programs keeps your computer running smoothly, keeps it organized, and leaves enough disk space for the programs you actually use.
5. Removing large files in windows
It’s crucial to locate huge files in Windows in order to discover and manage disk space more efficiently. Thankfully, Windows comes with tools and capabilities that make it easy to locate huge files quickly. Here’s how to locate big files on a Windows machine.
Using File Explorer:
By arranging files by size in Windows File Explorer, you may find huge files. This is how it’s done:
- Either click the File Explorer icon in the taskbar or press Windows Key + E to launch File Explorer.
- Navigate to the location on the drive or folder where the huge files are located.
- Click the search icon in File Explorer’s upper right corner and type the following search term: size:gigantic
- File Explorer shows all Large files (you can enter specific file size such as “size:largerthan:500MB” to customize the size filter to your liking).
- Look at the list of large files and decide if they should be kept or deleted.
6. Setting up windows storage sense
A simple solution to automatically manage storage space on your Windows computer is to set up Windows Storage Sense. By deleting superfluous things including temporary files, out-of-date Windows updates, and files in the Recycle Bin, Storage Sense helps free up disk space. Additionally, it has the ability to remove “Downloads” folder files that haven’t been edited in a certain amount of time. How to configure Windows Storage Sense is as follows:
- Open the settings: To launch the Windows Settings app, press Windows key + I. As an alternative, you can select the Start button, then select the Settings
- In the Settings window, select System.
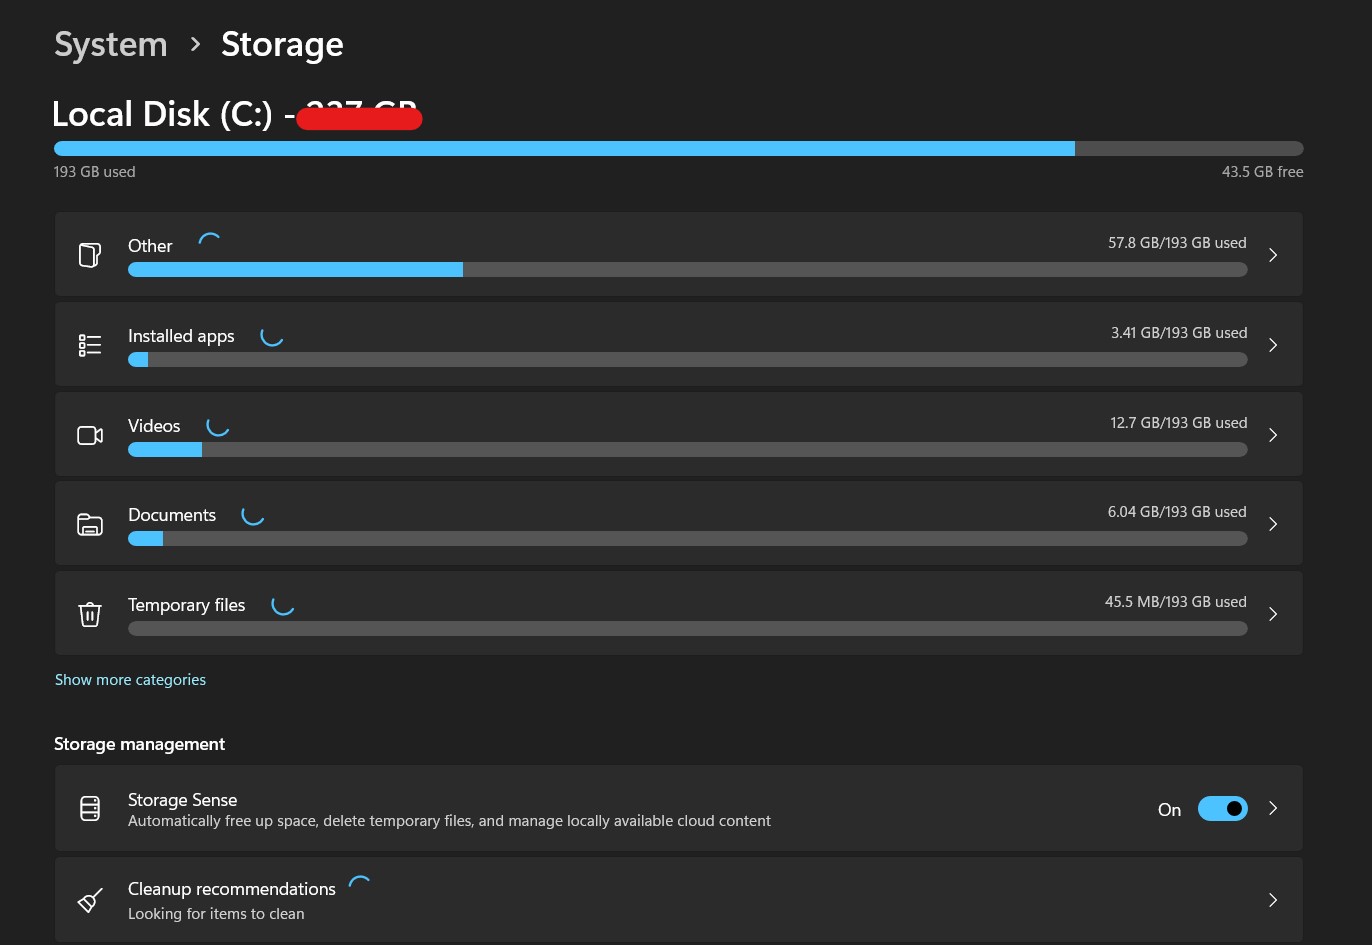
- Click Storage in the left-hand sidebar of the System
- You may obtain a summary of your storage consumption in the Storage settings. In that section, look for Storage Sense.
- Toggle the switch next to “Storage Sense” to “On” to activate the feature.
- By clicking on “Storage Sense” option after enabling Storage Sense, you can modify its settings.
- You can choose how frequently you want Storage Sense to run and clear space in the settings options. You have the following selections:
Off: Storage Sense won’t launch on its own, but you can still launch it manually when necessary.
Every day: Storage Sense will be activated to remove unused files.
Every Week: Storage Sense will operate once every week.
Every Month: Storage Sense will operate once per month.
- You can select the types of files that Storage Sense should clean up by making your selections below the options for cleanup frequency. It will be configured by default to delete temporary files and files from the recycle bin.
- Additionally, you can select the number of days after which files in the Downloads folder will be erased if they haven’t been edited by toggling on “Delete files in my Downloads folder that haven’t changed for over”.
- Once you’ve configured the Storage Sense options to your preference, you can close the Settings window, and Storage Sense will now automatically clean up unnecessary files based on your chosen settings.
Storage Sense is a useful feature that helps you manage your storage space automatically, ensuring your computer runs smoothly and efficiently. By regularly cleaning up unnecessary files, you can avoid running out of disk space and keep your system organized.
In conclusion, improving Windows performance by deleting unused files and clearing the cache has considerable advantages for both system effectiveness and cyber security. By reducing vulnerabilities, protecting sensitive data, and encouraging a pro-active defense approach, doing these maintenance chores on a regular basis helps to create a more secure computing environment. It also improves security tools, minimizes the attack surface, and makes storage space available, all of which increase the system’s resistance to online assaults. Adopting these optimization techniques guarantees a smoother and safer computing experience, shielding users from potential dangers while improving the overall performance and health of the system.
You can check out our other blogs here.
Stay Safe!!
Team CyberiumX
